Honey Glazed Chicken Thighs Flavorful and Easy Recipe

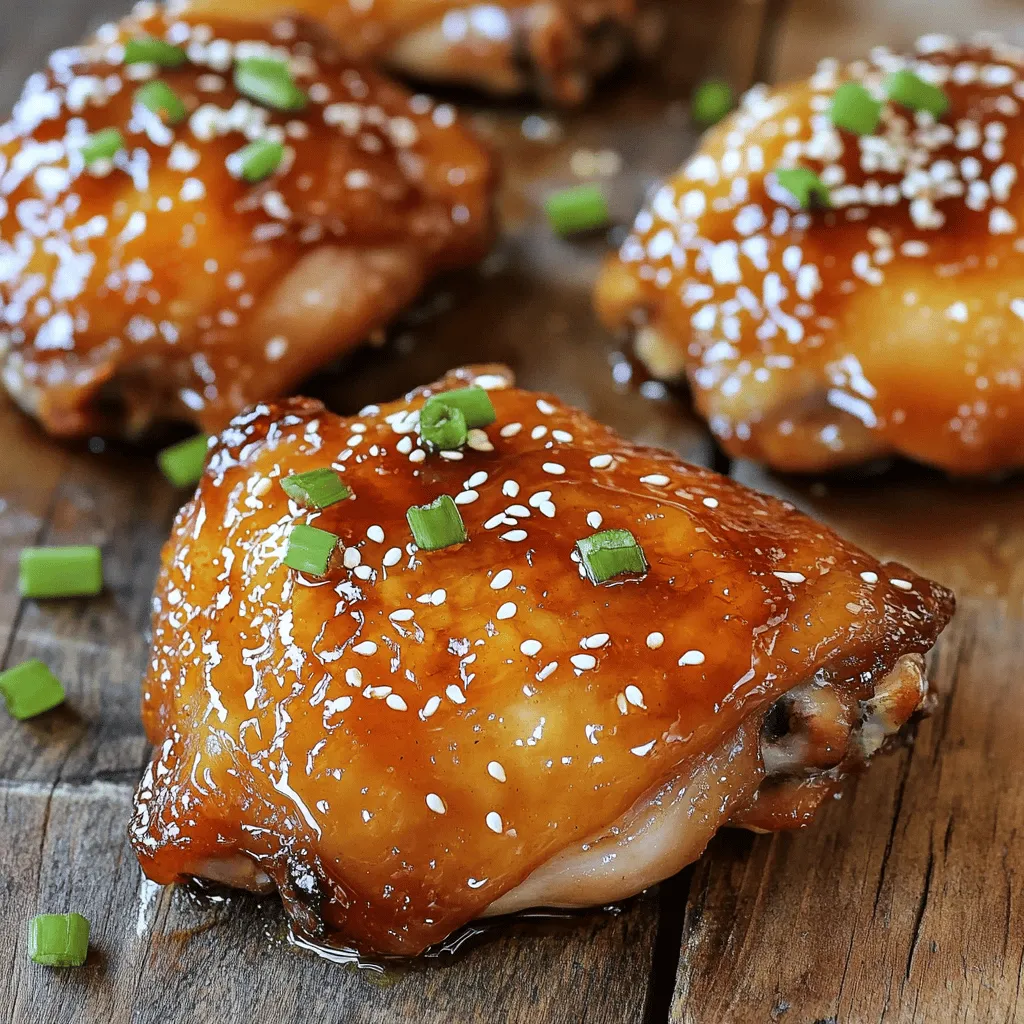
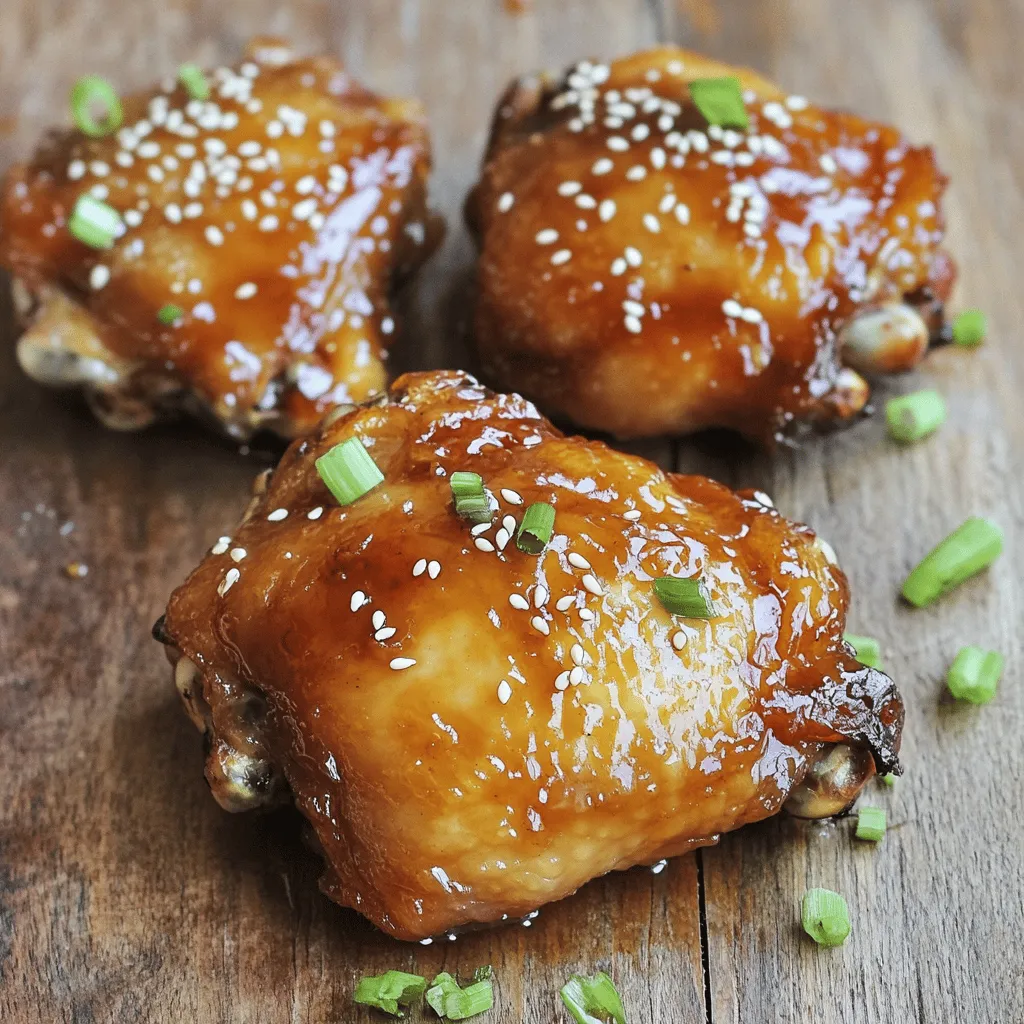
Get ready to savor the sweetness of my Honey Glazed Chicken Thighs! This easy recipe combines tender chicken with a rich honey-soy marinade for a dish that’s bursting with flavor. You’ll learn how to marinate, bake, and achieve a perfect glaze with crispy skin. Plus, I’ll share tips, variations, and serving suggestions. Let’s dive into this delicious journey that makes dinner a delightful success!
Ingredients
Main Ingredients
– 4 bone-in, skin-on chicken thighs
– 1/4 cup honey
– 2 tablespoons low-sodium soy sauce
Additional Flavorings
– 2 cloves garlic, minced
– 1 tablespoon fresh ginger, grated
– 1 teaspoon sesame oil
– 1 teaspoon rice vinegar
Garnishes
– 1 tablespoon sesame seeds (for garnish)
– 2 green onions, finely chopped (for garnish)
The chicken thighs are the star of this dish. Their rich flavor makes every bite juicy and satisfying. The honey adds a sweet touch that balances well with soy sauce. This mix creates a perfect flavor profile.
For added depth, I use garlic and ginger. These two ingredients bring warmth and a nice kick. A hint of sesame oil adds a nutty flavor, while rice vinegar gives a tangy twist. Together, they elevate the dish to a new level.
Garnishing with sesame seeds and green onions makes the meal visually appealing. The seeds add a subtle crunch, and the green onions offer a fresh taste. Together, they enhance the overall experience of this tasty dish.Enjoy the burst of flavors and the joy of cooking!
Step-by-Step Instructions
Preparing the Marinade
To make the marinade, grab a medium bowl. Combine these ingredients: honey, soy sauce, minced garlic, grated ginger, sesame oil, rice vinegar, salt, and pepper. Use a whisk to mix everything well. You want a smooth blend that coats the chicken nicely. This marinade gives the chicken its sweet and savory taste.
Marinating the Chicken
Now, take your chicken thighs. Place them in a resealable bag or a shallow dish. Pour the marinade over the chicken. Make sure each thigh gets a good coat. Seal the bag or cover the dish and pop it into the fridge. For the best flavor, let it marinate for at least 30 minutes. If you have time, two hours is even better.
Cooking the Chicken
Before you cook, preheat your oven to 400°F (200°C). This will help the chicken cook evenly. To keep things clean, line a baking dish with aluminum foil. Once the oven is ready, take out your chicken. Let any extra marinade drip off. Arrange the thighs in the baking dish, skin-side up. Save the leftover marinade for later.
Now, bake the chicken for 30 to 35 minutes. It is done when the internal temperature hits 165°F (75°C). You want the skin to be crispy and golden. This step is key for a delicious finish.
Tips & Tricks
Achieving Perfect Glaze
To get that shiny glaze, basting is key. You want to brush the chicken with the marinade as it cooks. This helps the glaze stick and adds flavor. For crispy skin, you can raise the oven temperature for the last few minutes. This makes the skin golden and crunchy.
Cooking Accuracy
A meat thermometer is your best friend here. Insert it into the thickest part of the thigh. When it reads 165°F (75°C), your chicken is done. If you don’t have a thermometer, look for clear juices. If the juices run clear, it’s safe to eat.
Enhancing Flavor
You can swap honey for maple syrup if you like. It gives a different but tasty flavor. Fresh herbs like thyme or rosemary add a nice aroma. Just sprinkle them on before baking. These tips make your honey glazed chicken thighs even better.

Variations
Honey Glazed Chicken with Spices
You can spice things up with honey-glazed chicken. Adding chili flakes gives it a nice heat. Just a pinch will do for a mild kick. If you want more, feel free to add more flakes.
Incorporating citrus zest adds a bright, tangy flavor. Lemon or orange zest works well. Just grate it finely and mix it into the marinade. This twist brings a fresh taste that brightens the dish.
Alternative Cooking Methods
You can grill or bake honey-glazed chicken. Grilling gives a smoky flavor and charred edges. Bake it for a hands-off approach. The chicken stays juicy this way.
Using a slow cooker is another option. Just place the marinated chicken in the cooker. Set it on low for about 4-6 hours. This method makes the chicken tender and full of flavor.
Serving Suggestions
Pair your honey-glazed chicken with various side dishes. Rice or quinoa complements the dish well. Steamed vegetables also add color and nutrition.
For sauces and dips, consider a tangy yogurt sauce. It cools the heat from any spices you added. A simple salad dressing can also work well. Try it for a fresh contrast to the sweetness of the chicken.
Storage Info
Storing Leftovers
To keep your honey glazed chicken thighs fresh, store leftovers in the fridge. Place them in an airtight container. This helps prevent moisture loss and keeps the flavors intact. Try to eat the leftovers within three days for the best taste.
If you want to save some for later, freezing is a good option. Wrap each thigh in plastic wrap, then place them in a freezer bag. This way, you can store them for up to three months. Just remember to label the bag with the date.
Reheating Options
When reheating, the oven is your best friend. Preheat it to 350°F (175°C). Place the chicken on a baking sheet. Cover it with foil to keep it moist. Heat for about 15-20 minutes. This method keeps the skin crispy and the meat juicy.
If you need a quicker option, use the microwave. Place the chicken in a microwave-safe dish. Cover it with a damp paper towel. Heat in 1-minute intervals until warm. This method is fast but may not keep the skin crispy.
Shelf Life
Honey glazed chicken thighs last about three to four days in the fridge. Always check for signs of spoilage. If the chicken smells off or has a slimy texture, it’s best to throw it away.
Also, look for any unusual colors. If the chicken looks gray or has dark spots, do not eat it. Safety first! Proper storage helps ensure you enjoy every bite of this delicious dish.
FAQs
What can I substitute for honey in this recipe?
You can use maple syrup or agave nectar. Both options add sweetness. Maple syrup has a rich flavor, while agave nectar is lighter. Measure the same amount as honey. These swaps work well in marinades. They bring a unique twist to your dish.
Can I use chicken breasts instead of thighs?
Yes, you can use chicken breasts. They cook faster than thighs. Bake them for about 25-30 minutes. Breasts may not be as juicy as thighs. Adjust your cooking time to avoid dryness. Thighs are more forgiving with heat.
What to serve with honey glazed chicken thighs?
You can pair the chicken with rice or quinoa. Steamed broccoli or green beans add color and crunch. A fresh salad balances out the meal. Try garlic bread for a comforting touch. These sides make your meal complete and tasty.
How do I know when the chicken is done?
Check the internal temperature with a meat thermometer. It should read 165°F (75°C). Look for golden, crispy skin as a sign too. If juices run clear when pierced, it’s ready. Cooking it right ensures safety and flavor.
You learned how to make honey-glazed chicken thighs from scratch. We covered the best ingredients, marination methods, and cooking techniques. With tips for flavor and storage, you can create a meal that’s tasty and stress-free. Experiment with variations or substitutions based on your taste. This dish is versatile and suited for any occasion. Enjoy your cooking and the delicious results!


![To make your Fajita Veggie Sheet Pan, gather these simple and fresh ingredients: - Bell peppers (red, yellow, or green) - Zucchini - Red onion - Cherry tomatoes - Black beans - Olive oil - Spices and seasonings (chili powder, cumin, garlic powder, salt, pepper) - Fresh cilantro for garnish - Lime wedges for serving - Tortillas (corn or flour) These ingredients create a colorful and tasty dish. Using fresh veggies adds great flavor and texture. The spices make everything pop! You can adjust the veggies based on what you have or prefer. For example, you might try adding corn or mushrooms. Each change can lead to a new twist on this tasty recipe. This Fajita Veggie Sheet Pan really shows how simple ingredients can shine together. When you gather these items, you set the stage for a fun cooking adventure. Check out the Full Recipe for complete details on how to bring this delicious dish to life. 1. First, preheat your oven to 425°F (220°C). This helps the veggies cook just right. 2. Next, line a large sheet pan with parchment paper. This makes cleanup easy. 3. In a big mixing bowl, combine the sliced bell pepper, zucchini rounds, red onion wedges, halved cherry tomatoes, and rinsed black beans. 4. Drizzle 3 tablespoons of olive oil over the mixture. It helps the flavors blend. 5. Now, add 2 teaspoons of chili powder, 1 teaspoon of ground cumin, and 1 teaspoon of garlic powder. Don't forget a pinch of salt and black pepper. 6. Toss everything gently until each piece is well-coated with oil and spices. 1. Spread the veggie and bean mixture evenly on the prepared sheet pan. Make sure they are not crowded. 2. Place the pan in the preheated oven and roast for 20-25 minutes. Stir halfway through for even cooking. 3. The veggies should be tender and have slightly caramelized edges when done. 1. To warm the tortillas, you can use a skillet or microwave. Just a minute or two will do. 2. Fill each warm tortilla with the roasted fajita veggies. 3. Top with fresh cilantro and a drizzle of lime juice for extra flavor. 4. Serve the filled tortillas on a platter, garnished with lime wedges and extra cilantro for a beautiful display. For the complete recipe, check out the [Full Recipe]. To get the best from your fajita veggies, even cooking is key. Spread the veggies in a single layer on the sheet pan. This helps them roast well. Stir them halfway through cooking. This way, they brown nicely on all sides. Each oven runs a bit differently. You may need to adjust the cooking time. Keep an eye on the veggies. They should be tender and slightly charred. Want to kick up the flavor? Add more spices! A pinch of smoked paprika or cayenne pepper can work wonders. Fresh herbs like oregano or thyme also add depth. Don’t forget lime juice! A squeeze right before serving makes the dish pop. It gives a fresh, zesty flavor that brightens everything up. When serving, arrange the filled tortillas on a pretty platter. It makes the meal more inviting. Garnish with lime wedges and extra cilantro for color. You can also sprinkle some crumbled cheese on top. This adds a nice touch and looks great. A vibrant display makes your Fajita Veggie Sheet Pan Delight even more appetizing. {{image_4}} You can swap out veggies to suit your taste. Try adding mushrooms or sweet potatoes. Seasonal choices like asparagus or butternut squash work well, too. Think of what’s fresh at your local market. Broccoli and cauliflower also add great texture. Mix and match for a colorful plate. Want to make this dish heartier? Tofu or tempeh are great choices. Cube them and toss with your veggies. You can also add chickpeas for extra protein. They blend well with the spices. If you eat meat, grilled chicken or shrimp can elevate this dish. Just season them like your veggies for a tasty mix. Experimenting with spices can change your dish. For a mild flavor, stick with cumin and garlic. If you like heat, add cayenne or smoked paprika. Try a taco seasoning mix for a new twist. You could even toss in fresh herbs like cilantro or oregano. This will keep your fajita veggie sheet pan exciting each time! To keep your fajita veggies fresh, store them in an airtight container. Place the container in the fridge. This way, your flavors stay bright. Use leftover veggies within three to four days for best taste. For reheating, the oven is your best friend. Preheat it to 350°F (175°C). Spread the veggies on a baking sheet and heat for about 10 minutes. This restores texture and taste. You can also use the microwave, but the oven keeps them crisp. If you have extras, try adding them to a salad or a quesadilla for a tasty twist. To freeze the fajita veggie mix, let it cool first. Then, transfer it to a freezer-safe bag. Remove as much air as you can before sealing. This helps prevent freezer burn. When ready to use, move it to the fridge overnight to thaw. Reheat as mentioned above, and enjoy! It takes about 10 minutes to prep. Roasting in the oven takes 20-25 minutes. Altogether, you can enjoy this dish in about 30-35 minutes. Yes, you can easily swap veggies. Try adding mushrooms, asparagus, or even corn. Just make sure they cut evenly for even cooking. Absolutely! This dish is great for meal prep. You can store it in the fridge for up to four days. Just reheat portions as needed. Corn or flour tortillas are both great options. Corn tortillas give a nice crunch, while flour tortillas are soft and chewy. To spice things up, add more chili powder. You can also include fresh jalapeños or a splash of hot sauce. Experiment with heat to find your perfect level. You can prepare the veggies and seasoning ahead. Just store them in the fridge. When ready, roast them for a quick, fresh meal. For the full recipe, check out the details in the main article! This blog post covered how to make delicious fajita veggies on a sheet pan. We talked about the ingredients, preparation steps, and tips for perfect roasting. You learned about storing leftovers and customizing the recipe to fit your taste. In summary, this dish is both fun and easy to prepare. You can explore different veggies and spices, making it your own. Enjoy this tasty meal with friends or family, and remember, cooking should always bring joy!](https://goldendishy.com/wp-content/uploads/2025/07/261fee1c-f0d4-4ba8-a84d-53625610978f-768x768.webp)
![To make a delightful vegan sweet potato curry, gather these simple ingredients: - 2 medium sweet potatoes, peeled and diced - 1 can (400ml) coconut milk - 1 can (400g) chickpeas, drained and rinsed - 1 medium onion, finely diced - 3 cloves of garlic, minced - 1 inch piece of fresh ginger, grated - 2 tablespoons of red curry paste - 1 bell pepper, chopped - 2 cups of fresh baby spinach - 1 tablespoon of olive oil - Salt and freshly ground pepper to taste - Fresh cilantro leaves for garnish - Lime wedges for serving Each ingredient plays a key role in the flavor and texture of the dish. The sweet potatoes give a creamy and sweet base, while the coconut milk adds richness. Chickpeas give protein and heartiness, making this dish filling. The fresh ginger and garlic bring a boost of flavor that warms your soul. Don't worry if you want to switch things up! The beauty of this curry is its flexibility. You can mix in other veggies or spices. Just keep the core ingredients for the best results. For the full recipe, check the reference above. Enjoy cooking! 1. Start by heating olive oil in a large pot over medium heat. 2. Add the diced onion and sauté for about 5 minutes. The onion should become soft and clear. 3. Mix in the minced garlic and grated ginger. Let it cook for one minute. This will make your kitchen smell amazing! 4. Next, add the red curry paste. Stir it in well and let it cook for 2 minutes. This helps deepen the flavors. 5. Now, add the diced sweet potatoes and chopped bell pepper. Stir everything well so the veggies are coated with the curry mix. 1. Pour in the creamy coconut milk and add the rinsed chickpeas. Stir everything together. 2. Turn up the heat slightly to bring the mixture to a gentle simmer. 3. Once it's simmering, lower the heat and cover the pot. Let it cook for about 20 minutes. The sweet potatoes should be tender by now. 4. After 20 minutes, gently fold in the baby spinach. Let it wilt into the curry for another 2 to 3 minutes. 5. Season with salt and freshly ground pepper. Adjust to your taste for the best flavor. 1. Serve the curry hot, garnished with fresh cilantro leaves. 2. Add lime wedges on the side for a zesty touch. 3. For a beautiful dish, use shallow bowls. This helps show off the vibrant colors. 4. Drizzle a bit of extra coconut milk on top for a stunning finish. A sprinkle of chopped cilantro looks great, too. For the complete recipe, check out the [Full Recipe]. To make your curry just right, focus on the texture. The curry should be thick but not dry. If it seems too thick, add a splash of water or more coconut milk. Stir often to keep it from sticking to the pot. When it comes to spice, taste is key. Start with a little red curry paste. You can always add more for some heat. If you prefer a milder dish, reduce the paste or add more coconut milk to balance. Want to add more color and nutrition? Toss in some extra veggies! Zucchini, carrots, or peas work great. You can also use frozen mixed veggies for convenience. Looking for protein? Try adding tofu or tempeh. These options soak up the curry flavor well. You can also use lentils for a hearty twist. To elevate the dish, consider adding spices like cumin or turmeric. These spices bring warmth and depth. A squeeze of lime juice can also brighten the flavors. Pair your curry with fluffy rice or warm naan. These sides soak up the sauce and make each bite special. You can also serve it with a fresh salad for a crunchy contrast. For the full recipe, check out the detailed instructions above. {{image_4}} You can easily adjust the spice level in your vegan sweet potato curry. For a mild dish, use less red curry paste. A medium heat works well with the standard amount of paste. If you want spice, add extra paste or mix in cayenne pepper. Different curry pastes offer unique flavors too. Try green curry paste for a fresh twist or massaman paste for a warm, nutty taste. You can play with various vegetables in your curry. Carrots, peas, or zucchini work well. For extra nutrition, add protein sources like tofu or tempeh. These options boost the dish's texture and flavor. If you want a heartier meal, consider adding lentils or quinoa. The right grain or bread makes your curry shine. Serve it with fluffy jasmine rice or warm naan. They soak up the delicious sauce and complement the curry's taste. If you have leftovers, use them in a wrap or as a topping on a salad. This way, you enjoy the flavors in different ways. For the full recipe, check the earlier section. You can keep the vegan sweet potato curry in the fridge for about 4 to 5 days. To store it, let the curry cool down first. Then, transfer it to an airtight container. This keeps the flavors fresh and tasty. When you want to eat it again, just scoop out what you need. If you want to save it for later, freezing is a great option. Pour it into a freezer-safe container. Leave some space at the top because it will expand when frozen. You can freeze the curry for up to 3 months. When you're ready to eat, take it out and place it in the fridge to thaw overnight. To reheat, warm it on the stove over low heat. Stir it well, and if needed, add a splash of coconut milk to bring back its creamy texture. Enjoy this cozy dish anytime! For the full recipe, check out the details above. Can I make this curry ahead of time? Yes, you can make this curry ahead of time. It tastes even better after a day. Just store it in the fridge. Heat it on the stove or in the microwave before serving. What other toppings can I use besides cilantro? You can use many toppings! Try fresh parsley, green onions, or avocado slices. These add color and flavor. Toasted nuts or seeds also bring a nice crunch. Is this dish gluten-free? Absolutely! This vegan sweet potato curry is gluten-free. All the ingredients in the recipe are safe for a gluten-free diet. Overview of caloric content per serving Each serving has about 350 calories. This makes it a hearty meal without being too heavy. Breakdown of key nutrients - Fiber: 10 grams - Protein: 12 grams - Carbohydrates: 45 grams This curry is rich in fiber and plant protein, making it filling and satisfying. What can I use instead of chickpeas? If you want a different protein, use lentils or black beans. Both are great choices and will still taste yummy. Alternative ingredients for coconut milk You can swap coconut milk for almond milk or oat milk. Just make sure to use a full-fat version for creaminess. If you want a richer flavor, try cashew cream. This blog covered how to make a tasty sweet potato curry. We explored essential ingredients, step-by-step cooking instructions, and tips for customizing your dish. I shared ideas for serving and storing your curry, along with answers to common questions. Incorporating these tips will help you create a flavorful meal. Enjoy experimenting with different spices and ingredients to make it your own. Cooking should be fun, and this curry recipe makes it easy to add joy to your table.](https://goldendishy.com/wp-content/uploads/2025/07/0119eb20-3e5b-446c-8228-d1dcea4a67d2-768x768.webp)


