Honey Garlic Roasted Carrots Flavorful Delight Recipe

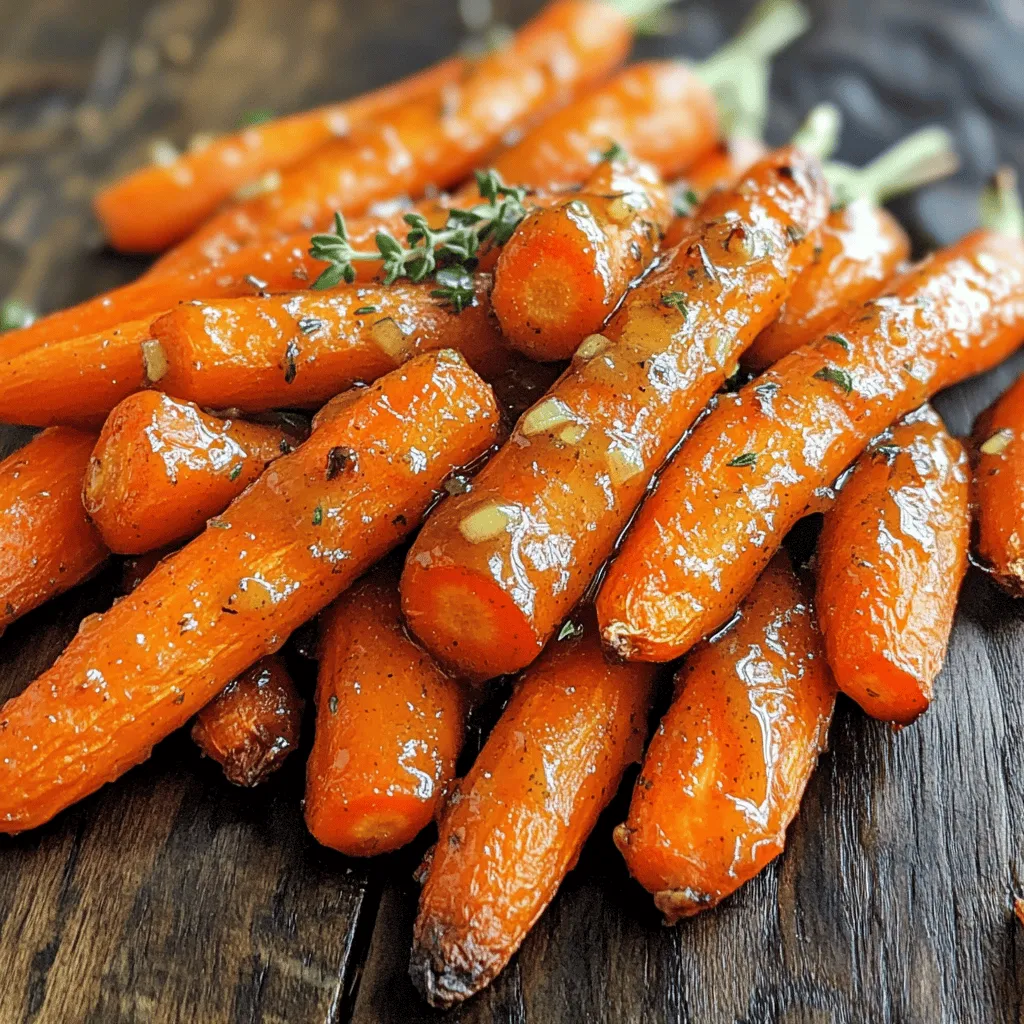
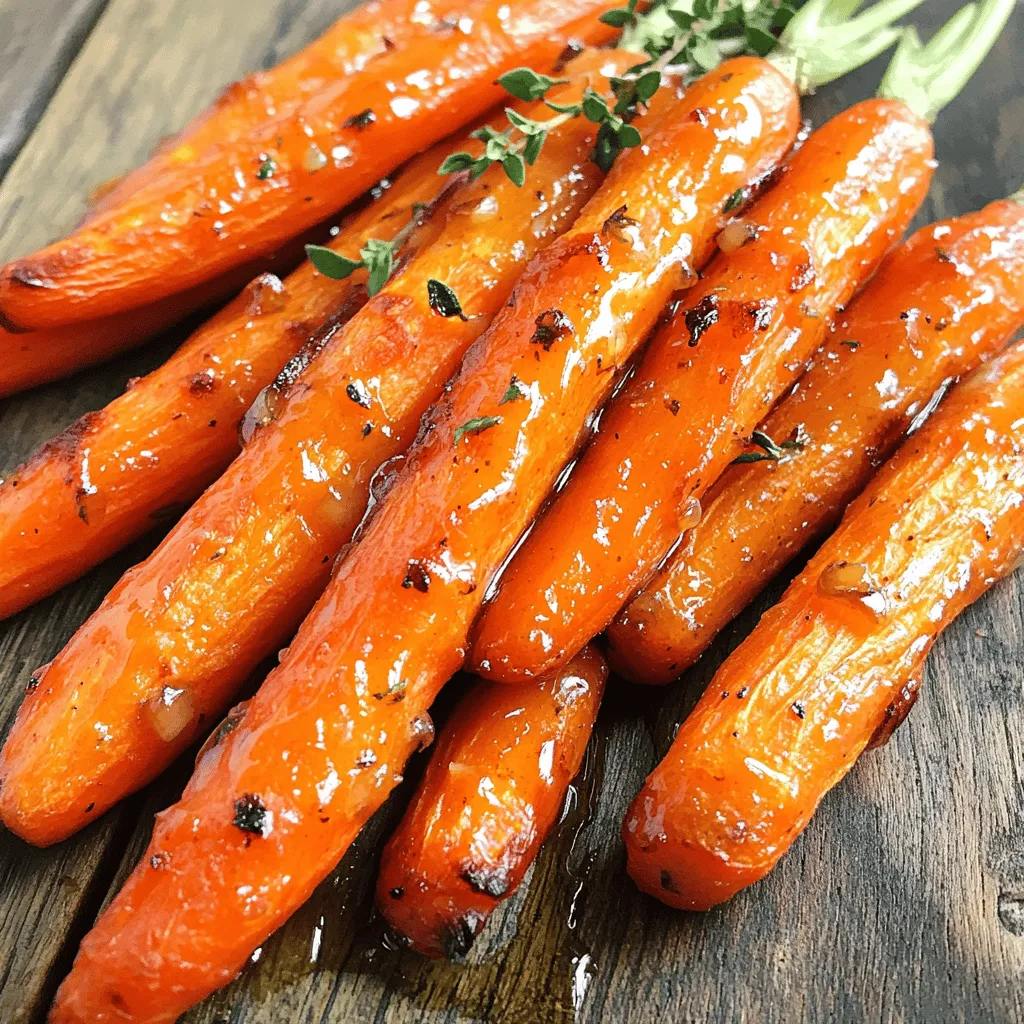
Are you ready to transform ordinary carrots into a tasty side dish? My Honey Garlic Roasted Carrots will have your taste buds singing! The sweet and savory mix of honey, garlic, and a hint of balsamic takes these simple veggies to a whole new level. In this article, I’ll share the easy steps, must-have ingredients, and pro tips for the perfect roast. Dive in and discover your new favorite recipe!
Ingredients
List of Ingredients
– Baby carrots (or medium carrots)
– Honey
– Garlic
– Extra virgin olive oil
– Balsamic vinegar
– Sea salt and freshly cracked black pepper
– Fresh thyme leaves or parsley (optional)
Measurements
– 1 lb of baby carrots
– 2 tablespoons of honey
– 3 cloves of garlic
– 2 tablespoons of olive oil
– 1 tablespoon of balsamic vinegar
Nutritional Information
– Calories per serving: 120
– Breakdown of macronutrients:
– Total fat: 5g
– Carbohydrates: 18g
– Protein: 1g
When I create honey garlic roasted carrots, I choose baby carrots for their sweetness. They cook quickly and stay tender. Honey brings a lovely glaze and rich flavor. Garlic adds depth and a savory kick. Extra virgin olive oil makes everything smooth and rich. Balsamic vinegar gives a nice tang that cuts through the sweetness.
For a serving of four, you’ll need 1 pound of baby carrots, 2 tablespoons of honey, and 3 cloves of garlic. Two tablespoons of olive oil help with roasting. You’ll also want 1 tablespoon of balsamic vinegar to enhance the flavors.
In each serving, you get about 120 calories. The dish provides 5 grams of fat, mostly from olive oil. It has 18 grams of carbohydrates, which mainly come from the carrots. You’ll also get a little protein, around 1 gram per serving.
If you want to add a pop of color, fresh thyme or parsley works well. It adds a hint of fresh flavor too.
Step-by-Step Instructions
Preheat the Oven
Preheat your oven to 400°F (200°C). This is the ideal temperature for roasting. Preheating helps the carrots cook evenly and develop a nice caramel color.
Prepare the Sauce
In a large bowl, mix these ingredients:
– 2 tablespoons honey
– 3 cloves garlic, minced
– 2 tablespoons extra virgin olive oil
– 1 tablespoon balsamic vinegar
– Sea salt and freshly cracked black pepper
Stir well until you have a smooth mixture. Seasoning is key to enhance the flavor of the carrots.
Coat the Carrots
Add 1 pound of baby carrots to the bowl. Toss them gently to ensure each carrot is coated. This helps the carrots soak up all the delicious flavor. Coating also promotes caramelization, giving the carrots a sweet, rich taste.
Arrange for Roasting
Line a baking sheet with parchment paper. Lay the coated carrots in a single layer. Make sure they have space around them. This allows hot air to circulate, ensuring even cooking.
Roast the Carrots
Put the baking sheet in the oven and roast for 20-25 minutes. Halfway, stir or shake the carrots for even cooking. You want them fork-tender with a golden glaze.
Cool and Serve
After roasting, take the carrots out of the oven. Let them cool for a few minutes. This cooling step enhances their flavor. Serve them in a dish, and drizzle any leftover sauce on top. For a final touch, sprinkle fresh thyme or parsley for color and freshness.
Tips & Tricks
Choosing the Right Carrots
– Best varieties for roasting: I love using baby carrots for their sweetness and tenderness. You can also use medium carrots. Just peel and cut them into even sticks.
– Preferred size for even cooking: Choose carrots that are similar in size. This helps them roast evenly. Aim for pieces about 2 to 4 inches long.
Enhancing Flavor
– Suggestions for additional herbs and spices: Add fresh rosemary or dill for a unique touch. A sprinkle of cumin or paprika can also boost flavor.
– Alternative sweeteners and acids: Try using maple syrup instead of honey for a different sweetness. Lemon juice can replace balsamic vinegar for a bright zing.
Serving Suggestions
– Pairing with proteins: These carrots pair well with grilled chicken or roasted pork. Their sweetness complements savory dishes nicely.
– Ideal side dishes for complete meal: Serve with creamy mashed potatoes or quinoa salad. A fresh green salad also rounds out the meal beautifully.

Variations
Different Glazing Options
You can change the glaze to suit your taste. One option is to use maple syrup instead of honey. Maple gives a sweet, earthy flavor. You can also try citrus juices, like orange or lemon, for a tangy twist. They add freshness and brightness to the dish.
Cooking Method Alternatives
You don’t have to roast the carrots if you prefer a different method. You can sauté them on the stovetop. Just heat some olive oil in a pan, add the carrots, and cook until tender. Another option is using an air fryer. Set the temperature to 375°F and cook for about 15 minutes, shaking the basket halfway through.
Adding Additional Vegetables
Feel free to mix in other vegetables for variety. You can add bell peppers, zucchini, or even red onions. These blend well and add different colors and flavors. Customizing your veggie blend makes the dish unique and fun!
Storage Info
Short-Term Storage
To refrigerate leftover honey garlic roasted carrots, cool them first. Place the carrots in an airtight container. Keep them in the fridge for up to three days. Make sure the container seals well to keep moisture in. Glass or plastic containers work great.
Long-Term Storage
To freeze cooked carrots, let them cool completely. Spread them on a baking sheet in a single layer. Freeze them for about one hour until firm. Then, transfer the carrots to a freezer bag or a container. Remove as much air as possible to avoid freezer burn. These can last for up to three months. When ready to use, thaw them overnight in the fridge.
Reheating Tips
For the best flavor and texture, reheat carrots in the oven. Preheat it to 350°F (175°C). Spread the carrots on a baking sheet and heat for about 10 to 15 minutes. This method keeps them tender and warms them evenly. If you’re in a rush, use the microwave. Place the carrots in a microwave-safe dish, cover it with a lid, and heat for 1-2 minutes. This method is quick but may make them softer than oven reheating.
FAQs
How do you make honey garlic roasted carrots?
To make honey garlic roasted carrots, start by preheating your oven to 400°F (200°C). This helps get the perfect roast. In a bowl, mix together honey, minced garlic, olive oil, balsamic vinegar, salt, and pepper. Make sure it is blended well. Next, toss your carrots in this mix until they are coated. Then, spread them out on a lined baking sheet in a single layer. Roast them for 20-25 minutes, stirring halfway through. They should be tender and slightly caramelized. Finally, let them cool briefly before serving.
Can I use frozen carrots for this recipe?
You can use frozen carrots, but the texture and taste will change. Frozen carrots may be softer after cooking. This can lead to a mushy result. If you choose to use them, reduce the cooking time slightly. This helps prevent overcooking. You might also want to drain excess moisture before coating them in the sauce. This keeps the flavor bright and fresh.
How do I make honey garlic sauce thicker?
To thicken the honey garlic sauce, consider adding more honey. This increases the viscosity naturally. You can also use cornstarch or arrowroot. Mix a small amount with cold water to form a slurry, then add it to the sauce. Heat it gently until it thickens. Another option is to simmer the sauce on low heat to reduce the liquid. This concentrates the flavors and enhances thickness.
What other herbs can be used?
You can use many herbs to change the flavor. Fresh thyme is a great option that pairs well. Rosemary adds a strong, earthy taste. You might also try dill for a bright flavor. Each herb will impact the overall profile. Adding herbs can make your dish unique and exciting. Just remember to use them sparingly for the best balance.
Roasting honey garlic carrots is simple and fun. You can use fresh or even frozen carrots. The right mix of flavors, like honey and garlic, makes each bite tasty. Don’t forget about tips for storage and reheating; they keep your carrots fresh. Feel free to try different herbs or even swap honey for maple syrup. Enjoy your tasty side dish with your favorite meal. With this guide, you can impress anyone at your table.


![- 1 cup green or brown lentils, thoroughly rinsed - 1 tablespoon coconut oil - 1 medium onion, finely chopped - 3 garlic cloves, minced - 1-inch piece of fresh ginger, grated - 1 can (14 oz) full-fat coconut milk - 2 ripe tomatoes, diced - 1 tablespoon curry powder - 1 teaspoon ground cumin - 1 teaspoon ground turmeric - 1 cup vegetable broth (use low-sodium if preferred) - 2 cups fresh spinach or kale, chopped - Sea salt and freshly ground black pepper to taste - Fresh cilantro, chopped (for garnish, optional) To make this Easy Vegan Lentil Curry, you need a few key items. The lentils are the base. They bring protein and texture. I prefer green or brown lentils because they hold their shape well. Rinsing them removes dust and ensures you start with clean lentils. Next, the coconut oil adds a rich, creamy taste. It helps sauté the onion, garlic, and ginger. These three ingredients create a fragrant base. They add depth and warmth to the curry. Tomatoes add sweetness and acidity. They balance the creamy coconut milk perfectly. The spices—curry powder, cumin, and turmeric—bring warmth and flavor. They transform the dish into a vibrant, colorful meal. For added nutrition, I recommend spinach or kale. These greens are packed with vitamins. They also bring a lovely color to the curry. Finally, fresh cilantro adds a bright, fresh flavor. You can use it as a garnish or mix it in for extra taste. For the full recipe, check out the detailed instructions. This dish is not only simple but full of flavor! - Heat 1 tablespoon of coconut oil in a medium pot over medium heat. - Once the oil is hot, add 1 finely chopped onion. Sauté for about 5 minutes. The onion should become soft and clear. - Next, add 3 minced garlic cloves and 1-inch grated ginger. Cook for 1 to 2 minutes. You want the kitchen to smell amazing! - Now, add 2 diced tomatoes, 1 tablespoon of curry powder, 1 teaspoon of ground cumin, and 1 teaspoon of ground turmeric. - Stir and cook this mix for about 2 to 3 minutes. This step helps the spices release their lovely flavors and soften the tomatoes. - Add 1 cup of rinsed lentils to the pot. Then, pour in 1 can of full-fat coconut milk and 1 cup of vegetable broth. - Stir well to combine, then bring the mix to a gentle boil. Once it boils, turn the heat down and cover the pot. Let it simmer for 25 to 30 minutes. Check the lentils to see if they are tender and creamy. - After the lentils are cooked, fold in 2 cups of chopped spinach or kale. Cook for about 5 minutes. The greens should be bright and wilted. - Taste the curry and add sea salt and freshly ground black pepper to make it just right for you. For the full recipe, you can check out the details above. Enjoy your cooking! You can adjust spices to suit your taste. If you love heat, add more curry powder. A dash of lime juice brightens the dish. It adds a fresh twist that wakes up the flavors. To save time, use pre-cooked lentils. They cook faster and save you at least 20 minutes. Vegetable broth can boost flavor without much work. It gives your curry a rich taste. Serve your curry in shallow bowls. A sprinkle of cilantro on top creates a nice look. Pair it with fluffy rice or warm naan. This makes your meal more filling and fun to eat. For the full recipe, check out the details above. {{image_4}} You can change the type of lentils in your curry. - Red lentils cook faster and give a smoother texture. - Black or French lentils add more firmness and bite. Using different lentils can change the dish's look and feel. I find red lentils to be a great option for a quick meal. They break down nicely, making the curry creamy. Black lentils keep their shape, adding a nice texture. Spices can make your curry unique. - Try garam masala or chili powder for a spicy kick. - Fresh herbs like cilantro or mint can brighten the flavor. Experimenting with spices can lead to exciting new tastes. Garam masala adds warmth and depth, while chili powder can increase heat. Fresh herbs not only taste great but also add color to your dish. Adding extra vegetables boosts nutrition and flavor. - Carrots or bell peppers add sweetness and crunch. - Swap kale for other leafy greens like Swiss chard. Incorporating more veggies is a fun way to customize your curry. Carrots add a lovely sweetness, while bell peppers bring crunch and color. Swiss chard can be a great substitute for kale and offers a different taste profile. To keep your Easy Vegan Lentil Curry fresh, store leftovers in an airtight container. This method helps maintain flavor and texture. You can keep it in the fridge for up to 4 days. If you want to save it for later, freeze portions for up to 3 months. Just make sure to label the container with the date. When you're ready to enjoy your curry again, reheat it on the stove. Add a splash of vegetable broth to keep it creamy and delicious. Stir it often to ensure even heating. If you're in a hurry, you can microwave it too. Do this in short bursts, stirring frequently to avoid hot spots. Always check for signs of spoilage before eating. Look for any off smells or changes in color. If your curry looks or smells strange, it’s best to discard it. Safety first! Enjoy your meal knowing you stored it well. For the full recipe, check out the earlier sections. - Prep time: 10 minutes, Total time: 40 minutes Making this curry is quick and easy. You will spend about 10 minutes getting ready. Cooking takes an additional 30 minutes. This means you can enjoy a tasty meal in just 40 minutes! - Yes, the flavors meld nicely if made a day ahead You can make this curry in advance. If you prepare it a day before, the flavors will blend well. This makes the dish even tastier when you eat it later. - Great with rice, quinoa, or naan for a hearty meal This curry pairs perfectly with many side dishes. Rice is a classic choice, but quinoa works well too. You can also serve it with warm naan for a filling meal. - Yes, all ingredients are naturally gluten-free You will be glad to know this recipe is gluten-free. All the ingredients, like lentils and coconut milk, do not contain gluten. This makes it a safe choice for anyone avoiding gluten. For the full recipe, check out the [Full Recipe]. This Easy Vegan Lentil Curry is tasty and simple to make. You learned about the main ingredients, step-by-step instructions, flavor tips, and storage info. Customization options, like different lentils and spices, let you make it your own. This dish is perfect for meal prep and serving with rice or naan. Remember to store leftovers properly and watch for spoilage signs. Enjoy this dish that is not only healthy but full of flavor! You will love experimenting with it for your next meal.](https://goldendishy.com/wp-content/uploads/2025/06/33b3e4d2-4af0-4f09-8df6-36adfea2fbd1-768x768.webp)


![When making vegetable and bean chili, gather these items first: - 1 tablespoon olive oil - 1 large onion, finely diced - 3 cloves garlic, minced - 1 bell pepper (red or yellow), chopped into bite-sized pieces - 1 medium carrot, diced into small cubes - 1 medium zucchini, diced - 1 cup corn kernels (fresh or frozen will work) - 1 can (15 oz) black beans, rinsed thoroughly and drained - 1 can (15 oz) kidney beans, rinsed thoroughly and drained - 1 can (15 oz) diced tomatoes with their juices - 2 cups vegetable broth (low sodium recommended) - 2 tablespoons chili powder - 1 teaspoon ground cumin - 1 teaspoon smoked paprika - Salt and pepper to taste - Fresh cilantro, chopped (for garnish) - Avocado slices (for serving, optional) These ingredients create a rich, hearty dish that warms you up. You can change this recipe to fit your taste. Here are some ideas: - Add more beans, like pinto or cannellini beans. - Swap in different vegetables, such as spinach or sweet potatoes. - Mix in some hot peppers for a spicy kick. - Use different herbs, like oregano or thyme, for extra flavor. - Top with cheese or sour cream if you prefer. These options let you make the chili your own! This vegetable and bean chili is not only tasty but also healthy. Here’s a quick breakdown of its nutrition: - Calories: Around 250 per serving - Protein: About 12 grams - Carbohydrates: Roughly 40 grams - Fiber: Nearly 12 grams - Fat: Around 5 grams This chili is high in fiber and protein, making it a satisfying meal. You can enjoy it guilt-free! For the full recipe, check out the [Full Recipe]. First, heat 1 tablespoon of olive oil in a large pot over medium heat. When the oil is hot, add 1 large onion, finely diced. Cook the onion for about 5 minutes. It should turn soft and clear. Next, add 3 minced garlic cloves. Stir the garlic in for 1 to 2 minutes. It should smell great and turn light gold. Now, add in a chopped bell pepper, a diced carrot, and a diced zucchini. Cook these veggies for 5 to 7 minutes. Stir them often as they start to soften and brighten. Then, mix in 1 cup of corn kernels. Let them cook for an extra 3 minutes. This adds sweet flavor and color. Next, add 1 can each of black beans and kidney beans, both rinsed and drained. Then, pour in 1 can of diced tomatoes with their juices and 2 cups of vegetable broth. Sprinkle in 2 tablespoons of chili powder, 1 teaspoon of ground cumin, and 1 teaspoon of smoked paprika. Stir everything together well. Increase the heat until it boils. Once boiling, lower the heat to let it simmer. Keep it uncovered for about 30 minutes. Stir occasionally to avoid sticking. Taste and add salt and pepper as you like. Once thickened, remove it from the heat. Let it sit for a few minutes. This helps the flavors mix well. Now, ladle the chili into bowls. You can top each bowl with freshly chopped cilantro. If you want, add avocado slices for a creamy finish. Check out the Full Recipe for more details! To boost the flavor of your vegetable and bean chili, try these tips: - Use Fresh Herbs: Fresh cilantro or parsley adds a bright taste. - Add Citrus: A squeeze of lime or lemon brightens the dish. - Incorporate Spices: Experiment with chipotle powder for heat or oregano for depth. You can also let the chili sit for a few hours or overnight. This resting time lets the flavors meld and deepen. If your chili is too thick, add more vegetable broth. Start with a half cup and stir well. If it’s too thin, simmer it longer. This helps the liquid reduce and thicken. You can also mash some beans to make the chili creamier. Serve your chili with various toppings. Here are some ideas: - Sliced avocado for creaminess - Shredded cheese for a cheesy touch - Crème fraîche or sour cream for richness - Crispy tortilla chips for crunch Pair your chili with warm bread or cornbread on the side. It’s a great way to soak up every delicious drop. For the full recipe, check out the robust vegetable & bean chili. Enjoy your hearty comfort food delight! {{image_4}} If you want a vegan chili, this recipe is already perfect! All the ingredients are plant-based. For gluten-free versions, check your vegetable broth and spices. Most brands are safe, but read labels to be sure. You can switch to gluten-free grains like quinoa or rice as a side. Feel free to change up the beans or veggies. If you don’t have black beans, use pinto or cannellini beans. You can also mix in lentils for added protein. For vegetables, try adding sweet potatoes, spinach, or even kale. This adds flavor and nutrition to your dish. To make your chili spicy, add more chili powder or diced jalapeños. You can also use hot sauce for an extra kick. If you prefer mild flavors, reduce the chili powder and smoked paprika. This way, everyone can enjoy their bowl of chili. For the full recipe, check out the detailed instructions and ingredient list! To keep your vegetable and bean chili fresh, let it cool first. Once cool, store it in an airtight container. Place the container in the fridge. Your chili will stay good for about 3 to 5 days. If you want to enjoy it later, freezing is a great option. You can freeze your chili for up to 3 months. First, let it cool completely. Then, pour it into a freezer-safe container. Leave some space at the top, as the chili will expand when frozen. Label the container with the date. This way, you will know when to use it. When you are ready to eat, thaw the chili in the fridge overnight. For quick reheating, use the microwave or the stove. If microwaving, heat in short bursts, stirring in between. On the stove, warm it over medium heat until it bubbles. Always check that it is hot all the way through before serving. Enjoy your hearty comfort food delight! For the full recipe, check out the detailed steps above. Yes, you can use canned beans. Canned beans save time and effort. Just rinse them well to remove excess sodium. For this chili, I recommend black beans and kidney beans. They add great texture and flavor. Vegetable bean chili lasts about 4 to 5 days in the fridge. Make sure to store it in an airtight container. The flavors actually improve over time, making it even tastier! You can serve this chili with many sides. Try crispy tortilla chips for crunch. Warm bread or cornbread pairs well too. Add a dollop of sour cream or Greek yogurt for creaminess. Don't forget fresh avocado slices for extra flavor! Check the Full Recipe for more serving ideas. This blog post covered all you need for a great vegetable bean chili. We explored the ingredients, showing how to customize it and understand its nutrition. The step-by-step instructions guide you through cooking, while tips enhance its flavor. Variations help you adapt to different diets. Finally, we discussed storage methods and answered common questions. Cooking a tasty chili doesn't have to be hard. You now have tools to make it your own and enjoy it for days. Happy cooking!](https://goldendishy.com/wp-content/uploads/2025/06/710b1993-2890-4a51-b686-850c3b1d6686-768x768.webp)