Garlic Herb Roasted Chickpeas Flavorful Snack Delight

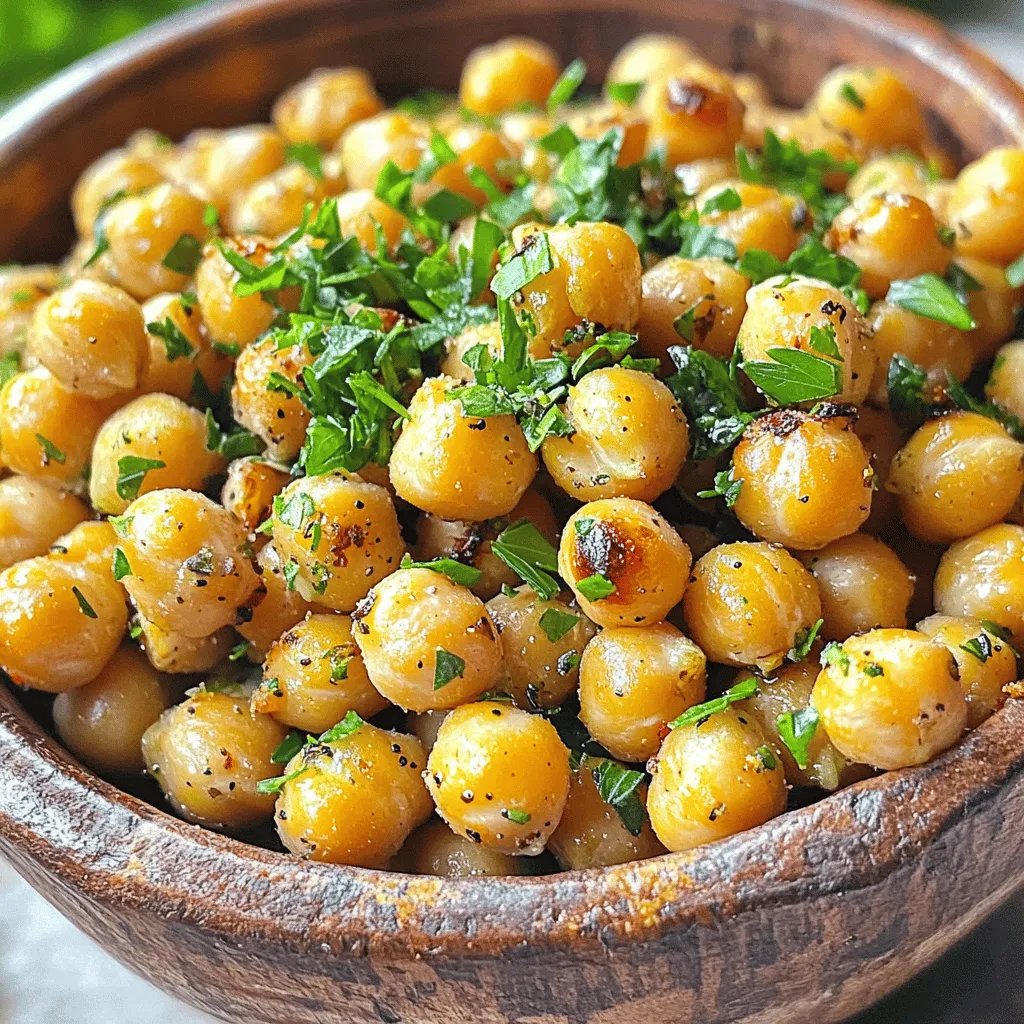
Are you craving a snack that’s both tasty and healthy? Look no further! In this article, I’ll show you how to make Garlic Herb Roasted Chickpeas, a flavorful delight that’s easy to whip up. With just a few simple ingredients and a few steps, you’ll create a snack that’s crunchy, savory, and satisfying. Let’s dive into this guilt-free treat that will have your taste buds dancing!
Ingredients
Required Ingredients
– 2 cans (15 oz each) of chickpeas, thoroughly drained and rinsed
– 3 tablespoons of high-quality olive oil
– 4 cloves of garlic, finely minced
– 1 teaspoon of dried oregano
– 1 teaspoon of dried thyme
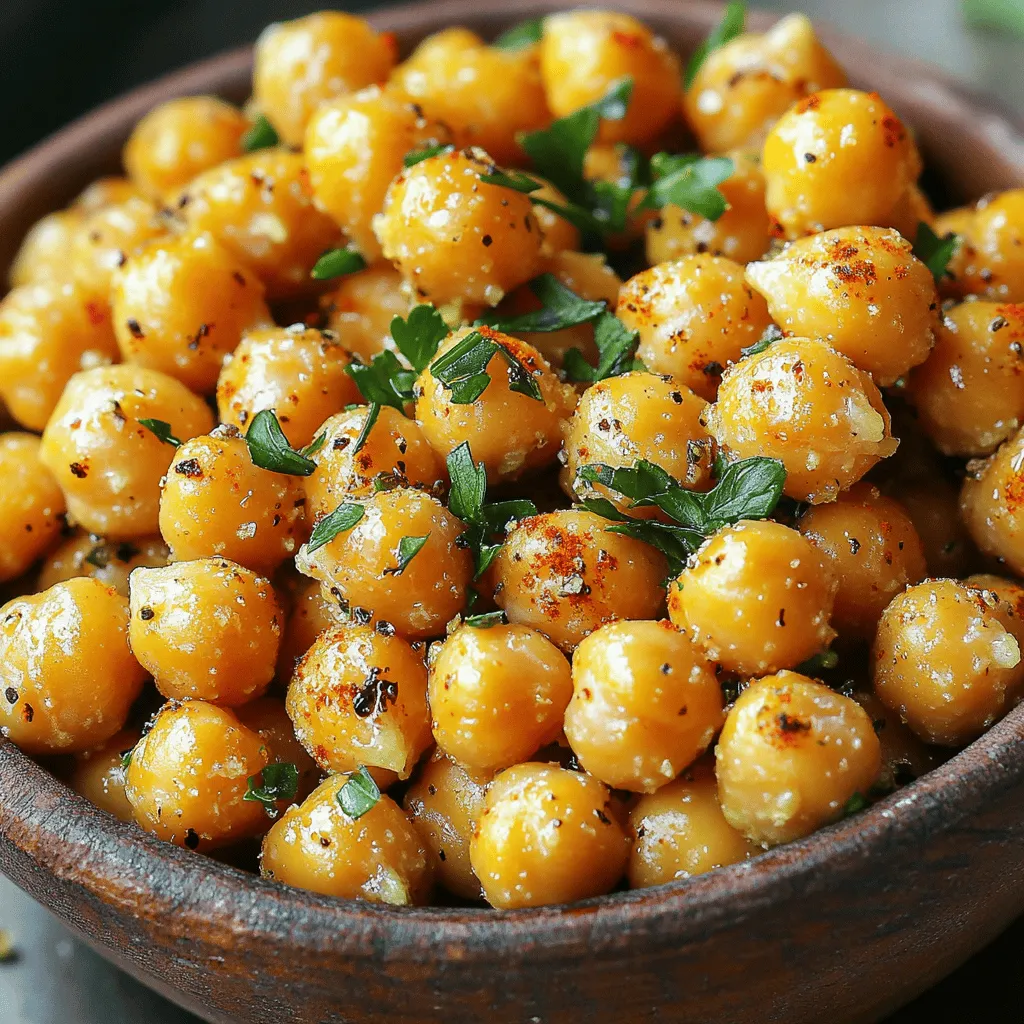
– 1 teaspoon of smoked paprika
– 1/2 teaspoon of sea salt
– 1/4 teaspoon of freshly ground black pepper
– Fresh parsley, finely chopped (for garnish)
To start, you need chickpeas. They are the star of this dish! Canned chickpeas work best for quick prep. Rinse them well to ensure they are clean. The garlic gives a lovely depth of flavor. Use fresh cloves for the best taste. Olive oil helps the seasonings stick and adds richness.
Next, you have your seasonings. Dried oregano and thyme bring a nice herbal note. Smoked paprika adds a hint of smokiness, which is delightful. Salt and pepper are essential; they enhance all the flavors.
Finally, fresh parsley adds color and a fresh taste. It’s perfect for garnishing your dish.
Optional Ingredients
– Additional spices for flavor variations
– Alternative oils for roasting
You can mix things up with extra spices. Try chili powder for a kick. Or add cumin for warmth. If you want a different oil, avocado oil or coconut oil works well too.Enjoy experimenting with flavors!
Step-by-Step Instructions
Preparation Steps
1. Start by preheating your oven to 400°F (200°C). This makes sure the heat is just right for roasting.
2. Grab two cans of chickpeas. Drain and rinse them well. This helps remove excess salt and makes them healthier.
3. Spread the chickpeas on a clean towel. Pat them dry gently. The drier they are, the crispier they will be!
Mixing and Seasoning
1. In a large bowl, add the chickpeas. Pour in three tablespoons of olive oil.
2. Next, add minced garlic, oregano, thyme, smoked paprika, salt, and pepper.
3. Stir everything well. You want each chickpea to be coated in the tasty mix. This step is key to great flavor!
Roasting Process
1. Now, spread the chickpeas evenly on a baking sheet lined with parchment paper. Don’t overcrowd them; they need space to get crispy.
2. Place the baking sheet in your oven. Roast them for 25-30 minutes.
3. Halfway through, take them out and stir. This helps them brown evenly. Keep an eye on them! You want them golden, not burnt.
4. Once they look perfect, take them out and let them cool. They will get even crispier as they cool down.
5. Finally, serve them in a bowl and garnish with chopped parsley for a fresh touch. Enjoy your healthy, tasty snack!
Tips & Tricks
Achieving Crispiness
To get crispy chickpeas, start by drying them well. After rinsing, spread them on a towel. Pat them down gently. The drier they are, the better they will roast. This step is key to avoid soggy snacks.
Oven temperature is also important. Set your oven to 400°F (200°C). This high heat helps to crisp up the chickpeas. Don’t skip the stirring halfway through cooking. It ensures even browning and crispiness.
Flavor Enhancement
Want to boost the flavor? Consider adding spices like cumin or chili powder. These spices can give your chickpeas a nice kick. You can also try curry powder for a different taste.
Adjusting seasoning is easy. Taste the mixture before roasting. If you want it saltier or spicier, add more. Mix well to ensure every chickpea is coated. This way, each bite is full of flavor.

Variations
Flavor Profiles
To make Garlic Herb Roasted Chickpeas even more exciting, consider some fun flavor twists.
– Mediterranean-inspired additions: Add lemon zest and a sprinkle of feta cheese for a bright taste. You can also toss in chopped olives or sun-dried tomatoes for a savory kick. The mix of herbs like basil or rosemary can deepen the flavor too.
– Spicy enhancements for heat lovers: If you love heat, add cayenne pepper or chili powder. Toss in some crushed red pepper flakes for a fiery bite. You can also blend in a touch of hot sauce before roasting for a zesty punch.
Serving Suggestions
Now, let’s explore how to enjoy your roasted chickpeas.
– Ideas for snack pairings: Serve the chickpeas with a yogurt dip or hummus for a tasty snack. They also pair well with fresh veggies like carrots and cucumbers. Try them on a cheese board alongside crackers and fruit for a fun treat.
– Ways to use roasted chickpeas in meals: Sprinkle them on salads for extra crunch and flavor. Add them to soups for texture and protein. You can also mix them into grain bowls or use them as a topping for roasted vegetables. These chickpeas add a delightful crunch and loads of flavor to any dish.
Storage Info
Proper Storage Techniques
To keep your garlic herb roasted chickpeas fresh and crispy, use an airtight container. Glass jars or resealable bags work well. Make sure to store them at room temperature. Avoid putting them in the fridge. Cold air makes them soft.
For best results, store them away from light and moisture. A cool, dry place is ideal. This helps keep the crunch intact.
Shelf Life
These roasted chickpeas are best enjoyed within a week. After that, they may lose their crunch. To check if they are still good, look for signs like a stale smell or a soft texture. If they feel chewy, it’s time to toss them out.
For longer storage, you can freeze them. Just remember to let them thaw at room temperature before enjoying.
FAQs
How to make Garlic Herb Roasted Chickpeas more flavorful?
To boost the flavor, add extra spices. Consider using cayenne for heat or lemon zest for brightness. You can also mix in nutritional yeast for a cheesy taste. Fresh herbs like rosemary or basil can make a big difference too. Experimenting with flavors keeps it fun!
Can I use dried chickpeas instead of canned?
Yes, you can use dried chickpeas. Start by soaking them overnight in water. This helps soften them. After soaking, boil them until tender. This process takes longer than canned chickpeas, but it allows for better texture and taste.
What are the health benefits of eating chickpeas?
Chickpeas are packed with protein and fiber. They help you stay full longer. They also support heart health due to their fiber content. Chickpeas are rich in vitamins and minerals, which are great for your body. Adding them to your diet can boost overall health.
How can I adjust this recipe for dietary restrictions?
To make this recipe gluten-free, ensure your spices are certified gluten-free. For a vegan version, this recipe already fits! If you need to avoid oil, you can use vegetable broth instead of olive oil. Just be sure to monitor the roasting time for best results.
Roasting chickpeas is simple and fun. Start with chickpeas, olive oil, and your favorite spices. Follow the steps to dry, season, and roast them perfectly. Use tips to enhance flavor and ensure crispiness. Explore different variations to keep things exciting. Store properly to enjoy later.
In conclusion, roasted chickpeas are a tasty, healthy snack. Experiment with flavors and share them with friends. With this guide, you can enjoy the perfect crunchy treat any time.


![- 1 lb ground chicken - 1 tablespoon olive oil - 1 red bell pepper, diced - 1 carrot, grated - 3 green onions, finely chopped - 2 cloves garlic, minced - 1 tablespoon fresh ginger, grated - 3 tablespoons low-sodium soy sauce - 1 tablespoon rice vinegar - 1 tablespoon sesame oil - 1 tablespoon honey - Salt and pepper to taste - 1 head of butter lettuce or iceberg lettuce, leaves carefully separated - Optional toppings: chopped almonds, fresh cilantro, shredded coconut I love cooking with ground chicken. It cooks fast and takes on great flavors. Olive oil helps to keep the chicken moist. Fresh vegetables add color and crunch to the wraps. I use red bell pepper, carrot, and green onions for taste and texture. Aromatics like garlic and ginger bring warmth and depth to the dish. They make the kitchen smell amazing while cooking. For the sauce, I mix low-sodium soy sauce, rice vinegar, sesame oil, and honey. This gives the wraps a sweet and savory kick. I prefer using butter or iceberg lettuce for the wraps. They provide a nice, crisp bite. You can also add toppings like chopped almonds or fresh cilantro. These add extra flavor and crunch. For a touch of sweetness, consider shredded coconut. For the full recipe, check out the details I provided earlier. Enjoy making these tasty, healthy chicken lettuce wraps! 1. Heating the Oil: Start by adding olive oil to a large skillet. Heat it over medium until it shimmers. 2. Cooking the Chicken: Add ground chicken to the skillet. Cook it for about 5-7 minutes, stirring often, until it turns brown. Break up any large clumps with a spatula. 3. Adding Aromatics: Stir in minced garlic and grated ginger. Sauté for 1-2 minutes until the garlic turns a light gold and the smell fills the kitchen. 4. Incorporating Vegetables: Toss in diced red bell pepper and grated carrot. Sauté for 3-4 minutes, or until the veggies soften nicely. 1. Whisking the Sauce Ingredients Together: In a small bowl, whisk together the soy sauce, rice vinegar, sesame oil, and honey. Mix until it's smooth. 2. Combining Sauce with Chicken and Veggies: Pour the sauce over the chicken and veggie mixture in the skillet. Stir well to coat everything. Cook for another 2-3 minutes until heated through. 3. Finishing with Green Onions: Remove the skillet from heat. Gently fold in chopped green onions for a fresh kick. 1. Spoon Chicken Filling into Lettuce Leaves: Take a lettuce leaf and spoon in a generous amount of the chicken mix. 2. Adding Optional Toppings for Extra Flavor: For added flavor, sprinkle chopped almonds, fresh cilantro, or shredded coconut on top. This method creates a fun and tasty meal that’s easy to make. For the full recipe, check the earlier section. To prevent the chicken from becoming dry, cook it over medium heat. Stir often and break up clumps. This helps it brown evenly and stay juicy. For chopping vegetables, use a sharp knife. Dice the red bell pepper and grate the carrot into thin pieces. This makes them blend well in the wraps and adds great texture. For plating, arrange the filled lettuce wraps on a colorful platter. Add some lime wedges and extra cilantro around them. This creates a vibrant look that is sure to impress. Ideal sides for your wraps include brown rice or a light salad. You could also serve a soy dipping sauce for added flavor. To make ahead, cook the chicken filling and store it in an airtight container. You can keep it in the fridge for up to three days. When reheating, use a microwave or a skillet. Heat it slowly to keep the chicken moist. Always check the temperature; it should be hot all the way through. For the [Full Recipe], follow the detailed steps for a delicious meal. {{image_4}} You can switch up the protein in your wraps. Turkey works well instead of chicken. Ground turkey has a similar taste and texture. If you want a plant-based option, use lentils or mushrooms. They add a nice, hearty feel to your dish. Ground beef or shrimp can also shine in these wraps. Just adjust your cooking time for each protein. Adding different sauces can change the whole meal. For a spicy kick, try adding sriracha or chili paste. You can also mix in some hot sauce for extra heat. If you like sweet flavors, swap honey for maple syrup or agave. Different vinegars can change the taste too. Try apple cider vinegar for a fruity twist or balsamic vinegar for a rich flavor. You can explore new veggies in your wraps. Bell peppers, carrots, and green onions are great, but don’t stop there! Try zucchini, shredded cabbage, or even corn. They add color and crunch. Adding spices like cumin or coriander can boost flavor. Fresh herbs, like basil or mint, can add a bright taste. The more you mix and match, the more fun your wraps will be! For the full recipe, check here. To keep your chicken filling fresh, store it in an airtight container. This will lock in flavor and moisture. Place the chicken in the fridge right after it cools. It can stay good for about 3 to 4 days. For the lettuce, wrap the leaves in a damp paper towel. Then, place them in a plastic bag. This helps keep them crisp and fresh for about 2 to 3 days. Yes, you can freeze the chicken filling! It’s best to freeze it in a sturdy container or bag. Make sure to remove as much air as possible. The filling can last up to 3 months in the freezer. When you’re ready to eat, thaw the chicken in the fridge overnight. Reheat it in a skillet over medium heat until hot. This keeps the flavor and texture nice. Cooked chicken can be safely stored in the fridge for 3 to 4 days. Always check for signs of spoilage before eating. If the chicken smells off or has a slimy texture, it’s best to throw it away. Freshness is key to enjoying your Healthy Chicken Lettuce Wraps. For the best taste, eat them as soon as possible! Enjoy the full recipe for more guidance on this dish. You can add heat in several ways. Use crushed red pepper flakes for a kick. Sriracha or chili sauce also works well. If you like fresh heat, add sliced jalapeños. For a smoky flavor, try smoked paprika. Adjust the amount based on your spice level. Each option adds a unique twist to your wraps. Yes, you can use regular soy sauce. However, it has more salt than low-sodium options. This will change the flavor, making it saltier. If you're watching your sodium intake, low-sodium is better. You might need to cut back on other salty ingredients too. Always taste as you go to avoid over-salting. Chicken lettuce wraps have many health benefits. Ground chicken is lean and high in protein. The fresh vegetables add vitamins and minerals. Lettuce is low in calories and high in fiber, which aids digestion. Using low-sodium soy sauce helps keep sodium levels in check. This meal is light yet filling, making it a great choice. To make the wraps vegan, swap ground chicken for plant-based meat. You can use lentils, chickpeas, or tofu as great options. Replace honey with maple syrup or agave for sweetness. Use tamari instead of soy sauce for a gluten-free option. With these changes, you can enjoy a tasty vegan version of the dish. For the complete recipe, check out the Full Recipe. Healthy chicken lettuce wraps are simple and tasty. We covered key ingredients like ground chicken, fresh veggies, and flavorful sauces. The step-by-step guide helps you cook and assemble them perfectly. Tips on meal prep and variations let you get creative. In the end, you can enjoy a delicious dish tailored to your taste. These wraps are healthy, fun, and easy to make. Make them for a light dinner or a snack! Enjoy your cooking adventure!](https://goldendishy.com/wp-content/uploads/2025/06/f37706c1-09e0-4508-86ce-50d139ffc9b7-768x768.webp)


