Garlic Butter Roasted Mushrooms Flavorful Oven Delight

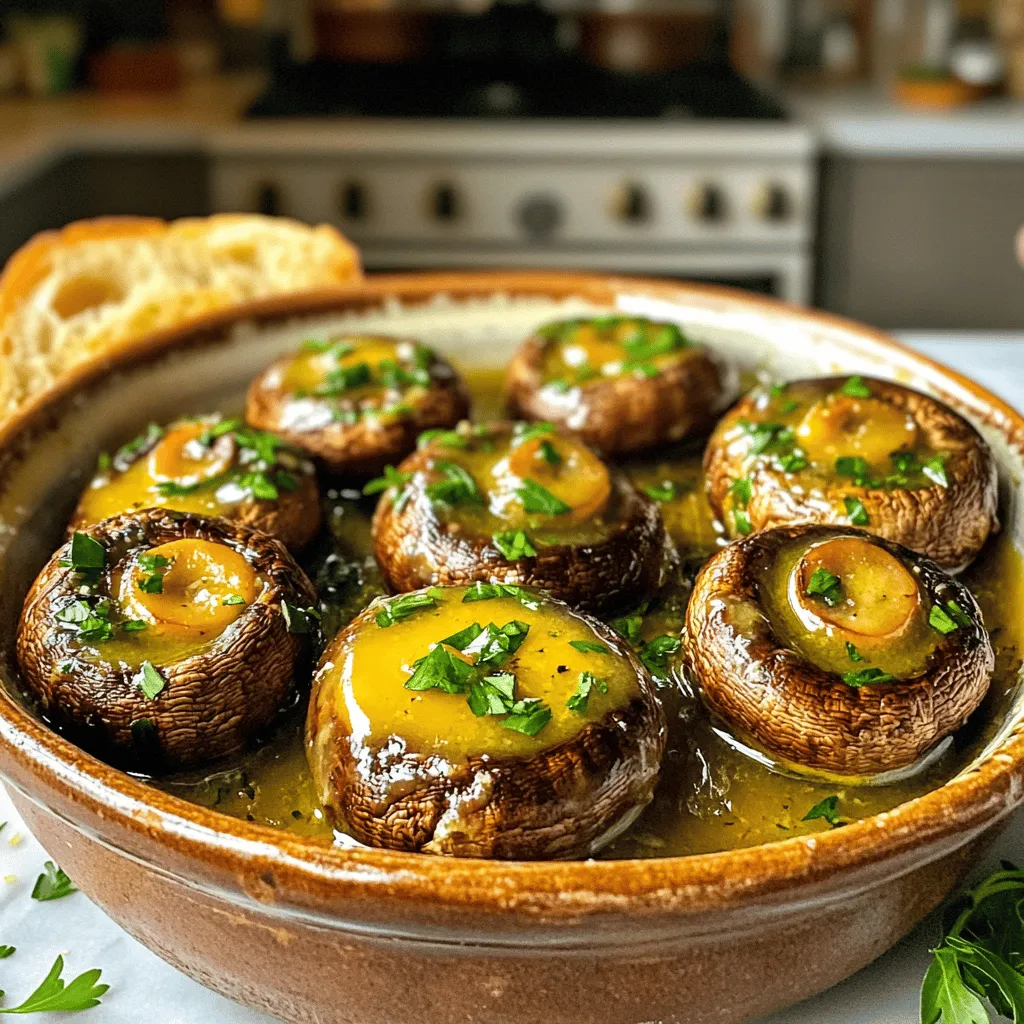
If you crave a tasty side dish, look no further than Garlic Butter Roasted Mushrooms. These little gems pack a big punch of flavor thanks to a simple blend of butter, garlic, and fresh herbs. Whether you need a quick appetizer or a cozy addition to dinner, this recipe hits the spot. Ready to impress your taste buds? Let’s dive into the mouthwatering details!
Ingredients
For Garlic Butter Roasted Mushrooms, you need simple and fresh ingredients. Here’s what you’ll need:
– Fresh cremini or button mushrooms
– Unsalted butter
– Garlic
– Fresh parsley
– Fresh thyme
– Salt and black pepper
– Lemon juice (optional)
This dish shines with just a few key items. Fresh mushrooms serve as the base, soaking up all the flavor from the garlic butter. I love using cremini or button mushrooms for their meaty texture. Unsalted butter provides richness, while garlic adds a lovely aroma. Fresh herbs like parsley and thyme brighten the dish. Don’t forget salt and pepper for seasoning! If you’re feeling adventurous, a squeeze of lemon juice at the end adds a zesty kick that balances the butter.
Step-by-Step Instructions
Preparation and Preheating
– Preheat the oven to 400°F (200°C).
– Clean and trim mushroom stems.
First, you want a hot oven to roast the mushrooms perfectly. This step makes sure they get nice and golden. Next, take your mushrooms and clean them under cool water. Use a damp cloth to wipe off dirt. Then, trim the stems so they are even.
Making Garlic Butter
– Melt butter over low heat.
– Sauté garlic until fragrant.
Now, let’s make the garlic butter. Put four tablespoons of unsalted butter in a small pan. Turn the heat to low. As it melts, watch it closely. Once it’s melted, add four cloves of minced garlic. Stir gently for about one to two minutes. The smell will be amazing, but do not let the garlic brown.
Coating the Mushrooms
– Combine mushrooms and garlic butter.
– Season with thyme, salt, and pepper.
In a big bowl, add the cleaned mushrooms. Pour the warm garlic butter over them. Make sure every mushroom gets coated. Next, sprinkle in some fresh thyme, salt, and black pepper. Toss the mushrooms gently so they get all the flavors.
Roasting the Mushrooms
– Spread on a baking sheet.
– Roast for 20-25 minutes.
Take a baking sheet and line it with parchment paper. Spread the mushrooms out in one layer. This helps them roast evenly. Now, pop them in the oven. Roast for about 20 to 25 minutes. Stir them halfway through to ensure they brown nicely.
Final Touches
– Drizzle with lemon juice (optional).
– Garnish with parsley.
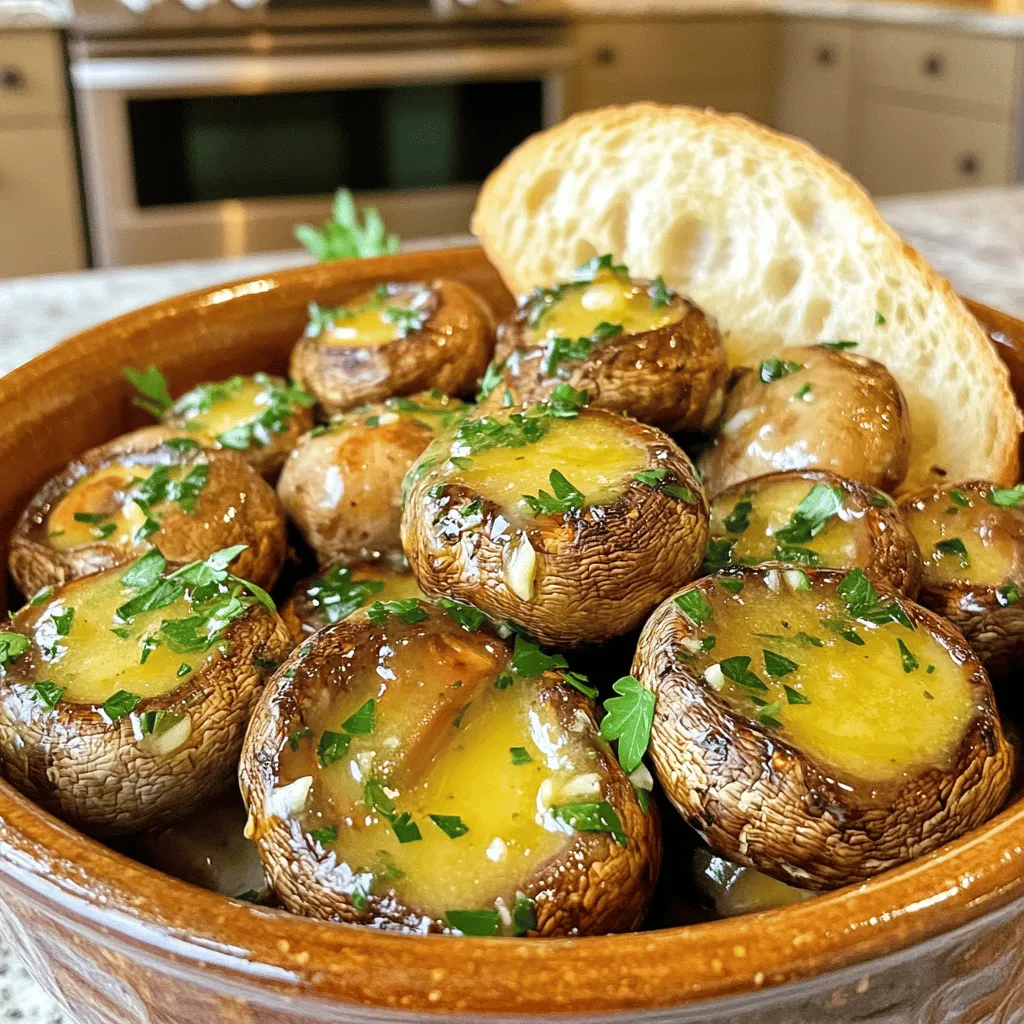
When the mushrooms are done, you can add a touch of lemon juice if you like. This gives a nice zing! Finally, sprinkle freshly chopped parsley on top. This adds color and freshness before serving.Enjoy your flavorful oven delight!
Tips & Tricks
Enhancing Flavor
To boost the taste of your garlic butter roasted mushrooms, try adding a splash of white wine. This adds depth and makes the dish more complex. You can also experiment with herbs like rosemary or thyme. Fresh herbs brighten the flavors and make each bite more exciting.
Perfecting Texture
For a meatier bite, use larger mushrooms. These hold up well during roasting and give you a satisfying texture. Make sure to spread the mushrooms out on the baking sheet. If they are too close together, they can steam instead of roast. This step is key for that perfect golden brown finish.
Serving Suggestions
These mushrooms pair well with crusty bread. You can use the bread to soak up the garlic butter. They also go great over rice, making a hearty meal. Serve them as a side dish or an appetizer; they fit any occasion.

Variations
Different Mushroom Types
You can switch things up by using different mushrooms. Try shiitake or portobello mushrooms. Shiitake mushrooms add a rich, earthy taste. Portobello mushrooms give a nice meaty texture. You can also explore wild mushrooms for unique flavors. They bring a variety of tastes and aromas to your dish.
Vegan Option
If you want a vegan version, you can easily make changes. Substitute butter with olive oil or coconut oil. This keeps the dish rich and flavorful without dairy. You can also use nutritional yeast for added umami. It gives your mushrooms a savory, cheesy flavor.
Spice it Up
Want to add some heat? Add crushed red pepper flakes for a spicy kick. This will make your mushrooms pop with flavor. You can also infuse butter with chili oil. This adds depth and warmth to the dish. These small changes can take your garlic butter roasted mushrooms to the next level.
Storage Info
Storing Leftovers
To keep your garlic butter roasted mushrooms fresh, store them in an airtight container. Place them in the refrigerator and use them within 3-4 days. This keeps their flavor intact and prevents spoilage.
Reheating Tips
When you want to enjoy your leftovers, reheat them in the oven. This method keeps the mushrooms crispy. Set your oven to 350°F (175°C) and warm them for about 10 minutes. If you prefer a softer texture, use the microwave. Add a splash of water to the container before heating to create steam.
Freezing Guidelines
If you want to save some mushrooms for later, freeze them before roasting. Clean and coat them in garlic butter, then place them in freezer-safe containers. This method helps maintain the texture when you cook them later.
FAQs
How can I add more flavor to Garlic Butter Roasted Mushrooms?
You can boost the flavor with herbs and spices. Here are some great options:
– Add fresh rosemary for a woodsy note.
– Sprinkle in some crushed red pepper flakes for heat.
– Use smoked paprika for a subtle smoky taste.
– Try adding a splash of white wine for depth.
Experiment with these flavors to find what you love best!
Can I make Garlic Butter Roasted Mushrooms ahead of time?
Yes, you can prep them in advance. Here are some tips:
– Clean and trim the mushrooms a day early.
– Mix the garlic butter and coat the mushrooms ahead of time.
– Store them in the fridge until you are ready to roast.
This way, you save time and still enjoy a fresh dish!
What are some good side dishes to serve with roasted mushrooms?
Garlic Butter Roasted Mushrooms pair well with many sides. Here are some ideas:
– Serve with crusty bread for dipping.
– Pair with rice or quinoa for a hearty meal.
– Offer alongside grilled meats or fish for balance.
– Include a fresh salad for a light, crisp contrast.
These pairings will enhance your meal and make it even tastier!
Garlic butter roasted mushrooms are a tasty dish made with simple ingredients. You learned to prepare and roast mushrooms with garlic butter, enhancing flavor with herbs. Tips to improve texture and suggestions for serving were also included.
Remember, you can adjust recipes to fit your taste. Try new mushrooms or substitutes, and even store extras for later. Enjoy these delicious bites anytime, whether as a side or an appetizer. Happy cooking!


![- 2 cups shredded cooked chicken - 1 (8 oz) package of cream cheese - 1/2 cup buffalo sauce - 1/2 cup ranch dressing For buffalo chicken dip, the main ingredients create a creamy and rich base. Shredded cooked chicken gives it that hearty texture. You can use rotisserie chicken to save time. Cream cheese adds smoothness, while buffalo sauce brings the heat. Ranch dressing balances the flavors and adds a nice creaminess. - 1/2 cup crumbled blue cheese - 1 green onion for garnish - Tortilla chips or celery sticks for serving Optional ingredients enhance the dip. Crumbled blue cheese adds a bold taste that many love. It pairs well with the spicy buffalo flavor. A sprinkle of green onion on top looks great and adds freshness. For serving, I recommend crunchy tortilla chips or crisp celery sticks. They both complement the dip's rich and creamy texture. Always remember to adjust the buffalo sauce to match your spice preference. You can find the full recipe in the section above for more detailed steps! 1. First, preheat your oven to 350°F (175°C). This helps the dip cook evenly. 2. In a large bowl, combine the shredded chicken, cream cheese, buffalo sauce, and ranch dressing. Mix until smooth. 1. Now, gently fold in the shredded cheddar cheese and blue cheese, if you use it. This adds great flavor and creaminess. 2. Next, transfer the chicken mixture to a baking dish. Spread it evenly with a spatula. 3. Bake the dip for 20-25 minutes. Look for bubbling edges and a slightly golden top. 1. When your dip is done, take it out and garnish with sliced green onions. This adds freshness. 2. Serve it warm with tortilla chips or celery sticks. Enjoy this creamy and flavorful delight! For the full recipe, check out the details above. Adjusting buffalo sauce is key for your dip. If you love heat, add more buffalo sauce. If you prefer mild dishes, use less. Start small and taste as you go. You can always add more but can’t take it out. If you want a cream cheese alternative, try Greek yogurt. It gives a nice tang and cuts some fat. You can also use vegan cream cheese for a plant-based option. This keeps the dip creamy without dairy. To get the perfect crust, bake your dip until it’s bubbly and golden. This usually takes about 20-25 minutes at 350°F. You want the edges to have a light brown color. This shows the dip is ready and adds flavor. For a crispy top, use a broiler after baking. Set your oven to broil and watch closely. Just a few minutes under the broiler can give your dip a nice crunch. Be careful not to burn it! When serving at parties, focus on presentation. Put the dip in the center of a colorful platter. Surround it with chips and celery sticks. This makes it look inviting and fun. For drinks, consider pairing it with light beers or sparkling water. The lightness balances the richness of the dip. You can also serve it with a side of fresh veggies for a nice crunch. {{image_4}} You can make buffalo chicken dip healthier with just a few swaps. - Low-fat cream cheese options: Use low-fat cream cheese. It cuts fat and calories but keeps the creaminess. - Using Greek yogurt instead of ranch dressing: Greek yogurt adds a tangy taste and protein. It's a great way to lower calories while keeping it creamy. You might want to kick up the flavor in your dip. - Additions like diced jalapeños or hot peppers: These add heat and a fresh taste. Adjust to your spice level. - Incorporating other cheeses for unique flavors: Try mixing in mozzarella or gouda. Each cheese adds its own twist to the dip's flavor. Change how you serve your buffalo chicken dip for fun. - Buffalo chicken dip stuffed in peppers: Hollow out mini bell peppers and fill them with the dip. Bake until warm for a tasty bite. - Spinach and buffalo chicken dip combo: Mix in fresh spinach. It adds color and nutrition, making the dip even better. For the complete recipe, check out the [Full Recipe]. To keep buffalo chicken dip fresh, place it in an airtight container. This helps prevent it from drying out. Store the dip in the fridge for up to five days. You may notice the flavors deepen as it sits. Just be sure to cover it well to avoid any fridge odors. You can freeze buffalo chicken dip for longer storage. First, let the dip cool completely. Then, transfer it to a freezer-safe container. Press plastic wrap directly on the dip before sealing. It can last for up to three months in the freezer. When you're ready to enjoy it, thaw it in the fridge overnight. You have two great options to reheat buffalo chicken dip: the oven or microwave. If using the oven, preheat it to 350°F (175°C). Place the dip in an oven-safe dish and heat for about 20 minutes. Stir halfway through for even warming. If you choose the microwave, heat in 30-second intervals. This prevents hot spots and keeps the dip creamy. To maintain texture, avoid overheating. Let the dip sit for a minute after reheating. This helps the flavors come back together. Enjoy your dip warm with chips or celery sticks! Yes, you can make buffalo chicken dip ahead of time. To prepare in advance, follow these steps: - Mix the ingredients: Combine the shredded chicken, cream cheese, buffalo sauce, and ranch dressing. - Store it: Place the mixture in a baking dish, cover it with plastic wrap, and put it in the fridge. - Bake when ready: When you are ready to serve, take it out and bake it at 350°F for 20-25 minutes. This way, you save time and enjoy a warm dip at your gathering. If you want to swap ranch dressing, here are some great options: - Blue cheese dressing: This adds a tangy flavor that works well. - Greek yogurt: Use plain Greek yogurt for a healthier twist. - Caesar dressing: This offers a different but tasty flavor profile. Feel free to experiment with your favorite dressings! To kick up the spice level, try these ideas: - Extra buffalo sauce: Add more buffalo sauce to your mix. - Diced jalapeños: Mix in fresh or pickled jalapeños for heat. - Hot sauce: Drizzle hot sauce on top before serving for an extra kick. Adjust the spice to match your taste, and enjoy the heat! Buffalo chicken dip can be gluten-free, but check your ingredients. Here’s what to know: - Buffalo sauce: Most brands are gluten-free, but confirm by reading the label. - Ranch dressing: Look for gluten-free options if using store-bought. - Dipping options: Use gluten-free tortilla chips or fresh veggies for dipping. With careful choices, everyone can enjoy this dip! You now know how to make buffalo chicken dip from scratch. We covered key ingredients like chicken, cream cheese, and buffalo sauce. I shared step-by-step instructions to get delicious results. You learned tips for adjustments and variations to suit your taste. Remember, this dip is versatile; you can customize it for any gathering. Enjoy experimenting with flavors and serving styles. Your next snack night will be a hit!](https://goldendishy.com/wp-content/uploads/2025/07/99cdad4a-7337-4a60-a9b0-2f79e024797e-768x768.webp)

![- 1 pound fresh asparagus, trimmed - 3 tablespoons unsalted butter - 2 tablespoons freshly squeezed lemon juice - Zest of 1 lemon - 2 cloves garlic, finely minced Fresh asparagus is key to this dish. When you choose asparagus, look for bright green stalks that feel firm. The butter adds richness, while the lemon juice and zest bring a bright, zesty punch. Garlic gives a nice aroma and flavor, making the dish exciting. - Salt and freshly ground black pepper, to taste Salt and pepper enhance all the flavors. Use good-quality salt for the best taste. Freshly ground black pepper adds warmth and a bit of spice. - 1 tablespoon fresh parsley, finely chopped (for garnish) Fresh parsley adds color and freshness. You can also use lemon wedges for extra zing. They allow you to customize how much lemon flavor you want. These small touches make the dish look and taste even better. For the full recipe, check out the details above! Start by washing the fresh asparagus. Rinse it well under cool water to remove dirt. Next, trim the tough ends. You can snap them off or cut 1-2 inches from the bottom. This makes the asparagus more tender and easy to eat. In a large skillet, melt the unsalted butter over medium heat. Watch for the butter to bubble and foam; this means it is hot enough. Once it is ready, add the minced garlic. Cook the garlic for about 30 seconds and stir often. It should smell great but not turn brown. Brown garlic can taste bitter. Now, add the trimmed asparagus to the skillet. Toss it gently in the garlic butter. Make sure each piece gets coated well. Sauté the asparagus for 4-6 minutes. Turn it with tongs so it cooks evenly. You want it bright green and still a bit crisp. Once cooked, drizzle the lemon juice over the asparagus and sprinkle the zest on top. Season with salt and black pepper. Toss everything together to mix the flavors. Finally, transfer the asparagus to a serving dish. Garnish with chopped parsley for a lovely look. For the complete recipe, check the [Full Recipe]. To cook asparagus just right, start with fresh, vibrant stalks. Look for asparagus that is firm and bright green. Trim the ends, as they can be tough. When cooking, aim for a tender yet crisp texture. Sauté for 4 to 6 minutes. The color should become a vivid green. If you want to test doneness, simply pierce a stalk with a fork. It should be easy to pierce but still hold its shape. If you're out of any ingredients, don't worry! You can swap unsalted butter for olive oil. This will give a different flavor but still taste great. For lemon juice, you can use lime juice instead. If you lack fresh garlic, try garlic powder. Use half the amount, as it's stronger. Fresh parsley can be replaced with basil or cilantro for a fun twist. These substitutions keep the dish flavorful while using what you have. How you present your dish matters! Arrange the asparagus neatly on a white platter. This will highlight the bright green color. For a pop of color, add lemon wedges around the sides. This not only looks nice but also invites guests to add more lemon. You can sprinkle extra parsley on top for a fresh look. A simple, clean presentation makes your lemon butter asparagus look gourmet. {{image_4}} You can make Lemon Butter Asparagus a full meal by adding protein. Chicken or shrimp works well. For chicken, use thin strips and sauté them in the butter first. Cook until they turn golden brown. Then, add the asparagus and follow the recipe as usual. For shrimp, add them after the garlic. Cook until they turn pink, then toss in the asparagus. This adds flavor and makes it more filling. To spice things up, add red pepper flakes. Just a pinch can bring a nice kick. You can mix them in with the garlic for a burst of heat. If you love bold flavors, try adding lemon zest or herbs like thyme or basil. These add depth and make the dish more exciting. Feel free to mix in other seasonal vegetables. Cherry tomatoes, bell peppers, or snap peas all pair nicely with asparagus. Add them in the skillet after the garlic to keep them fresh. This not only enhances the taste but also boosts the nutrition of your dish. For the full recipe, check out the details above. After enjoying your Lemon Butter Asparagus, you might have some left. Store it in an airtight container. Keep it in the fridge for up to three days. The asparagus will stay fresh, but it may lose its crispness over time. To reheat, use a skillet over medium heat. Add a splash of water or a bit of butter. This helps keep the asparagus moist. Cook for about 3-4 minutes. Stir occasionally until warm. You can also use a microwave. Heat in 30-second bursts until hot. Freezing is a great option if you want to save this dish for later. Start by blanching the asparagus for 2-3 minutes in boiling water. Then, cool it quickly in ice water. Once cool, drain and pat dry. Place it in a freezer-safe bag, removing as much air as possible. It can stay frozen for up to three months. When you're ready to eat, thaw it in the fridge overnight before reheating. Yes, you can use frozen asparagus. It is a great option if fresh asparagus is not available. Just remember to thaw it first. Drain any excess water before cooking. You may need to adjust cooking time. Frozen asparagus cooks faster, so keep an eye on it. Aim for a tender yet crisp texture. Lemon Butter Asparagus pairs well with many dishes. Here are some ideas: - Grilled chicken - Pan-seared fish - Quinoa or rice - Pasta with olive oil - A fresh salad These options balance the flavors and add variety to your meal. Making lemon butter sauce is simple. Here’s how: 1. Melt butter in a pan over medium heat. 2. Add minced garlic and sauté until fragrant. 3. Stir in freshly squeezed lemon juice and zest. 4. Season with salt and pepper. This easy lemon butter sauce elevates many dishes, not just asparagus. For the full recipe, refer to the earlier sections. In this post, we covered everything you need for Lemon Butter Asparagus. I shared the fresh ingredients, pantry staples, and optional garnishes. We went through step-by-step instructions to prepare and cook each part. Tips and tricks helped you perfect your dish and suggested tasty variations. Finally, I gave you storage info and answered common questions. Embrace this dish, and enjoy your cooking adventure!](https://goldendishy.com/wp-content/uploads/2025/07/9c4cbd12-069a-483d-8240-a9afe0533cf0-768x768.webp)
