Craving a warm, flavorful meal that’s simple to make? You’re in the right place! My “Easy Chicken Tikka Masala” recipe combines tender chicken thighs with rich yogurt and spices, creating a dish that’s both delicious and satisfying. With just a few ingredients and simple steps, you can impress your family or treat yourself. Let’s dive into this easy recipe and bring bold, authentic flavors to your table!
Ingredients
Main Ingredients
– 1 pound boneless, skinless chicken thighs
– 1 cup plain yogurt
– 2 tablespoons garam masala
– 1 tablespoon ground cumin
– 1 tablespoon ground coriander
– 1 teaspoon turmeric powder
– 1 teaspoon smoked paprika
– 3 cloves garlic, minced
– 1 inch fresh ginger, grated
– 1 tablespoon lemon juice
– 2 tablespoons vegetable oil or ghee
– 1 medium onion, chopped
Additional Ingredients
– 1 can (15 oz) diced tomatoes
– 1 cup coconut milk
– Fresh cilantro for garnish
Tools Needed
– Mixing bowl
– Skillet or heavy-bottomed pan
– Cooking utensils
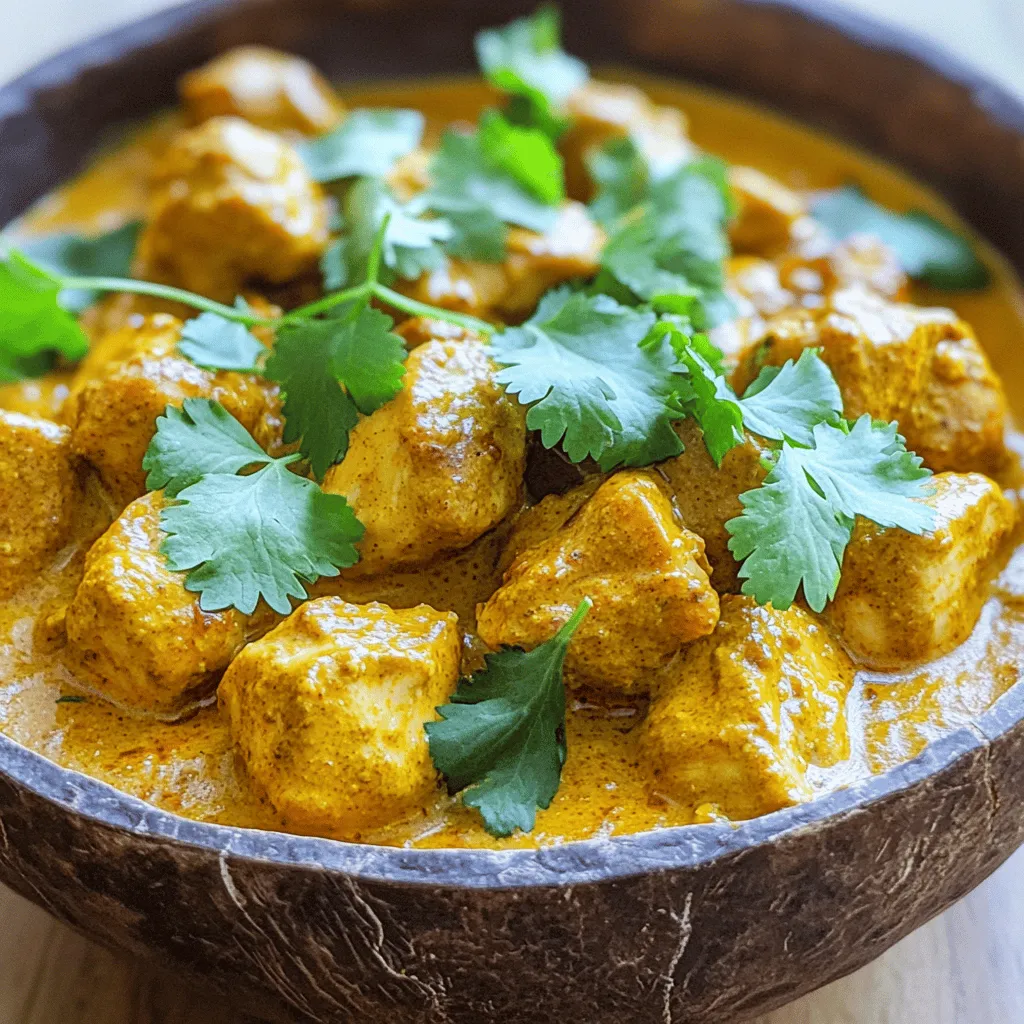
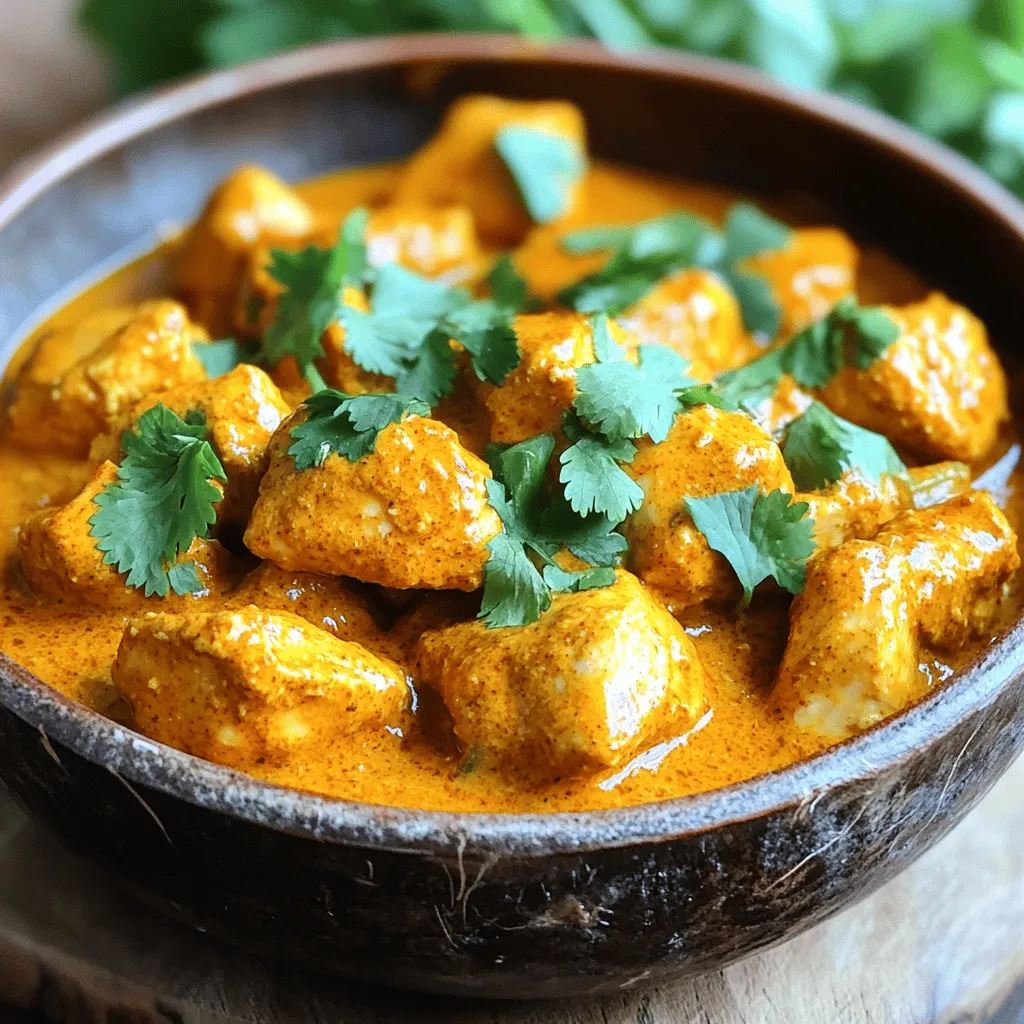
Using these ingredients makes your Chicken Tikka Masala rich and full of flavor. I love using boneless chicken thighs for their tenderness. The plain yogurt helps to marinate the chicken and adds creaminess to the dish. The spices create a warm aroma that fills the kitchen. You’ll also need diced tomatoes and coconut milk to build the sauce. Fresh cilantro ties everything together, adding a pop of color and freshness.
Gather your mixing bowl, skillet, and cooking utensils so you’re ready to start. This recipe is easy and enjoyable, perfect for any cook.
Step-by-Step Instructions
Preparing the Marinade
To start, I mix the yogurt and spices in a bowl. I use 1 cup of plain yogurt and add:
– 2 tablespoons garam masala
– 1 tablespoon ground cumin
– 1 tablespoon ground coriander
– 1 teaspoon turmeric powder
– 1 teaspoon smoked paprika
– 3 cloves garlic, minced
– 1 inch fresh ginger, grated
– 1 tablespoon lemon juice
I stir until everything is blended well. Then, I add the chicken chunks to the marinade. I make sure each piece is coated. I cover the bowl and place it in the fridge for at least one hour, but overnight is best for flavor.
Cooking the Chicken
Next, I heat 2 tablespoons of vegetable oil in a large skillet over medium heat. I add a finely chopped onion and sauté it until golden, which takes about 5-7 minutes. The onion should be soft and fragrant.
Once the onion is ready, I add the marinated chicken to the skillet. I keep any leftover marinade for later. I cook the chicken, stirring occasionally, until it is browned on all sides. This usually takes around 5-8 minutes.
Creating the Sauce
After the chicken is browned, I stir in a can of diced tomatoes with their juices and the reserved marinade. I bring this mix to a gentle simmer, letting it cook for about 10 minutes. This helps all the flavors blend together.
Then, I pour in 1 cup of coconut milk and stir it all together. I increase the heat a little and let the curry simmer gently for about 15 minutes. I stir occasionally to keep it from sticking. The chicken should be fully cooked, and the sauce should have thickened to my liking.
I taste the dish and season with salt and freshly cracked black pepper as needed.
Tips & Tricks
Marinating for Flavor
For the best taste, marinate your chicken for at least one hour. Overnight is even better for deeper flavor. You can use different marinades, too. Try mixing yogurt with lemon juice and your favorite spices for a twist.
Cooking Tips
To ensure your chicken cooks perfectly, look for a nice golden color. You can cut a piece to check if it’s done. If you want a thicker sauce, let it simmer longer. For a thinner sauce, add a splash of water or broth.
Presentation Suggestions
Serve your Chicken Tikka Masala over fluffy basmati rice or warm naan. This adds texture and helps soak up the sauce. For a pop of color, garnish with fresh cilantro leaves. You can also add a lemon wedge for a zesty touch. Enjoy your meal!
Variations
Adding Vegetables
You can easily add vegetables to your Chicken Tikka Masala. Bell peppers and spinach work great. Just chop them up and add them in when cooking the onions. This adds color and nutrition to the dish. If you want a vegetarian version, swap the chicken for your favorite veggies. Cauliflower, zucchini, or chickpeas are all tasty choices.
Alternative Proteins
Chicken thighs are juicy and tender, but you can use chicken breast instead. It cooks faster and is leaner. For a different taste, try tofu or paneer. Both soak up the flavors well. If you choose tofu, press it first to remove extra moisture. This helps it absorb more of the sauce.
Flavor Adjustments
Want more heat? You can make it spicier by adding chili powder. Start with a little, and taste as you go. You can also use different types of yogurt. Greek yogurt adds creaminess. It also gives a tangy taste. Regular yogurt works too, but it’s less thick.Enjoy experimenting with these variations!
Storage Info
Short-term Storage
Store your Chicken Tikka Masala in the fridge. Use an airtight container to keep it fresh. It stays good for up to four days. When you’re ready to eat, simply reheat it on the stove or in the microwave. If you choose the microwave, use a microwave-safe bowl and cover it to prevent splatters.
Long-term Storage
You can freeze Chicken Tikka Masala for longer storage. After it cools, transfer it to a freezer-safe container. It can last for up to three months in the freezer. When you’re ready to enjoy it again, thaw it in the fridge overnight. Reheat it on the stove over low heat, stirring gently until it’s hot.
Shelf Life
In the fridge, Chicken Tikka Masala lasts about four days. Always check for signs of spoilage before eating. Look for off smells, changes in color, or mold. If you see any of these signs, it’s best to throw it away. Enjoy your delicious Chicken Tikka Masala while it’s fresh!
FAQs
What is Chicken Tikka Masala?
Chicken Tikka Masala is a popular Indian dish. It features marinated chicken in a spicy, creamy sauce. The dish likely originated in the UK, blending Indian and British flavors. It is famous for its rich taste and vibrant color.
You can enjoy Chicken Tikka Masala with various sides. It pairs well with fluffy basmati rice or warm naan. Some like to serve it with a side of fresh salad for balance.
Can I make this recipe dairy-free?
Yes, you can make Chicken Tikka Masala dairy-free. To do this, substitute yogurt with coconut yogurt or cashew cream. Both options give a creamy texture without dairy.
For the coconut milk, you can use almond milk or soy milk. Just make sure to choose unsweetened versions for the best flavor. Adjust spices in the recipe to ensure it remains rich and tasty.
How do I make Chicken Tikka Masala spicier?
To spice up your Chicken Tikka Masala, add more chili powder or cayenne pepper. Start with a small amount, taste, and adjust as needed.
You can also use fresh green chilies. Chop them finely and add them to the marinade. Another tip is to include more garam masala, which adds depth and warmth to the dish.
For a unique twist, try adding a dash of hot sauce at the end. This brings a fresh kick without altering the dish’s base flavor.
This blog post covered the key ingredients for Chicken Tikka Masala, including chicken, yogurt, and spices. I shared steps for marinating, cooking, and creating a rich sauce with tomatoes and coconut milk. You learned tips for enhancing flavor and presentation. Variations allow you to experiment with vegetables and proteins. Lastly, I shared storage options and answered common questions about the dish. You can enjoy this meal, knowing you have the skills to make it your own!


