Easy Chicken Shawarma Flavorful and Simple Recipe

If you crave bold flavors and simple steps, I have the perfect dish for you: Easy Chicken Shawarma! This recipe packs a punch with tasty spices and fresh ingredients. In just a few steps, you can enjoy savory marinated chicken wrapped in warm pita bread. Perfect for weeknight dinners or weekend feasts, let’s dive into this flavorful journey and transform your kitchen into a delicious shawarma shop!
Ingredients
List of Required Ingredients
– Chicken Thighs and Marinade Components
– 1.5 lbs boneless, skinless chicken thighs
– 4 cloves garlic, finely minced
– 2 tablespoons ground cumin
– 2 tablespoons ground coriander
– 1 tablespoon sweet paprika
– 1 tablespoon ground turmeric
– 1 teaspoon ground cinnamon
– ½ teaspoon cayenne pepper (or to taste)
– Sea salt and freshly ground black pepper to taste
– ¼ cup plain yogurt (preferably Greek yogurt for creaminess)
– 3 tablespoons extra virgin olive oil
– 2 tablespoons fresh lemon juice (about 1 lemon)
The chicken thighs give the shawarma a juicy and rich taste. The marinade adds deep flavors, thanks to the spices and yogurt.
– Fresh Vegetables for Topping
– Crispy lettuce
– Juicy tomatoes
– Refreshing cucumbers
– Thinly sliced red onion
These veggies add crunch and freshness, balancing the warm spices of the chicken.
– Sauces for Serving
– Tahini sauce
– Zesty garlic sauce
The sauces enhance the dish’s flavor, making every bite exciting.
This is your go-to list for making easy chicken shawarma.
Step-by-Step Instructions
Marinating the Chicken
Preparing the Marinade
To start, grab a large mixing bowl. Add these ingredients:
– 4 cloves garlic, finely minced
– 2 tablespoons ground cumin
– 2 tablespoons ground coriander
– 1 tablespoon sweet paprika
– 1 tablespoon ground turmeric
– 1 teaspoon ground cinnamon
– ½ teaspoon cayenne pepper (or to taste)
– Sea salt and freshly ground black pepper to taste
– ¼ cup plain yogurt
– 3 tablespoons extra virgin olive oil
– 2 tablespoons fresh lemon juice
Whisk them together until smooth. This mix smells amazing!
Coating the Chicken
Next, take 1.5 lbs of boneless, skinless chicken thighs. Add them to the marinade, ensuring each piece is well coated. Cover the bowl with plastic wrap. Place it in the fridge for at least 1 hour. If you have time, let it marinate overnight. This step makes the chicken super flavorful!
Cooking the Chicken
Grilling or Skillet Cooking Instructions
When ready to cook, preheat your grill or a heavy skillet over medium-high heat. If using a skillet, add a bit of olive oil to prevent sticking. Remove the chicken from the fridge and let any extra marinade drip off.
Place the chicken on the hot grill or skillet. Cook for about 5-7 minutes on each side. You want nice char marks and the chicken cooked through. Use a meat thermometer to check if it hits 165°F (75°C).
Checking for Doneness
Once cooked, take the chicken off and place it on a cutting board. Let it rest for 5 minutes. This helps the juices stay inside. After that, slice it into thin strips.
Assembling the Shawarma
Preparing the Pita Bread
Warm 4 soft pita breads in the skillet or microwave. This makes them soft and easy to fold.
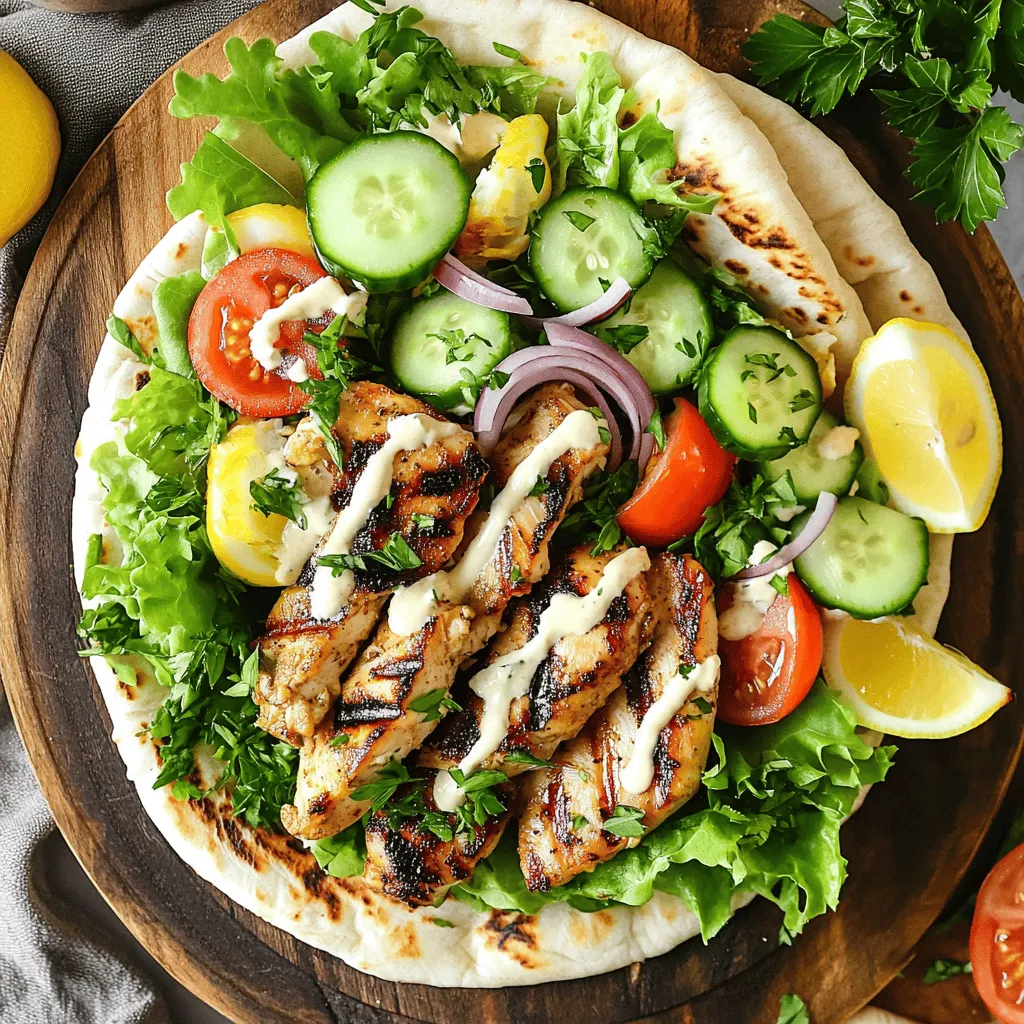
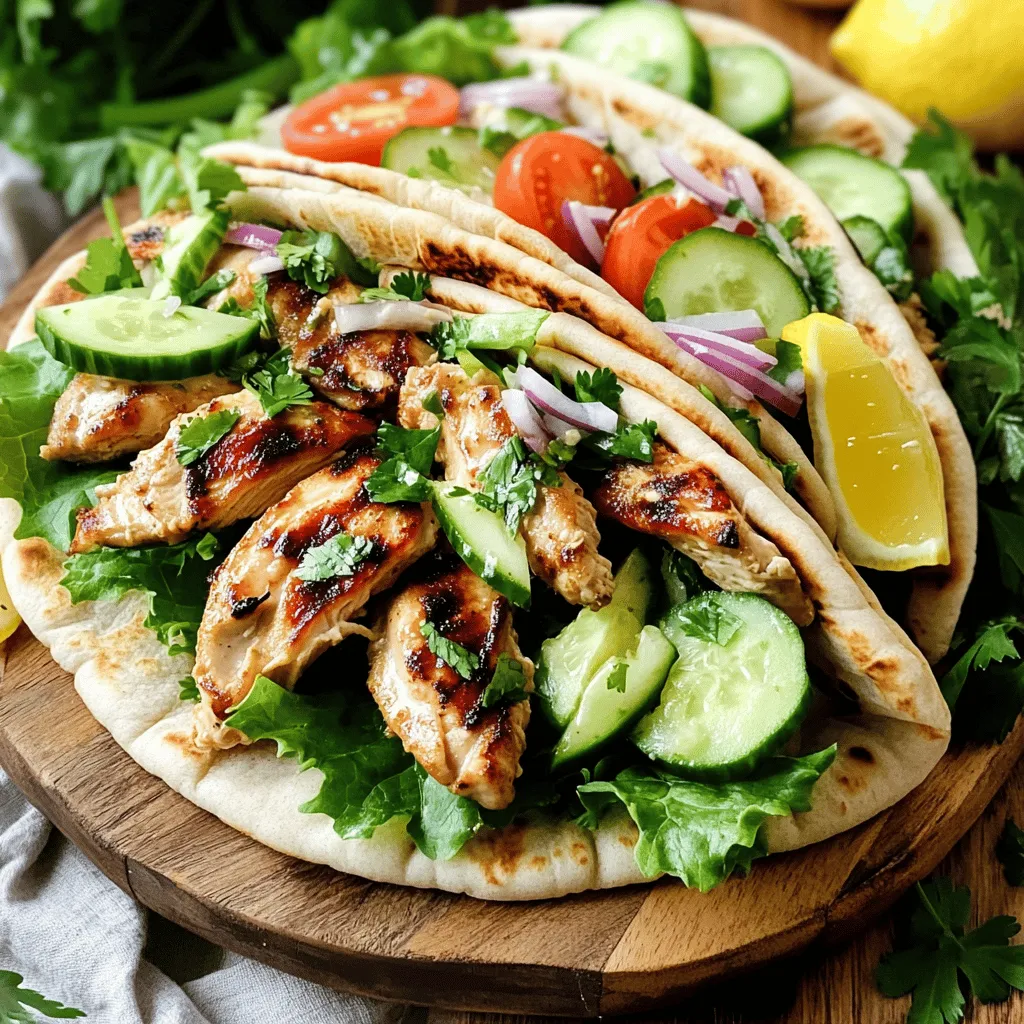
Layering Ingredients
Lay each pita flat. Start with a generous portion of sliced chicken. Add fresh veggies like:
– Crispy lettuce
– Juicy tomatoes
– Refreshing cucumbers
– Thinly sliced red onion
Finish with a drizzle of tahini sauce or zesty garlic sauce. Fold or roll the pita tightly around the filling. Enjoy your homemade chicken shawarma!
Tips & Tricks
Perfecting the Marinade
To make the best chicken shawarma, you must start with the marinade. I suggest marinating for at least an hour. For deeper flavor, marinate overnight. This allows the spices to soak into the chicken. You can also add a touch of honey for sweetness. A pinch of smoked paprika can give it a nice depth.
Cooking Techniques
You can cook your chicken shawarma in different ways. Grilling gives it a smoky flavor. If you don’t have a grill, use an oven or an air fryer. For the oven, preheat it to 400°F (200°C). Bake the marinated chicken for about 20-25 minutes. An air fryer cooks it faster, usually in 15-20 minutes. Always check with a meat thermometer. Your chicken should reach 165°F (75°C) for safety.
Serving Suggestions
Shawarma pairs well with many sides. Try serving it with a fresh salad or crispy fries. You can also add hummus or tabbouleh for extra flavor. For presentation, arrange your shawarma on a large platter. Serve sauces in small bowls alongside. Garnish with lemon wedges and fresh parsley to make it inviting.

Variations
Different Types of Meat
Substituting Chicken with Other Proteins
You can easily swap chicken for other meats. Try beef or lamb for a richer taste. Turkey is also a great option if you want a leaner choice. Just be sure to adjust cooking times based on the meat you choose. For beef, cook until it reaches 145°F (63°C). For lamb, aim for 145°F (63°C) as well.
Making a Vegetarian Version
If you prefer a vegetarian option, use marinated mushrooms or eggplant. These veggies absorb flavors well. Slice them thickly and grill them until they are tender. You can also use chickpeas for a protein-packed twist. Toss them in the same marinade for a hearty filling.
Flavor Profile Adjustments
Spicy Shawarma Variations
Want to add some heat? Increase the cayenne pepper in the marinade. For an extra kick, add chopped jalapeños to the fresh toppings. You can also drizzle some hot sauce over the assembled shawarma. This gives it an exciting flavor that spice lovers will enjoy.
Herb and Spice Customizations
Feel free to play with the herbs and spices. Add fresh herbs like cilantro or parsley for a fresh taste. You can mix in some ground cardamom or allspice for warmth. This will change the flavor profile, making it your own. Experiment until you find the balance you love best.
Storage Info
Storing Leftovers
To keep your chicken shawarma fresh, follow these tips:
– Best Practices for Refrigeration: Place any leftover shawarma in an airtight container. This keeps moisture in and helps prevent drying out. Store it in the fridge for up to three days. If you plan to eat it later, it’s best to separate the chicken from the pita and toppings.
– Reheating Techniques: When reheating, use a skillet over medium heat. This method keeps the chicken juicy. Heat for about 5 minutes, turning the chicken to warm evenly. You can also use a microwave, but do this in short bursts to avoid overcooking.
Freezing Tips
If you want to store chicken shawarma for a longer time, freezing works well.
– How to Freeze Chicken Shawarma: Let the chicken cool completely before freezing. Wrap each portion tightly in plastic wrap and then place them in a freezer-safe bag. This helps prevent freezer burn. You can freeze it for about three months.
– Thawing Procedures: To thaw, move the chicken to the fridge for several hours or overnight. This method keeps the chicken safe and tasty. If you’re in a hurry, you can use the microwave. Just be sure to cook it right after thawing to ensure safety.
FAQs
How do I make Chicken Shawarma from scratch?
To make Chicken Shawarma, start with chicken thighs. Mix garlic, cumin, coriander, paprika, turmeric, cinnamon, and cayenne in a bowl. Add yogurt, olive oil, and lemon juice. Stir until blended. Coat the chicken in the marinade. Let it sit in the fridge for at least one hour. After marinating, grill or pan-fry the chicken until cooked through. Slice it thin and serve in pita with veggies and sauce.
Can I use chicken breast instead of thighs?
Yes, you can use chicken breast. However, chicken thighs offer more flavor and moisture. Breast meat cooks faster and can dry out. If using breast, watch cooking time closely. You may need to reduce marinating time too. Both options can make a tasty shawarma.
What sauces pair well with Chicken Shawarma?
Tahini sauce is a classic choice. It adds creaminess and richness. Garlic sauce is also popular. It brings a zesty kick. You can even try yogurt-based sauces for a fresh touch. Mix your favorite sauces for a unique flavor.
How long can I store cooked Chicken Shawarma?
You can store cooked Chicken Shawarma in the fridge for up to four days. Use an airtight container to keep it fresh. For longer storage, freeze it for up to three months. Just thaw in the fridge overnight before reheating.
In this post, we covered how to make Chicken Shawarma from scratch. You learned about the best ingredients, from marinating chicken thighs to fresh toppings. I shared step-by-step cooking methods, tips for perfecting flavors, and different variations. Finally, I offered advice on storage and serving ideas.
Now, you can create a delicious meal that impresses everyone. Enjoy your tasty journey into homemade Chicken Shawarma!


![- 12 oz fettuccine or pappardelle pasta - 2 cups butternut squash, peeled and cubed - 1 tablespoon olive oil The base of this dish is fettuccine or pappardelle pasta. I love these shapes as they hold the creamy sauce well. You will also need fresh butternut squash. It gives the dish a warm color and sweet flavor. Using olive oil helps with roasting and adds richness to the pasta. - 1 small onion, diced - 2 cloves garlic, minced - 1 teaspoon freshly grated nutmeg Onions and garlic add depth to the sauce. Dicing the onion makes it cook evenly. Minced garlic gives a punch of flavor. Nutmeg brings warmth and a hint of spice, making the dish cozy and inviting. - 1 cup vegetable broth - 1 cup coconut milk (or heavy cream for a non-vegan option) - ½ cup grated Parmesan cheese (optional) For the sauce, you need vegetable broth for a savory base. Coconut milk adds creaminess and a hint of sweetness. If you prefer, heavy cream works too. Adding Parmesan cheese can enhance the flavor, but it's optional. - Salt and freshly cracked pepper to taste - Fresh sage leaves for garnish Season with salt and cracked pepper to bring everything together. Fresh sage leaves add a lovely touch. They not only look nice but also add an aromatic flavor that complements the dish well. These ingredients create a lovely balance of flavors in the creamy butternut squash pasta. For the full recipe, check out the detailed instructions to make this delicious meal. - Preheat your oven to 400°F (200°C). - Toss the cubed butternut squash in olive oil, salt, and pepper. - Spread the squash on a baking sheet. Roast for 20-25 minutes. The squash should be tender and have a light caramel color. - Bring a large pot of salted water to a boil. - Add the pasta and cook it as per package instructions. - Before draining, reserve 1 cup of the pasta water. This helps adjust your sauce later. - Heat olive oil in a large skillet over medium heat. - Add diced onion and sauté until soft, about 5 minutes. - Stir in minced garlic and cook for about 1 minute. - Blend the roasted squash with the sautéed onion, garlic, vegetable broth, and coconut milk. Use an immersion blender or a regular blender. - Return the blended sauce to the skillet and heat on low. - Add the cooked pasta and gradually mix in the reserved pasta water. - Stir well until the pasta is coated with the sauce. - If you like, stir in the Parmesan cheese. - Taste and adjust seasoning with salt and pepper as needed. - Plate the pasta in shallow bowls for a nice look. - Garnish with fresh sage leaves and drizzle a little olive oil on top. For a detailed guide, check out the Full Recipe. Enjoy your creamy butternut squash pasta! To get a creamy consistency, blend the roasted butternut squash well. You want it smooth. Use an immersion blender for easy mixing. If it’s too thick, add a splash of pasta water. This helps the sauce cling to the noodles. Want to add more flavor? Try spices like cinnamon or a pinch of chili powder. Fresh herbs, such as thyme or rosemary, can boost taste too. You can also add veggies like spinach or kale for added nutrition. They cook quickly and blend well with the sauce. Pair creamy butternut squash pasta with a simple salad. A mix of greens with a light vinaigrette works well. For drinks, a glass of white wine like Sauvignon Blanc complements the dish nicely. If you prefer non-alcoholic options, try sparkling water with a slice of lemon. These sides enhance the meal and make it even more enjoyable. For the full recipe, check out [Full Recipe]. {{image_4}} You can easily adjust creamy butternut squash pasta to fit different diets. For a vegan option, swap heavy cream with coconut milk and skip the cheese. This change still gives you a creamy sauce that tastes great. If you need gluten-free pasta, use rice or corn-based noodles. These options keep the dish light and tasty. Experimenting with different ingredients can make this dish exciting. Instead of butternut squash, try using acorn or delicata squash. Each type has its unique flavor and texture. For cheese, you can use feta for a tangy twist or goat cheese for a creamy finish. These swaps let you create new flavor combinations that keep things fresh. To make this dish more seasonal, add roasted vegetables like Brussels sprouts or carrots. This not only enhances the flavor but also adds color. Making creamy butternut squash pasta in fall is perfect. You can enjoy the warmth of the season with every bite. Try using spices like cinnamon or cloves for a cozy feel. For the full recipe, check out the complete guide and enjoy the rich flavors! To store leftover creamy butternut squash pasta, let it cool first. Then, place it in an airtight container. Glass or BPA-free plastic containers work best. Make sure to seal them tightly to keep the air out. This helps keep the pasta fresh and tasty. Store the container in the fridge for up to four days. Yes, you can freeze this dish! To do this, use a freezer-safe container. Leave some space at the top for expansion. It is best to freeze the pasta without the cheese added. This helps keep the texture right. When you are ready to eat, move the container to the fridge to thaw overnight. To reheat, use a skillet over low heat. Add a splash of vegetable broth or water to help it warm up evenly. In the fridge, creamy butternut squash pasta lasts for about four days. After that, the taste and quality may drop. Always check for signs of spoilage. If the pasta smells sour or has a strange texture, it’s best to throw it away. Enjoy your creamy butternut squash pasta fresh! For the full recipe, visit [Full Recipe]. It takes about 40 minutes to make creamy butternut squash pasta. The prep time is 10 minutes. Cooking the dish takes about 30 minutes. You will spend 20-25 minutes roasting the squash. Boiling the pasta adds another 10-12 minutes. This dish is quick and easy for a weeknight meal! Yes, you can use many types of pasta. Fettuccine and pappardelle work well for this sauce. You can also try penne or rigatoni for a fun twist. Each shape holds the sauce differently, so feel free to experiment! Absolutely! To make it nut-free, use coconut milk instead of cream. If you want a non-vegan option, use heavy cream instead. You can skip any nuts in the garnish. This keeps the dish creamy and delicious without nuts. You can serve this dish with many sides. A crisp green salad pairs well. Try a side of garlic bread for extra comfort. For dessert, pumpkin pie or apple crisp can be great choices. These options enhance the cozy vibe of the meal. To reheat, use a skillet over low heat. Add a splash of water or broth to the pasta. This helps keep the sauce creamy. Stir until heated through. You can also use the microwave, but stir halfway for even heating. Enjoy your leftovers just as much! This creamy butternut squash pasta combines hearty flavors and texture. We roasted the squash and blended it with garlic and onion to create a rich sauce. You learned how to make it creamy, adjust seasoning, and even swap ingredients. In the end, this dish is versatile and perfect for any meal. Enjoy experimenting with flavors and sharing this delightful recipe with friends and family.](https://goldendishy.com/wp-content/uploads/2025/07/000431ad-92db-4f90-88d6-bb841745a08c-768x768.webp)

. This blog post covered how to make Parmesan Herb Crusted Tilapia. You learned about key ingredients like tilapia, herbs, and panko for a crunchy topping. I shared simple steps for prep, coating, and baking. Tips for flavor and variations help you personalize the dish. Knowing the right storage and reheating methods keeps leftovers tasty. Enjoy creating this dish with fresh herbs and your favorite flavors. Cooking can be fun and rewarding!](https://goldendishy.com/wp-content/uploads/2025/08/d7b754dc-0283-4cf5-9e7a-95472ebc1437-768x768.webp)
![To make Ranch Chicken and Rice Casserole, gather these items: - 1 lb (450g) boneless, skinless chicken breasts, cut into bite-sized pieces - 1 cup uncooked white rice (e.g., jasmine or basmati) - 2 cups low-sodium chicken broth - 1 cup creamy ranch dressing - 1 cup frozen mixed vegetables (a colorful blend of peas, carrots, and corn) - 1 cup shredded sharp cheddar cheese - 1 teaspoon onion powder - 1 teaspoon garlic powder - Salt and freshly ground black pepper to taste - Fresh parsley, chopped (for garnish, optional) Garnishes add beauty and taste to your dish. Here are a few: - Fresh parsley, chopped - Extra shredded cheddar cheese - A drizzle of ranch dressing These add color and a fresh taste to the casserole. You can mix and match based on what you like! Sometimes, you may need to swap out ingredients. Here are some ideas: - Chicken: Use turkey breast or cooked rotisserie chicken for a quicker option. - Rice: Brown rice or quinoa can work well. Just adjust the cooking time. - Vegetables: Feel free to use any frozen veggies you have, like broccoli or bell peppers. - Dressing: If you prefer, swap ranch dressing for other creamy dressings like blue cheese or Caesar. With these swaps, you can make the dish fit your taste or what you have on hand. First, preheat your oven to 375°F (190°C). This step is key for even cooking. A hot oven helps the chicken cook well and the cheese melt perfectly. In a large bowl, add the diced chicken, uncooked rice, chicken broth, and creamy ranch dressing. Then, sprinkle in the onion powder and garlic powder. Use a spatula to mix everything well. Make sure the chicken and rice are coated with the ranch dressing. Add salt and pepper to taste. Next, fold in the frozen mixed vegetables. This gives your casserole color and nutrition. Make sure the veggies are spread throughout the mixture. Pour your chicken and rice mixture into a greased 9x13-inch baking dish. Spread it out evenly for best results. Cover the dish tightly with aluminum foil. This traps moisture and helps the dish cook well. Bake in the preheated oven for 25 minutes. After 25 minutes, remove the foil carefully. Watch out for steam! Now, sprinkle the shredded cheddar cheese on top. Return the dish to the oven, uncovered, for another 15-20 minutes. You will know it’s ready when the chicken is cooked through, and the cheese is melted and bubbly. Once done, take it out and let it cool for about 5 minutes. This resting time helps the flavors settle. If you like, add freshly chopped parsley for a nice touch before serving. To make perfect rice, rinse it first. This removes extra starch. Use a 1:2 ratio of rice to broth. This keeps the rice moist. Cook it covered for even heat. If you want extra flavor, add herbs to the broth. You can mix in extras to change the taste. Try adding diced bell peppers for crunch. Use different frozen veggies like broccoli or green beans. You can also swap ranch dressing for a spicy sauce. This gives it a kick. For a cheesy twist, add cream cheese with the ranch. One mistake is not covering the dish while baking. This can dry out the rice. Another error is using too much liquid. Stick to the right amounts in the recipe. Don’t skip the resting time after baking. This helps the flavors blend well. Always taste before serving. Adjust salt and pepper as needed. For a full recipe with all these tips, check out the [Full Recipe]. {{image_4}} You can make a tasty vegetarian version of this dish. Start by swapping the chicken for a mix of beans or lentils. Use 2 cups of cooked black beans or chickpeas instead. Then, keep all the other ingredients the same. The ranch dressing adds great flavor, and the veggies provide crunch. This version is hearty and filling, perfect for a meatless meal. If you love heat, try a spicy twist on the classic recipe. Add diced jalapeños or a pinch of cayenne pepper to the mix. You can also use spicy ranch dressing in place of the regular one. This gives the dish a nice kick. Top it off with pepper jack cheese instead of cheddar for extra spice. Your taste buds will thank you! For a one-pan meal, mix everything in a large oven-safe skillet. This saves on clean-up time. Just add the rice and broth to the skillet along with the chicken and veggies. Cover and bake as you normally would. The flavors blend well, and you still get that creamy goodness from the ranch dressing. This method makes dinner even easier and quicker. You can find the full recipe linked above, allowing you to create these delicious variations! You can keep leftover Ranch Chicken and Rice Casserole in the fridge. Place it in an airtight container. It will stay fresh for up to three days. Make sure the casserole is cool before sealing it. This helps prevent moisture from building up. If you want to save some for later, freezing is easy. Use a freezer-safe container or heavy-duty freezer bag. Store the casserole in portions for easy meals. It will keep well for up to three months. To freeze, let it cool completely first. Label the container with the date to track freshness. When you’re ready to enjoy your casserole again, you can reheat it in different ways. The oven gives the best results. Preheat it to 350°F (175°C). Bake the casserole for about 20-30 minutes, covered with foil. This keeps it moist. You can also use a microwave. Heat in short bursts, stirring in between to ensure even warming. Always check that the chicken is heated all the way through. For extra flavor, add a little ranch dressing before serving. To adjust the recipe for fewer servings, simply halve the ingredients. Use ½ lb of chicken and ½ cup of rice. Also, cut the broth and dressing in half. This way, you keep the same flavors. Make sure to check the baking time. Smaller portions may cook faster, so keep an eye on them. Yes, you can use brown rice. However, brown rice takes longer to cook. It may need more liquid too. I recommend cooking it for a few minutes before adding it to the casserole. This helps it soften. Follow the same steps, but adjust the cooking time. Ranch Chicken and Rice Casserole goes well with many sides. Here are a few tasty options: - Simple green salad with a light dressing - Steamed broccoli or green beans for a crunchy bite - Garlic bread for a cozy touch - Roasted vegetables for extra flavor and color These sides add balance and make your meal complete. Enjoy the casserole with your favorite sides! For the full recipe, check out the link above. In this blog post, we covered the key steps to make a delicious Ranch Chicken and Rice Casserole. We explored the ingredients, sharing options for garnishes and substitutions. The step-by-step instructions guide you from preheating the oven to baking. I also shared tips to perfect your dish and variations for added flavor. Finally, we discussed how to store leftovers for later enjoyment. Follow these tips, and you’ll create a tasty meal that everyone will love!](https://goldendishy.com/wp-content/uploads/2025/06/349f3b9c-e648-45ce-b7ed-2f76b31339ac-768x768.webp)