Easy Chicken Enchiladas Simple and Flavorful Recipe

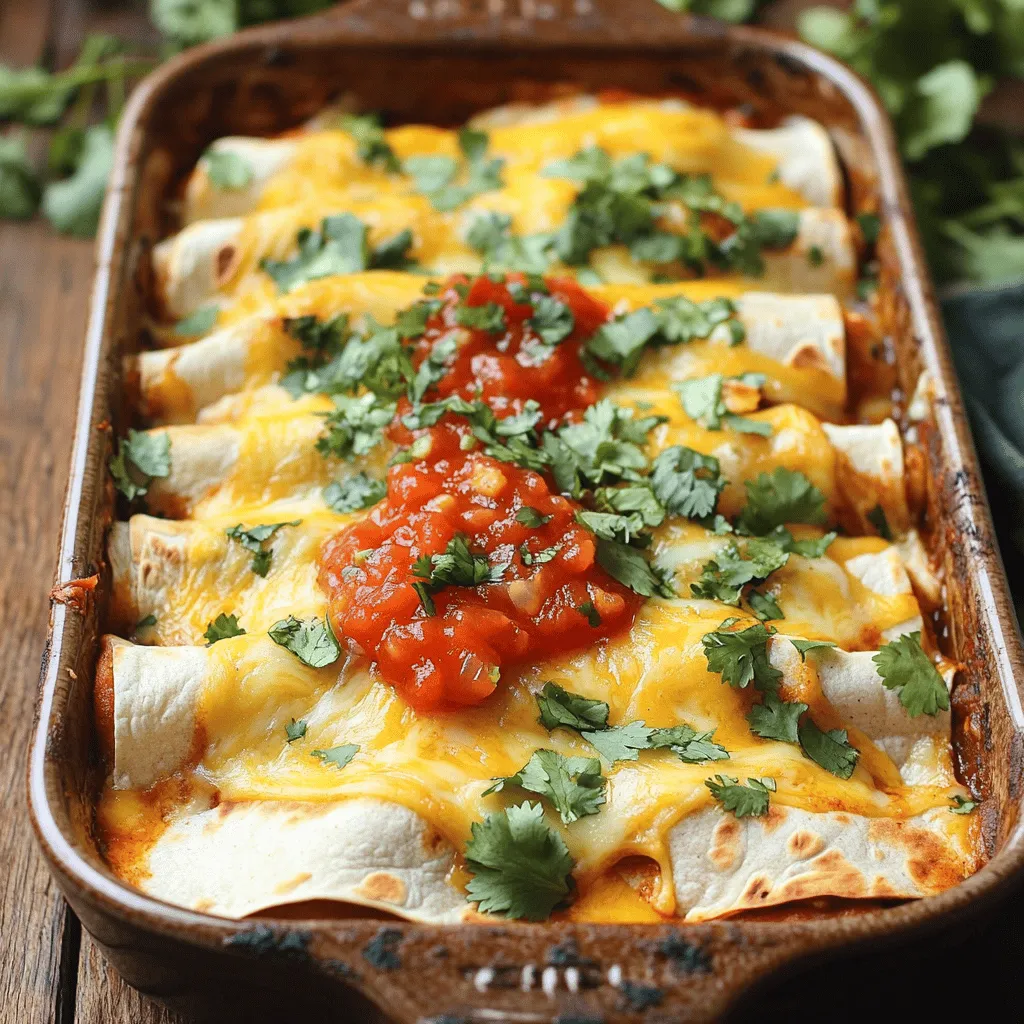
Are you ready to spice up your weeknight dinners? This easy chicken enchiladas recipe packs bold flavors into a simple, quick meal. With just a few ingredients, you can create a comforting dish that everyone will love. I’ll guide you through each step, from selecting the right add-ins to perfecting your baking technique. Let’s dive in and make something delicious together!
Ingredients
Main Ingredients for Easy Chicken Enchiladas
To make these enchiladas, you need a few key items. Gather these ingredients to get started:
– 2 cups cooked chicken, shredded
– 1 cup black beans, drained and rinsed
– 1 cup corn kernels (choose between fresh or frozen)
– 1 teaspoon ground cumin
– 1 teaspoon chili powder
– 1 cup salsa (select your preferred heat level)
– 8 small flour tortillas
– 1 ½ cups shredded cheese (cheddar or your favorite cheese blend)
– ½ cup sour cream
– Fresh cilantro, chopped, for garnish
– Lime wedges, for serving
These ingredients create a mix of flavors. The chicken gives protein, while the beans and corn add texture. The spices bring warmth, and cheese melts beautifully on top.
Optional Add-Ins and Substitutions
Feel free to customize your enchiladas! Here are some ideas:
– Swap chicken for shredded beef or turkey for a different taste.
– Use black beans or pinto beans based on your preference.
– Add sautéed bell peppers or onions for extra flavor and crunch.
– For a spicy kick, include diced jalapeños or a spicy salsa.
– Replace flour tortillas with corn tortillas for a gluten-free option.
These choices let you create your perfect enchilada!
Recommended Sides to Serve with Enchiladas
Pair your enchiladas with tasty sides. Here are some great options:
– Spanish rice for a comforting staple.
– Refried beans add a nice protein boost.
– A fresh garden salad with lime vinaigrette is a light option.
– Guacamole for a creamy, rich addition.
– Chips and salsa for a crunchy snack.
These sides enhance the meal and bring more flavor to your table.
Step-by-Step Instructions
Preparing the Chicken Filling
First, gather your ingredients. You need cooked chicken, black beans, corn, cumin, chili powder, and salsa. In a large bowl, mix them well. This step is key for good flavor. Make sure the chicken is shredded into small pieces. It helps with even cooking. The spices give the filling a great taste.
Assembling the Enchiladas
Now, we will build the enchiladas. Take a tortilla and put about a ¼ cup of the chicken mix in the center. Add a tablespoon of cheese on top. Roll the tortilla tightly. Place it seam-side down in a baking dish. Repeat this for all tortillas. Arrange them snugly next to each other in the dish. This helps them cook evenly.
Baking and Serving the Dish
Next, pour salsa over the rolled enchiladas. Make sure they are well covered. Then, sprinkle the remaining cheese on top. Cover the dish with foil to keep them moist. Bake at 375°F (190°C) for 20 minutes. After that, remove the foil and bake for another 10 minutes. You want the cheese to be bubbly and golden. Once baked, let them rest for 5 minutes. This makes serving easier. Drizzle sour cream on top and add cilantro for freshness. Enjoy your meal!
Tips & Tricks
Common Mistakes to Avoid
When making enchiladas, avoid using too much filling. If you overstuff, they might burst. Also, be cautious with the salsa. Too much can make them soggy. Look for a balance in flavors and textures. Lastly, don’t skip letting them rest after baking. This step helps keep everything together when you serve them.
How to Make the Enchiladas Ahead of Time
To prepare enchiladas ahead of time, assemble them but do not bake. Cover the dish tightly with foil or plastic wrap. Store it in the fridge for up to 24 hours. When you’re ready to eat, bake them right from the fridge. Just add a few extra minutes to the cooking time to ensure they heat through.
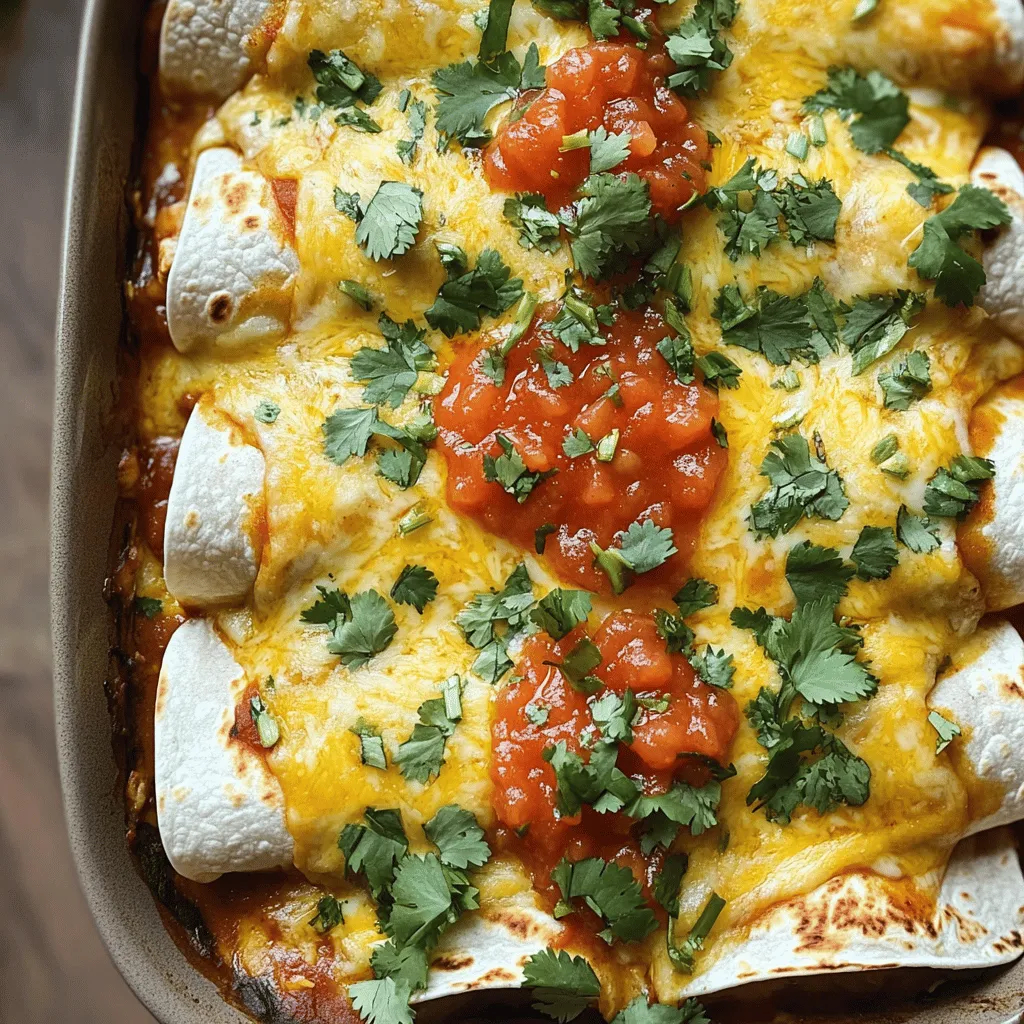
Best Ways to Garnish and Serve
For garnishing, fresh cilantro is a must. It adds color and flavor. Lime wedges also work great on the side. They give a zesty kick when squeezed over the enchiladas. You can also add sliced jalapeños for spice lovers. Serve these enchiladas hot from the oven to enjoy the melted cheese and warm flavors.

Variations
Vegetarian Chicken Enchiladas
You can make tasty vegetarian enchiladas by using plant-based chicken. Replace the shredded chicken with shredded jackfruit or tofu. Both options mimic the texture of chicken and soak up flavors well. Add more veggies like bell peppers, onions, or spinach. This adds color and nutrition. You can use the same spices and tortillas from the original recipe. Keep the salsa and cheese for a great taste.
Spicy Chicken Enchiladas
If you love heat, spice up your enchiladas! Use hotter salsa or add chopped jalapeños to the chicken mix. You can also sprinkle in cayenne pepper or crushed red pepper flakes for extra kick. Another option is to use pepper jack cheese instead of cheddar. This gives a creamy, spicy flavor that pairs well with the chicken. Adjust the spice to your liking for a flavorful meal.
Enchiladas with Different Sauces
Feel free to explore different sauces for your enchiladas. A green tomatillo sauce gives a tangy twist. For a richer taste, try mole sauce. Blend your choice of sauce with the chicken mixture for a unique flavor. You can also layer sauces on top before baking. This adds depth and creates a beautiful presentation. Each sauce changes the dish while keeping it simple and fun.
Storage Info
How to Store Leftover Enchiladas
To store leftover enchiladas, let them cool first. Place them in an airtight container. Ensure they fit snugly to keep moisture in. You can also cover them tightly with plastic wrap. Store the enchiladas in the fridge for up to three days. This keeps them fresh and ready to eat later.
Freezing Tips for Enchiladas
Freezing enchiladas is easy and great for meal prep. After assembling but before baking, wrap each enchilada in foil. Place them in a freezer-safe bag or container. Label the bag with the date. Frozen enchiladas can last for up to three months. When ready to eat, thaw them overnight in the fridge.
Reheating Instructions
To reheat enchiladas, preheat your oven to 350°F (175°C). Place the enchiladas in a baking dish. Cover them with foil to keep them moist. Bake for about 20 minutes or until heated through. You can also reheat them in the microwave for quick meals. Heat for 1-2 minutes, checking often to avoid overcooking.
FAQs
What can I substitute for chicken in enchiladas?
You can use several options instead of chicken. Some great ideas are:
– Shredded beef
– Cooked turkey
– Black beans or lentils for a vegetarian option
– Tofu for a plant-based choice
These options provide similar textures and flavors. Each one adds a unique twist to your enchiladas. If you want to try something new, go for it!
How can I make enchiladas lower in calories?
To lower the calories in your enchiladas, consider these tips:
– Use low-fat cheese or skip it entirely
– Replace sour cream with Greek yogurt
– Opt for corn tortillas instead of flour tortillas
– Add more veggies to the filling, like zucchini or peppers
These changes keep the taste delicious while cutting down on calories. You can enjoy enchiladas without worrying about extra calories.
Can I make enchiladas in advance?
Yes, you can make enchiladas ahead of time! Here’s how:
– Prepare the filling and assemble the enchiladas.
– Cover them tightly and place them in the fridge.
– Bake them within 24 hours for the best flavor.
You can also freeze them for later. Just make sure to wrap them well. This way, you have a tasty meal ready when you need it.
We explored how to make easy chicken enchiladas. You learned about the main ingredients, optional add-ins, and tasty sides to serve. I shared step-by-step instructions for making the filling, assembling, and baking the dish. You discovered tips to avoid mistakes and ways to garnish perfectly. We even covered fun variations and how to store leftovers.
Now, you can create your own delicious enchiladas. Enjoy experimenting with flavors, and share your tasty results!


. - Heat your skillet over medium heat. - Add the unsalted butter and let it melt. - Once melted, watch for it to bubble gently. - Next, add the minced garlic. - Sauté the garlic for about one minute. - Stir often until it smells great and turns lightly golden. - Now, add the peeled and deveined shrimp to the skillet. - Season the shrimp with salt and pepper. - If you like spice, sprinkle in some red pepper flakes. - Cook the shrimp for 2-3 minutes on one side. - Flip the shrimp to cook the other side evenly. - Add the lemon zest and juice as they cook. - Keep cooking until the shrimp are opaque. - Remove the skillet from the heat. - Stir in the chopped parsley for a fresh taste. - Serve the shrimp over warm pasta or fluffy rice. - Drizzle the leftover lemon-garlic butter sauce on top for extra flavor. - For a lovely presentation, you can garnish with lemon wedges. For more details, check the Full Recipe. - Achieving the perfect shrimp texture: To get tender shrimp, avoid overcooking. Cook them just until they turn pink. This usually takes about 2-3 minutes per side. - Best practices for sautéing garlic: Start with a hot skillet and melted butter. Add minced garlic and stir for about 1 minute. Keep an eye on it so it doesn’t burn; burnt garlic tastes bitter. - Presentation ideas for a beautiful dish: Serve the shrimp in shallow bowls to make it look elegant. Add a sprinkle of parsley on top for color. Include lemon wedges on the side for a fresh touch. - Pairing options with side dishes: Lemon garlic butter shrimp goes well with cooked pasta or fluffy rice. You can also serve it with a side salad for a light meal. - Additional herbs or spices to try: Consider adding fresh basil or thyme for extra flavor. These herbs pair well with lemon and shrimp. - Adjusting spice levels with red pepper flakes: If you like heat, add more red pepper flakes. Start with a teaspoon and adjust to your taste. This will make your dish more exciting! For more details, check the Full Recipe. {{image_4}} You can change the seafood in this recipe. Try scallops or even crab. These swaps add new tastes while keeping the dish simple. If you want a healthier fat, swap butter for olive oil. Olive oil works well and gives a light, fresh flavor. To mix things up, add other citrus flavors. Lime or orange juice can brighten the dish. You can also infuse the recipe with herbs. Try basil or thyme for a different twist. These herbs can make the dish feel more seasonal. If you need a gluten-free option, serve the shrimp over quinoa or zucchini noodles. Both are great gluten-free choices. For a low-calorie meal, cut back on the butter. You can use less or replace it with vegetable broth. This keeps the dish tasty but lighter. After enjoying your lemon garlic butter shrimp, store any leftovers in the fridge. Use an airtight container to keep them fresh. These shrimp will stay good for about 2-3 days. Always check for freshness before eating. To freeze lemon garlic butter shrimp, let them cool completely first. Place them in a freezer-safe bag, removing as much air as possible. They can last for about 2 months in the freezer. When you're ready to eat, thaw the shrimp in the fridge overnight. Reheat them gently in a skillet over low heat. This keeps them tender and tasty. Always ensure your shrimp is safe to eat after storage. Check for any off smells or changes in color. If the shrimp look slimy or smell bad, it’s best to discard them. Trust your senses to keep your meals safe and enjoyable. Cook shrimp for 4-6 minutes. They cook quickly. In a hot skillet, shrimp turn pink when done. Avoid overcooking; it makes them tough. Yes, you can use frozen shrimp. Thaw them first for best results. Place them in cold water for about 15 minutes. This way, they cook evenly and taste fresh. I love serving lemon garlic butter shrimp with: - Cooked pasta - Fluffy rice - Fresh salad - Garlic bread These sides balance the rich flavors well. Check for color and texture. Cooked shrimp turn pink and opaque. They should feel firm but not hard. When in doubt, cut one open. It should be white inside, not translucent. You’ve learned how to make lemon garlic butter shrimp. We covered essential ingredients, easy steps, tips for cooking, and variations to try. Remember to adjust flavors to your taste and pair with your favorite sides. Store leftovers safely for later enjoyment. Cooking shrimp can be simple and satisfying. Enjoy every bite, and don't hesitate to experiment. Whether for a cozy night in or impressing guests, this dish shines every time. Let your kitchen be a place of fun and flavor!](https://goldendishy.com/wp-content/uploads/2025/06/8ad1771e-7d26-4dd4-879b-9e464bbb0647-768x768.webp)


![- 8 ounces fettuccine or spaghetti - 1 pound boneless, skinless chicken breast - 2 cups cremini or button mushrooms - 3 cloves garlic - 1 medium onion - 1 cup heavy cream - 1 tablespoon extra virgin olive oil - 1 teaspoon dried thyme - 1/2 cup freshly grated Parmesan cheese When you gather these ingredients, you're on your way to a delicious meal. The fettuccine or spaghetti forms the base of the dish. I love using fresh chicken breast; it cooks quickly and stays juicy. The mushrooms add a rich flavor that pairs perfectly with the cream sauce. For the additional ingredients, garlic and onion bring depth. They form the aromatic base of your sauce. The heavy cream is key for that creamy finish that makes this dish so comforting. Don't forget the seasonings! Extra virgin olive oil helps cook the chicken and gives a lovely flavor. Dried thyme adds a nice herbal note, while the Parmesan cheese makes everything taste even better. This dish is not just tasty; it’s simple and quick. You can find the full recipe to guide you step by step. Enjoy the process of cooking and savor your savory chicken and mushroom pasta! To start, bring a large pot of salted water to a rolling boil. Add 8 ounces of fettuccine or spaghetti. Cook the pasta according to the package directions until it is al dente. This usually takes about 8-10 minutes. When the pasta is ready, drain it but save about 1 cup of the pasta water. This water is important for later. It helps make the sauce creamy and smooth. While the pasta cooks, heat 1 tablespoon of extra virgin olive oil in a large skillet over medium heat. Add 1 pound of diced boneless, skinless chicken breast to the skillet. Cook the chicken for about 6-8 minutes, stirring occasionally. You want it golden brown and fully cooked. Season the chicken with salt and freshly ground black pepper. This will boost the flavor. Once done, take the chicken out and set it aside on a plate. In the same skillet, add 1 medium onion, finely chopped, and 3 cloves of minced garlic. Sauté these for about 3 minutes. You want the onion to turn translucent and fragrant. Next, add 2 cups of sliced cremini or button mushrooms to the skillet. Cook the mushrooms for about 5 minutes, stirring now and then. They should soften and release their moisture. Now, sprinkle 1 teaspoon of dried thyme and 1 teaspoon of Italian seasoning blend over the mushrooms. Stir to mix it well. Pour in 1 cup of heavy cream and bring the mixture to a gentle simmer. Let it thicken for about 3-5 minutes, stirring often. Finally, return the cooked chicken to the skillet. Mix it well with the sauce. If the sauce is too thick, gradually add some reserved pasta water until you reach your desired consistency. Now, add the drained pasta to the skillet. Toss everything together until the pasta is well coated with the sauce. Stir in 1/2 cup of freshly grated Parmesan cheese until it melts and creates a rich, creamy texture. Taste and adjust the seasoning with more salt or pepper if needed. For more detail, check the [Full Recipe]. Enjoy creating this delightful dish! To make your chicken and mushroom pasta really shine, consider adding a dash of lemon juice or zest. It brightens up the dish. Fresh herbs like basil or oregano also add great flavor. You can use a splash of white wine while cooking the chicken. This adds depth and richness. For cooking techniques, try searing the chicken on high heat. This gives it a nice golden crust. When cooking mushrooms, don't crowd the pan. This helps them brown nicely. To thicken your sauce, let it simmer longer. Stir it often to avoid burning. You can also add a bit of grated cheese. This helps create a creamy texture. If your sauce is too thick, use reserved pasta water. Slowly add it in, mixing well. This water has starch that helps the sauce stick to the pasta. For plating, use a large bowl or individual plates. Twirl the pasta with a fork for a neat look. Top each serving with a sprinkle of fresh parsley. This adds color and a fresh taste. To elevate your dish, add more grated Parmesan on top. A light sprinkle of cracked black pepper adds a nice touch. Enjoy your beautiful and tasty meal! {{image_4}} You can change the protein in this dish to fit your taste. If you want to try other meats, consider using shrimp or turkey. Both blend well with the creamy sauce and mushrooms. If you're looking for vegetarian options, tofu or chickpeas work great. They add protein and soak up the flavors. If you have dietary restrictions, you can swap the chicken for plant-based alternatives. Many brands offer delicious meatless chicken that mimics the texture and taste. This makes it easy for everyone to enjoy this dish. Switching up the type of pasta can give your meal a fresh twist. You can use penne, rigatoni, or even whole wheat pasta. Each choice brings its own flavor and texture. If you need gluten-free options, look for pasta made from rice, corn, or lentils. These options are tasty and keep the dish light. If you're looking for dairy-free options, substitute heavy cream with coconut milk or cashew cream. Both will provide a rich and creamy texture. You can also add veggies to boost flavor. Spinach, broccoli, or bell peppers can enhance the dish. Just sauté them with the onions and garlic for added taste. For the full recipe, check out Heavenly Chicken & Mushroom Fettuccine. To keep chicken and mushroom pasta fresh, store it in an airtight container. Always let it cool first before sealing. Place the container in the fridge. It should last for 3 to 4 days. Use glass or BPA-free plastic containers for the best results. To freeze chicken and mushroom pasta, follow these steps: 1. Allow the dish to cool completely. 2. Place it in a freezer-safe container or heavy-duty freezer bag. 3. Remove as much air as possible before sealing. 4. Label the container with the date. It can stay frozen for up to 2 months. When ready to eat, thaw it in the fridge overnight. To reheat your pasta, use these methods: - Stovetop: Heat in a skillet over medium heat. Add a splash of water or broth to prevent sticking. - Microwave: Place in a microwave-safe bowl. Cover with a damp paper towel and heat in 1-minute intervals. Avoid overcooking by checking often. Stir to ensure even heating. Enjoy your meal! For the full recipe, check out Heavenly Chicken & Mushroom Fettuccine. Chicken and mushroom pasta lasts about 3 to 4 days in the fridge. Store it in an airtight container. This keeps the pasta fresh and safe to eat. Make sure to cool it to room temperature before putting it in the fridge. This helps prevent bacteria growth. Yes, you can make chicken and mushroom pasta ahead of time. Cook the dish and let it cool completely. Then, store it in the fridge. When you are ready to eat, reheat it on low heat. Add a splash of cream or pasta water to keep it creamy. Side dishes that pair well include: - Garlic bread - A fresh green salad - Steamed vegetables - Roasted asparagus These options add variety and color to your meal. Yes, chicken and mushroom pasta is great for meal prep. You can store individual portions in containers. This makes it easy to grab a meal on busy days. Just remember to keep the pasta sauce separate if you want to avoid soggy noodles. You can use dried mushrooms if fresh ones are not available. Just soak them in warm water for about 20 to 30 minutes. Drain and chop them before adding to the dish. This way, you still get rich mushroom flavor in your pasta. For the best results, use a mix of dried and fresh mushrooms if you can. In this post, we covered how to make a tasty Chicken and Mushroom Pasta. You learned about key ingredients like chicken, mushrooms, and pasta. We walked through each step, from cooking the pasta to making a creamy sauce. You now have tips to boost flavor and present your dish well. Remember, you can adapt this recipe with different proteins or sauces. Keep it fresh by following our storage tips. Enjoy cooking and sharing this delicious meal!](https://goldendishy.com/wp-content/uploads/2025/06/be10f885-e993-4582-ae05-a82ade9d612d-768x768.webp)