Easy Chicken and Waffles Quick and Tasty Recipe

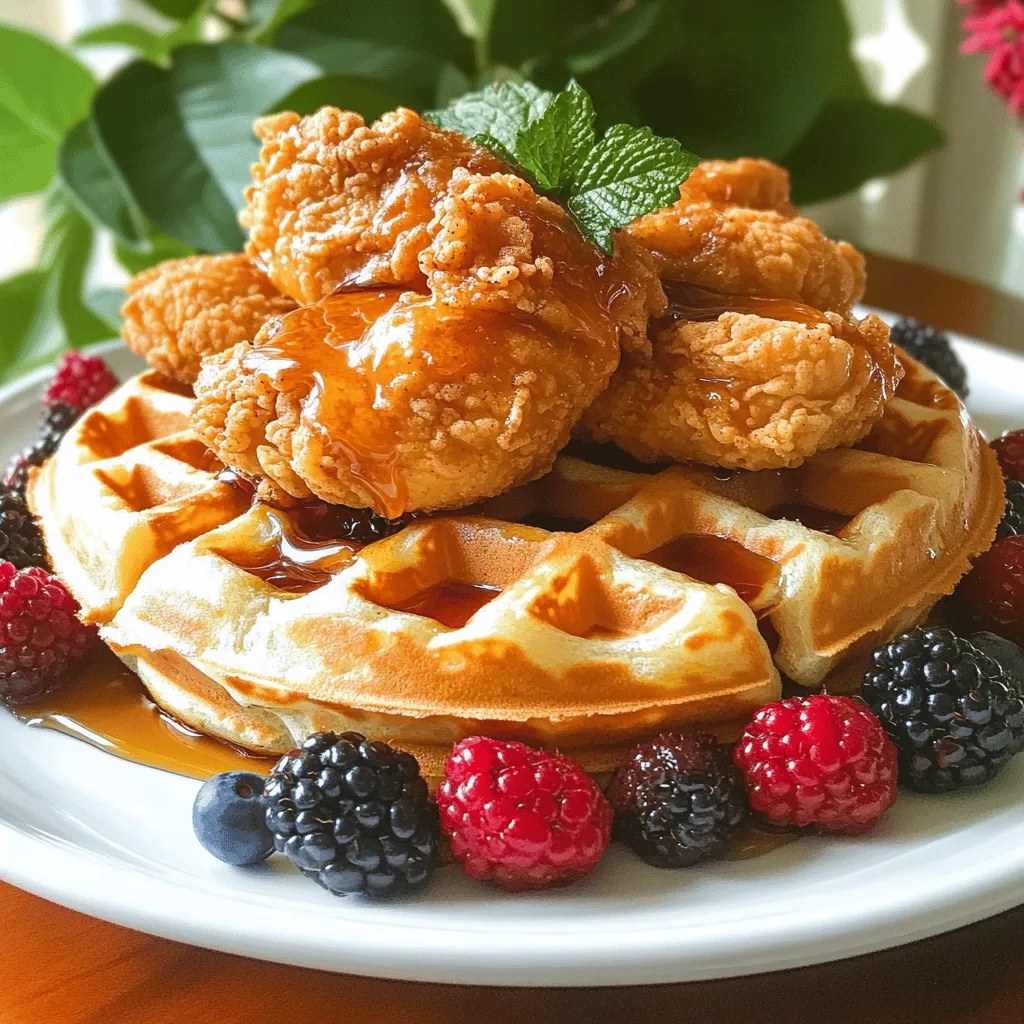
Craving something delicious? Let’s make Easy Chicken and Waffles! This recipe combines juicy chicken and fluffy waffles for a meal everyone loves. Perfect for brunch or dinner, I’ll guide you through every step. You’ll learn about the best ingredients and tools, plus tips for the crispiest chicken. Ready to wow your family or friends? Dive into this quick and tasty recipe to bring joy to your table!
Ingredients
Main Ingredients for Easy Chicken and Waffles
To make this dish, you need:
– 2 boneless chicken breasts
– 1 cup buttermilk
– 1 cup all-purpose flour
– 1 teaspoon baking powder
– 1 teaspoon garlic powder
– 1 teaspoon paprika
– ½ teaspoon cayenne pepper (optional for heat)
– Salt and pepper to taste
– 2 large eggs
– Cooking oil for frying
– 2 cups waffle mix (or homemade), prepared with 1 ½ cups water
– Maple syrup for drizzling
– Fresh berries for garnish (optional)
These ingredients create a great balance of flavors. The buttermilk tenderizes the chicken, making it juicy. The spices add flavor, while the waffle mix provides a fluffy base.
Optional Ingredients to Enhance Flavor
You can add a few extras for more taste:
– Hot sauce for a kick
– Honey for sweetness
– Cinnamon for a warm spice
– Nuts for crunch
These additions can make your meal feel special. You can adjust to your taste.
Recommended Tools and Equipment
Having the right tools makes cooking easier:
– Deep, heavy skillet for frying
– Mixing bowls for marinating and coating
– Waffle iron for making crispy waffles
– Tongs for flipping chicken
– Measuring cups and spoons
With these tools, you can create delicious chicken and waffles. They help ensure everything cooks well and turns out great.
Step-by-Step Instructions
How to Marinate the Chicken
To make the chicken tender and tasty, start with buttermilk. In a bowl, add the chicken breasts. Pour in 1 cup of buttermilk, making sure the chicken is fully covered. Cover the bowl and place it in the fridge for at least 30 minutes. This step is key to a juicy chicken.
Preparing the Coating and Frying the Chicken
Next, get ready to fry that chicken! In a separate bowl, mix these dry ingredients:
– 1 cup all-purpose flour
– 1 teaspoon baking powder
– 1 teaspoon garlic powder
– 1 teaspoon paprika
– ½ teaspoon cayenne pepper (optional)
– Salt and pepper to taste
Stir them until they blend well. Now, heat oil in a deep skillet. Pour in enough oil to reach about 1 inch deep. Heat the oil to around 350°F (175°C). You can check this by dropping a bit of flour in the oil; it should sizzle.
Once the oil is hot, take the marinated chicken out of the buttermilk. Let excess buttermilk drip off. Coat each piece in the flour mix. Press the flour onto the chicken to make it stick. Carefully place the chicken in the hot oil. Fry for 5-7 minutes on one side, then flip and fry for another 5-7 minutes. The chicken should be golden brown and reach 165°F (75°C) inside. Once done, move the chicken to a paper towel-lined plate to soak up extra oil.
Making the Waffles
While the chicken fries, it’s time for the waffles! Prepare your waffle batter. You can use a mix or make your own. If using a mix, follow the package instructions. Preheat your waffle iron and spray it lightly with non-stick spray. Pour the batter into the iron and close it. Cook until the waffles are golden and crisp, which usually takes about 3-5 minutes.
Now, you have crispy chicken and fluffy waffles ready to enjoy!
Tips & Tricks
Tips for Perfectly Fried Chicken
To make the best fried chicken, start with buttermilk. This helps keep the chicken juicy and adds great flavor. Marinate the chicken for at least 30 minutes, or longer if you can. The longer it sits, the better it tastes! When you’re ready to fry, heat the oil to 350°F. Test it by dropping a bit of flour into the oil. If it sizzles, it’s ready. Fry the chicken in small batches. This keeps the oil hot and helps the chicken cook evenly. Cook each side for 5-7 minutes. Look for a golden brown color and an internal temperature of 165°F.
Best Practices for Fluffy Waffles
For fluffy waffles, use a good waffle mix or make your own. If you make your own, use baking powder for lift. Make sure your waffle iron is hot before pouring in the batter. This helps create a crispy outer layer. Don’t overfill the waffle iron; the batter should spread just right. Cook until the waffles are golden and crisp, usually around 3-5 minutes. Let them cool for a minute before serving.
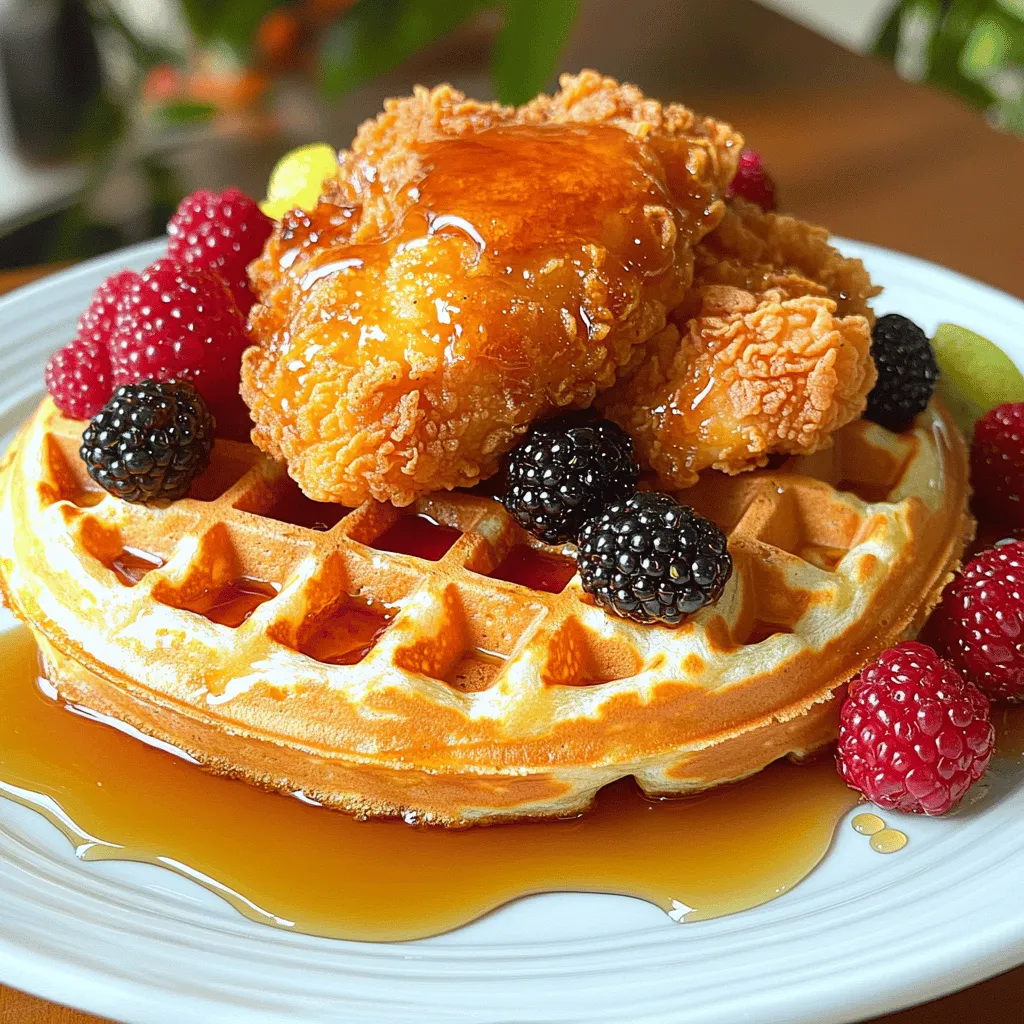
Serving Suggestions for Chicken and Waffles
When serving chicken and waffles, stack the chicken on top of a fluffy waffle. Drizzle maple syrup generously for sweetness. You can also add fresh berries for a pop of color and flavor. If you want, serve with a side of hot sauce for those who like a spicy kick. Consider adding whipped cream or a dusting of powdered sugar for a fun twist!

Variations
Spicy Chicken and Waffles
If you want to kick up the heat, try spicy chicken and waffles. Add cayenne pepper to the flour mix. You can also use hot sauce in the buttermilk. This will give your chicken a nice kick. For the waffles, mix in some jalapeños or diced green chilies. Top it with spicy syrup or a drizzle of sriracha for extra flavor.
Vegan Option for Chicken and Waffles
Making a vegan version is easy. Use plant-based chicken substitutes like seitan or tofu. Marinate them in plant-based milk with your favorite spices. For the waffles, just use a vegan waffle mix. You can make homemade waffles with almond milk and flaxseed for binding. Serve with maple syrup and fresh fruit for a tasty treat.
Different Toppings and Syrups Ideas
The toppings can change your dish completely. Try adding whipped cream on top of your waffles. Fresh fruits like strawberries or blueberries make great additions. For syrups, consider maple syrup, honey, or even berry compote. You could also try a drizzle of chocolate sauce for a sweet twist. Each option can transform your meal into something new and exciting.
Storage Info
Storing Leftover Chicken and Waffles
To store leftover chicken and waffles, place them in an airtight container. Make sure the chicken cools down first. For best taste, eat them within three days. Keep the chicken separate from the waffles to maintain their texture. If you stack them, the waffles might get soggy.
Reheating Tips for Leftovers
Reheat chicken and waffles in the oven for the best results. Preheat your oven to 350°F (175°C). Place the chicken on a baking sheet. Cover it with foil to keep it moist. Heat for about 10-15 minutes. For waffles, toast them in a toaster or place them on the same baking sheet for 5-7 minutes. This keeps them crispy.
Freezing Chicken and Waffle Components
You can freeze chicken and waffle components to enjoy later. For the chicken, cool it fully. Wrap each piece in plastic wrap and place them in a freezer bag. For waffles, stack them with parchment paper between each one. Seal in a freezer bag or container. They can last up to three months. When you’re ready, thaw them in the fridge overnight before reheating. For a quick meal, this method works great!
FAQs
How do I make the chicken extra crispy?
To make your chicken extra crispy, use a few simple tricks. First, marinate the chicken in buttermilk. This helps tenderize and flavor the meat. Next, coat the chicken in a mix of flour, baking powder, and spices. The baking powder makes it rise and adds crunch. When frying, make sure the oil is hot, around 350°F. This ensures a golden, crispy crust. Avoid overcrowding the pan; fry in batches to keep the heat up. Finally, let the chicken rest on paper towels. This helps drain excess oil and keeps it crispy.
Can I use store-bought waffle mix?
Yes, you can use store-bought waffle mix. It saves time and is easy to use. Just follow the package instructions for mixing. You can add extra flavor by mixing in a bit of vanilla or cinnamon. If you want to make it special, try adding fresh fruit or chocolate chips to the batter. Store-bought mixes can give you great results with less effort. You still get that fluffy, warm waffle to pair with your chicken.
What sides pair well with Chicken and Waffles?
Many sides go well with chicken and waffles. Here are a few options to consider:
– Fresh Fruit: Berries, sliced bananas, or citrus add brightness.
– Green Salad: A simple salad with greens balances the richness.
– Coleslaw: This adds crunch and tang to your meal.
– Bacon or Sausage: These can add salty flavor and heartiness.
– Fried Green Tomatoes: A Southern classic that pairs well with this dish.
Feel free to mix and match your favorites!
This blog covered the key steps to make easy chicken and waffles. We explored main and optional ingredients, tools, and the cooking process. I shared tips for perfect chicken and fluffy waffles, plus fun variations to try. You also learned how to store and reheat leftovers.
Enjoying this dish at home is easy. Each bite brings comfort and joy. Now, it’s time for you to create your own tasty memories with chicken and waffles!


![- 4 large russet potatoes - 2 cups fresh broccoli florets, steamed to perfection - 1 cup sharp shredded cheddar cheese - 1/2 cup cream cheese, softened at room temperature To make cheesy broccoli stuffed potatoes, you need the right main ingredients. Start with large russet potatoes. These potatoes have thick skins and a fluffy inside. They hold the filling well. Next, grab fresh broccoli florets. Steaming them keeps their bright color and nutrients. For the cheesy goodness, use sharp cheddar cheese. It adds a bold flavor. Cream cheese makes the filling rich and creamy. Mixing these ingredients creates a tasty filling. - 1/4 cup sour cream for creaminess - 2 tablespoons unsalted butter, melted - 1 teaspoon garlic powder for flavor - Salt and freshly cracked black pepper to taste - Fresh chopped chives for an eye-catching garnish Seasonings enhance the flavors of your dish. Sour cream adds a nice creaminess. Melted butter gives richness to the filling. Garlic powder brings a warm, savory taste. Don't forget salt and pepper. They balance all the flavors perfectly. For a lovely garnish, use fresh chives. They add color and a mild onion taste. This combination of seasonings makes your cheesy broccoli stuffed potatoes even more delightful. For the full recipe, check [Full Recipe]. To start, you need to preheat your oven to 400°F (200°C). This helps ensure your potatoes bake evenly. Next, wash and scrub the russet potatoes to remove dirt. Use a fork to prick each potato 6-8 times. This allows steam to escape while baking. Place the potatoes on a baking sheet and bake them for 45-60 minutes. They should feel soft when you poke them with a fork. While your potatoes bake, it’s time to prepare the broccoli. Steam the fresh broccoli florets in a steamer basket over boiling water. This should take about 5-7 minutes. You want the broccoli to be bright green and tender. After steaming, set it aside to cool. In a large bowl, mix the steamed broccoli with shredded cheddar cheese, softened cream cheese, sour cream, melted butter, garlic powder, salt, and pepper. Stir until everything is creamy and well combined. Once your potatoes are done baking, take them out and let them cool for about 5 minutes. Cut each potato in half lengthwise. Scoop out some of the potato flesh, but leave a thin border for strength. Take the scooped potato and mix it into the cheesy broccoli filling. Stir until it is well blended. Now, spoon this mixture back into the potato skins. Make sure to pile it high for a nice look. Place the stuffed potatoes back on the baking sheet and return them to the oven. Bake for 15-20 minutes, or until the tops are golden and bubbly. Once they are ready, let them cool slightly before serving. You can find the full recipe for even more details on how to make this dish! To achieve a creamy consistency in your Cheesy Broccoli Stuffed Potatoes, you need the right balance of ingredients. Here’s how: - Use soft cheeses: Cream cheese and sour cream create a smooth mix. They help blend well with the broccoli. - Don’t overcook the broccoli: Steam it just until tender. Overcooking makes it mushy. - Mix well: Stir the cheese and broccoli together thoroughly. This way, every bite will be creamy. Ensuring the potatoes are fully cooked is crucial for best results. Here’s how to check: - Baking time: Bake russet potatoes for 45-60 minutes. They should feel soft when pierced. - Test for doneness: Use a fork to poke the potatoes. They should yield easily without resistance. You can add extra flavors to make your dish unique. Here are some ideas: - Bacon bits: Add crispy bacon for a salty crunch. It pairs well with broccoli. - Fresh herbs: Chopped chives or parsley can brighten the dish. They add a fresh taste. Adjusting spices can also elevate your stuffed potatoes. Here are some suggestions: - Garlic powder: Add more if you love garlic. It enhances the overall flavor. - Spice it up: A pinch of red pepper flakes gives a nice kick. For more details, check the Full Recipe. {{image_4}} You can switch up the cheese in your Cheesy Broccoli Stuffed Potatoes. Use different blends to create new flavors. For a milder taste, try using mozzarella or Monterey Jack. If you want a stronger flavor, go for Gouda or blue cheese. Mixing cheeses adds a fun twist to this dish! If you need a dairy-free option, try vegan cheese. Many brands offer tasty dairy-free cheese that melts well. You could also use nutritional yeast for a cheesy flavor without dairy. This keeps your dish creamy and delicious. Want to make your stuffed potatoes more filling? Add proteins! You can mix in cooked chicken or turkey. Shredded rotisserie chicken works great and saves time. For a vegetarian option, consider black beans or lentils. They add protein and make the dish hearty. If you love seafood, shrimp or crab can be exciting additions. Cook the seafood first, then fold it into the cheese and broccoli mix. This adds a unique flavor that makes your stuffed potatoes special. To store leftovers safely, let the stuffed potatoes cool to room temperature. Place them in an airtight container. You can keep them in the fridge for up to three days. When reheating, preheat your oven to 350°F (175°C). Place the stuffed potatoes on a baking sheet. Cover them with foil to prevent drying. Heat for about 15-20 minutes, or until they are hot throughout. This method helps keep them creamy and delicious. You can freeze stuffed potatoes for later use. First, let them cool completely after baking. Wrap each potato tightly in plastic wrap. Then, place them in a freezer bag or container. They can last up to three months in the freezer. When you want to enjoy them, take the potatoes out of the freezer. Let them thaw in the fridge overnight. Then, bake them in a preheated oven at 350°F (175°C) for about 30-40 minutes. Make sure they are hot inside before serving. This way, you can savor a tasty meal anytime. For the full recipe, check out the detailed steps included above. Cheesy broccoli stuffed potatoes are baked russet potatoes filled with a creamy mix of broccoli and cheese. The dish is hearty and comforting. You can serve them as a side or a main dish. They are perfect for family dinners or casual get-togethers. Kids and adults love this meal, making it a family favorite. To make these stuffed potatoes healthier, you can reduce calories by using low-fat cheese. You can also swap sour cream for Greek yogurt. This keeps the creaminess but cuts fat. Try using less butter or replacing it with olive oil for a healthier fat option. Fresh herbs can add flavor without extra calories. Yes, you can prepare cheesy broccoli stuffed potatoes ahead of time. After filling the potatoes, cover them and store them in the fridge for up to two days. When you are ready to eat, reheat them in the oven at 350°F (175°C) for about 20-25 minutes. Make sure they are warmed through before serving. In this post, we explored how to make Cheesy Broccoli Stuffed Potatoes. You learned about the key ingredients and the step-by-step process. I also shared tips and variations to make it your own. Remember, you can adjust flavors and textures to fit your taste. These stuffed potatoes are easy to prepare and perfect for any meal. Enjoy making them, and share your creations with friends and family!](https://goldendishy.com/wp-content/uploads/2025/07/b761c5e5-34eb-4a0c-a694-3380b074c9b4-768x768.webp)


![To make this tasty dish, gather these main items: - 1 large head of cauliflower, cut into bite-sized florets - 5 cloves of garlic, skins left on - 3 tablespoons extra virgin olive oil, divided - 1/4 cup unsweetened almond milk (or your preferred milk) - 2 tablespoons butter (or a vegan alternative) - Salt and freshly ground black pepper, to taste These ingredients form the base of the mash. The cauliflower gives the dish its creamy texture. Roasting the garlic adds a rich flavor. You can change the recipe to suit your taste. Here are some ideas: - Swap almond milk for regular milk or cream for a richer flavor. - Use ghee instead of butter for a unique twist. - Add a pinch of nutmeg for warmth. - Incorporate herbs like thyme or rosemary for added depth. These options let you make the dish your own. Feel free to get creative! Garnishing makes the dish look appealing. Here are some great choices: - Fresh chives, finely chopped, for a pop of color - A drizzle of extra virgin olive oil for richness - A sprinkle of smoked paprika for a touch of spice These garnishes enhance the flavor and presentation. They make your Roasted Garlic Cauliflower Mash shine on the table. For the full recipe, check the earlier section. To start, I preheat my oven to 400°F (200°C). This temperature works best for roasting. Next, I take one large head of cauliflower and cut it into bite-sized florets. I love using fresh cauliflower for the best flavor. On a baking sheet, I place the florets and five unpeeled cloves of garlic. Then, I drizzle two tablespoons of extra virgin olive oil over them. I sprinkle salt and black pepper generously, then toss everything together. It helps the veggies get well-coated. I spread the cauliflower and garlic in a single layer. Now, I roast them for 25 to 30 minutes. Halfway through, I gently toss them to ensure they cook evenly. I look for a nice golden brown color and tender texture when they are done. Once roasted, I let the garlic cool for a few minutes before handling it. After cooling, I squeeze the softened garlic out of its skin. I put it into a large mixing bowl with the roasted cauliflower. Then, I add a quarter cup of unsweetened almond milk, two tablespoons of butter, and the last tablespoon of olive oil. I grab a hand mixer or an immersion blender to blend the mix. I blend until it turns smooth and creamy. If I want a chunkier mash, I blend just until combined. I make sure not to overmix, as it can change the texture. Once blended, I taste the mash. If it needs more flavor, I adjust with extra salt and pepper. I love a well-seasoned mash! Now, I transfer the cauliflower mash to a serving bowl. For a fun finishing touch, I sprinkle freshly chopped chives on top. This adds color and a nice flavor. To make it look fancy, I might drizzle a bit of olive oil on top. This mash is now ready to impress! Enjoy this easy and tasty dish from the [Full Recipe]. To make the best roasted garlic cauliflower mash, follow these tips. First, use a large head of cauliflower. This gives you enough to work with. Cut the florets into even sizes. This helps them cook at the same rate. Roasting adds flavor, so don’t rush it. Allow the cauliflower to become tender and golden. When blending, don’t overmix. A few pulses will give you a nice texture. If you want it creamier, add a splash more milk. Always taste as you go. Adjust salt and pepper to your liking for the best flavor. Having the right tools makes cooking easier. Here’s what I recommend: - Baking sheet for roasting - Large mixing bowl for combining ingredients - Immersion blender or hand mixer for smoothness - Measuring cups and spoons for precise amounts - Knife and cutting board for prep These tools help you work efficiently and make the process enjoyable. Watch out for these common mistakes. First, don’t skip the roasting step. Raw cauliflower will not have the same rich taste. Second, avoid using too much liquid. It can make your mash watery. If you prefer a thicker mash, add less almond milk. Finally, remember to season well. Under-seasoning can leave your mash bland. Always taste your dish before serving. This way, you ensure it is full of flavor. For the full recipe, check the details above. Enjoy making your roasted garlic cauliflower mash! {{image_4}} You can easily make this dish dairy-free. Use almond milk or coconut milk instead of regular milk. For a buttery flavor, swap butter for vegan butter or olive oil. This keeps the mash creamy and rich without dairy. Adding flavors can elevate your mash. Fresh herbs like thyme or rosemary add a lovely touch. You can also sprinkle in garlic powder for extra garlic flavor. If you enjoy cheese, mix in some grated Parmesan for a savory kick. Get creative with how you serve this mash! Use it as a base for grilled chicken or fish. You can also serve it as a side dish with roasted vegetables. Try topping it with sautéed mushrooms or crispy bacon bits for added flavor and texture. After enjoying your roasted garlic cauliflower mash, let it cool. Place it in an airtight container. Store it in the fridge for up to 4 days. This keeps the flavor fresh and the texture nice. If you have more leftovers, freezing is a great option. Put the mash in a freezer-safe bag or container. Make sure to remove excess air. It will last for about 3 months. Label the container with the date so you can keep track. When you're ready to enjoy the mash again, reheat it gently. You can use the microwave or a stovetop. If it seems dry, add a splash of almond milk or butter. Stir it well as you heat it. This keeps it creamy and delicious. Yes, you can make Roasted Garlic Cauliflower Mash ahead of time. Prepare the mash, then let it cool. Store it in an airtight container in the fridge for up to three days. When you’re ready to eat, simply reheat it on the stove or in the microwave. You may need to add a splash of milk to bring back the creamy texture. Yes, cauliflower mash is a low-carb alternative to mashed potatoes. A cup of cooked cauliflower has about 5 grams of carbs, while a cup of mashed potatoes has around 35 grams. This makes cauliflower mash a great choice if you want to cut carbs but still enjoy a creamy side dish. Roasted Garlic Cauliflower Mash pairs well with many dishes. You can serve it with roasted chicken, grilled steak, or pan-seared fish. It also complements sautéed vegetables or a fresh salad. For a hearty meal, try it with a rich mushroom gravy or a savory sauce. The mash's creamy texture and garlic flavor enhance any main dish beautifully. Roasted Garlic Cauliflower Mash is simple and tasty. We covered its key ingredients, from cauliflower to garlic. You can customize it with optional ingredients and garnishes for more flavor. The step-by-step instructions ensure a smooth texture every time. You now have tips to avoid common mistakes. Variations allow for dairy-free or unique flavors. Storing is easy, and leftovers can even be frozen. This mash is a great low-carb option. Try it with your favorite dishes for a perfect side.](https://goldendishy.com/wp-content/uploads/2025/07/e8f9d6da-9905-472e-90b5-76f2ba9b0789-768x768.webp)

![To make vegan creamy pesto pasta, gather these fresh and simple ingredients. - 12 oz pasta (penne, spaghetti, or your favorite variety) - 2 cups fresh basil leaves, tightly packed - 1/2 cup raw cashews (soaked in water for at least 2 hours) - 1/4 cup nutritional yeast (for a cheesy flavor) - 3 cloves garlic, minced - 1/4 cup extra virgin olive oil - 1 tablespoon fresh lemon juice - Sea salt and freshly ground black pepper, to taste - 1 cup cherry tomatoes, halved (for topping) - Extra fresh basil leaves (for garnish) Each ingredient plays a vital role. The pasta is the base, while basil brings freshness. Cashews create a rich, creamy texture. Nutritional yeast adds a cheesy taste, perfect for vegan dishes. Garlic gives depth, while olive oil provides smoothness. Lemon juice brightens the flavors. Salt and pepper enhance everything. Cherry tomatoes add color and sweetness. Extra basil leaves make the dish look beautiful. For the full recipe, check out the link to ensure a delicious meal! First, fill a large pot with water and add a generous amount of salt. Bring the water to a rapid boil. This step is key; the salt helps flavor the pasta. Once boiling, add 12 ounces of your favorite pasta, like penne or spaghetti. Cook according to the package instructions. You want the pasta to be al dente, which means it should be tender but still firm to bite. Usually, this takes about 8 to 12 minutes. When the pasta is ready, drain it well and set it aside. Next, it’s time to make the vegan pesto. Grab your blender or food processor. Add 2 cups of fresh basil leaves, 1/2 cup of soaked raw cashews, and 1/4 cup of nutritional yeast. Also, include 3 cloves of minced garlic and 1 tablespoon of fresh lemon juice. Season with a pinch of sea salt and freshly ground black pepper. Blend this mixture until it becomes smooth and creamy. If it doesn't blend well, scrape down the sides of the blender and blend again until you get a silky texture. Now, combine the drained pasta with the creamy pesto sauce. Use a large mixing bowl for this. Pour the pesto over the pasta. With a pair of tongs or a spatula, toss everything together. Ensure that each piece of pasta gets coated with the vibrant pesto. If the sauce looks too thick, add a little water, one teaspoon at a time, until it reaches the desired consistency. Don't forget to taste! Adjust the seasoning with more salt, pepper, or lemon juice if needed. Finally, gently fold in 1 cup of halved cherry tomatoes for a fresh burst of flavor. Serve this delicious dish warm, garnished with extra basil leaves. Enjoy your vegan creamy pesto pasta! For the complete recipe, check the [Full Recipe]. Soaked cashews are the secret to a smooth and creamy sauce. They soften and blend well, making the pesto rich. Soak them in water for at least two hours before use. This step is key for a silky texture. If your pesto is too thick, don’t worry. Just add water! Start with a teaspoon at a time. Blend until you reach your desired creaminess. This helps the sauce hug the pasta perfectly. Don’t stop at just basil! You can spice it up with some red pepper flakes for heat. A pinch of black pepper adds depth. Try adding a bit of garlic powder for more flavor. Lemon juice adds freshness, but balance is key. If it’s too tangy, add a pinch of sugar or more cashews. This helps round out the flavors and brings the dish to life. Pair this pasta with roasted vegetables for a colorful plate. A side salad adds crunch and freshness. For a drink, consider a light white wine, like Sauvignon Blanc. As for portion sizes, aim for about one and a half cups per person. This ensures everyone leaves satisfied. Enjoy this dish warm for the best flavor experience! {{image_4}} You can change nuts or seeds in your pesto. Try using almonds or sunflower seeds. Each option brings a unique taste. For those avoiding gluten, select gluten-free pasta. Options like brown rice or chickpea pasta work well. Both choices give a nice texture and flavor. To mix up the flavor, add different herbs like parsley or spinach. These herbs bring extra freshness to your dish. You can also incorporate various vegan cheeses. Options like cashew cheese or nutritional yeast can enhance the creamy taste. This helps create layers of flavor in your pesto. Make your dish fresh by using seasonal veggies. For example, zucchini or asparagus can add crunch and color. You can also try different tomatoes. Roasted tomatoes can bring a sweet touch, while cherry tomatoes add a pop of freshness. Finish with garnishes like pine nuts or extra basil for a lovely look. For the complete recipe, check the Full Recipe. After enjoying your vegan creamy pesto pasta, store any leftovers in an airtight container. This keeps the pasta fresh and tasty. Place it in the fridge right away. The best storage time is up to 3 days. Beyond that, the pasta may lose its flavor and texture. To reheat your pasta, the best method is using a stovetop. Heat a pan over medium heat. Add a splash of water or olive oil to keep it moist. Stir gently to warm it up. When reheating, avoid high heat, as this can dry out the sauce. You want to keep that creamy goodness intact. Enjoy your delicious meal again! To make vegan creamy pesto pasta, follow these simple steps: 1. Cook the Pasta: Bring salted water to a boil. Add 12 oz of your pasta and cook until tender. This usually takes about 8-12 minutes. Drain and set aside. 2. Prepare the Pesto: In a blender, add 2 cups of fresh basil leaves, 1/2 cup of soaked raw cashews, and 3 minced garlic cloves. Pour in 1/4 cup of nutritional yeast and 1 tablespoon of lemon juice. Add a pinch of sea salt and black pepper. Blend until smooth. 3. Emulsify with Olive Oil: While blending, slowly add 1/4 cup of extra virgin olive oil. Keep blending until creamy. If it’s too thick, add water, one teaspoon at a time. 4. Combine Pasta and Pesto: In a large bowl, mix the drained pasta with your creamy pesto. Toss gently to coat the pasta well. 5. Final Touches: Taste the mix and adjust the seasoning. Fold in 1 cup of halved cherry tomatoes for a fresh touch. 6. Serve: Serve warm with extra basil leaves on top. Enjoy your delicious vegan creamy pesto pasta! Yes, you can freeze vegan creamy pesto pasta. Here are some tips to keep it tasty: - Cool Before Freezing: Let the pasta cool down before packing it. - Use Airtight Containers: Store the pasta in airtight containers or freezer bags. - Leave Space: Leave some room in the container for the pasta to expand. - Label and Date: Always label your containers with the date. Use within 2-3 months for best quality. When ready to eat, thaw in the fridge overnight. Reheat gently on the stove or in the microwave. Add a splash of water if it seems dry. If you don’t have nutritional yeast, try these alternatives: - Grated Vegan Cheese: Use a dairy-free cheese for a similar flavor. - Ground Flaxseed: This can add a nutty taste, though it won't mimic the cheese flavor. - T nutritional yeast: You can use this if you want a similar profile. - Parmesan Substitute: Some brands offer vegan parmesan that works well in pesto. Each substitute will change the flavor a bit, so adjust to your taste! This blog post covered how to make vegan creamy pesto pasta. You learned about ingredients, cooking pasta, and blending the pesto. We explored tips for smooth texture and flavor. I shared variations to keep things fresh, plus storage and reheating advice. In the end, making this dish is quick and fun. Enjoy experimenting with flavors and textures. This pasta will please vegans and non-vegans alike!](https://goldendishy.com/wp-content/uploads/2025/07/928f57b2-1357-48f3-b20e-4d7b01e4c937-768x768.webp)