Crispy Tofu Buddha Bowl Nutritious and Flavorful Meal
. This Buddha bowl recipe highlights the joy of crispy tofu and fresh veggies. You learned about key ingredients like firm tofu, quinoa, and avocado. I shared tips for prepping and baking tofu to keep it crispy. Customize your bowl with different grains and seasonal veggies for variety. Lastly, my storage tips help you enjoy leftovers later. Make this dish your own, and enjoy healthy eating!](https://goldendishy.com/wp-content/uploads/2025/06/f58aaf25-4393-4431-ab1e-3aeff1cd4ada.webp)
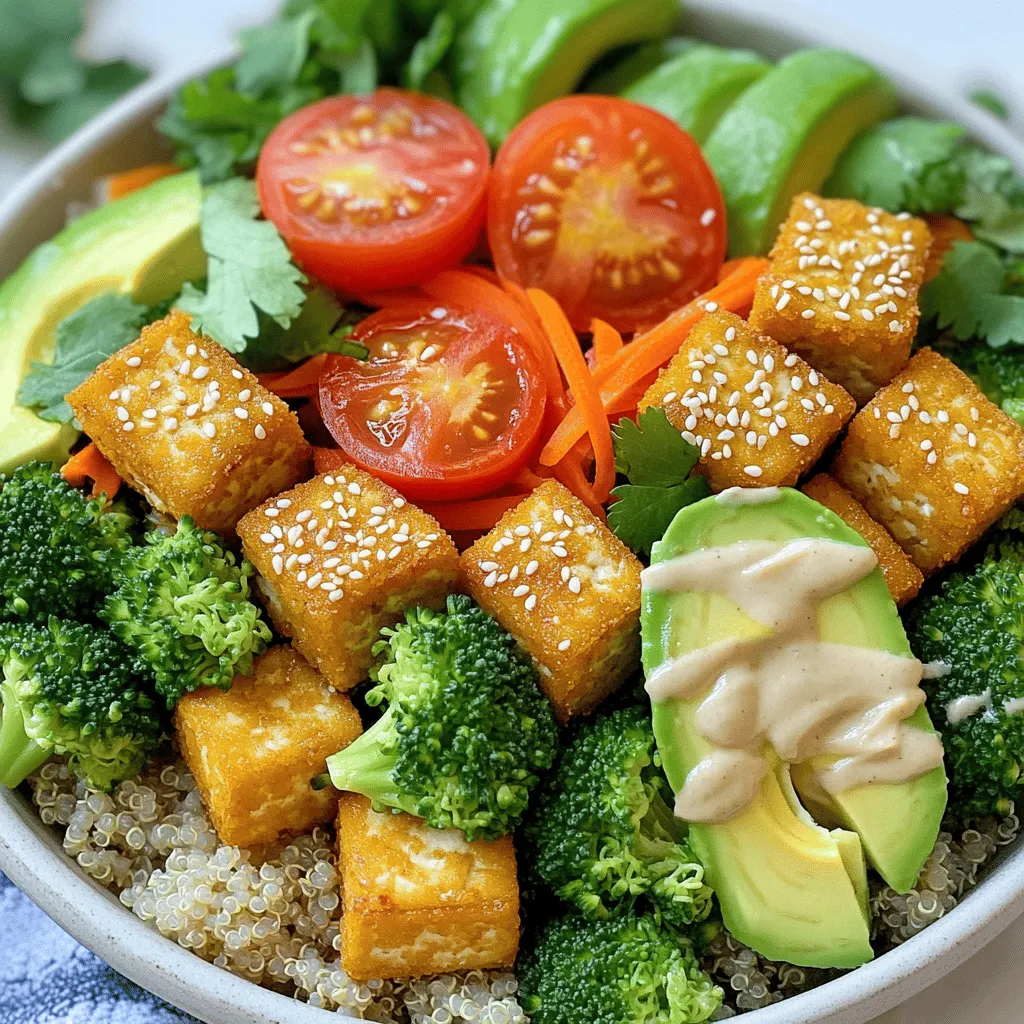
Looking for a tasty and healthy meal? The Crispy Tofu Buddha Bowl is your answer! This dish combines firm tofu with colorful veggies and fluffy quinoa. It’s perfect for lunch or dinner. Packed with flavor and nutrition, you’ll love how easy this bowl is to make. Join me as I share the simple steps to create a satisfying meal that’s both crispy and delicious!
Ingredients
Main Ingredients for Crispy Tofu Buddha Bowl
– 1 block of firm tofu, thoroughly pressed and cut into bite-sized cubes
– 1 cup cooked quinoa, as the hearty base
– 1 cup broccoli florets, packed with nutrients
– 1 cup shredded carrots, adding sweetness and color
– 1 ripe avocado, sliced for creaminess
– 1 cup cherry tomatoes, halved for freshness
Flavor Enhancers
– 2 tablespoons soy sauce, for flavor
– 1 tablespoon sesame oil, enhances richness
– 1 teaspoon garlic powder, for an aromatic touch
– 2 tablespoons tahini, for a nutty dressing
– 1 tablespoon fresh lemon juice, to brighten the flavors
Seasonings and Garnishes
– 2 tablespoons cornstarch, for extra crunch
– Salt and pepper, to taste
– Sesame seeds, for garnish
– Fresh cilantro, for a burst of color and flavor
When I create a Crispy Tofu Buddha Bowl, I focus on fresh and nutritious ingredients. Each component plays a key role in flavor and texture. Firm tofu serves as the protein base, while quinoa adds a hearty touch. The broccoli and carrots bring a splash of color and nutrition.
Flavor enhancers like soy sauce and sesame oil make each bite delightful. Garlic powder adds a nice kick. Don’t forget tahini and lemon juice; they elevate the dish with a creamy, tangy dressing.
For seasoning, cornstarch is essential. It gives the tofu that desired crispy crunch. A sprinkle of salt and pepper, along with sesame seeds and fresh cilantro, finishes the bowl perfectly.
The best part?
Step-by-Step Instructions
Preparing the Tofu
Start by preheating your oven to 400°F (200°C). This temperature works well for crispy tofu. Next, take your block of firm tofu and press it to remove excess water. Cut the tofu into bite-sized cubes.
In a medium bowl, mix the tofu with soy sauce, sesame oil, garlic powder, and a pinch of salt and pepper. Toss gently to coat each piece well.
Now, sprinkle the cornstarch over the marinated tofu. Mix until all cubes are coated. This step is key for that crunchy texture you want.
Baking the Tofu
Arrange the coated tofu cubes on a lined baking sheet. Spread them out so they cook evenly. Bake the tofu for 25-30 minutes. Flip the tofu halfway through. This ensures an even golden color and crispy exterior.
Preparing the Vegetables
While the tofu bakes, steam the broccoli florets for about 5 minutes. You want them tender-crisp to keep their bright color. Set the broccoli aside once done.
Now, get your cooked quinoa ready as the hearty base for your bowl.
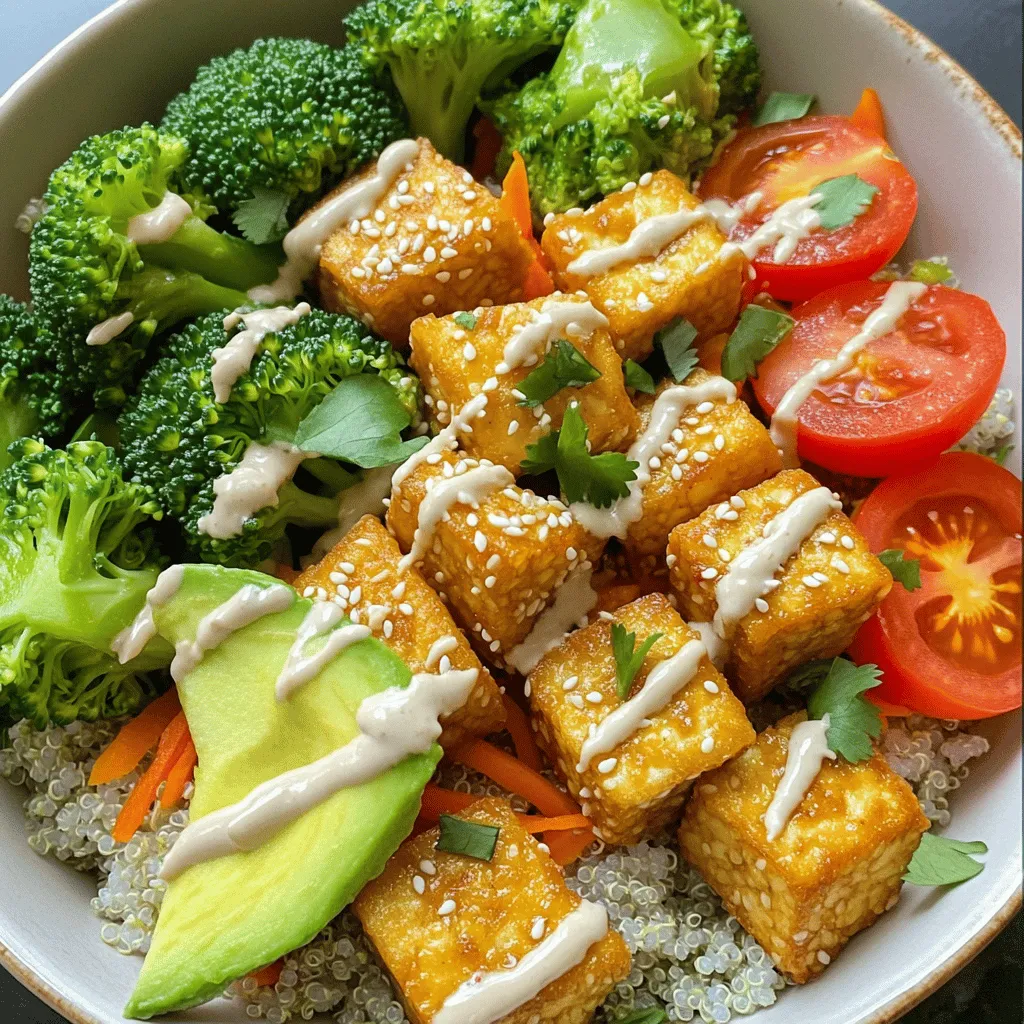
When everything is prepped, it’s time to assemble your Buddha bowl. Start with the quinoa, then layer the steamed broccoli, shredded carrots, avocado slices, and halved cherry tomatoes.
Tips & Tricks
Perfecting the Crispy Tofu
To get crispy tofu, start with firm tofu. Press it well to remove excess water. This step is key to achieving a great texture. Next, coat the tofu cubes with cornstarch. This gives it that extra crunch we all love. Bake your tofu at 400°F (200°C). This temperature helps it crisp up nicely. Make sure to flip the tofu halfway through baking. This ensures even cooking and a golden-brown finish.
Customizing Your Buddha Bowl
You can customize your Buddha bowl easily. Add more vegetables like bell peppers or spinach for extra nutrients. Try different grains too. Brown rice or farro can replace quinoa. If you want more protein, add chickpeas or edamame. These swaps keep your bowl exciting and tasty.
Enhancing Flavor Profiles
For dressings, tahini mixed with lemon juice is a winner. But you can get creative! Try adding soy sauce or a splash of hot sauce for a kick. Seasoning is also key. Adjust salt and pepper to match your taste. Don’t forget to garnish! Fresh herbs like cilantro or green onions add color and flavor.

Variations
Vegan and Vegetarian Options
You can easily make this bowl even more special. If you want to swap tofu, try tempeh or chickpeas. Tempeh has a nutty taste and is rich in protein. Chickpeas add a hearty texture and are great for crunch. Both options offer a unique twist. They keep the meal filling and nutritious. Don’t forget to season them as you would tofu!
Grain Alternatives
Quinoa is a wonderful base, but you can also use other grains. Brown rice is a good choice for a chewy texture. Farro is nutty and adds a lovely bite. Couscous cooks fast and is light. Each grain brings a different flavor to your bowl. Feel free to mix and match based on what you have!
Seasonal Variations
Using seasonal veggies can brighten your Buddha bowl. In spring, add asparagus or snap peas for freshness. Summer is perfect for zucchini or bell peppers. In fall, use roasted squash or sweet potatoes. Winter calls for hearty greens like kale or Brussels sprouts. Also, switch up the dressing flavors based on the season. A citrus dressing works well in warm months, while a richer, creamier one can warm up a cold day.
Storage Info
Storing Leftovers
After enjoying your Crispy Tofu Buddha Bowl, you may have some leftovers. First, let the bowl cool down to room temperature. Then, place your leftovers in an airtight container. This helps keep your food fresh. Store the container in the fridge. The leftovers can last for about 3 to 4 days. If you want to keep them longer, consider freezing them. However, the texture may change once thawed.
Reheating Instructions
To reheat your Buddha bowl, the goal is to keep the tofu crispy. I suggest using an oven or an air fryer for the best results. Preheat your oven to 375°F (190°C). Spread the tofu on a baking sheet. Heat for about 10 to 15 minutes. For an air fryer, set it to 350°F (175°C) and heat for about 5 to 7 minutes. This method keeps the tofu crunchy. Avoid using a microwave, as it can make the tofu soggy.
Meal Prep Suggestions
Meal prep makes cooking easy and quick. Start by cooking a large batch of quinoa at the beginning of the week. You can store it in the fridge for up to 5 days. Next, you can press and cube the tofu. Marinate it in soy sauce, sesame oil, and spices. Store the marinated tofu in the fridge for up to 3 days. Chop your veggies in advance too. Keep them in airtight containers. This way, you can assemble your Buddha bowls in just a few minutes. For the dressing, you can mix tahini and lemon juice ahead of time. Just shake it well before using.
FAQs
Can I use frozen tofu for this recipe?
Yes, you can use frozen tofu. Freezing changes the texture and makes it spongy. This helps it soak up flavors better. Just thaw it first, squeeze out excess water, and press it again. This will give you a tasty, chewy texture in your Buddha bowl.
How do I ensure my tofu is crispy?
To get crispy tofu, start by pressing it well. Remove as much water as possible. Coat it with cornstarch before baking. This creates a crunchy layer. Bake at a high temperature and flip halfway through. This ensures all sides get golden and crispy.
What can I substitute for tahini in the dressing?
If you don’t have tahini, try using peanut butter or almond butter. These options add creaminess and flavor. You can also blend sunflower seeds with water for a nut-free option. Adjust the amount of lemon juice to keep the flavor bright.
How can I add more protein to my Buddha bowl?
You can add chickpeas, edamame, or lentils for more protein. These options mix well with the other ingredients. You could also add grilled chicken or fish if you want a non-vegetarian option.
What vegetables can I add to my bowl?
Feel free to mix in any veggies you like. Bell peppers, spinach, or snap peas work well. You can use seasonal vegetables for added freshness.
How do I make this dish more filling?
To make it heartier, increase the quinoa portion. You can also add nuts or seeds for crunch. Consider topping it with a fried egg for extra protein.
Can I prepare this dish in advance?
Yes, you can prep most ingredients ahead of time. Cook the quinoa and chop the veggies early. Store the components separately to keep them fresh. Assemble your bowl right before eating.
What is the best way to store leftovers?
Store leftovers in an airtight container in the fridge. Keep the dressing separate to avoid sogginess. The leftovers can last for about 3 days.
How can I customize the dressing?
You can mix different ingredients to change the flavor. Try adding fresh herbs like basil or dill. A dash of hot sauce can give it a spicy kick. Adjust the lemon juice for brightness or add maple syrup for sweetness.
This Buddha bowl recipe highlights the joy of crispy tofu and fresh veggies. You learned about key ingredients like firm tofu, quinoa, and avocado. I shared tips for prepping and baking tofu to keep it crispy. Customize your bowl with different grains and seasonal veggies for variety. Lastly, my storage tips help you enjoy leftovers later. Make this dish your own, and enjoy healthy eating!
. This Buddha bowl recipe highlights the joy of crispy tofu and fresh veggies. You learned about key ingredients like firm tofu, quinoa, and avocado. I shared tips for prepping and baking tofu to keep it crispy. Customize your bowl with different grains and seasonal veggies for variety. Lastly, my storage tips help you enjoy leftovers later. Make this dish your own, and enjoy healthy eating!](https://goldendishy.com/wp-content/uploads/2025/06/f58aaf25-4393-4431-ab1e-3aeff1cd4ada-300x300.webp)


![- Bell peppers: Choose bright colors like red, yellow, or orange. These colors not only look great but also add natural sweetness. Each pepper holds the filling nicely and provides a tasty bite. - Quinoa: Rinse the quinoa well under cold water. This step removes the bitter coating called saponin. Rinsing ensures your quinoa has a clean, nutty flavor that shines in the dish. - Vegetable broth: Use low-sodium broth for better control of the flavor. It enhances the taste of quinoa and adds depth to the dish. You can also try homemade broth for a fresher taste. - Ground spices: Cumin, smoked paprika, and chili powder are key. Cumin gives an earthy flavor, while paprika adds a hint of smokiness. Chili powder can amp up the heat level, making your dish exciting. - Beans and corn: Black beans add protein and fiber, making the meal hearty. Corn brings sweetness and crunch, creating a balanced texture. Both ingredients make the filling more nutritious and filling. - Cheese alternatives: Depending on your diet, choose cheddar for a classic taste or opt for a dairy-free cheese. Both melt well and enhance the flavors, giving a creamy finish to each stuffed pepper. For the full list of ingredients, check the Full Recipe. Start by preheating your oven to 375°F (190°C). This step matters because the right heat cooks the peppers evenly and makes them tender. While the oven warms up, you can prepare the bell peppers. Cut the tops off and scoop out the seeds and membranes inside. Stand the peppers upright in a baking dish. This helps them stay stable while they bake. Next, it’s time to cook the quinoa. In a medium saucepan, add 1 cup of rinsed quinoa and 2 cups of vegetable broth. Bring it to a boil, then lower the heat. Cover and let it simmer for about 15 minutes. You want the quinoa to be fluffy and all the liquid should be gone. While the quinoa cooks, you can mix the filling. In a large bowl, combine the fluffy quinoa, black beans, corn, diced tomatoes, cumin, smoked paprika, and chili powder. Add salt and pepper to taste. Make sure everything is mixed well to ensure a consistent flavor in every bite. Now comes the fun part—stuffing the peppers! Use a spoon to fill each bell pepper with your quinoa mixture. Pack it down gently to fit as much filling as possible. Once filled, sprinkle a good amount of cheese on top of each pepper. Cover the baking dish with aluminum foil and place it in the oven. Bake for 25 minutes. After that, remove the foil and bake for another 10 minutes. This helps the cheese melt and become bubbly. The peppers should be tender but still hold their shape. Once done, take the dish out and let it cool for a few minutes. Right before serving, add fresh cilantro or parsley on top for a nice touch. For the full recipe, check out the details provided earlier. To achieve fluffy quinoa, rinse it well before cooking. Rinsing removes the bitter coating called saponin. Use a fine mesh strainer for this step. Then, cook the quinoa in the right ratio of water to quinoa. I recommend 2 cups of vegetable broth for every 1 cup of quinoa. Bring it to a boil, then simmer for 15 minutes. This way, the quinoa will be light and fluffy. When baking your stuffed peppers, timing is key. Start by covering the dish with foil for the first 25 minutes. This keeps the moisture in, helping the peppers cook evenly. After that, remove the foil and bake for an extra 10 minutes. This will make the cheese melt perfectly and the peppers tender but not mushy. For presentation, serve your stuffed peppers on a large platter. Sprinkle extra herbs like cilantro or parsley around for a fresh look. A drizzle of olive oil or a squeeze of lime juice adds brightness and flavor. As for side dishes, consider a simple green salad or some roasted vegetables. These pair well with the peppers and add color to your meal. A light white wine or sparkling water complements the dish nicely, enhancing your dining experience. For the full recipe, check out [Full Recipe]. {{image_4}} What can I use instead of black beans? You can swap in other legumes like chickpeas or kidney beans. Each offers unique flavors and textures. Chickpeas add a nutty taste, while kidney beans bring a soft bite. Both boost protein and fiber, making your meal heartier. Can I add meat to my stuffed peppers? Yes! Chicken or turkey works great. Use cooked ground meat for easy mixing. This adds a savory depth to your dish. Just remember to season the meat well for the best flavor. How can I change the spices? Explore with different spices to create new flavors. Try adding oregano for a Mediterranean twist or curry powder for a bold kick. Each spice changes the overall taste, making your stuffed peppers exciting. Can I use different veggies? Absolutely! Seasonal vegetables like zucchini, spinach, or mushrooms can enhance your filling. They add more nutrients and variety. Just chop them finely and mix them in with your quinoa and beans. For the full recipe, check out the details above. After enjoying your quinoa stuffed bell peppers, store leftovers in the fridge. Place them in an airtight container. This keeps them fresh for up to four days. If you plan to eat them later, consider freezing them. To freeze, wrap each pepper in plastic wrap. Then place them in a freezer-safe bag or container. Make sure to remove as much air as possible. Properly stored, they can last for up to three months in the freezer. When it’s time to enjoy your stuffed peppers again, you can reheat them in several ways. The oven is my favorite method. Preheat it to 350°F (175°C). Place the peppers in a baking dish and cover with foil. Bake for about 20 minutes, or until heated through. You can also use the microwave for quick reheating. Simply place a pepper on a microwave-safe plate. Cover it with a paper towel to keep moisture in. Heat it for about 2-3 minutes, checking to avoid overheating. If you prefer the stovetop, heat a skillet over medium heat and add a little water. Place the peppers in the skillet and cover. Heat for about 5-7 minutes, turning occasionally. To keep the texture nice, avoid sogginess. When reheating, do not add extra moisture or cover too tightly. This will help maintain that delightful crunch of the peppers. For the full recipe, visit the [Full Recipe]. How long do quinoa stuffed peppers last in the fridge? Quinoa stuffed peppers can last about 3 to 5 days in the fridge. Store them in an airtight container to keep them fresh. If you want to enjoy them later, just heat them up in the oven or microwave. Can I make quinoa stuffed peppers ahead of time? Yes, you can prepare quinoa stuffed peppers ahead of time. Stuff the bell peppers and store them in the fridge. Bake them when you’re ready to eat. This makes meal prep easy and convenient. What can I substitute for quinoa in this recipe? If you want to swap out quinoa, try using brown rice or couscous. Both options provide a nice texture. Just remember to adjust cooking times as needed for these ingredients. Are quinoa stuffed peppers healthy? Yes, quinoa stuffed peppers are healthy. They’re packed with protein, fiber, and vitamins. Quinoa is a complete protein, making this dish a great choice for a balanced meal. Gluten-free options: Ensuring a safe meal for all Quinoa is naturally gluten-free, so this dish is safe for gluten-sensitive people. Just check your labels for any added ingredients that might contain gluten. Vegetarian vs. vegan: Key differences in ingredients Vegetarian quinoa stuffed peppers include cheese, while vegan ones use dairy-free cheese. Both versions are delicious. Choose based on your dietary needs. Quinoa stuffed bell peppers use fresh ingredients and bold flavors for a tasty meal. First, choose colorful bell peppers and rinse the quinoa for the best taste. Use ground spices and beans to boost nutrition. Follow the steps closely for perfect results, and don’t forget to try different flavors and proteins. Store leftovers well to enjoy later. Healthy and easy, this dish fits any dinner. You can impress friends and family while eating well! So, get cooking and enjoy every bite of your delicious creation.](https://goldendishy.com/wp-content/uploads/2025/06/de4f4195-310c-4430-9b68-8374d14e079c-768x768.webp)

![To make vegan creamy pesto pasta, gather these fresh and simple ingredients. - 12 oz pasta (penne, spaghetti, or your favorite variety) - 2 cups fresh basil leaves, tightly packed - 1/2 cup raw cashews (soaked in water for at least 2 hours) - 1/4 cup nutritional yeast (for a cheesy flavor) - 3 cloves garlic, minced - 1/4 cup extra virgin olive oil - 1 tablespoon fresh lemon juice - Sea salt and freshly ground black pepper, to taste - 1 cup cherry tomatoes, halved (for topping) - Extra fresh basil leaves (for garnish) Each ingredient plays a vital role. The pasta is the base, while basil brings freshness. Cashews create a rich, creamy texture. Nutritional yeast adds a cheesy taste, perfect for vegan dishes. Garlic gives depth, while olive oil provides smoothness. Lemon juice brightens the flavors. Salt and pepper enhance everything. Cherry tomatoes add color and sweetness. Extra basil leaves make the dish look beautiful. For the full recipe, check out the link to ensure a delicious meal! First, fill a large pot with water and add a generous amount of salt. Bring the water to a rapid boil. This step is key; the salt helps flavor the pasta. Once boiling, add 12 ounces of your favorite pasta, like penne or spaghetti. Cook according to the package instructions. You want the pasta to be al dente, which means it should be tender but still firm to bite. Usually, this takes about 8 to 12 minutes. When the pasta is ready, drain it well and set it aside. Next, it’s time to make the vegan pesto. Grab your blender or food processor. Add 2 cups of fresh basil leaves, 1/2 cup of soaked raw cashews, and 1/4 cup of nutritional yeast. Also, include 3 cloves of minced garlic and 1 tablespoon of fresh lemon juice. Season with a pinch of sea salt and freshly ground black pepper. Blend this mixture until it becomes smooth and creamy. If it doesn't blend well, scrape down the sides of the blender and blend again until you get a silky texture. Now, combine the drained pasta with the creamy pesto sauce. Use a large mixing bowl for this. Pour the pesto over the pasta. With a pair of tongs or a spatula, toss everything together. Ensure that each piece of pasta gets coated with the vibrant pesto. If the sauce looks too thick, add a little water, one teaspoon at a time, until it reaches the desired consistency. Don't forget to taste! Adjust the seasoning with more salt, pepper, or lemon juice if needed. Finally, gently fold in 1 cup of halved cherry tomatoes for a fresh burst of flavor. Serve this delicious dish warm, garnished with extra basil leaves. Enjoy your vegan creamy pesto pasta! For the complete recipe, check the [Full Recipe]. Soaked cashews are the secret to a smooth and creamy sauce. They soften and blend well, making the pesto rich. Soak them in water for at least two hours before use. This step is key for a silky texture. If your pesto is too thick, don’t worry. Just add water! Start with a teaspoon at a time. Blend until you reach your desired creaminess. This helps the sauce hug the pasta perfectly. Don’t stop at just basil! You can spice it up with some red pepper flakes for heat. A pinch of black pepper adds depth. Try adding a bit of garlic powder for more flavor. Lemon juice adds freshness, but balance is key. If it’s too tangy, add a pinch of sugar or more cashews. This helps round out the flavors and brings the dish to life. Pair this pasta with roasted vegetables for a colorful plate. A side salad adds crunch and freshness. For a drink, consider a light white wine, like Sauvignon Blanc. As for portion sizes, aim for about one and a half cups per person. This ensures everyone leaves satisfied. Enjoy this dish warm for the best flavor experience! {{image_4}} You can change nuts or seeds in your pesto. Try using almonds or sunflower seeds. Each option brings a unique taste. For those avoiding gluten, select gluten-free pasta. Options like brown rice or chickpea pasta work well. Both choices give a nice texture and flavor. To mix up the flavor, add different herbs like parsley or spinach. These herbs bring extra freshness to your dish. You can also incorporate various vegan cheeses. Options like cashew cheese or nutritional yeast can enhance the creamy taste. This helps create layers of flavor in your pesto. Make your dish fresh by using seasonal veggies. For example, zucchini or asparagus can add crunch and color. You can also try different tomatoes. Roasted tomatoes can bring a sweet touch, while cherry tomatoes add a pop of freshness. Finish with garnishes like pine nuts or extra basil for a lovely look. For the complete recipe, check the Full Recipe. After enjoying your vegan creamy pesto pasta, store any leftovers in an airtight container. This keeps the pasta fresh and tasty. Place it in the fridge right away. The best storage time is up to 3 days. Beyond that, the pasta may lose its flavor and texture. To reheat your pasta, the best method is using a stovetop. Heat a pan over medium heat. Add a splash of water or olive oil to keep it moist. Stir gently to warm it up. When reheating, avoid high heat, as this can dry out the sauce. You want to keep that creamy goodness intact. Enjoy your delicious meal again! To make vegan creamy pesto pasta, follow these simple steps: 1. Cook the Pasta: Bring salted water to a boil. Add 12 oz of your pasta and cook until tender. This usually takes about 8-12 minutes. Drain and set aside. 2. Prepare the Pesto: In a blender, add 2 cups of fresh basil leaves, 1/2 cup of soaked raw cashews, and 3 minced garlic cloves. Pour in 1/4 cup of nutritional yeast and 1 tablespoon of lemon juice. Add a pinch of sea salt and black pepper. Blend until smooth. 3. Emulsify with Olive Oil: While blending, slowly add 1/4 cup of extra virgin olive oil. Keep blending until creamy. If it’s too thick, add water, one teaspoon at a time. 4. Combine Pasta and Pesto: In a large bowl, mix the drained pasta with your creamy pesto. Toss gently to coat the pasta well. 5. Final Touches: Taste the mix and adjust the seasoning. Fold in 1 cup of halved cherry tomatoes for a fresh touch. 6. Serve: Serve warm with extra basil leaves on top. Enjoy your delicious vegan creamy pesto pasta! Yes, you can freeze vegan creamy pesto pasta. Here are some tips to keep it tasty: - Cool Before Freezing: Let the pasta cool down before packing it. - Use Airtight Containers: Store the pasta in airtight containers or freezer bags. - Leave Space: Leave some room in the container for the pasta to expand. - Label and Date: Always label your containers with the date. Use within 2-3 months for best quality. When ready to eat, thaw in the fridge overnight. Reheat gently on the stove or in the microwave. Add a splash of water if it seems dry. If you don’t have nutritional yeast, try these alternatives: - Grated Vegan Cheese: Use a dairy-free cheese for a similar flavor. - Ground Flaxseed: This can add a nutty taste, though it won't mimic the cheese flavor. - T nutritional yeast: You can use this if you want a similar profile. - Parmesan Substitute: Some brands offer vegan parmesan that works well in pesto. Each substitute will change the flavor a bit, so adjust to your taste! This blog post covered how to make vegan creamy pesto pasta. You learned about ingredients, cooking pasta, and blending the pesto. We explored tips for smooth texture and flavor. I shared variations to keep things fresh, plus storage and reheating advice. In the end, making this dish is quick and fun. Enjoy experimenting with flavors and textures. This pasta will please vegans and non-vegans alike!](https://goldendishy.com/wp-content/uploads/2025/07/928f57b2-1357-48f3-b20e-4d7b01e4c937-768x768.webp)

