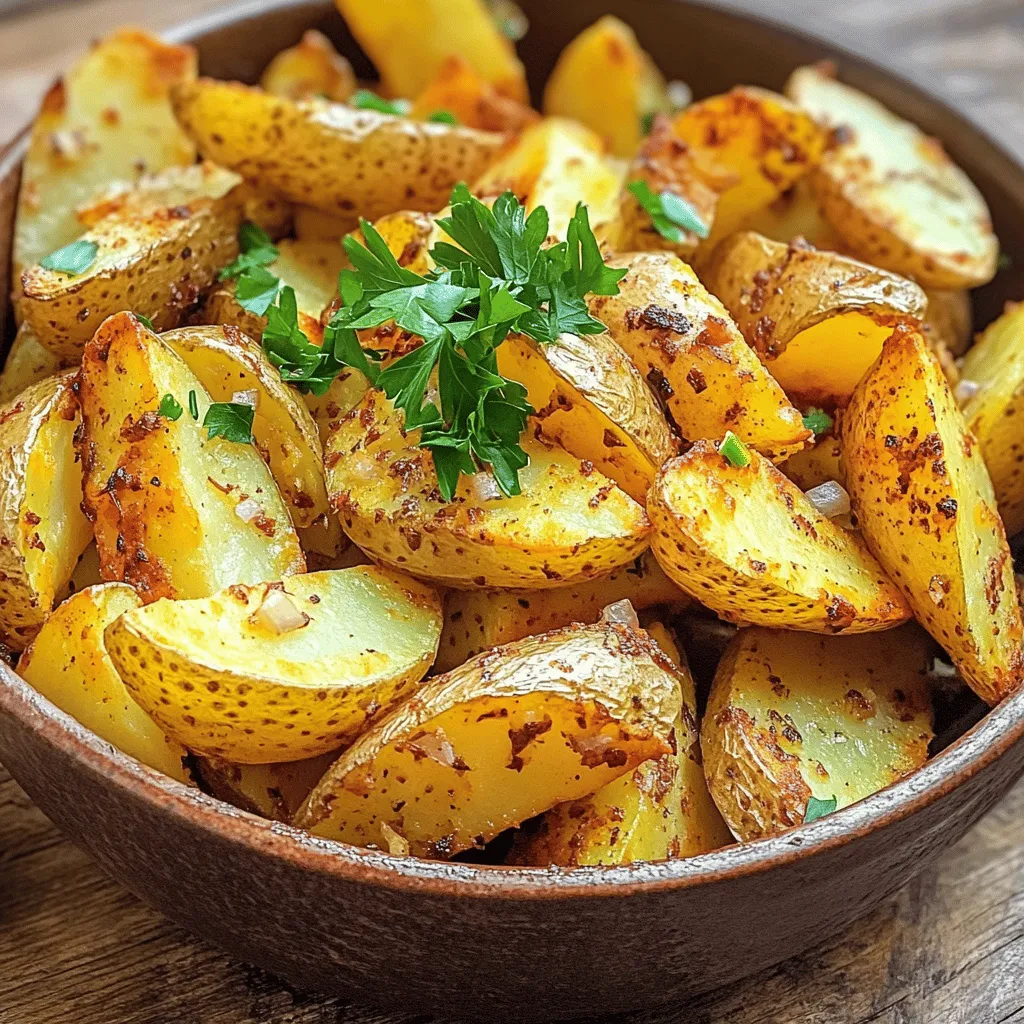
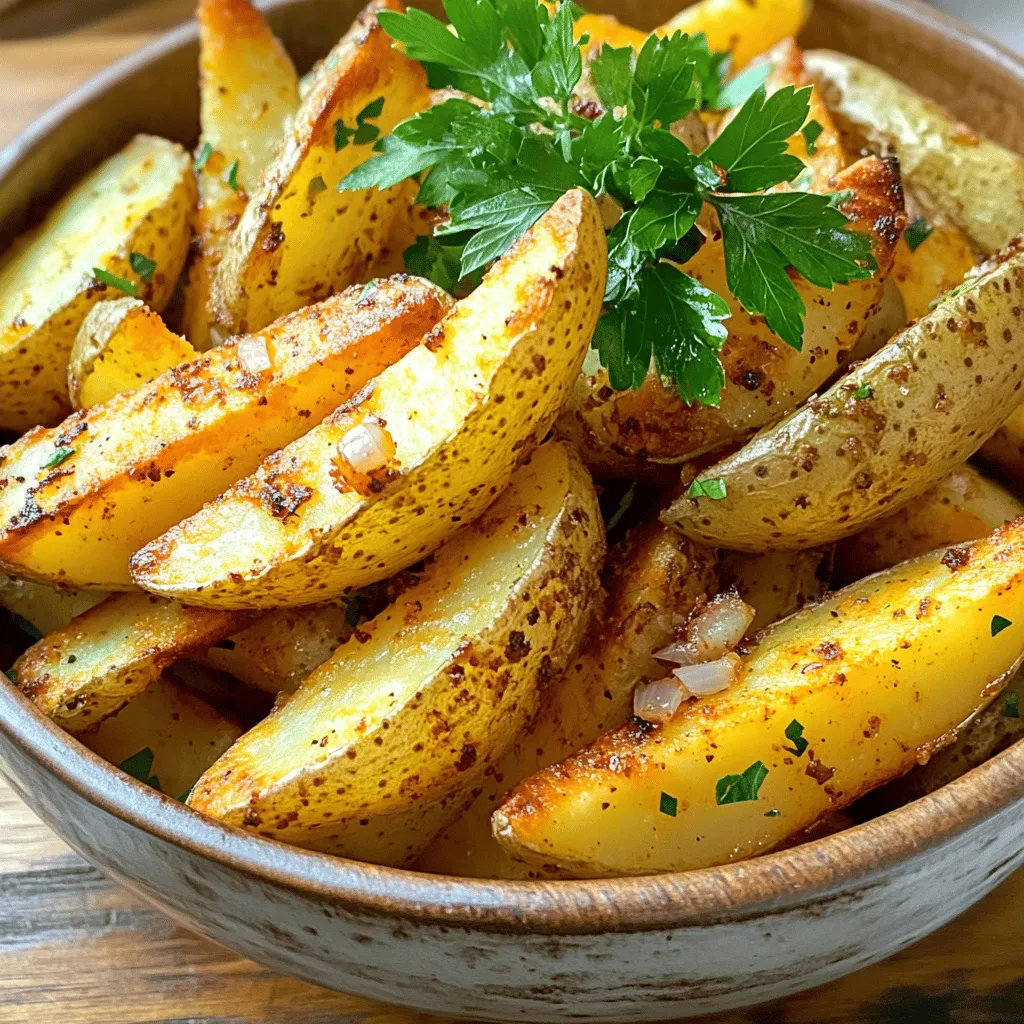
Want crispy, golden potato wedges in a snap? I’ve got you covered! My easy recipe for air fryer potato wedges not only delivers crunch but packs in flavor. With just a handful of simple ingredients and a straightforward process, you’ll enjoy a snack that’s light yet satisfying. Let’s dive in and learn how to make these tasty wedges your new go-to treat!
Ingredients
To make crispy air fryer potato wedges, gather these simple ingredients:
– 4 large russet potatoes
– 3 tablespoons olive oil
– 1 teaspoon garlic powder
– 1 teaspoon onion powder
– 1 teaspoon smoked paprika
– 1 teaspoon dried oregano
– Salt and black pepper to taste
– Fresh parsley, chopped (for garnish, optional)
These ingredients work together to create the perfect flavor and crunch. The russet potatoes give a nice texture. The olive oil helps them crisp up. The spices add a punch of flavor that makes these wedges stand out.
When choosing your potatoes, look for ones that are firm and free of blemishes. This ensures that your wedges will be tasty and hold their shape. You can adjust the spices to suit your taste. If you love garlic, add more garlic powder. If you want heat, toss in some cayenne pepper.
Remember, these ingredients are just a base. Feel free to get creative! You can mix in other herbs or spices you enjoy. The goal is to make a snack that you and your loved ones will crave.
Step-by-Step Instructions
Preparation Steps
– Scrub and cut potatoes into wedges
First, wash the russet potatoes under running water. This removes dirt and grit. After cleaning, slice each potato into wedges. Aim for about eight wedges per potato. Keeping the skin adds flavor and texture.
– Mix seasoning ingredients in a bowl
In a large bowl, pour the olive oil. Add garlic powder, onion powder, smoked paprika, dried oregano, salt, and black pepper. Whisk these ingredients together. This mix creates a tasty seasoning blend.
– Coat potato wedges with seasoning
Gently add the potato wedges to the seasoning bowl. Toss the wedges using your hands or a spatula. Make sure each wedge is fully coated with the seasoning mix. This step is key for flavor.
Cooking Instructions
– Preheat air fryer to 400°F (200°C)
Set your air fryer to 400°F (200°C) and let it preheat for about five minutes. This ensures the air fryer is hot for even cooking.
– Arrange wedges in air fryer basket
Carefully place the seasoned potato wedges in the air fryer basket. Arrange them in a single layer for best results. If your air fryer is small, cook in batches to avoid overcrowding.
– Air fry for 15-20 minutes, shaking halfway
Cook the wedges for 15 to 20 minutes. Shake the basket halfway through cooking. This helps the wedges crisp up evenly. When they turn golden brown, they are ready to enjoy.
Tips & Tricks
Achieving Crispy Texture
To get those crispy potato wedges, you need to coat them well. Use olive oil and seasonings. This mix helps the wedges brown nicely. I like to use 3 tablespoons of olive oil for 4 large russet potatoes. This amount works great!
Make sure your air fryer is set to 400°F (200°C). This high heat is key for crispiness! Preheat your air fryer for five minutes before cooking. This step helps the wedges cook evenly.
When you place the wedges in the air fryer, arrange them in a single layer. This way, hot air can flow freely around them. If your air fryer is small, cook in batches. Don’t overcrowd the basket; it will lead to soggy wedges.
Adjusting Seasonings
Want to change up the flavors? Try adding spices! You can use chili powder for heat or Parmesan cheese for a cheesy twist. Feel free to mix and match spices based on your taste.
You can also customize your flavors. If you love herbs, add fresh rosemary or thyme to the mix. Taste the seasoning blend before coating the wedges. Adjust it until you find the perfect balance! This way, your snack will be just how you like it.Enjoy your crispy air fryer potato wedges!
Variations
Flavor Variations
You can easily change the taste of your crispy air fryer potato wedges. Here are some fun ideas:
– Cheesy potato wedges: Add grated cheese on top of the wedges before air frying. Cheddar or parmesan works great. It melts and gives a rich flavor.
– Spicy buffalo-style wedges: Toss the cooked wedges in buffalo sauce after frying. This adds heat and tang. Serve with ranch dressing for a cool contrast.
– Herb-infused options: Mix fresh herbs like rosemary or thyme with the seasoning. This gives a lovely earthy taste. You can also use dried herbs if fresh ones are not available.
Alternative Cooking Methods
While air frying gives great results, you can try other methods too.
– Oven-baked potato wedges: Preheat your oven to 425°F (220°C). Arrange the seasoned wedges on a baking sheet. Bake for 25-30 minutes, flipping halfway. They will be crispy and delicious.
– Deep-fried potato wedges: Heat oil in a deep pot to 350°F (175°C). Fry the wedges in batches for about 5-7 minutes. This method gives a classic crunchy texture. Just be mindful of the extra oil used.
Storage Info
Storing Cooked Potato Wedges
To keep your crispy air fryer potato wedges fresh, let them cool down. This helps avoid moisture buildup. Once cooled, place them in a clean, dry container. I recommend using an airtight container. It keeps the wedges from drying out. You can also use a zip-top bag, squeezing out as much air as possible before sealing.
Reheating Instructions
To reheat your potato wedges, use an air fryer or oven. Preheat your air fryer to 350°F (175°C). Then, place the wedges in a single layer. Heat for about 5 to 7 minutes. This ensures they stay crispy. If using an oven, preheat to 375°F (190°C) and bake for 10 to 15 minutes.
To avoid sogginess, do not cover the wedges while reheating. If you have leftover wedges, you can also toss them in the air fryer for a quick crisp.
FAQs
How do I make potato wedges crispy in the air fryer?
To make potato wedges crispy, follow these key steps:
– Use oil: Coat the wedges in olive oil. This helps them crisp up.
– Season well: Use salt and spices for flavor. The seasoning adds to the crunch.
– Preheat the air fryer: Heating it to 400°F (200°C) is important. It helps to create a crispy outer layer.
– Do not overcrowd: Place the wedges in a single layer. This allows hot air to reach all sides and makes them crispier.
– Shake halfway: Give the basket a shake at about 10 minutes. This helps them cook evenly.
By following these steps, you will get perfectly crispy potato wedges every time.
Can I use sweet potatoes instead of russet potatoes?
Yes, you can use sweet potatoes! Here are some tips for cooking them:
– Cooking time: Sweet potatoes may need a little less time. Aim for 12-18 minutes.
– Cut size: Cut them into similar sizes as russet wedges. This helps them cook evenly.
– Flavor: Sweet potatoes have a sweeter taste. You might want to adjust spices to match their flavor.
Sweet potato wedges are a tasty alternative to russet potatoes.
What dipping sauces pair well with potato wedges?
Dipping sauces can elevate your potato wedges. Here are some great options:
– Ketchup: A classic choice that many love.
– Ranch dressing: Creamy and flavorful, a favorite for dipping.
– Honey mustard: Adds a sweet and tangy kick.
– Spicy mayo: For those who like a bit of heat, this is a perfect match.
– Barbecue sauce: Smoky and sweet, it pairs well with the crispy texture.
Try these sauces to make your crispy air fryer potato wedges even more enjoyable!
To sum up, we explored how to make delicious potato wedges. You learned about the ingredients needed, from russet potatoes to tasty spices. The step-by-step guide showed you how to prepare and cook them in an air fryer. We also shared tips for achieving that perfect crispiness and offered flavor variations. Finally, we covered storage and reheating methods. With these easy steps, you can enjoy tasty wedges any time. Get creative and make them your own!


