Creamy Garlic Mashed Potatoes Rich and Flavorful Dish
. This recipe includes all the details you need for perfecting this rich side dish. Enjoy making it! We covered the key steps to make creamy garlic mashed potatoes. First, we explored essential ingredients and shared brands to try. Next, I laid out easy prep instructions and tips for texture and flavor. Then, we looked at tasty variations, like vegan options. Finally, I highlighted how to store and reheat your potatoes. These mashed potatoes will elevate your meals. Try new variations to keep things exciting. Enjoy crafting this dish that your family will love!](https://goldendishy.com/wp-content/uploads/2025/06/88d864b9-3d37-4779-9fe5-8809feb11d6c.webp)
Creamy Garlic Mashed Potatoes are a must-have side dish that will wow your taste buds. I’ll share my simple recipe, using fresh garlic and rich butter for a dreamy flavor. Whether for a holiday or a weeknight dinner, these mashed potatoes shine on any table. Get ready to master this comforting dish with my step-by-step guide and pro tips. Let’s dive in and make something amazing together!
Ingredients
List of Essential Ingredients
To make creamy garlic mashed potatoes, you need:
– 2 pounds Yukon Gold potatoes, peeled and cut into 1-inch chunks
– 4 cloves of garlic, minced
– 1 cup heavy cream
– 4 tablespoons unsalted butter
– ½ cup sour cream
– Salt and black pepper, to taste
– Fresh chives, finely chopped (for garnish)
Suggested Brand or Type of Products
For the best flavor, I recommend using Yukon Gold potatoes. They have a buttery taste and creamy texture. For garlic, fresh cloves work best. When it comes to cream, choose a high-quality heavy cream for richness. I also like to use unsalted butter so I can control the salt. For sour cream, look for a brand with a rich and creamy texture.
Common Substitute Ingredients
If you can’t find Yukon Gold potatoes, you can use Russet potatoes. They are larger and starchier but will still give good results. If you want a lighter dish, consider using half-and-half instead of heavy cream. Greek yogurt can replace sour cream for a tangy twist. Lastly, if you’re out of chives, green onions work well as a garnish.
Step-by-Step Instructions
Preparation of Potatoes
Start with 2 pounds of Yukon Gold potatoes. First, peel them and cut them into 1-inch chunks. Place the chunks into a large pot. Cover the potatoes with cold water. Add a good pinch of salt to flavor them. Bring the water to a boil over high heat. Once boiling, lower the heat to medium. Let the potatoes simmer for 15-20 minutes. They are done when a fork easily pierces them.
Sautéing Garlic and Butter
While the potatoes cook, melt 4 tablespoons of unsalted butter in a small saucepan. Use low heat for this step. Add 4 minced garlic cloves to the melted butter. Sauté for 1-2 minutes. Stir gently to avoid browning the garlic. You want the garlic to be fragrant, not burnt. Once ready, remove the saucepan from the heat to let the flavors merge.
Mashing and Combining Ingredients
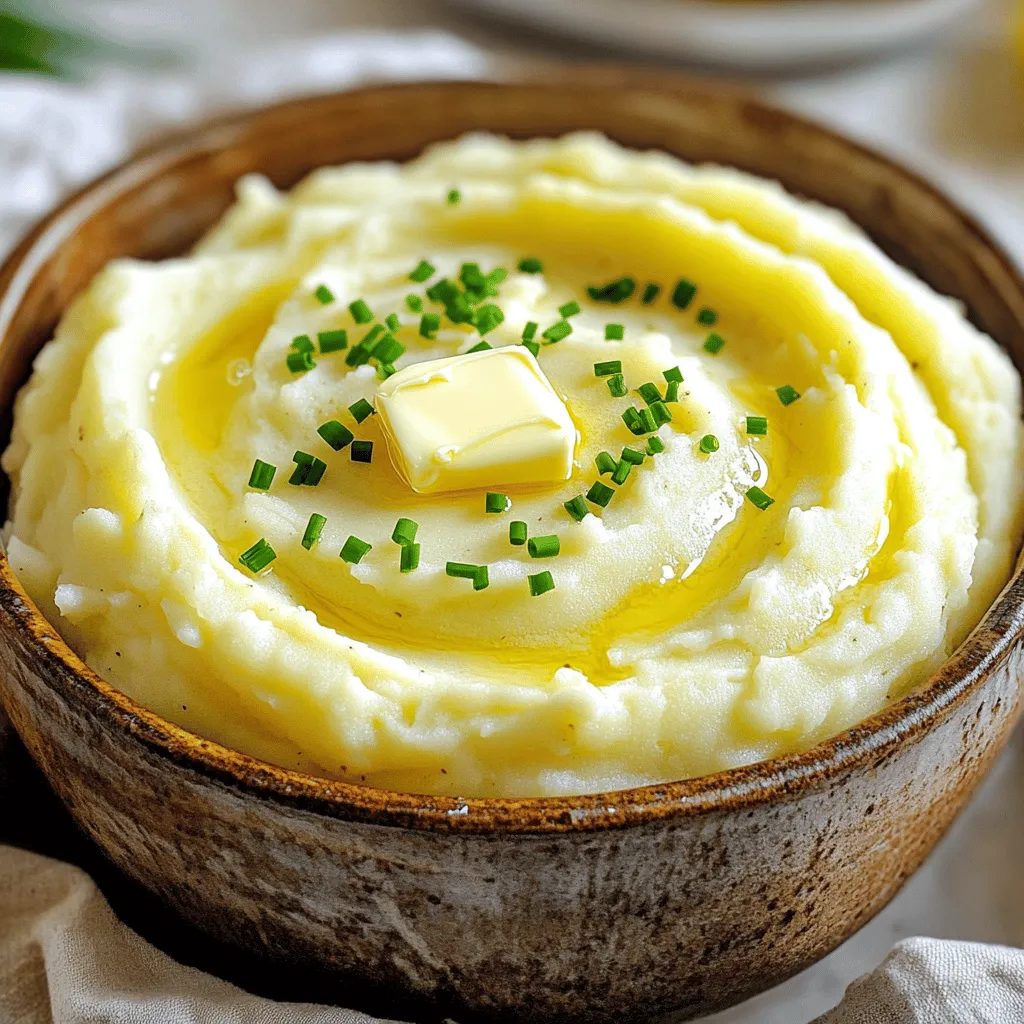
After draining the potatoes in a colander, return them to the pot. This keeps them warm. Add the garlic-infused butter, 1 cup of heavy cream, and ½ cup of sour cream. Season with salt and black pepper to taste. Use a potato masher or ricer to mash the potatoes. Aim for a creamy texture, mixing all the ingredients well. Taste them and adjust the salt or pepper if needed. Finally, serve the creamy garlic mashed potatoes in a warm bowl. Top them with chopped chives for a fresh touch.
Tips & Tricks
Achieving the Perfect Creamy Texture
To get that ideal creamy texture, start with Yukon Gold potatoes. They are buttery and smooth. Cut them into even chunks. This ensures they cook evenly. Boil them until they are very tender. If they are undercooked, your mash will be lumpy. After draining, return the potatoes to the pot. This allows steam to escape, making them fluffier. Use a potato masher or ricer for the best results. I recommend mashing while still warm for a smooth finish.
Flavor Enhancements & Additions
Adding flavor is key to great mashed potatoes. I use minced garlic sautéed in butter. This gives a rich taste without overpowering. You can also mix in sour cream for tanginess. For a different twist, consider adding roasted garlic or cheese. Cream cheese or Parmesan will make the dish even richer. Fresh herbs, like chives or parsley, enhance the flavor and add color. Always taste your mix before serving. Adjust salt and pepper as needed for the best flavor.
Kitchen Tools for Best Results
The right tools can make a big difference. A sturdy potato masher or ricer is essential. A large pot for boiling potatoes helps them cook evenly. A colander is great for draining. Don’t forget a wooden spoon for mixing. If you want to go extra smooth, use an electric mixer. Just avoid over-mixing; this can make your potatoes gluey. To check the texture, scoop some into a bowl. If it looks creamy, you’ve done well.

Variations
Herb-Infused Creamy Garlic Mashed Potatoes
To add a fresh twist, try herb-infused creamy garlic mashed potatoes. I love using fresh herbs like rosemary or thyme. Chop about one tablespoon of your chosen herb and mix it in with the butter and garlic. This extra layer of flavor makes the dish even more special. You can also use dried herbs if fresh ones aren’t available, but use less. Start with half a teaspoon and add to taste.
Healthier Alternatives (Low-Fat Options)
If you want a lighter version, swap out some ingredients. Use low-fat milk instead of heavy cream. You can also replace sour cream with Greek yogurt. These changes keep the creamy texture while cutting down on calories. You can use olive oil instead of butter for a heart-healthy fat. This option still tastes great and is good for your waistline!
Vegan Creamy Garlic Mashed Potatoes
For a vegan take, start by using plant-based milk, like almond or oat milk. Instead of butter, try vegan butter or olive oil for richness. To keep the creaminess, add silken tofu or cashew cream. They blend well and add a nice texture. This way, you still enjoy creamy garlic mashed potatoes without any animal products.
Storage Info
Proper Cooling and Storing Techniques
To keep your creamy garlic mashed potatoes fresh, cool them quickly. Spread them in a shallow dish. This helps them cool faster. Once cooled, cover the dish with plastic wrap or a lid. Store them in the fridge for up to three days. Make sure to label the container with the date to track freshness.
Reheating Methods for Leftovers
Reheating creamy garlic mashed potatoes is easy. You can use the microwave or stovetop. If using the microwave, place them in a safe dish. Add a splash of milk or cream to keep them moist. Heat in short bursts, stirring in between. On the stovetop, warm them over low heat. Stir often and add a little milk if they seem dry.
Freezing Instructions
You can freeze creamy garlic mashed potatoes for later use. Pack them in an airtight container or freezer bag, leaving some space for expansion. Label the bag with the date. They can last up to three months in the freezer. When ready to eat, thaw in the fridge overnight. Reheat as mentioned above for the best taste.
FAQs
How to fix gluey mashed potatoes?
If your mashed potatoes turn out gluey, they likely got over-mixed. To fix this, add a splash of warm milk or cream. Gently fold it in until the texture improves. Avoid using a mixer, as it can make potatoes gummy. Stick with a masher or ricer for the best results.
Can I make creamy garlic mashed potatoes ahead of time?
Yes, you can make creamy garlic mashed potatoes ahead of time. Prepare them, then cool them down. Store in an airtight container in the fridge for up to two days. When ready to serve, reheat gently on the stove or in the microwave, adding a bit more cream if needed for creaminess.
What to serve with creamy garlic mashed potatoes?
Creamy garlic mashed potatoes pair well with many dishes. Try serving them with:
– Roast chicken
– Grilled steak
– Baked salmon
– Sautéed vegetables
– A rich mushroom gravy
These flavors complement the creamy texture and garlic taste well, creating a balanced meal.This recipe includes all the details you need for perfecting this rich side dish. Enjoy making it!
We covered the key steps to make creamy garlic mashed potatoes. First, we explored essential ingredients and shared brands to try. Next, I laid out easy prep instructions and tips for texture and flavor. Then, we looked at tasty variations, like vegan options. Finally, I highlighted how to store and reheat your potatoes.
These mashed potatoes will elevate your meals. Try new variations to keep things exciting. Enjoy crafting this dish that your family will love!
. This recipe includes all the details you need for perfecting this rich side dish. Enjoy making it! We covered the key steps to make creamy garlic mashed potatoes. First, we explored essential ingredients and shared brands to try. Next, I laid out easy prep instructions and tips for texture and flavor. Then, we looked at tasty variations, like vegan options. Finally, I highlighted how to store and reheat your potatoes. These mashed potatoes will elevate your meals. Try new variations to keep things exciting. Enjoy crafting this dish that your family will love!](https://goldendishy.com/wp-content/uploads/2025/06/88d864b9-3d37-4779-9fe5-8809feb11d6c-300x300.webp)


![For this tasty dish, gather the following main ingredients: - 4 boneless, skinless chicken breasts - 1 cup dill pickle juice (for marinating) - 1 cup ranch dressing - 1 cup breadcrumbs (Italian or panko) - 1 cup grated Parmesan cheese - 1 cup marinara sauce - 1 cup shredded mozzarella cheese These ingredients make the base of your chicken parmesan. The chicken stays juicy from the pickle juice, and the ranch dressing adds a creamy flavor. Next, you will need these seasonings: - 1 tablespoon olive oil - 1 teaspoon garlic powder - 1 teaspoon Italian seasoning - Salt and pepper to taste These seasonings give your chicken a great taste. The garlic powder and Italian seasoning work together to create a cozy flavor. The salt and pepper help balance everything. For a more colorful dish, consider these garnishes: - Fresh parsley for garnish (optional) You can also serve your chicken with sides like: - Pasta - Fresh green salad These sides add color and texture to your meal. They keep things fresh and light. For the complete cooking steps, check out the Full Recipe. To start, take 4 boneless, skinless chicken breasts. Place them in a resealable plastic bag. Pour 1 cup of dill pickle juice over the chicken. Make sure they are fully submerged. Seal the bag tight. Put it in the fridge and let it marinate for at least 1 hour. If you want a stronger taste, let it sit for up to 4 hours. Next, preheat your oven to 400°F (200°C). In a shallow dish, mix 1 cup of breadcrumbs, 1 cup of grated Parmesan cheese, 1 teaspoon of garlic powder, and 1 teaspoon of Italian seasoning. Add a pinch of salt and pepper to taste. Stir these dry ingredients well. This mix gives the chicken a tasty and crunchy coat. After marinating, take the chicken out and pat it dry with paper towels. Dip each piece into 1 cup of ranch dressing, coating both sides well. Then, dredge the chicken in the breadcrumb mix. Press lightly to ensure it sticks. In a large, oven-safe skillet, heat 1 tablespoon of olive oil over medium heat. Once it shines, add the coated chicken breasts. Sear each side for about 3-4 minutes. They should turn a nice golden brown. After searing, pour 1 cup of marinara sauce over the chicken. Make sure each piece is covered. Then, sprinkle 1 cup of shredded mozzarella cheese on top. This adds a gooey touch. Now, transfer the skillet to your preheated oven. Bake for 20-25 minutes. Ensure the chicken reaches an internal temperature of 165°F (75°C). The cheese should be melted and slightly golden brown. Once done, take the skillet out and let it cool for a few minutes. If you like, sprinkle fresh parsley on top for a burst of color and flavor. Serve it up and enjoy the delicious blend of flavors in your pickle ranch chicken parmesan. For the full recipe, check the earlier sections! To get the best crust on your chicken, start with dry chicken. After marinating, pat the chicken dry with paper towels. This helps the coating stick well. Next, dip the chicken in ranch dressing. Make sure to coat both sides. Then, dredge it in the breadcrumb mix. Press down lightly to pack on that flavor. For extra crunch, you can double-coat the chicken. Just repeat the ranch and breadcrumbs steps. If you have leftovers, store them in an airtight container. This keeps the chicken fresh. Place the chicken in the fridge and eat it within three days. To reheat, use an oven or air fryer. This way, you keep that crispy texture. Avoid the microwave, as it can make the coating soggy. To boost flavor, try adding spices to your breadcrumb mix. A pinch of cayenne pepper adds heat. You might even try smoked paprika for a smoky taste. Another option is to mix in some chopped herbs. Fresh basil or oregano can really brighten up the dish. Don't forget to drizzle some extra ranch on top just before serving. These small changes can make your Pickle Ranch Chicken Parmesan even more tasty! For complete cooking steps and ingredient details, check the [Full Recipe]. {{image_4}} You can easily adapt this recipe for various diets. Here are some ideas: - Gluten-Free: Use gluten-free breadcrumbs or crushed cornflakes. - Dairy-Free: Substitute the ranch dressing with a dairy-free version. Try coconut yogurt or a cashew-based alternative. - Low-Carb: Replace breadcrumbs with crushed nuts or pork rinds for a crunchy topping. Want to boost flavors? Consider these add-ins: - Spices: Add cayenne pepper for heat or smoked paprika for depth. - Herbs: Mix in fresh basil or oregano to the marinara for freshness. - Veggies: Layer sliced bell peppers or mushrooms under the cheese for added taste and texture. Not in the mood to bake? Try these methods instead: - Air Fryer: Cook at 375°F (190°C) for about 15-18 minutes, flipping halfway. - Grill: Grill the marinated chicken on medium heat for 5-7 minutes per side. Add the sauce and cheese in the last few minutes to melt. - Slow Cooker: Cook on low for 4-6 hours with sauce and cheese on top for a tender dish. These variations make the recipe fit your lifestyle. Enjoy customizing your Pickle Ranch Chicken Parmesan! For the full details, check the Full Recipe. To keep your Pickle Ranch Chicken Parmesan fresh, store it in an airtight container. Let the chicken cool to room temperature first. Once cooled, transfer it to the container and seal tightly. It can last in the fridge for 3 to 4 days. To keep flavors intact, try to use it up within that time. When it's time to enjoy leftovers, preheat your oven to 350°F (175°C). Place the chicken in an oven-safe dish. Cover it with foil to prevent drying out. Heat for about 15 to 20 minutes, or until it's warmed through. You can also reheat in the microwave, but the oven keeps the chicken crispy. If you want to save some for later, freezing is a great option. Wrap each chicken breast tightly in plastic wrap and then in foil. This helps prevent freezer burn. You can freeze it for up to 3 months. To reheat, thaw in the fridge overnight, then follow the reheating instructions. Enjoy your meal anytime! You should marinate the chicken for at least 1 hour. This helps the meat soak up the pickle juice. For even more flavor, try marinating for up to 4 hours. This longer time allows the tangy taste to infuse deeper. Yes, you can prepare this dish ahead of time. Marinate the chicken and coat it as directed. Then, store it in the fridge for up to 24 hours before baking. When ready, just bake it as per the recipe. There are many tasty sides that go well with Pickle Ranch Chicken Parmesan. Here are some ideas: - Garlic bread - Pasta with marinara sauce - A fresh green salad - Roasted vegetables - Mashed potatoes Feel free to mix and match to find your favorite pairings! For the full recipe, check out the earlier section. We've covered how to make Pickle Ranch Chicken Parmesan. We discussed key ingredients, step-by-step instructions, and helpful tips. You learned about storage and variations to fit your taste. Remember, this dish is fun and easy to customize. Enjoy exploring new flavors and methods in your cooking. With practice, you'll master this recipe and impress others. Ready to make your own? Now, it’s your turn to get creative in the kitchen!](https://goldendishy.com/wp-content/uploads/2025/07/3835c891-434d-4cb2-bcdb-f0268378baad-768x768.webp)


