Classic Guacamole Flavorful and Simple Recipe

Craving a dip that’s both tasty and easy to make? Look no further than classic guacamole! In this guide, I’ll show you how to create a rich and flavorful guacamole with just a handful of ingredients. Whether you’re hosting a party or enjoying a quiet night at home, this simple recipe will satisfy your cravings and impress your guests. Let’s dive into the world of guacamole bliss!
Ingredients for Classic Guacamole
Essential Ingredients
To make a great guacamole, you need just a few simple items. Here’s what you’ll need:
– 3 ripe avocados
– 1 medium tomato, diced
– 1/4 cup red onion, finely chopped
– 1 jalapeño pepper, deseeded and minced
– 2 cloves garlic, minced
– Juice from 2 fresh limes
– 1/4 cup fresh cilantro, finely chopped
– Salt and pepper to taste
These ingredients come together to create a creamy and zesty dip. Each one adds its own flavor. The avocados bring richness. The lime juice adds brightness. And the jalapeño gives it a nice kick.
You can personalize your guacamole by adjusting the ingredients. For example, you can add more lime juice for extra tang or skip the jalapeño if you prefer less spice.
I enjoy using fresh ingredients. They make a big difference in taste. Fresh cilantro adds a burst of flavor. Each bite becomes more exciting with its herbaceous notes.It offers a fun way to enjoy guacamole.
Step-by-Step Instructions
Preparing the Avocados
Start by slicing the avocados in half. Use a knife to carefully remove the pit. I like to use a spoon to scoop the creamy flesh into a bowl. Make sure to discard the skin.
Mashing the Avocados
Next, take a fork and mash the avocado. You can choose how smooth or chunky you want it. If you like it creamy, mash it well. For a bit of texture, leave some chunks.
Mixing the Ingredients
Now it’s time to mix in the other ingredients. Add the diced tomato, chopped red onion, minced jalapeño, and garlic. Stir gently to combine the flavors evenly.
Adding Lime and Cilantro
Squeeze fresh lime juice over the mixture. This adds a bright flavor. Then, fold in the chopped cilantro. It brings a nice herb taste to the guacamole.
Final Seasoning and Serving
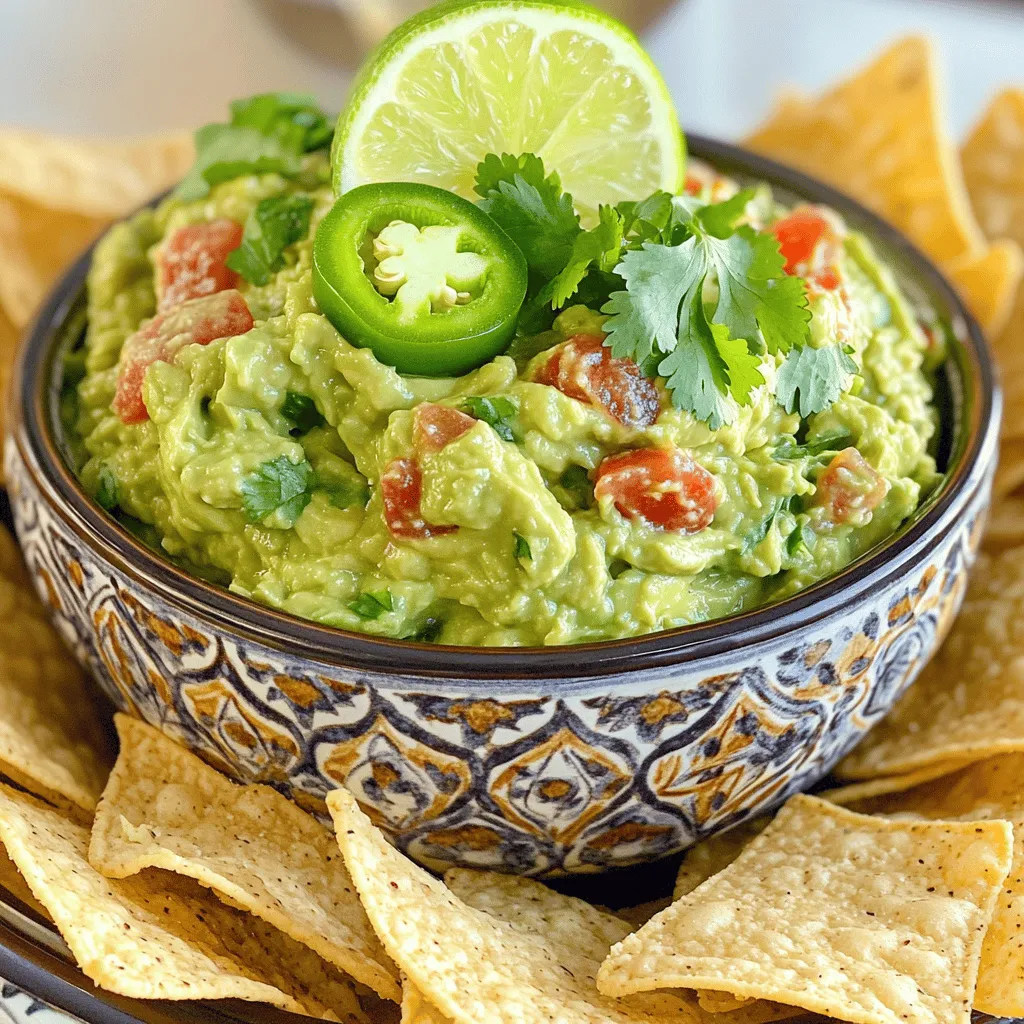
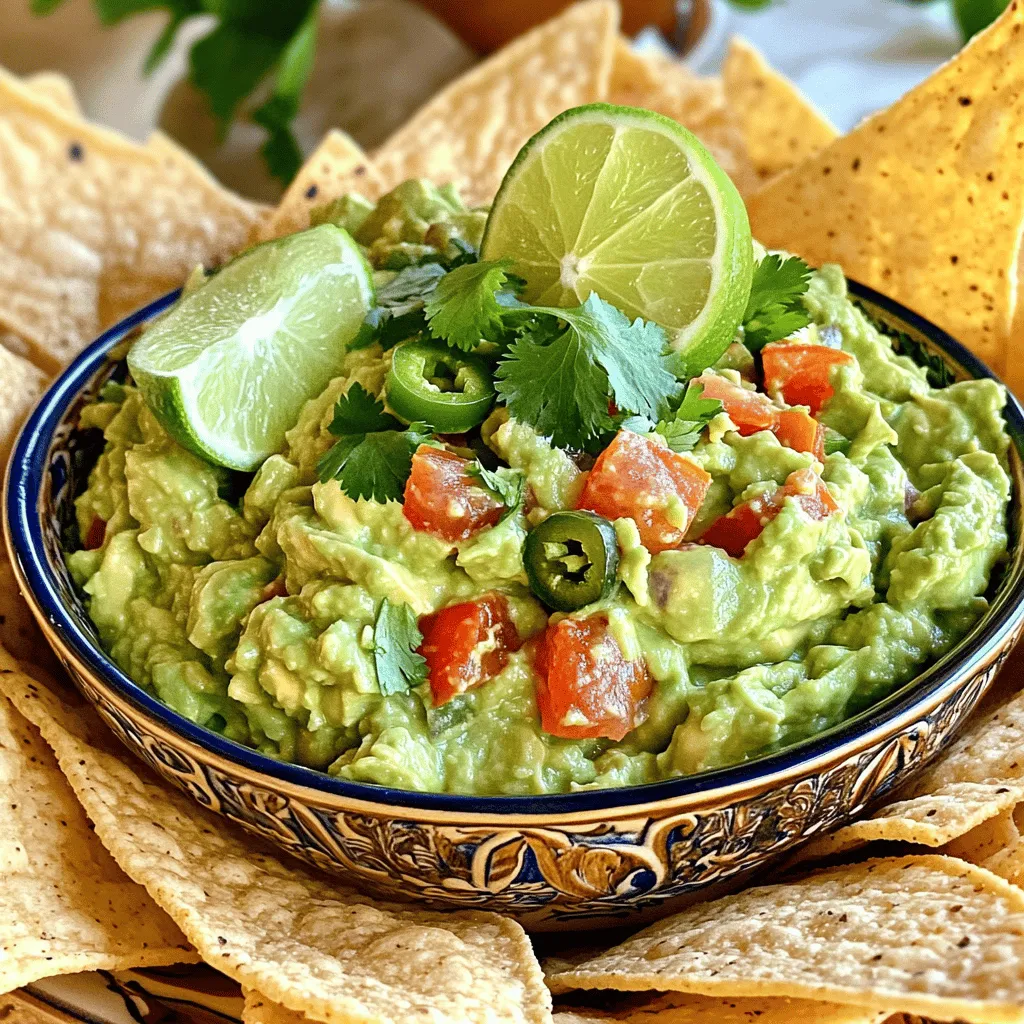
Finally, season with salt and pepper to taste. Give it one last quick mix. Serve your guacamole right away with crispy tortilla chips. Enjoy this creamy delight with friends!
Tips & Tricks
Selecting the Right Avocados
For the best guacamole, choose Hass avocados. They are creamy and rich. Look for avocados that feel soft but not mushy. A ripe avocado should yield to gentle pressure. If it feels hard, it needs more time to ripen. Place unripe avocados in a paper bag to speed up the ripening process.
Flavor Enhancements
To elevate your guacamole, try adding spices. Cumin adds warmth and depth. You can also mix in some chili powder for a smoky flavor. Want more heat? Add more jalapeño or even diced serrano peppers. You can adjust the heat level to fit your taste.
Presentation Ideas
Present your guacamole in a colorful bowl. A bright dish makes it pop! Garnish with cilantro leaves or a lime wedge. This adds freshness and color. For serving, use a wooden board or a platter. Arrange tortilla chips around your guacamole for a fun display. It makes for a perfect party snack.

Variations of Classic Guacamole
Guacamole is a versatile dish. You can change it up easily. Here are some fun ideas to make your guacamole special.
Adding Fruits and Vegetables
You can mix in fruits like mango or pineapple. They add a sweet twist. The sweetness balances the creamy avocado. You can also spice things up with different peppers. Try a serrano or habanero for a hotter guacamole. These peppers bring a nice kick!
Creamy Additions
Want a richer flavor? Try adding Greek yogurt or sour cream. These ingredients make the guacamole creamier and tangy. You can also mix in cheese. Crumbled feta or cotija adds a salty touch that works well.
Guacamole for Different Diets
Guacamole is great for many diets. It’s naturally vegan and gluten-free. Just avoid dairy if you’re vegan. For low-carb options, skip the chips. Instead, serve it with veggie sticks like carrots or cucumbers. This keeps it healthy and fresh.
Feel free to explore these variations to find your favorite.
Storage Info
How to Store Leftover Guacamole
To keep your guacamole fresh, store it in an airtight container. Press plastic wrap directly onto the surface of the guacamole before sealing the lid. This helps reduce air exposure, which causes browning. Place it in the fridge and use it within two days for the best taste.
Preventing Browning
Guacamole turns brown due to oxidation. To keep it fresh and green, use lime juice. The acid in lime juice slows down the browning process. You can also add a thin layer of water or olive oil on top before sealing the container. When ready to eat, just pour off the liquid and mix again.
Freezing Guacamole
Can you freeze guacamole? Yes, you can freeze it for later use! To freeze guacamole, spoon it into a freezer-safe bag or container. Remove as much air as possible to avoid freezer burn. When you want to use it, thaw it in the fridge overnight. For best results, use frozen guacamole within three months.
FAQs about Classic Guacamole
What is the best way to serve guacamole?
Serve guacamole in a bowl with tortilla chips. You can also add veggies like carrots or cucumber sticks. This way, everyone can dip in and enjoy. For a fun touch, garnish the guacamole with cilantro or lime slices. It makes the dish look pretty and fresh.
Can guacamole be made ahead of time?
Yes, you can make guacamole ahead of time. Store it in an airtight container to keep it fresh. To slow browning, press plastic wrap directly on the surface before sealing the lid. It will stay good for about a day in the fridge.
How can I make guacamole spicier?
Add minced jalapeño or a dash of hot sauce for heat. If you want more spice, try adding diced serrano peppers. Taste as you go to find the right balance. Remember, you can always add more spice, but it’s tough to take it away!
What to do if guacamole is too salty?
If your guacamole is too salty, try adding more mashed avocado. This will balance the saltiness. You can also mix in some diced tomatoes or a bit of lime juice. These add flavor and help reduce the salty taste.
Is guacamole healthy?
Yes, guacamole is healthy! It’s made from avocados, which are full of good fats. These fats help your heart. Guacamole also has fiber and vitamins. Enjoy it in moderation, and you get a tasty and nutritious snack.
Classic guacamole is simple and delicious with just a few key ingredients. You learned how to prepare and mix avocados, tomatoes, onions, and seasoning. We discussed tips for selecting ripe avocados and flavor boosts to make your guacamole stand out. You can also explore various fun twists, like adding fruits or creamy elements. Remember to store leftovers properly to keep them fresh. With these easy steps, you can enjoy great guacamole anytime. Now, it’s time to get creative and make your perfect dip!


![- 8 oz (about 225g) rotini or penne pasta - 1 cup cherry tomatoes, halved - 1 cucumber, finely diced - 1/2 red onion, finely chopped - 1 bell pepper (any color), diced into small pieces - 1 cup Kalamata olives, pitted and sliced in half - 1 cup feta cheese, crumbled into bite-sized pieces - 1/4 cup fresh parsley, roughly chopped - 1/4 cup high-quality olive oil - 2 tablespoons red wine vinegar (optional for flavor) - 1 tablespoon freshly squeezed lemon juice - 1 teaspoon dried oregano - Sea salt and freshly cracked black pepper to taste You can make this salad your own. Try adding: - Grilled chicken or shrimp for protein - Artichoke hearts for extra flavor - Sun-dried tomatoes for a sweeter touch - Avocado for creaminess - Different herbs like mint or dill for freshness Fresh ingredients shine in this salad. Here’s how to pick the best: - Choose firm, bright cherry tomatoes. They should smell sweet. - Look for a cucumber with smooth skin. It should feel heavy for its size. - Pick bell peppers that are shiny and firm. Avoid any with soft spots. - For olives, select Kalamata that are dark and plump. - Get feta cheese that is crumbly and moist, not dry. Using fresh ingredients elevates the flavor and makes your Easy Greek Pasta Salad a true delight. For the full recipe, check out the Mediterranean Delight Pasta Salad 🥗! Start by boiling a large pot of salted water. This step is key to flavor. Add 8 oz of rotini or penne pasta. Cook it according to the package directions until it is al dente. This should take about 8-10 minutes. Once the pasta is cooked, drain it well. Rinse the pasta under cold water to stop the cooking and cool it down. This keeps the texture just right. In a large mixing bowl, add the cooled pasta. Next, toss in 1 cup of halved cherry tomatoes, 1 diced cucumber, and 1/2 finely chopped red onion. Don’t forget 1 diced bell pepper, which adds color and crunch. Add 1 cup of Kalamata olives that you’ve pitted and sliced. Finally, sprinkle in 1/4 cup of roughly chopped fresh parsley. Mix everything well to combine the flavors. In a small bowl, whisk together the dressing. Use 1/4 cup of high-quality olive oil. Add 2 tablespoons of red wine vinegar or fresh lemon juice if you prefer a brighter taste. Squeeze in 1 tablespoon of lemon juice for extra zest. Mix in 1 teaspoon of dried oregano. Season with sea salt and freshly cracked black pepper to taste. Whisk until the ingredients blend into a smooth dressing. Drizzle the dressing over the pasta and vegetable mix. Toss gently to coat all the ingredients well with the dressing. This step is crucial for flavor. Now, softly fold in the crumbled feta cheese. Be careful not to break the cheese too much; you want those nice chunks. For the best flavor, cover the salad with plastic wrap. Place it in the refrigerator for at least 20 minutes. This waiting period allows the flavors to blend beautifully. After chilling, taste the salad. Adjust the seasoning with more salt, pepper, or lemon juice if needed. Enjoy making this Easy Greek Pasta Salad! For the Full Recipe, check the link. To make the best Greek pasta salad, start with the right pasta. Use rotini or penne, as they hold the dressing well. Cook the pasta just right. It should be al dente, so it stays firm. Rinse it under cold water after cooking. This step cools the pasta and stops it from cooking more. Next, chop your veggies evenly. This way, each bite has a bit of everything. Fresh ingredients bring the best flavor. Use ripe cherry tomatoes and a crisp cucumber. Kalamata olives add a nice briny touch. Don’t forget the feta cheese! It should be crumbly but not too small. Many people overcook the pasta. This makes it mushy and not enjoyable. Also, don’t skip the rinsing step. It keeps the pasta from sticking together. Another mistake is not seasoning enough. Taste your salad after mixing. You might need more salt, pepper, or lemon juice. Always adjust to make it perfect for your palate. Lastly, let your salad chill before serving. This step allows the flavors to blend and deepen. A quick chill of at least 20 minutes works wonders. For more flavor, try adding fresh herbs. Basil or dill can brighten the dish. If you like heat, add a pinch of red pepper flakes. This gives your salad a nice kick. Experiment with your dressing too! Swap red wine vinegar for lemon juice for a brighter taste. A splash of balsamic vinegar can also add depth. Lastly, if you want a creamier salad, mix in some Greek yogurt. It adds richness without overpowering other flavors. For the full recipe, check out the Mediterranean Delight Pasta Salad. Enjoy making this simple and colorful dish! {{image_4}} You can easily add proteins to your Easy Greek Pasta Salad. Grilled chicken or canned tuna are great choices. They boost the dish's nutrition and make it more filling. For chicken, use cooked, diced pieces. For tuna, just drain and flake it. Mix your chosen protein right into the salad for a complete meal. Feel free to switch up the veggies in your pasta salad. Different colors and flavors keep it exciting. Try adding artichoke hearts, sun-dried tomatoes, or roasted red peppers. You can also use zucchini or spinach for a fresh twist. Just chop them into small pieces and mix them in. If you want a vegan version, swap feta cheese for a plant-based alternative. Nutritional yeast can also add a cheesy flavor without dairy. For gluten-free options, use gluten-free pasta. There are many types available now. This way, you can enjoy the salad without worry. Check labels to ensure all ingredients meet your dietary needs. Find the full recipe at [Full Recipe]. To keep your Easy Greek Pasta Salad fresh, store it in an airtight container. This helps prevent air and moisture from spoiling your salad. If you have leftovers, make sure to cool the salad before sealing it. This keeps the flavors intact and avoids sogginess. You can also separate the dressing if you want to keep the salad crisp for longer. This salad tastes best cold, so there’s no need to reheat it. If you find the pasta has absorbed the dressing, add a splash of olive oil or lemon juice. Toss it gently to revive the flavors. If you stored the salad in the fridge, let it sit at room temperature for about 10 minutes before serving. This will enhance the taste and texture. Your Easy Greek Pasta Salad can last about 3 to 5 days in the fridge. Always check for any signs of spoilage. Look for changes in color or texture. If you notice any off smells, discard it. Trust your senses; if something seems off, it’s better to be safe. Enjoy your salad while it's fresh for the best taste! You can store Easy Greek Pasta Salad in the fridge for about 3 to 5 days. Keep it in a sealed container to keep it fresh. If you see any signs of spoilage, like an off smell or discoloration, it's best to toss it out. Yes, you can make this salad ahead of time! In fact, it tastes better after sitting for a while. The flavors meld together nicely. I recommend making it a few hours in advance or even the night before. Just remember to add the feta cheese right before serving to keep it fresh. Greek Pasta Salad pairs well with various dishes. You can serve it alongside grilled chicken, lamb, or fish. It also works great as a side for burgers or sandwiches. If you're having a picnic, it's perfect with some crusty bread and hummus. Yes, you can substitute feta cheese if you prefer. Try using goat cheese or ricotta for a different flavor. For a dairy-free option, you can use a plant-based cheese. Just keep in mind that the taste will change slightly, but the salad will still be delicious! This blog post covers how to make Easy Greek Pasta Salad. We discussed essential ingredients and tips for freshness. You learned steps to prepare the salad, mix the ingredients, and make the dressing. We highlighted ways to enhance flavors and avoid common mistakes. Plus, you can try various protein and veggie options. Finally, you got storage tips to keep the salad fresh. Enjoy making this salad for your next meal or gathering! It’s simple, tasty, and fun to customize.](https://goldendishy.com/wp-content/uploads/2025/06/0fc22d26-3c6f-4a8e-aae2-92058968a948-768x768.webp)

![- 2 cans (15 oz each) chickpeas, thoroughly drained and rinsed - 2 tablespoons extra virgin olive oil - 1 tablespoon smoked paprika - 1 teaspoon cayenne pepper - 1 teaspoon garlic powder - 1 teaspoon onion powder - 1 teaspoon ground cumin - Salt, to taste - Fresh cilantro for garnish (optional) Chickpeas are the star of this recipe. They are high in protein and fiber, making them a healthy choice. Each can of chickpeas gives you a great base for a crispy snack. Now, let's break down the other ingredients. Extra virgin olive oil adds healthy fats, helping the spices stick. Smoked paprika gives a deep flavor, while cayenne pepper adds heat. Garlic and onion powders give a nice aroma and a touch of sweetness. Ground cumin brings an earthy taste that balances the spices. You can adjust the salt to your liking. Fresh cilantro is optional but adds a fresh touch. Chickpeas are packed with nutrients. One serving has about 120 calories. They provide around 6 grams of protein and 2 grams of fat. You also get about 20 grams of carbs and 5 grams of fiber. Chickpeas support heart health, help with digestion, and can aid in weight management. They are a smart choice for a snack or a meal. They fit well into many diets, too! For the full recipe, check out [Full Recipe]. Start by preheating your oven to 400°F (200°C). This step is key for making the chickpeas crispy. Use a baking sheet lined with parchment paper. This helps with easy cleanup and ensures the chickpeas do not stick. Next, rinse the chickpeas under cold water. Drain them well, then pat them dry with a clean paper towel. This step is very important. Removing moisture makes the chickpeas crispier when roasting. In a large bowl, mix the drained chickpeas with olive oil and spices. Use smoked paprika, cayenne pepper, garlic powder, onion powder, ground cumin, and a pinch of salt. Toss gently so every chickpea gets coated in the spice mix. Even coverage is vital for that great flavor. Spread the seasoned chickpeas on the baking sheet in a single layer. This helps them roast evenly. Place the sheet in the oven and roast for about 25-30 minutes. Shake the pan halfway through to promote even cooking. Watch them closely near the end to avoid burning. Once they are golden and crispy, take the chickpeas out. Let them cool on the baking sheet for a few minutes. They will continue to crisp up as they cool. For a fresh touch, sprinkle chopped cilantro on top before serving. Enjoy them as a snack or use them as a topping on salads. For the full recipe, check the ingredient list above. To make your spicy roasted chickpeas super crispy, dry them well. After draining, rinse them under cold water. Then, pat them dry with a paper towel. This step is vital! Any leftover moisture will make them soggy. Spread the chickpeas in a single layer on your baking sheet. This helps them cook evenly. If they overlap, they won’t get as crisp. Adjusting the spice levels is easy. If you want more heat, add more cayenne pepper. For less spice, reduce the amount or skip it. You can also experiment with other spices! Try adding chili powder or even a dash of curry powder for a fun twist. Taste the mix before roasting to find your perfect balance. Store any leftover roasted chickpeas in an airtight container. Keep them at room temperature for up to three days. If they get soft, re-crisp them in the oven for a few minutes. This restores their crunch. Enjoy them as a snack or toss them on salads. For the full recipe, check out the original source. {{image_4}} You can change the flavor of spicy roasted chickpeas easily. Try adding different spices or herbs. Here are some great ideas: - Cumin: Boost the earthy flavor. - Chili powder: Add more heat. - Turmeric: For a warm, golden color. - Herbs: Experiment with thyme or rosemary for fresh notes. For a sweet twist, mix in a little cinnamon and honey. Toss your roasted chickpeas with a bit of honey after cooking. The sweetness pairs well with spice. It creates a tasty snack that balances flavors. Spicy roasted chickpeas work well with many dishes. They are great as a snack on their own. You can also add them to salads or grain bowls for extra crunch. - Salads: Sprinkle them over leafy greens. They add texture and flavor. - Bowls: Use them in grain bowls for a hearty meal. - Snacking: Serve them in a bowl at parties for a fun treat. Feel free to mix them into soups for added richness. The crispy texture enhances warm dishes too. Get creative and enjoy these versatile little gems! For the full recipe, check the earlier section. To keep your spicy roasted chickpeas fresh, place them in an airtight container. This helps lock in their crunch. You can store them on the counter for up to three days. For longer storage, try the fridge, where they can last up to a week. However, they might lose some crispness in the fridge. If you want to save them for later, consider freezing them. In the freezer, they can last for about three months. Just remember to let them cool completely before storing. When you’re ready to enjoy leftovers, the best way to reheat them is in the oven. Preheat your oven to 375°F (190°C). Spread the chickpeas on a baking sheet in a single layer. Heat them for about 10 minutes. This method helps restore their crunch and flavor. You can also use an air fryer for quick reheating. Set it to 350°F (175°C) and heat for five to seven minutes. Both methods keep your chickpeas crispy and tasty! If you can't use chickpeas, try these options: - Canned white beans: They are creamy and mild in taste. - Edamame: These young soybeans add a nice crunch. - Lentils: Cooked lentils can work, but they won’t be as crunchy. - Roasted pumpkin seeds: They give a great crunch and are nutty. These alternatives are great for those with dietary restrictions or different tastes. Yes, you can easily adapt this recipe for an air fryer. Here’s how: - Preheat your air fryer to 400°F (200°C). - Follow the same steps to season your chickpeas. - Place them in the air fryer basket in a single layer. - Cook for about 15 to 20 minutes, shaking the basket halfway. This method gives you extra crispiness while saving time. The spice level of spicy roasted chickpeas is adjustable. The cayenne pepper in the recipe gives a kick, but you can change it. - For mild: Use less or skip the cayenne. - For extra spicy: Add more cayenne or include chili powder. Taste as you go to find your perfect heat! Yes, spicy roasted chickpeas are naturally gluten-free. Chickpeas do not contain gluten, making them a safe choice for those with gluten sensitivities. Always check your spice labels to ensure no gluten-containing ingredients are added. Enjoy these snacks worry-free! For the full recipe, visit the Spicy Roasted Chickpeas section. This blog post covered how to make spicy roasted chickpeas. We went through the ingredients, detailed the steps, and shared tips for perfecting your snack. Chickpeas are healthy, tasty, and easy to customize. You can adjust spices or enjoy them sweet. Whether you serve them in salads or as a snack, there are many ways to enjoy them. With proper storage, your leftovers will stay fresh. Get ready to impress with this simple recipe!](https://goldendishy.com/wp-content/uploads/2025/07/52a5824a-88a4-4b76-bbe8-61087731f54f-768x768.webp)

