Cilantro Lime Grilled Fish Flavorful and Simple Recipe

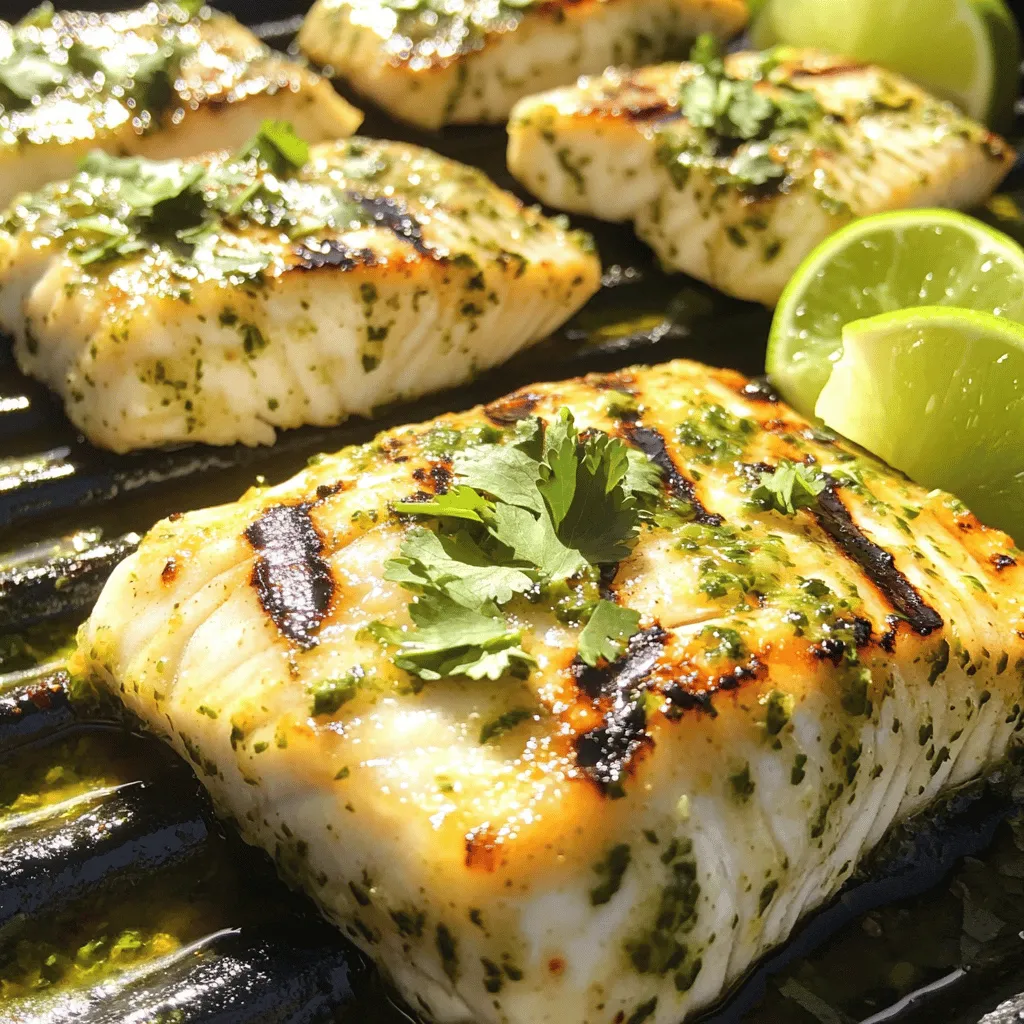
Are you ready to transform your dinner routine? This Cilantro Lime Grilled Fish recipe is your ticket to a fresh and thrilling meal. With just a handful of simple ingredients, you can create a dish bursting with zesty flavor. Perfect for a quick weeknight dinner or weekend gathering, this recipe will impress everyone at your table. Join me as we dive into the steps to grill fish that’s delicious and easy!
Ingredients
List of Ingredients
– 4 fillets of firm white fish (such as tilapia or snapper)
– 1/4 cup fresh cilantro, finely chopped
– 3 tablespoons fresh lime juice (about 2 limes)
– 1 teaspoon lime zest (grated outer peel of 1 lime)
– 2 cloves garlic, minced
– 1 teaspoon ground cumin
– 1/2 teaspoon chili powder
– 1/2 teaspoon sea salt
– 1/4 teaspoon freshly ground black pepper
– 2 tablespoons extra virgin olive oil
– Lime wedges, for serving
Measurement Notes
To make your cooking easy, know that volume is not the same as weight. A cup of cilantro weighs less than a cup of water. Use a kitchen scale for best results.
Ingredient Substitutions
If you do not have cilantro, try using parsley. It has a fresh taste too. For fish, you can use salmon or cod. Both offer a different flavor and texture.
Step-by-Step Instructions
Marinade Preparation
To start, mix the marinade ingredients thoroughly. In a small bowl, combine the chopped cilantro, lime juice, lime zest, minced garlic, ground cumin, chili powder, sea salt, black pepper, and olive oil. This mix brings bright flavors to your fish. Make sure everything blends well for consistent taste. If you want a smoother texture, you can whisk it faster.
Marinating the Fish
Next, we need to marinate the fish. Place the fillets in a shallow dish or a resealable plastic bag. Pour the marinade over the fish. Ensure each piece is evenly coated. This step is key for great flavor. Cover the dish or seal the bag, then refrigerate for at least 30 minutes. If you have more time, letting it sit for up to 2 hours works wonders.
Grilling Process
Now, let’s get to grilling. Preheat your grill to medium-high heat. If you use a grill pan, lightly coat it with oil. This helps prevent sticking and gives you nice grill marks. After marinating, take the fish out of the fridge. Let excess marinade drip off before placing the fillets on the hot grill. Cook for about 3-4 minutes on each side. The fish is done when it flakes easily with a fork and has lovely grill marks.
Serving Suggestions
Finally, it’s time to serve. Transfer the grilled fish to a plate and let it rest for a couple of minutes. This helps keep it juicy. Garnish with fresh cilantro for a pop of color. Serve with lime wedges to add more citrus flavor. Pair the fish with a light salad or coconut rice. These sides enhance the dish and create a refreshing meal.
Tips & Tricks
Grilling Tips
To make great grilled fish, start with the right temperature. Preheat your grill to medium-high heat. You want it hot enough to sear the fish, but not so hot that it burns. A good way to test is to hold your hand above the grill. If you can only keep it there for 2-3 seconds, you’re ready to go.
You can know your fish is done when it flakes easily with a fork. Look for a nice, opaque color too. If it looks shiny and translucent, it needs more time.
Flavor Enhancement
To boost lime and cilantro flavors, use fresh herbs and juice. They pack more punch than dry spices. When you chop cilantro, do it just before you use it. This keeps it fresh and bright. For lime, always use fresh juice instead of bottled. The taste is far better!
If you have to use dried spices, use less. They are stronger than fresh. A little goes a long way.
Meal Prep & Planning
To make quick weeknight meals, prep in advance. You can marinate your fish the night before. Just put it in the fridge, and it’s ready to cook when you are.
Portion control is also key. When you prepare your fish, cut it into serving sizes. This way, you can grab just what you need. Less waste means more meals!Happy grilling!

Variations
Flavor Variations
You can change the citrus in this dish. Instead of lime, try orange or lemon. Each option brings a fresh twist. If you like heat, add jalapeños to the marinade. This will spice things up! You can slice them thin or add them whole. Either way, it gives a nice kick.
Cooking Method Alternatives
Grilling is great, but you have options. You can bake or broil the fish for a different flavor. Baking keeps the fish moist, while broiling gives it a nice crust. If you prefer, pan-searing is also a good choice. It allows you to control the heat better and adds a lovely brown color.
Serving Variation Ideas
How you serve the fish can change the meal. Use different sauces or dressings. A mango salsa or a creamy avocado sauce adds flavor and fun. You can also change up the sides. Pair the fish with rice, salad, or grilled veggies from other cuisines. Each side will bring new tastes and textures to your meal.
Storage Info
Storing Leftovers
To keep your cilantro lime grilled fish fresh, store it in the fridge. Use an airtight container to seal in the flavors. This helps prevent the fish from drying out. Properly stored, the fish stays good for up to three days. If you want to keep it longer, consider freezing it. Just wrap each fillet tightly in plastic wrap before placing it in a freezer bag. This way, the fish can last for about two months in the freezer without losing its taste.
Reheating Tips
When it comes to reheating grilled fish, you want to avoid drying it out. One great method is to use the oven. Preheat it to 350°F (175°C). Place the fish on a baking sheet and cover it with foil. This keeps the moisture in while it warms up. Heat for about 10-15 minutes, or until it’s hot throughout.
You can also use the microwave. Just place the fish on a microwave-safe plate and cover it with a damp paper towel. Heat for short bursts of 30 seconds until warm.
For both methods, choose storage containers that are airtight and microwave-safe. This ensures the fish stays fresh and tasty when you reheat it. Want to keep things simple? Just heat what you need, so you don’t have to reheat all the leftovers at once. Enjoy your meal!
FAQs
How to select the best fish for grilling?
When choosing fish for grilling, look for firm white fish. Some great options are:
– Tilapia
– Snapper
– Halibut
– Mahi-mahi
These fish hold up well on the grill. They have a mild taste that pairs nicely with the cilantro and lime. Freshness is key, so choose fish that smells clean and has bright, clear eyes.
Can I make this recipe ahead of time?
Yes, you can prepare this recipe ahead of time. Marinate the fish for at least 30 minutes. For more flavor, marinate for up to 2 hours. If you plan to prep ahead, keep the marinated fish in the fridge. This makes cooking quick and easy when you’re ready to grill.
What can I serve with cilantro lime grilled fish?
You can serve this fish with many delicious sides. Here are some ideas:
– A light green salad with a citrus dressing
– Coconut rice for a tropical touch
– Grilled veggies like zucchini and bell peppers
– Quinoa salad for a hearty complement
These sides will enhance the fresh flavors of your grilled fish.
How do I know when the fish is done cooking?
To check if your fish is done, look for a few signs:
– The fish should flake easily with a fork.
– It should have nice grill marks.
– The inside should be opaque, not translucent.
Cooking times can vary, but aim for about 3-4 minutes per side. This ensures a perfect, juicy result.
This recipe for cilantro lime grilled fish is simple yet packed with flavor. You learned about the essential ingredients and how to prepare them. The step-by-step instructions guide you through marinating and grilling with ease. We explored tips to enhance flavors and variations to keep things fresh.
Remember, grilling is both an art and a science. With practice, you can master it. Enjoy your meal prep and have fun experimenting with different flavors. Now go create a delicious dish that will impress your family or friends!


![- 2 cups elbow macaroni - 4 cups water - 1 teaspoon salt - 2 tablespoons unsalted butter - 1 cup sharp cheddar cheese, shredded - 1 cup Monterey Jack cheese, shredded - 1/2 cup cream cheese, softened - 1 teaspoon garlic powder - 1 teaspoon onion powder - 1/4 teaspoon black pepper - 1/4 teaspoon smoked paprika - Fresh parsley, chopped - Chives, chopped To make delicious Instant Pot mac and cheese, you need a few key ingredients. First, the elbow macaroni is your base. It holds the sauce well and cooks up perfectly. Water helps cook the pasta and creates steam. The salt adds flavor to the mix. Unsalted butter enriches the dish, making it creamy. Next, the cheese! Cheddar cheese gives that classic flavor, while Monterey Jack adds creaminess. Cream cheese helps bind everything together. For seasonings, garlic powder and onion powder bring depth. Black pepper adds a bit of heat. Smoked paprika gives a nice smoky touch. Finally, if you want to garnish, fresh parsley and chives add color and flavor. These ingredients come together to create a comforting dish that feels like a hug in a bowl. You can find the full recipe [here]. Start by adding the elbow macaroni into the Instant Pot. Next, pour in 4 cups of water. Sprinkle in 1 teaspoon of salt for flavor. Make sure all the macaroni is covered in water. Secure the lid tightly on the Instant Pot. Set the pressure release valve to the sealing position. Select the manual high-pressure setting. Adjust the timer to cook for 4 minutes. When the cooking cycle ends, do a quick pressure release. Carefully turn the valve to venting. Wait until the pressure is fully released. Open the lid slowly, being cautious of steam. Stir the noodles gently to separate any that are stuck together. Add 2 tablespoons of butter right away. Then, mix in 1 cup of sharp cheddar cheese, 1 cup of Monterey Jack cheese, and 1/2 cup of softened cream cheese. Next, add 1 teaspoon of garlic powder, 1 teaspoon of onion powder, 1/4 teaspoon of black pepper, and 1/4 teaspoon of smoked paprika. Stir well until the cheese melts into a creamy sauce. If your mac and cheese is too thick, add a splash of water or milk. Stir until it reaches your desired creamy consistency. Taste your mac and cheese and adjust the seasoning as needed. You can add a pinch more salt or pepper if you want. Serve your dish hot and enjoy the creamy comfort of this Instant Pot mac and cheese. For the full recipe, check the details above. To make your mac and cheese shine, choose a mix of cheeses. I love sharp cheddar for its bold taste and Monterey Jack for creaminess. Together, they create a rich flavor that sings. For a twist, add a bit of gouda or parmesan for depth. Preventing sticking is key. Make sure to stir the pasta before cooking. Adding a touch of oil helps too. This keeps the macaroni from clumping together in the pot. Cook in larger batches to save time. The Instant Pot can handle it! You can double the recipe easily. This way, you have leftovers for quick meals later. Just store them in the fridge. Clean-up can be quick if you act fast. Rinse the pot right after use. Soaking it for a few minutes also helps. Use a soft sponge to keep it scratch-free. For a stunning display, serve your mac and cheese in a beautiful bowl. Top it with extra cheese or crispy breadcrumbs for texture. Fresh herbs like parsley or chives add color and flavor too. Pair your dish with a simple salad or garlic bread. This makes a balanced meal that everyone will enjoy. {{image_4}} You can switch up the cheese for fun. Try using Gouda for a rich taste. It melts well and adds creaminess. Parmesan also works great. It gives a salty, nutty kick. If you're dairy-free, nut cheese is a good choice. It can make your dish creamy while keeping it plant-based. Want to make your mac and cheese more exciting? Add veggies! Broccoli or spinach mixes in nicely. They boost both flavor and nutrition. You can also throw in proteins like chicken or bacon. These ingredients add heartiness and make the dish more filling. If you like heat, spice it up! Add jalapeños for a fresh kick. Hot sauce can also bring the heat. Another fun idea is using smoky chipotle. It gives a deep, smoky flavor that pairs well with cheese. These spicy twists can take your mac and cheese to the next level. For the full recipe, check out the instructions above. Enjoy creating your perfect bowl of mac and cheese! After you make your Instant Pot mac and cheese, let it cool down first. This helps keep the creamy texture. Once cooled, place it in an airtight container. I like to use glass containers for easy reheating. Store it in the fridge for up to three days for the best taste. When it’s time to enjoy those leftovers, you can reheat them in two ways. The microwave is quick and easy. Just place a portion in a bowl and cover it. Heat for one minute, stir, and heat again if needed. The stovetop method keeps the texture nice. Add a splash of milk to a pan, stir in the mac and cheese, and heat on medium until hot. You can freeze mac and cheese for later! Let it cool completely, then spoon it into freezer-safe bags. Press out as much air as possible before sealing. It can stay fresh for about three months. To thaw, move it to the fridge overnight. After thawing, reheat it using the stovetop method for a creamy finish. To make Instant Pot Mac and Cheese, you start by adding elbow macaroni to the pot. Pour in water and add salt. Then, secure the lid and cook on high pressure for 4 minutes. After that, release the pressure quickly. Open the lid and stir the pasta. Add butter and mix in your cheeses. Finally, stir in the seasonings until smooth. You can find the full recipe for more details. Yes, you can use gluten-free macaroni. Just substitute regular pasta with gluten-free options. The cooking time may stay the same, but check the package for specific instructions. Some gluten-free pasta might need a little less time, so watch closely. This way, you can enjoy a creamy dish without gluten. If your mac and cheese is too thick, don’t worry! You can fix it easily. Add a splash of water or milk to the pot. Stir well until it reaches your desired creaminess. If it still seems thick, add a bit more liquid. This will help create that perfect velvety texture. You learned how to make Instant Pot mac and cheese with ease. We covered ingredients, cooking steps, and tips for perfect flavor. You can customize your dish with different cheeses and add-ins. Remember to store leftovers properly to enjoy later. Now it’s your turn to create a creamy, cheesy delight. Experiment with flavors and share your results! Enjoy your cooking journey.](https://goldendishy.com/wp-content/uploads/2025/07/fbbf4859-6ee8-4460-a645-018ee95cc89f-768x768.webp)

. {{image_4}} To make your Lemon Basil Pasta Salad heartier, add protein. Grilled chicken is a great choice. Cook it simply with salt and pepper. Shrimp also works well when sautéed until just pink. For a vegetarian twist, use chickpeas or black beans. They add good texture and flavor. You can even sprinkle in some diced tofu for a plant-based option. The key is to balance flavors while keeping it light. Feel free to mix up the veggies in your salad. Instead of cherry tomatoes, try sun-dried tomatoes for a richer taste. Bell peppers can be swapped for zucchini or carrots. You can even toss in some spinach for a nutrient boost. Just remember to use fresh, crisp veggies for the best flavor. The colors will make your dish pop while adding more vitamins. While the lemon vinaigrette shines, other dressings can change the salad's vibe. A balsamic vinaigrette brings a sweet tang, while a creamy dressing adds richness. Consider a pesto for an Italian twist. Just be mindful of the dressing amount; you want to enhance, not overpower. Experimenting with dressings keeps your pasta salad exciting and fresh. For the full recipe, check the details above. After you enjoy your Lemon Basil Pasta Salad, store any leftovers in an airtight container. Keep the salad in the fridge. Make sure it is cool before sealing it. This helps to keep the flavors fresh. If you added feta cheese, cover it with a bit of extra dressing. This keeps it from drying out. Your Lemon Basil Pasta Salad can last up to three days in the fridge. After that, the veggies may lose their crispness. The salad may still taste good, but it won’t be as fresh. Always check for any off smells before eating. This salad is best served cold. If you want to refresh it, add a splash of olive oil and lemon juice. Toss it gently to mix. If you must reheat, do so briefly in the microwave. Heat it for just 15-30 seconds. This will warm it without cooking the veggies. Yes, you can make this pasta salad ahead. It tastes better after sitting in the fridge. I suggest preparing it up to a day in advance. Store it in an airtight container. Just remember to leave out the basil until you serve it. This keeps the basil fresh and bright. If you need gluten-free pasta, there are great choices. Look for pasta made from rice, quinoa, or chickpeas. Brands like Banza or Tinkyada offer tasty options. They hold up well in salads. Cook them according to the package directions for the best results. To make this pasta salad vegan, skip the feta cheese. You can add extra veggies for flavor. Consider using avocado for creaminess. Nutritional yeast can add a cheesy taste, too. Just mix it in with the dressing for a nice touch. For the dressing, all the other ingredients are already vegan-friendly. In this blog post, I shared how to make a refreshing lemon basil pasta salad. We covered key ingredients, step-by-step instructions, and tips for perfecting your dish. You learned how to add variety with proteins and different veggies. Storing leftover salad properly ensures it stays fresh. By answering important FAQs, I aimed to make this recipe easy for you. Enjoy this tasty dish at your next meal or gathering. With these insights, you'll impress everyone with your delicious creation!](https://goldendishy.com/wp-content/uploads/2025/06/6f7717e1-8c71-4a8f-834a-cf8283cfe0e6-768x768.webp)


