Chili Lime Roasted Chickpeas Flavorful Snack Idea

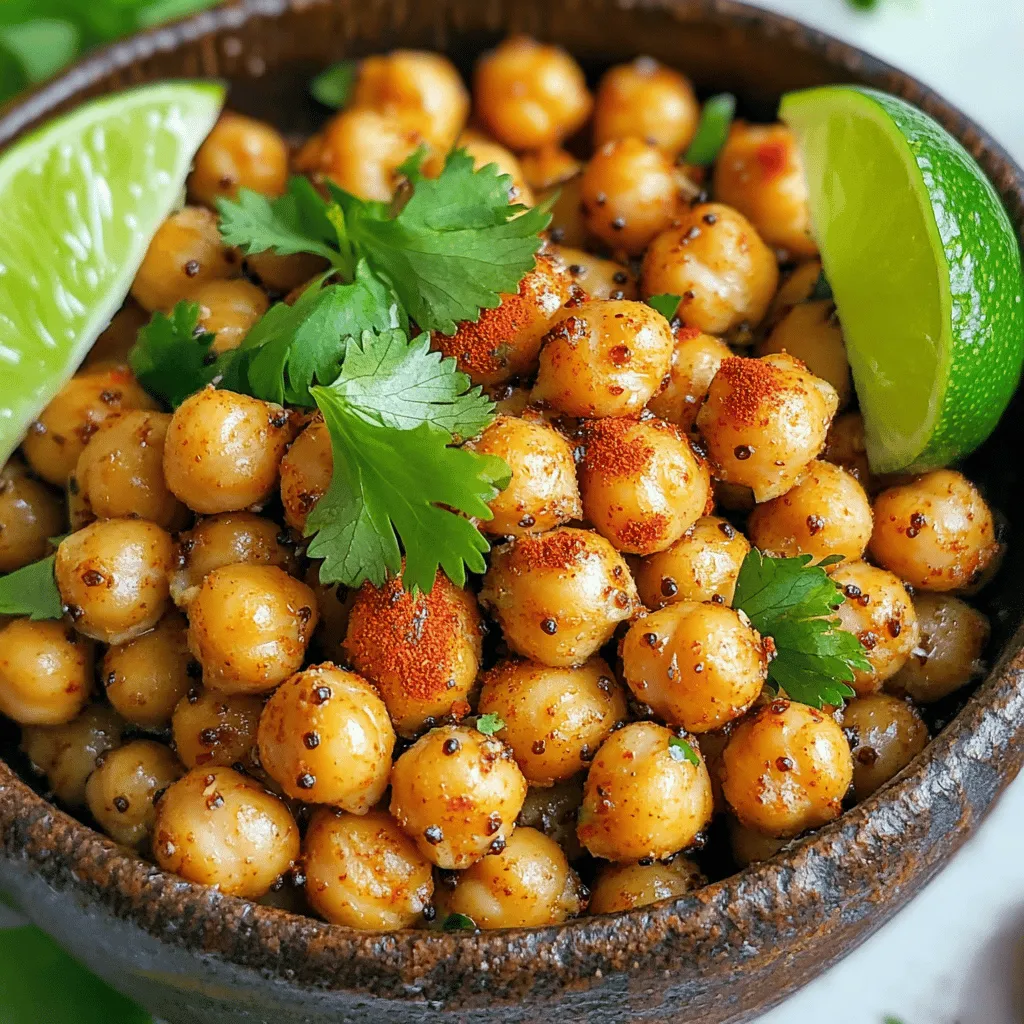
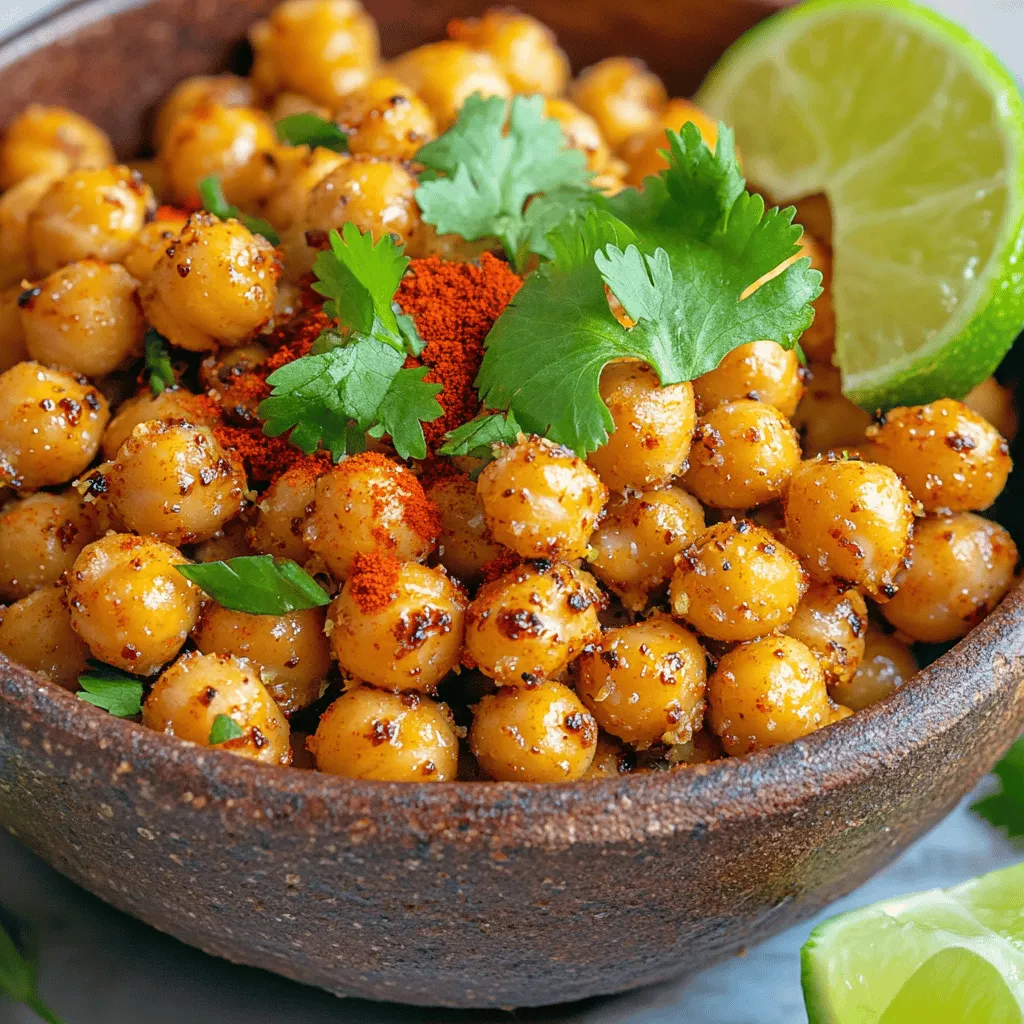
Looking for a tasty snack that’s both crunchy and healthy? Try my Chili Lime Roasted Chickpeas! They’re quick to make and packed with flavor. In just 30 minutes, you’ll have a zesty treat perfect for munching or adding to your meals. Plus, these chickpeas are great for customizing with different spices. Let’s dive into this easy recipe and spice up your snacking game!
Ingredients
Main Ingredients for Chili Lime Roasted Chickpeas
– 1 can (15 oz) chickpeas, drained and rinsed
– 2 tablespoons olive oil
– 1 teaspoon chili powder
– 1 teaspoon smoked paprika
– 1/2 teaspoon ground cumin
– 1/2 teaspoon garlic powder
– Zest of 1 lime
– Juice of 1 lime
– Salt and freshly cracked black pepper to taste
– Fresh cilantro, finely chopped (for garnish)
To make Chili Lime Roasted Chickpeas, gather all your ingredients first. The chickpeas are the star of this dish. They are packed with protein and fiber. Using canned chickpeas saves time. Just make sure to drain and rinse them well.
Next, the olive oil is a must. It helps the spices stick and adds flavor. The spices are key here. Chili powder gives heat, while smoked paprika adds depth. Ground cumin brings warmth, and garlic powder packs a punch.
Then, we add fresh ingredients. Lime zest and juice balance the spice with a bright, tangy taste. Salt and pepper enhance all the flavors. Finally, fresh cilantro adds a pop of color and freshness.
Step-by-Step Instructions
Preparing the Oven and Chickpeas
– Preheat the oven to 400°F (200°C).
– Dry the chickpeas thoroughly with a kitchen towel.
First, I set my oven to 400°F (200°C). This temperature helps the chickpeas become crispy. While the oven heats, I spread the rinsed chickpeas on a clean kitchen towel. I pat them dry gently with another towel. This step helps remove moisture. Dry chickpeas roast better and turn crispier.
Seasoning the Chickpeas
– Combine chickpeas with olive oil and spices.
– Toss until evenly coated.
Next, I grab a large bowl. I pour in the dried chickpeas and add 2 tablespoons of olive oil. Then, I sprinkle in 1 teaspoon of chili powder, 1 teaspoon of smoked paprika, and 1/2 teaspoon of ground cumin. I also add 1/2 teaspoon of garlic powder, lime zest, and lime juice. I mix everything well with my hands. Each chickpea should be coated in spices and oil. This mix gives them bold flavor.
Roasting the Chickpeas
– Arrange seasoned chickpeas on the baking sheet.
– Roast for 25-30 minutes, stirring halfway.
Now, I take a baking sheet and line it with parchment paper. This step stops the chickpeas from sticking. I spread the seasoned chickpeas out in a single layer. It’s important not to crowd them. I place the sheet in the oven and set a timer for 25-30 minutes. Halfway through, I stir the chickpeas to ensure they roast evenly. I check on them often to avoid burning. Once they turn golden brown, I pull them out. Enjoy these tasty snacks warm or let them cool.
Tips & Tricks
Achieving Maximum Crispiness
To get your chickpeas crispy, start by drying them well. After rinsing, spread them on a clean towel. Pat them dry gently with another towel. This step is key. If they are wet, they will steam instead of roast.
Next, roast at the right temperature. Preheat your oven to 400°F (200°C). This hot setting helps them crisp up nicely. Spread the chickpeas in a single layer on the baking sheet. Avoid overcrowding them. Give them space to breathe while roasting.
Adjusting Seasonings
You can enhance the flavors of your chickpeas easily. If you love lime, add more lime juice or zest. You can also try extra spices. A pinch of cayenne pepper gives them a nice kick.
Before serving, taste the chickpeas. Adjust the seasoning if needed. Add a bit more salt, pepper, or lime juice. This simple step makes a big difference in flavor. Enjoy your tasty snack!

Variations
Flavor Additions
You can change the flavor of your roasted chickpeas easily. Try adding cayenne for heat. It gives a nice kick that many love. Curry powder is another fun option. It adds a warm, earthy taste.
If you want a cheesy flavor, sprinkle in some nutritional yeast. This adds a rich taste without using dairy. You can mix and match spices to find your favorite combo. Don’t be afraid to experiment!
Serving Suggestions
Chili lime roasted chickpeas make a great topping for salads and bowls. They add crunch and flavor to fresh greens or grain bowls. You can also use them as a snack. Serve them with dips like hummus or guacamole.
Another fun idea? Toss them in a wrap or sandwich. They give a nice crunch and add protein. You can also mix them into soups for added texture. The options are endless, so get creative!
Storage Info
Storing Leftovers
To keep your roasted chickpeas crispy, store them in an airtight container. Place a paper towel inside to absorb moisture. This helps maintain their crunch. You can store them at room temperature for up to three days. If you want them to last longer, consider refrigerating them. They may lose some crispiness in the fridge.
Reheating Tips
When you’re ready to enjoy the leftovers, reheating is key. Use an oven to bring back their crunch. Preheat your oven to 350°F (175°C). Spread the chickpeas on a baking sheet and heat for about 10 minutes. This method keeps them crispy.
You can also add a sprinkle of lime juice or chili powder when reheating. This boosts the flavor and brings back that fresh taste.
FAQs
Can I use dried chickpeas instead of canned?
Yes, you can use dried chickpeas. First, soak them overnight in water. This helps them soften. After soaking, drain and rinse the chickpeas. Next, cook them in boiling water for 1 to 1.5 hours. Test them until they’re tender. You will need about 1.5 cups of cooked chickpeas for this recipe. Using dried chickpeas gives a fresh taste, but it does take more time.
How can I make these chickpeas spicier?
To add more heat, try these tips:
– Add cayenne pepper or crushed red pepper flakes.
– Increase the amount of chili powder in the mix.
– Mix in some diced jalapeños before roasting.
– Serve with a spicy dipping sauce for extra flavor.
These options help you customize the heat level to your taste.
What are the nutritional benefits of roasted chickpeas?
Roasted chickpeas are a healthy snack choice. They are high in protein, which helps build muscles. They also contain fiber, which aids digestion. Each serving gives you vitamins and minerals like iron and magnesium. Plus, they are low in calories and fat. This makes them a smart option for snacking. Enjoy them guilt-free while getting great nutrition.
Chili lime roasted chickpeas are quick and fun to make. You learned about the main ingredients, step-by-step instructions, and tips for the best results. These snacks are not just tasty; they’re also healthy. You can mix up the flavors and serve them in many ways. Store leftovers properly to keep them crispy. Roasting chickpeas adds crunch to salads or bowls. Experiment with spices to find your favorite flavor. Enjoy your cooking adventure with these simple, nutritious snacks!


![- Bell pepper (red, yellow, or green) - Zucchini and yellow squash - Red onion and cherry tomatoes - Mushrooms When I make grilled veggie skewers, I choose a mix of colorful vegetables. They not only look great but also taste fantastic. Bell peppers are a must. You can pick red, yellow, or green. Each type adds a sweet taste. Zucchini and yellow squash are next. Their soft texture and mild flavor work well on the grill. I like to cut them into thick rounds. This helps them hold their shape while cooking. Red onions add a nice bite. I cut them into wedges so they cook evenly. Cherry tomatoes are fun and juicy. I use them whole, so they burst with flavor when grilled. Finally, I love mushrooms. They soak up the marinade and get smoky when grilled. - Olive oil, garlic powder, smoked paprika - Salt and black pepper To bring out the flavors, I use a simple marinade. I drizzle extra virgin olive oil over the veggies. It helps the spices stick and adds richness. I sprinkle garlic powder for a savory kick and smoked paprika for a hint of smoke. Don’t forget to add salt and black pepper. They enhance all the natural flavors. I mix everything well, so each piece is coated. This step is crucial for a tasty outcome. - Fresh basil leaves After grilling, I like to add fresh basil leaves. They give a burst of color and flavor. Just tear them up and sprinkle on top of the skewers. This final touch makes the dish even more inviting. For the full recipe, check out the [Full Recipe]. First, we need to get our grill ready. Preheating is key to good grilling. It helps to cook the veggies evenly and gives them nice grill marks. Set your grill to medium-high heat. This temperature is perfect for cooking our colorful skewers. Let’s prep our vegetables. Start by cutting them into pieces. Cut the bell pepper into 1-inch chunks. Slice the zucchini and yellow squash into thick rounds. Cut the red onion into wedges. Keep the cherry tomatoes whole and use whole mushrooms or half them if they are large. Next, we’ll mix the veggies. Place all the cut veggies in a big bowl. Drizzle them with olive oil and sprinkle in garlic powder, smoked paprika, salt, and black pepper. Now, toss everything gently with your hands or a spatula. Make sure each piece is well-coated with the seasoning. This step adds a lot of flavor! Now comes the fun part: assembling the skewers. Take a skewer and start threading the veggies. Alternate the types of veggies to create a colorful mix. This not only looks great but also adds different flavors in every bite. Be careful when handling the skewers. The ends can be sharp, so keep your hands clear when you thread the veggies. Once you finish, your skewers are ready for the grill. For the full recipe, check out the details above. Grilling veggie skewers is simple and fun. Aim for a medium-high heat. This ensures your veggies cook well. Grill them for about 10-12 minutes. Turn them often to get nice grill marks. You want them tender but not mushy. To boost flavor, try adding spices like cumin or dill. A splash of lemon juice also brightens the taste. For a smoky flavor, use smoked paprika or a dash of liquid smoke. Marinades can add depth, too. A blend of olive oil, vinegar, and herbs works great. For a beautiful presentation, stand skewers upright in a holder. You can also lay them on a platter. Drizzle with olive oil and sprinkle fresh herbs. Pair the skewers with dips like hummus or tzatziki. These add flavor and make serving easier. Check out the Full Recipe for more ideas! {{image_4}} You can mix and match veggies for your skewers. Seasonal vegetables make great choices. In summer, try zucchini and corn. In fall, use butternut squash and Brussels sprouts. You can also add eggplant for a nice smoky taste. Asparagus gives a nice crunch and fresh flavor. If you can’t grill, you can bake or roast your skewers. For oven-baking, preheat your oven to 400°F (200°C). Place the skewers on a baking sheet. Bake for about 20 minutes. Keep an eye on them to ensure they don’t burn. Roasting gives a rich taste and helps the flavors blend well. This recipe is easy to adapt for different diets. For a vegan version, stick to the veggies and oil. If you need gluten-free options, all ingredients in this recipe work well. Just make sure to check labels on sauces or seasonings. You can enjoy tasty skewers that fit your needs by making small swaps. For the full recipe, check the details above. To keep your grilled veggie skewers fresh, use airtight containers. Store them in the fridge right after they cool down. Make sure to eat them within three days for the best taste and quality. If you notice any moisture, add a paper towel inside the container to soak it up. You can reheat skewers in the microwave or on the grill. For the microwave, place them on a plate and cover them with a damp paper towel. Heat in short bursts to avoid overcooking. To reheat on the grill, warm it up and place the skewers back on for a few minutes. This keeps the texture nice and doesn't make them soggy. To freeze skewers, wrap them tightly in plastic wrap and place them in a freezer bag. Make sure to remove as much air as possible. They can last for up to three months in the freezer. When you’re ready to eat them, thaw them in the fridge overnight. Reheat on the grill or in the oven to restore their flavor and texture. For the full recipe, check out the details above. I prefer metal skewers for grilling. They heat up quickly and help cook the veggies evenly. They are also reusable, making them eco-friendly. Wooden skewers are lighter but can burn easily. If you use wooden skewers, you need to soak them in water first. This helps prevent them from catching fire. Both types work well, so choose what you like best. Yes, you can use frozen vegetables. They are convenient and save time. However, frozen veggies may not have the same texture as fresh ones. They can become mushy when cooked. If you choose to use them, thaw them first. Pat them dry to remove extra moisture before grilling. This helps keep them from steaming and allows for better grilling. To prevent sticking, coat your vegetables with olive oil. This adds flavor and creates a barrier. Preheat your grill well before adding the skewers. A hot grill helps to sear the veggies quickly. Turn them gently with tongs. Avoid using a fork, as this can pierce the vegetables and let juices escape. Keep an eye on them, so they don't burn. Soaking wooden skewers is a good idea. It prevents them from burning on the grill. Soak them for at least 30 minutes before using. This helps them stay intact while grilling. If you skip soaking, watch them closely as they cook. You might need to turn down the heat to avoid burning. Soaking is a simple step that makes grilling easier. This blog post guides you on making vibrant vegetable skewers. We covered key ingredients, including bell peppers, zucchini, and cherry tomatoes. I shared tips for preparing the grill and veggies, along with assembling skewers safely. Remember optimal grilling time and temperature for the best results. You can try different vegetables or cooking methods for variety. Don’t forget about storing leftovers properly for later enjoyment. With the right techniques, you’ll create tasty skewers that impress. Your grilling skills can elevate any meal!](https://goldendishy.com/wp-content/uploads/2025/06/899b9bee-2fb2-475c-b5a5-3b543ce01d01-768x768.webp)
![To create this vibrant salad, gather these fresh ingredients: - 1 medium zucchini, sliced into half-moons - 1 bell pepper (red or yellow for sweetness), chopped into bite-sized pieces - 1 small eggplant, diced into uniform cubes - 1 cup cherry tomatoes, halved for a burst of sweetness - 1 red onion, cut into wedges for flavor - 3 tablespoons balsamic vinegar for a tangy kick - 2 tablespoons extra-virgin olive oil for richness - 1 tablespoon honey to balance the acidity - Sea salt and freshly cracked pepper to taste - 1 teaspoon dried oregano for an aromatic touch - 1 cup mixed greens (arugula, spinach, or your favorites) - ¼ cup feta cheese, crumbled (optional, for creaminess) - Fresh basil leaves for a fragrant garnish Not all ingredients need to be set in stone. Here are some smart swaps: - Use yellow squash instead of zucchini. The texture remains similar. - Any color bell pepper works well; green adds a more bitter taste. - Swap eggplant for mushrooms for a different texture and flavor. - Try different vinegars, like red wine vinegar, if balsamic is not available. - Maple syrup can replace honey for a vegan option. - For a dairy-free choice, omit feta cheese or use a vegan alternative. Choosing the right veggies makes a big difference. Here’s how to select the best: - Look for firm zucchini with shiny, smooth skin. Avoid soft spots. - Choose bell peppers that feel heavy and have smooth skin. - For eggplant, pick ones that are shiny and feel heavy for their size. - Cherry tomatoes should be plump and free from blemishes. - Pick red onions that are firm and have a vibrant color. - Visit local farmers' markets for the freshest produce whenever possible. These small choices can bring your Balsamic Roasted Vegetable Salad to life. For the complete recipe, check the [Full Recipe]. First, set your oven to 425°F (220°C). This high heat helps the veggies roast nicely. While the oven heats, grab a large mixing bowl. Add your sliced zucchini, chopped bell pepper, diced eggplant, halved cherry tomatoes, and red onion wedges. Mix them well. This step ensures every bite is packed with flavor. Next, take a small bowl. In it, combine 3 tablespoons of balsamic vinegar, 2 tablespoons of extra-virgin olive oil, and 1 tablespoon of honey. Add a pinch of sea salt and freshly cracked pepper. Finally, mix in 1 teaspoon of dried oregano. Whisk these ingredients together until smooth. This vinaigrette will bring a tangy and sweet kick to your salad. Now, line a baking sheet with parchment paper. Spread your mixed vegetables in a single layer. Make sure they are not crowded, as this helps them roast evenly. Place the baking sheet in the oven and roast for 20-25 minutes. Stir the vegetables halfway through. This mix ensures they cook evenly and get that lovely caramelization. Once the veggies are tender and golden, take them out and let them cool for a few minutes. In a large serving bowl, add your fresh mixed greens. Then, toss in the roasted vegetables. Gently mix until the greens and vegetables blend well. If you like, sprinkle ¼ cup of crumbled feta on top. Finally, add fresh basil leaves for a fragrant touch. Enjoy your colorful and tasty salad! For the full recipe, check out the details provided above. To get the best flavor, cut your vegetables into similar sizes. This step helps them roast evenly. Place them in a single layer on the baking sheet. Crowding the pan can cause steaming instead of roasting. Stir the vegetables halfway through cooking. This simple action helps them brown nicely on all sides. Always dress your salad right before serving. This keeps the greens fresh and crunchy. Use just enough dressing to coat the veggies. A light touch prevents sogginess. When mixing, toss gently to avoid bruising the greens. If you prefer more flavor, add more balsamic vinegar or a splash of lemon juice. Fresh herbs can elevate your salad. Try adding chopped parsley or cilantro for a fresh twist. You can also add a pinch of red pepper flakes for a kick. Experiment with spices like cumin or paprika for unique flavors. These additions can make your salad truly special and memorable. {{image_4}} You can mix and match veggies to suit your taste. Try adding carrots for sweetness or broccoli for crunch. Swap in asparagus for a fresh twist. You can even use sweet potatoes for a hearty base. The options are endless! Each veggie brings its own flavor and texture. You can create a new salad every time. Want to make this salad filling? Add proteins like grilled chicken or shrimp. Chickpeas or black beans also work well for plant-based options. They boost the protein without altering the salad's great taste. If you want a creamy touch, add avocado slices. These options turn your salad into a complete meal. This salad is easy to make vegan and gluten-free. Just skip the feta cheese or use a plant-based alternative. Use gluten-free grains like quinoa for added texture. You can also mix in nuts or seeds for crunch. These simple swaps keep your salad tasty while meeting dietary needs. Enjoy the fresh flavors without worry! For the full recipe, check out the Balsamic Roasted Vegetable Salad. Store leftover Balsamic Roasted Vegetable Salad in an airtight container. Make sure the salad is cool before sealing it. This keeps the flavors fresh and prevents sogginess. Try to eat the leftovers within three days for the best taste. I recommend using glass containers for storing your salad. Glass is non-reactive and helps keep the food fresh longer. If you prefer plastic, choose BPA-free containers. Make sure they fit your salad snugly to limit air exposure. To reheat roasted vegetables, place them on a baking sheet. Heat your oven to 350°F (175°C) and roast for about 10-15 minutes. This keeps the veggies crispy and warm. You can also reheat them in a skillet over medium heat for a few minutes. Just stir often to avoid burning. If you want to add a little moisture, a splash of balsamic vinegar can help revive the flavors. Enjoy your meal! Yes, you can make this salad ahead. Roast the veggies and prepare the salad. Keep the roasted veggies and greens separate. Store them in the fridge. Mix them just before serving for the best taste and texture. Mixed greens work great with roasted veggies. I love using arugula, spinach, or kale. They add crunch and a fresh taste. You can choose any greens you enjoy. Just pick ones that won’t wilt fast. Balsamic roasted vegetables last about 3 to 5 days in the fridge. Store them in an airtight container. The flavors will deepen over time, making them even tastier. Just reheat them before serving for a warm dish. You can use frozen vegetables, but fresh is best. Frozen veggies may release more water while cooking. If using frozen, roast them a bit longer. This helps them get nice and crispy. Balsamic roasted vegetable salad is easy and fun to make. We covered the ingredients, step-by-step instructions, and tips for the best results. You can customize this salad with different veggies or proteins. Proper storage keeps leftovers fresh, and I shared FAQs to answer common questions. Try this salad for a tasty and healthy meal. Enjoy making it your own!](https://goldendishy.com/wp-content/uploads/2025/06/26f5156f-9b75-49f6-aa69-260bfc3a782d-768x768.webp)


