Chicken and Vegetable Soup Hearty and Nourishing Dish

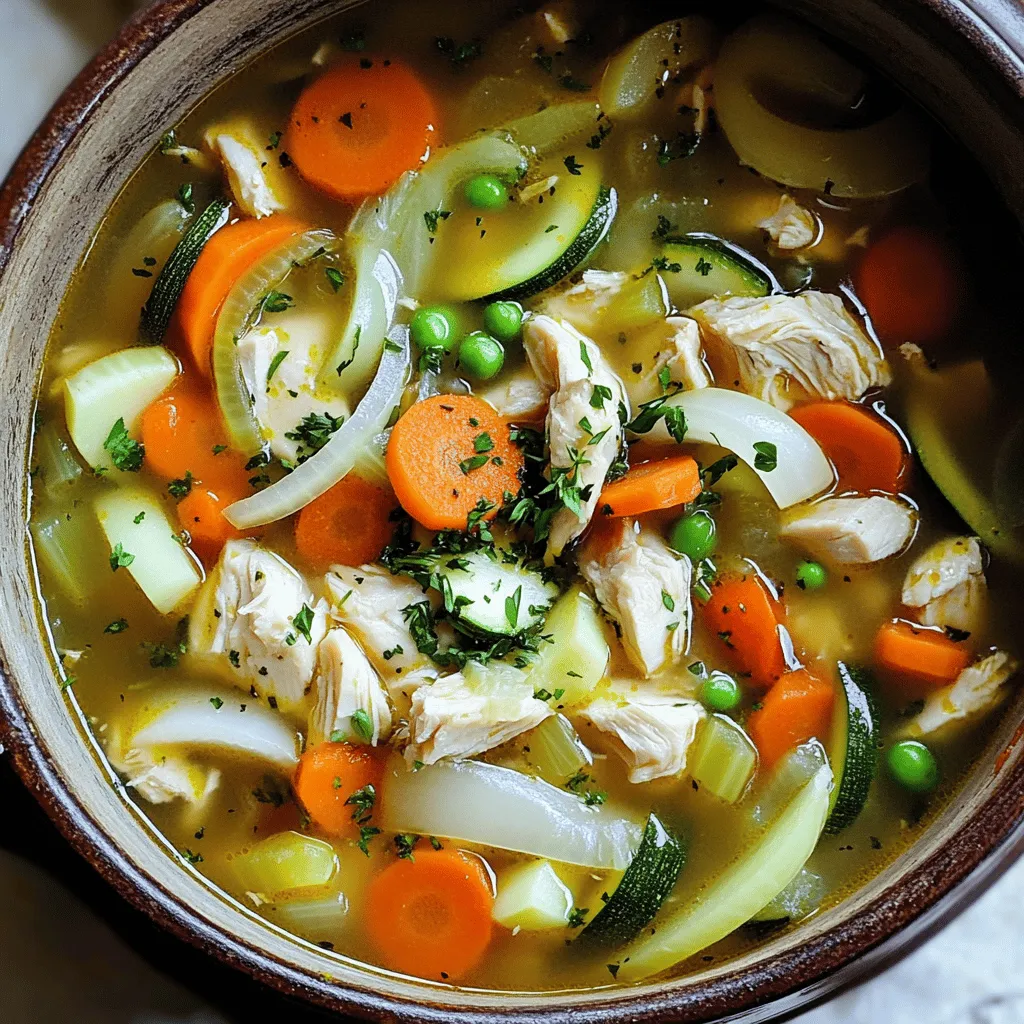
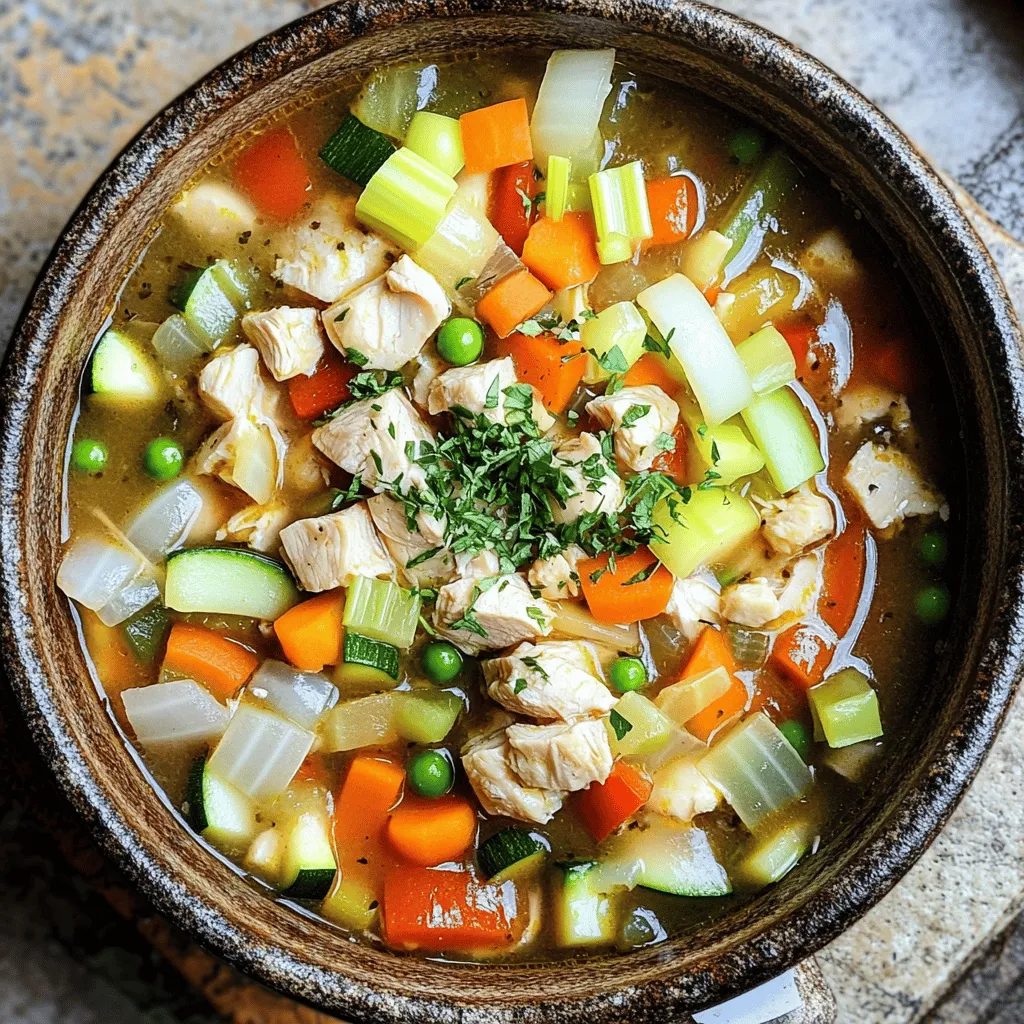
Looking for a warm and hearty meal? Let me introduce you to my Chicken and Vegetable Soup! It’s not just comforting; it’s nourishing too. In this post, I’ll guide you through easy steps to create a delicious bowl of soup. You’ll learn about the best ingredients, helpful tips, and even fun variations. Whether it’s a chilly day or you want a healthy dish, this soup will hit the spot. Let’s get cooking!
Ingredients
Main Ingredients
– 2 boneless, skinless chicken breasts, diced into bite-sized pieces
– 1 medium onion, finely chopped
– 2 large carrots, peeled and sliced
– 2 celery stalks, chopped into small pieces
– 1 red bell pepper, diced into small cubes
– 1 medium zucchini, diced
– 2 cloves of garlic, minced
– 1 cup frozen peas
Chicken is the heart of this soup. It adds protein and flavor. I prefer boneless, skinless chicken breasts for this recipe. They cook quickly and stay tender.
Vegetables add color and nutrients. I like a mix of carrots, celery, and bell peppers. These give a nice crunch and sweetness. Zucchini adds a mild taste and soft texture.
Herbs and spices boost flavor. I use dried thyme and oregano. They add warmth without overpowering the dish. Fresh garlic gives a strong, rich taste.
Broth and Seasoning
– 4 cups low-sodium chicken broth
– 1 teaspoon dried thyme
– 1 teaspoon dried oregano
– Salt and freshly ground black pepper, to taste
Low-sodium chicken broth forms the base of this soup. It gives depth without adding too much salt. You can also make your own broth for more flavor.
Seasonings bring the soup to life. I recommend adding salt and pepper to taste. Adjust these after simmering to get just right.
Garnishes
– Fresh parsley, finely chopped, for garnish
– Optional toppings
Fresh parsley adds color and freshness. It brightens the soup and makes it look appealing. You can also try adding a drizzle of olive oil or a sprinkle of cheese for extra flavor.
This hearty dish is all about balance. Each ingredient plays an important role in creating a warm, nourishing meal.
Step-by-Step Instructions
Preparation Steps
Sautéing the vegetables
Start by heating olive oil in a large pot over medium heat. Once the oil shimmers, add the chopped onion, sliced carrots, and chopped celery. Sauté these veggies for about five minutes. Stir them often until they soften and the onion turns translucent. Next, add minced garlic and cook for one more minute, stirring until it smells nice but doesn’t brown.
Cooking the chicken
Now, add the diced chicken to the pot. Stir it often until it turns white on the outside. This should take about five to seven minutes. Make sure the chicken cooks through.
Combining Ingredients
Adding broth and spices
Pour in the low-sodium chicken broth. Then, toss in the diced red bell pepper, zucchini, dried thyme, dried oregano, and a bay leaf. Increase the heat and bring the broth to a gentle boil.
Simmering the soup
Once it’s boiling, reduce the heat to low. Cover the pot and let it simmer for about 20 minutes. This lets all the flavors mix well together.
Final Touches
Stirring in peas
After the soup has simmered, stir in the frozen peas. Season the soup with salt and freshly ground black pepper to your taste. Let it simmer for another five minutes, until the peas are warm.
Adjusting seasoning
Before you serve, remember to take out the bay leaf. Taste the soup and adjust the seasoning if needed. Ladle the soup into bowls and garnish with fresh parsley for a bright touch.
Tips & Tricks
Ingredient Selection
Choosing fresh vegetables is key for great flavor. Look for bright colors and firm textures. This ensures your soup tastes vibrant and delicious. I often use carrots, celery, and bell peppers. They add great sweetness and crunch.
Selecting quality chicken broth also matters. Use low-sodium broth to control salt levels. A rich broth enhances the soup’s flavor. If you have time, homemade broth takes it to the next level. Just simmer chicken bones with veggies for hours.
Cooking Techniques
Browning chicken before adding broth is important. It adds depth to the dish. Cook until the chicken turns golden brown. This step makes your soup more flavorful.
Sautéing veggies is better than boiling them. Sautéing keeps their color and texture. It also enhances their taste. I sauté my onions, carrots, and celery first. Then, I add the garlic for an extra aroma.
Serving Suggestions
Pair your soup with crusty bread for a nice touch. A slice of sourdough or baguette works well. It soaks up the tasty broth.
For presentation, use warm bowls. Ladle the soup into each bowl. Top with fresh parsley to add color. A drizzle of olive oil also looks great. It gives a rich finish to your dish.

Variations
Dietary Adjustments
You can easily make this soup fit your needs. For a gluten-free option, choose gluten-free broth. Most broth brands offer gluten-free choices. Just check the label. For a vegetarian alternative, swap out the chicken for chickpeas or lentils. Use vegetable broth instead of chicken broth. This keeps the soup hearty and flavorful.
Flavor Enhancements
To spice things up, add red pepper flakes or diced jalapeños. This will give your soup a nice kick. If you want more depth, try different herbs. Rosemary, basil, or cilantro can change the flavor completely. Just sprinkle them in as you cook and taste as you go.
Seasonal Variations
Using seasonal vegetables can make your soup shine. In spring, add fresh asparagus and peas. In summer, use zucchini and corn for a bright taste. In fall, try sweet potatoes or squash. In winter, root vegetables like carrots and parsnips work great. Adjust your recipe to fit what’s fresh and in season. This way, your soup stays exciting and full of flavor.
Storage Info
Refrigerating Leftovers
Storing leftover chicken and vegetable soup is simple. Use an airtight container to keep the soup fresh. You can also divide the soup into smaller portions. This makes it easier to reheat later.
In the fridge, your soup stays good for about 3 to 4 days. Always check for any off smells or changes in color before eating.
Freezing Instructions
Want to save soup for later? Freezing is a great option! Let the soup cool fully before you freeze it. Pour the soup into freezer-safe containers or bags. Leave some space at the top for expansion.
When you’re ready to eat it, thaw the soup in the fridge overnight. You can also use the microwave for quick thawing.
Reheating Tips
Reheating chicken and vegetable soup is easy. The best way is on the stove. Pour the soup into a pot and heat over medium heat. Stir often to make sure it heats evenly.
If you use a microwave, heat it in short bursts. Stir between bursts to avoid hot spots.
Be careful not to overcook the vegetables. You want them to stay tender, not mushy. Add a splash of broth or water if the soup seems too thick when reheating. Enjoy your hearty soup!
FAQs
Common Questions
How to make chicken and vegetable soup without a recipe?
To make chicken and vegetable soup without a recipe, start by sautéing onions, garlic, and your choice of veggies. You can use carrots, celery, or even potatoes. Add diced chicken and cook until it turns white. Then, pour in some broth and let it simmer. Season with herbs like thyme and oregano. Taste as you go. It’s all about your favorite flavors!
Can I use frozen chicken for this recipe?
Yes, you can use frozen chicken in this soup. Just ensure to cook it longer to make sure it’s fully done. Add the frozen chicken to the pot at the same time as the broth. This method keeps the soup easy and quick.
Nutritional Information
Calories per serving
This hearty chicken and vegetable soup has about 300 calories per serving. It fills you up without being heavy, making it a great choice for lunch or dinner.
Protein content
Each serving contains around 25 grams of protein. The chicken provides a good source of lean protein, helping you stay strong and satisfied.
Cooking Times
Adjusting cooking times for larger batches
When making a larger batch, increase the cooking time slightly. Allow the soup to simmer for an extra 5 to 10 minutes. Always check the chicken to ensure it’s cooked through.
Times for cooking in different appliances (stovetop, slow cooker)
– Stovetop: Total time is about 45 minutes.
– Slow cooker: Cook on low for 6 to 8 hours or on high for 3 to 4 hours. This method allows flavors to deepen nicely.
This article covered how to make a tasty chicken and vegetable soup. We discussed the main ingredients like chicken, fresh veggies, and flavorful herbs. I shared step-by-step instructions for preparation, combining, and adding final touches. You learned helpful tips for choosing ingredients and cooking techniques. We explored variations for different diets and seasons. Finally, I shared best practices for storing leftovers and reheating. Making this soup is easy and rewarding. Enjoy your creation and share it with others!


![For this soup, fresh broccoli is key. Use about 4 cups of broccoli florets, roughly chopped. This gives the soup its vibrant green color and healthy crunch. You also need 1 medium onion, finely chopped, and 2 cloves of garlic, minced. These aromatics build a rich flavor base. Dairy makes this soup creamy and rich. You will need 1 cup of heavy cream. If you prefer a lighter option, substitute with coconut cream. For the broth, use 3 cups of low-sodium vegetable broth. This adds depth without overpowering the other flavors. Seasonings elevate the taste of your soup. Use 1 teaspoon of garlic powder and 1/2 teaspoon of onion powder. Don’t forget to add salt and freshly ground black pepper to taste. If you want a crunchy finish, top your soup with toasted croutons. They add a delightful texture and flavor contrast. This combination of ingredients creates a comforting, flavorful Broccoli Cheddar Soup. For a complete guide, check the Full Recipe. Start by melting the butter in a large pot over medium heat. Add the finely chopped onion. Sauté for about five minutes. You want the onion to be soft and clear. Next, add the minced garlic and cook for one to two minutes. This will make your kitchen smell amazing! Be careful not to burn the garlic. Now it’s time for the broccoli. Add the roughly chopped florets to the pot. Sauté them for about three to four minutes. This helps them soften a bit before the next step. Pour in the vegetable broth and raise the heat to bring it to a boil. Once boiling, reduce the heat to a simmer. Let it cook for about ten to twelve minutes until the broccoli is tender. After the broccoli is tender, it’s blending time! Use an immersion blender right in the pot. If you have a regular blender, transfer the soup in batches. Just be careful with the hot liquid. Blend until smooth. Return the soup to the pot and stir in the heavy cream, keeping the heat low. Slowly add the shredded sharp cheddar cheese. Stir until it melts and mixes well. Finally, add garlic powder and onion powder, and season with salt and pepper. Let it warm for a few more minutes. Serve your soup hot, and add toasted croutons if you like. Enjoy this cheesy broccoli bliss! You can find the full recipe above. To get that creamy feel, blend the soup well. Use an immersion blender for ease. If you want a chunkier soup, blend only half. This keeps some broccoli bits for a nice bite. Make sure to blend until smooth. This step makes all the difference in your final dish. Add more depth to your soup by using fresh herbs. Parsley or thyme brings bright notes. You can also toss in a dash of nutmeg for warmth. Adjust the salt and pepper to your taste. A squeeze of lemon juice can brighten flavors, too. Experiment with these extras until you find your favorite mix. Store leftover soup in an airtight container. It will keep well in the fridge for up to three days. Reheat gently on the stove to avoid curdling the cream. If you freeze it, leave out the cheese. Add it back when you reheat for the best flavor. Store in portions to make it easy to enjoy later. {{image_4}} You can make a vegan version of this soup. Replace the heavy cream with coconut cream. Use nutritional yeast instead of cheddar cheese. This option keeps the cheesy flavor while being dairy-free. Blend the soup until smooth, just like the original. You can still enjoy that creamy texture without any animal products. For a low-carb soup, swap the heavy cream for cauliflower. Cook the cauliflower with the broccoli, then blend it all together. This change cuts carbs while keeping the soup rich and hearty. You can also use a low-carb cheese to enhance the flavor without adding too many carbs. Want to boost the protein? Add cooked chicken or beans. They pair well with the flavors of broccoli and cheese. You can also toss in other veggies like carrots or spinach. This adds color and nutrients to your soup. Just make sure to cook them until tender before blending. For the full recipe, check out the main article. A serving of broccoli cheddar soup contains about 350 calories. The calorie count may vary based on the ingredients you use. For instance, using heavy cream adds more calories than coconut cream. If you add croutons, that will increase the total calories too. This soup packs a punch of nutrients. Here are some key nutrients you get in each serving: - Protein: About 12 grams, mostly from cheese and cream. - Fat: Approximately 25 grams, primarily from cheddar and cream. - Carbohydrates: Around 20 grams, mainly from broccoli and onion. - Fiber: Offers about 4 grams, thanks to the broccoli. Broccoli is more than just tasty. It is a superfood! Here are some reasons to love it: - Rich in Vitamins: It's high in vitamins C and K. - Antioxidants: Broccoli has powerful antioxidants. They help fight free radicals in your body. - Supports Digestion: The fiber helps keep your digestive system healthy. - Boosts Immunity: Eating broccoli may help strengthen your immune system. This nutritional information shows why broccoli cheddar soup is a great choice for a meal. It is not just delicious; it also nourishes your body. To store leftover broccoli cheddar soup, let it cool first. Then, pour it into an airtight container. It keeps well in the fridge for about three to four days. When you want to eat it, just reheat it on the stove or in the microwave. Stir well to mix the flavors again before serving. Yes, you can freeze broccoli cheddar soup. First, let it cool down completely. Then, place it in a freezer-safe container. Make sure to leave some space at the top, as the soup will expand when frozen. It can last for about three months in the freezer. To use, thaw it overnight in the fridge and reheat gently. To make broccoli cheddar soup gluten-free, use gluten-free broth. Most vegetable broths are gluten-free, but always check the label. Also, use cornstarch instead of flour if you want to thicken it. Just mix cornstarch with a little water before adding it to the soup. This way, you will enjoy a creamy soup without gluten. For the full recipe, check out [Full Recipe]. This blog covered how to make a tasty broccoli cheddar soup. We discussed key ingredients, including fresh broccoli and flavor-packed aromatics. I outlined helpful steps for cooking and blending the soup. You learned tips for great texture and flavor as well as how to store leftovers. Try variations like vegan options or low-carb versions to fit your needs. Broccoli brings healthy nutrients, making this soup a smart choice. Enjoy this dish, knowing you can customize it just the way you like!](https://goldendishy.com/wp-content/uploads/2025/06/c21049f2-ac49-4cf8-bdd7-9e479da09cd5-768x768.webp)


![For this tasty dish, gather the following main ingredients: - 4 boneless, skinless chicken breasts - 1 cup dill pickle juice (for marinating) - 1 cup ranch dressing - 1 cup breadcrumbs (Italian or panko) - 1 cup grated Parmesan cheese - 1 cup marinara sauce - 1 cup shredded mozzarella cheese These ingredients make the base of your chicken parmesan. The chicken stays juicy from the pickle juice, and the ranch dressing adds a creamy flavor. Next, you will need these seasonings: - 1 tablespoon olive oil - 1 teaspoon garlic powder - 1 teaspoon Italian seasoning - Salt and pepper to taste These seasonings give your chicken a great taste. The garlic powder and Italian seasoning work together to create a cozy flavor. The salt and pepper help balance everything. For a more colorful dish, consider these garnishes: - Fresh parsley for garnish (optional) You can also serve your chicken with sides like: - Pasta - Fresh green salad These sides add color and texture to your meal. They keep things fresh and light. For the complete cooking steps, check out the Full Recipe. To start, take 4 boneless, skinless chicken breasts. Place them in a resealable plastic bag. Pour 1 cup of dill pickle juice over the chicken. Make sure they are fully submerged. Seal the bag tight. Put it in the fridge and let it marinate for at least 1 hour. If you want a stronger taste, let it sit for up to 4 hours. Next, preheat your oven to 400°F (200°C). In a shallow dish, mix 1 cup of breadcrumbs, 1 cup of grated Parmesan cheese, 1 teaspoon of garlic powder, and 1 teaspoon of Italian seasoning. Add a pinch of salt and pepper to taste. Stir these dry ingredients well. This mix gives the chicken a tasty and crunchy coat. After marinating, take the chicken out and pat it dry with paper towels. Dip each piece into 1 cup of ranch dressing, coating both sides well. Then, dredge the chicken in the breadcrumb mix. Press lightly to ensure it sticks. In a large, oven-safe skillet, heat 1 tablespoon of olive oil over medium heat. Once it shines, add the coated chicken breasts. Sear each side for about 3-4 minutes. They should turn a nice golden brown. After searing, pour 1 cup of marinara sauce over the chicken. Make sure each piece is covered. Then, sprinkle 1 cup of shredded mozzarella cheese on top. This adds a gooey touch. Now, transfer the skillet to your preheated oven. Bake for 20-25 minutes. Ensure the chicken reaches an internal temperature of 165°F (75°C). The cheese should be melted and slightly golden brown. Once done, take the skillet out and let it cool for a few minutes. If you like, sprinkle fresh parsley on top for a burst of color and flavor. Serve it up and enjoy the delicious blend of flavors in your pickle ranch chicken parmesan. For the full recipe, check the earlier sections! To get the best crust on your chicken, start with dry chicken. After marinating, pat the chicken dry with paper towels. This helps the coating stick well. Next, dip the chicken in ranch dressing. Make sure to coat both sides. Then, dredge it in the breadcrumb mix. Press down lightly to pack on that flavor. For extra crunch, you can double-coat the chicken. Just repeat the ranch and breadcrumbs steps. If you have leftovers, store them in an airtight container. This keeps the chicken fresh. Place the chicken in the fridge and eat it within three days. To reheat, use an oven or air fryer. This way, you keep that crispy texture. Avoid the microwave, as it can make the coating soggy. To boost flavor, try adding spices to your breadcrumb mix. A pinch of cayenne pepper adds heat. You might even try smoked paprika for a smoky taste. Another option is to mix in some chopped herbs. Fresh basil or oregano can really brighten up the dish. Don't forget to drizzle some extra ranch on top just before serving. These small changes can make your Pickle Ranch Chicken Parmesan even more tasty! For complete cooking steps and ingredient details, check the [Full Recipe]. {{image_4}} You can easily adapt this recipe for various diets. Here are some ideas: - Gluten-Free: Use gluten-free breadcrumbs or crushed cornflakes. - Dairy-Free: Substitute the ranch dressing with a dairy-free version. Try coconut yogurt or a cashew-based alternative. - Low-Carb: Replace breadcrumbs with crushed nuts or pork rinds for a crunchy topping. Want to boost flavors? Consider these add-ins: - Spices: Add cayenne pepper for heat or smoked paprika for depth. - Herbs: Mix in fresh basil or oregano to the marinara for freshness. - Veggies: Layer sliced bell peppers or mushrooms under the cheese for added taste and texture. Not in the mood to bake? Try these methods instead: - Air Fryer: Cook at 375°F (190°C) for about 15-18 minutes, flipping halfway. - Grill: Grill the marinated chicken on medium heat for 5-7 minutes per side. Add the sauce and cheese in the last few minutes to melt. - Slow Cooker: Cook on low for 4-6 hours with sauce and cheese on top for a tender dish. These variations make the recipe fit your lifestyle. Enjoy customizing your Pickle Ranch Chicken Parmesan! For the full details, check the Full Recipe. To keep your Pickle Ranch Chicken Parmesan fresh, store it in an airtight container. Let the chicken cool to room temperature first. Once cooled, transfer it to the container and seal tightly. It can last in the fridge for 3 to 4 days. To keep flavors intact, try to use it up within that time. When it's time to enjoy leftovers, preheat your oven to 350°F (175°C). Place the chicken in an oven-safe dish. Cover it with foil to prevent drying out. Heat for about 15 to 20 minutes, or until it's warmed through. You can also reheat in the microwave, but the oven keeps the chicken crispy. If you want to save some for later, freezing is a great option. Wrap each chicken breast tightly in plastic wrap and then in foil. This helps prevent freezer burn. You can freeze it for up to 3 months. To reheat, thaw in the fridge overnight, then follow the reheating instructions. Enjoy your meal anytime! You should marinate the chicken for at least 1 hour. This helps the meat soak up the pickle juice. For even more flavor, try marinating for up to 4 hours. This longer time allows the tangy taste to infuse deeper. Yes, you can prepare this dish ahead of time. Marinate the chicken and coat it as directed. Then, store it in the fridge for up to 24 hours before baking. When ready, just bake it as per the recipe. There are many tasty sides that go well with Pickle Ranch Chicken Parmesan. Here are some ideas: - Garlic bread - Pasta with marinara sauce - A fresh green salad - Roasted vegetables - Mashed potatoes Feel free to mix and match to find your favorite pairings! For the full recipe, check out the earlier section. We've covered how to make Pickle Ranch Chicken Parmesan. We discussed key ingredients, step-by-step instructions, and helpful tips. You learned about storage and variations to fit your taste. Remember, this dish is fun and easy to customize. Enjoy exploring new flavors and methods in your cooking. With practice, you'll master this recipe and impress others. Ready to make your own? Now, it’s your turn to get creative in the kitchen!](https://goldendishy.com/wp-content/uploads/2025/07/3835c891-434d-4cb2-bcdb-f0268378baad-768x768.webp)