Cherry Cheesecake Dip Flavorful and Simple Delight

Craving a sweet treat that’s easy to make and delicious? I’ve got you covered with this Cherry Cheesecake Dip! It’s a fun twist on a classic dessert, perfect for any gathering or just a cozy night in. You’ll learn how to blend simple ingredients to create a creamy, fruity dip. Ready to impress your friends and family? Let’s dive into the world of flavors with this simple delight!
Ingredients
Main Ingredients for Cherry Cheesecake Dip
To make Cherry Cheesecake Dip, you need a few simple items:
– 8 oz cream cheese, at room temperature
– 1 cup powdered sugar
– 1 tsp pure vanilla extract
– 1 cup sour cream
– 1/2 cup heavy whipping cream
– 1 cup cherry pie filling (can be canned or homemade)
– 1/2 cup crushed graham crackers
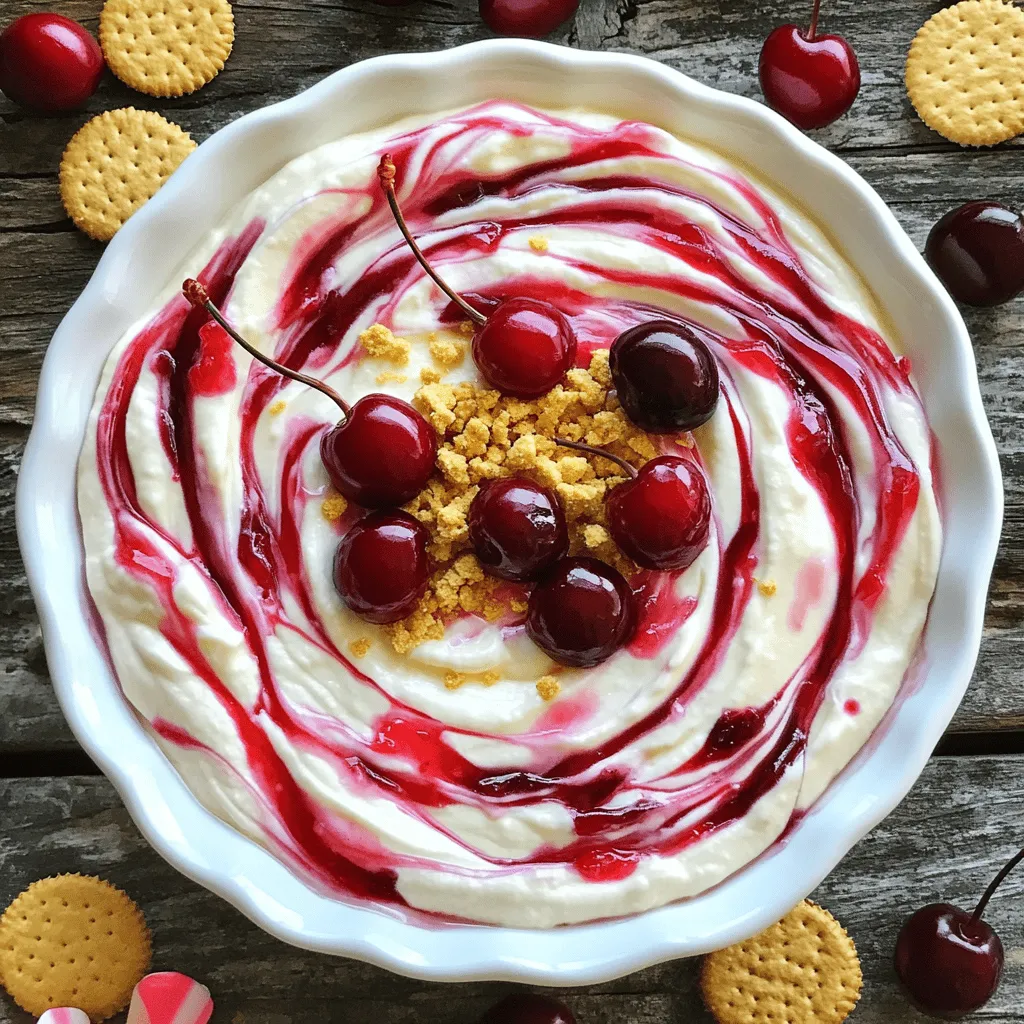
These ingredients create a rich and creamy dip. The cream cheese gives it a smooth texture. The sour cream adds tanginess, while the powdered sugar sweetens it just right. The cherry pie filling gives your dip its fruity flavor and color.
Optional Garnishes
For a fun touch, consider adding:
– Fresh cherries for garnish
– Additional crushed graham crackers
These garnishes not only make your dip look great but also add extra flavor and texture. Fresh cherries provide a burst of taste, while more graham crackers give a nice crunch.
Key Kitchen Tools
To make this dip, you will need:
– Mixing bowls
– Electric mixer or hand mixer
– Spatula
– Serving bowl
These tools help you mix the ingredients well and serve your dip beautifully. A good mixer is key for getting that creamy texture. A spatula helps fold in the whipped cream gently, keeping it light and airy.
Step-by-Step Instructions
Mixing the Base Ingredients
Start by taking your cream cheese out. It should feel soft. Place it in a large bowl. Add the powdered sugar on top. Use an electric mixer on medium speed. Mix until it is smooth and creamy. You want to remove all lumps. Then, add the pure vanilla extract. Pour in the sour cream next. Keep mixing on low speed. Your mixture should feel silky and well combined.
Incorporating the Whipped Cream
Now, let’s whip the heavy cream. Pour it into a separate bowl. Use a hand mixer or a stand mixer. Beat it on high speed. Watch for stiff peaks to form. This step is key for a light dip. Once you have stiff peaks, gently fold this whipped cream into the cream cheese mix. Use a spatula for this. Be careful not to deflate the whipped cream. This keeps your dip airy and fluffy.
Adding the Cherry Pie Filling
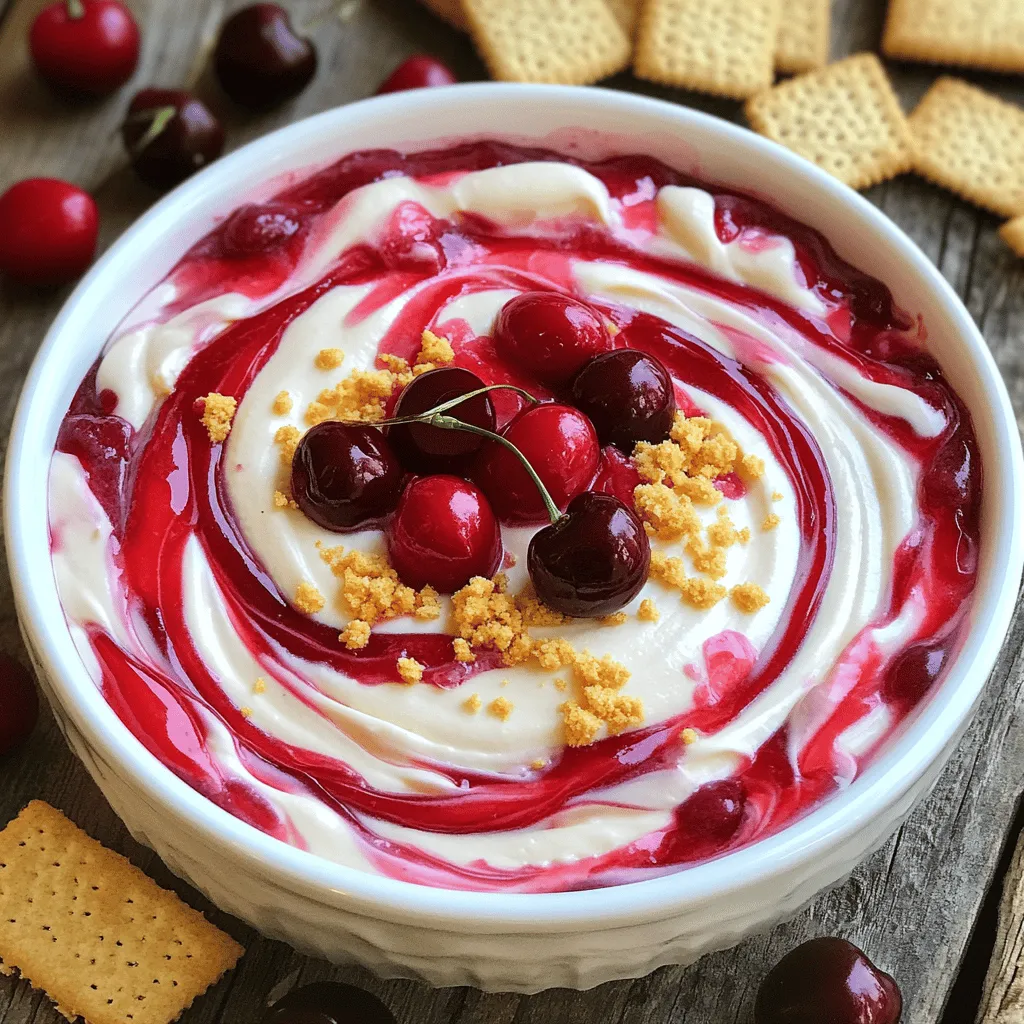
Once the whipped cream is folded in, it is time for the cherry pie filling. Spoon the filling into your dip mixture. Gently fold it in, making sure to keep those pretty swirls. You want to see the cherry color spread. Once mixed well, transfer your dip to a serving bowl. Top it with crushed graham crackers for some crunch. Cover it with plastic wrap. Place it in the fridge for at least 30 minutes. This helps the flavors blend.
Tips & Tricks
How to Achieve the Perfect Consistency
To get the best dip, start with soft cream cheese. Make sure it’s at room temperature. This helps it blend well. Beat the cream cheese and sugar until smooth. When you add the whipped cream, fold it gently. This keeps the dip light and fluffy. If it feels too thick, add a splash of milk to loosen it up.
Substitutions for Ingredients
You can mix things up a bit. Instead of sour cream, use Greek yogurt for a tangy twist. If you want a lower-calorie dip, try using light cream cheese. For a dairy-free option, go for vegan cream cheese. You can also swap cherry pie filling for other fruit fillings like strawberry or blueberry. This dip is versatile and can fit many tastes!
Serving Suggestions
Serve your dip with a variety of dippers. Graham crackers and vanilla wafers are classic choices. Fresh fruit like apple slices or strawberries also works great. For a fun twist, use pretzels for a salty contrast. Make your dip a centerpiece by adding fresh cherries on top and a sprinkle of graham crackers. This makes it look beautiful and inviting.

Variations
Chocolate Cherry Cheesecake Dip
You can mix chocolate into your cherry cheesecake dip for a rich twist. Start with the base dip recipe. Melt about 4 ounces of semi-sweet chocolate and let it cool. Once cool, fold the chocolate into the cream cheese mixture. This adds a deep flavor that pairs well with cherries. The chocolate brings a new layer to your dip. Serve it with chocolate wafers or pretzels for a fun crunch.
No-Bake Cherry Cheesecake Bars
Turn your dip into no-bake bars! Use the dip as a filling. Spread it into a pan lined with parchment paper. Press crushed graham crackers on top for the crust. Chill it in the fridge for at least two hours. Once set, cut it into squares. These bars are perfect for parties and easy to grab. You can even drizzle chocolate over the top for extra sweetness.
Fruit Variations Beyond Cherry
You can swap out cherries for other fruits in the dip. Fresh strawberries or blueberries work great. Just use the same amount of fruit pie filling. You can also mix in diced peaches or raspberries for a summer twist. Each fruit brings its own taste profile. Experimenting with flavors keeps the dip fresh and exciting. Don’t forget to serve it with an array of colorful dippers!
Storage Info
How to Store Leftovers
After you enjoy your Cherry Cheesecake Dip, keep any leftovers in the fridge. Place the dip in an airtight container. This helps keep it fresh. Always cover the top with plastic wrap if you do not have a lid.
Recommended Storage Containers
Choose a container that seals well. Glass containers work great. They do not absorb smells and keep flavors intact. Plastic containers are lighter and easy to store. Just make sure they are safe for the fridge.
Shelf Life and Best Practices
The dip lasts about 3 to 5 days in the fridge. To enjoy the best taste, eat it within 3 days. Always check for signs of spoilage, like odd smells or changes in texture. To keep the dip fresh, do not let it sit out for too long during serving. Return it to the fridge when not in use.
FAQs
Can I use a different type of fruit filling?
Yes, you can use other fruit fillings. Strawberry, blueberry, or raspberry work well. Each fruit adds a different flavor. You can even mix fruits for a fun twist. Just make sure the filling is thick enough. This keeps the dip creamy.
Is it possible to make this dip ahead of time?
Absolutely! You can make this dip a day before your event. Just store it in the fridge. This gives the flavors time to blend. Just remember to cover it well. This keeps it fresh and tasty.
What can I serve with Cherry Cheesecake Dip?
You have many tasty options for serving. Try these:
– Graham crackers
– Vanilla wafers
– Fresh fruit like strawberries or apple slices
– Pretzel sticks for a salty crunch
These will add fun textures and flavors. Each bite will be a delight!
This blog post covered how to make Cherry Cheesecake Dip from start to finish. We explored the main ingredients, optional garnishes, and key kitchen tools. You learned how to mix the base, incorporate whipped cream, and add cherry filling. You now have tips for consistency, substitutions, and serving ideas. Variations like chocolate cherry dip offer new flavors, while proper storage helps keep leftovers fresh. Remember, it’s easy to customize this dip. Experiment and enjoy your sweet creation!


. To keep your scones fresh, let them cool completely. Place them in an airtight container. You can store them at room temperature for up to three days. If you live in a humid area, refrigerate them to prevent spoilage. Use parchment paper between layers to keep them from sticking. Reheat your scones for the best taste. Preheat your oven to 350°F (175°C). Place the scones on a baking sheet. Heat them for about 5 to 10 minutes, or until warm. You can also use a microwave. Heat them for 15 to 20 seconds. This warms them quickly but may make them soft. To freeze scones, wrap each one in plastic wrap. Place them in a freezer bag or airtight container. Label with the date for easy tracking. They can last up to three months in the freezer. When ready to eat, thaw them in the fridge overnight. Reheat as mentioned above for a fresh taste. Check the Full Recipe for more tips on making these treats! To make cinnamon roll scones, follow this simple process. First, mix the dry ingredients in a bowl. This includes flour, sugar, baking powder, salt, and cinnamon. Next, cut in cold butter until the mix looks crumbly. Then, whisk buttermilk, melted butter, and vanilla in another bowl. Combine the wet and dry mixes gently. Pat the dough into a rectangle, brush melted butter, and sprinkle brown sugar for the swirl. Roll it up, slice it, and bake. For the full recipe, check the details above. Yes, you can use milk instead of buttermilk. If you do, add a splash of lemon juice or vinegar. This helps the milk mimic buttermilk's tangy flavor. It also makes the scones soft and fluffy. However, buttermilk adds a richer taste. Serve cinnamon roll scones warm for the best taste. Drizzle the icing over the top just before serving. You can also sprinkle a little cinnamon on top for added flavor. Pair them with coffee or tea for a relaxing treat. They look great on a nice platter. Cinnamon roll scones last for about two days at room temperature. To keep them fresh longer, store them in an airtight container. You can also refrigerate them for up to a week. Just warm them in the oven before serving to regain that fresh-baked taste. Yes, you can make cinnamon roll scones ahead of time. Prepare the dough, and cut the scones. Then, place them on a baking sheet and freeze until firm. After that, transfer them to a bag or container. When you’re ready, bake them straight from the freezer, adding a few extra minutes to the baking time. This way, you enjoy fresh scones anytime! Making scones is simple and fun. You learned about ingredients, tools, and baking steps. I shared tips to help you avoid mistakes and find the best flavors. You also discovered flavor variations and storage methods. Scones can be your tasty treat for any occasion. With a few easy steps, you can impress your friends. Enjoy baking, and don’t forget to share your tasty results!](https://goldendishy.com/wp-content/uploads/2025/07/878de396-77ac-4fc1-b8cf-b56551936fe1-768x768.webp)


![To make easy lemon bars, you need a few simple ingredients. Here’s what you’ll need: - 1 cup all-purpose flour - 1/2 cup powdered sugar (plus extra for dusting) - 1/4 teaspoon salt - 1/2 cup unsalted butter, melted - 2 large eggs - 1 cup granulated sugar - 1/4 cup freshly squeezed lemon juice - Zest of 1 fresh lemon - 1/2 teaspoon baking powder Each ingredient plays a key role in the flavor and texture. The flour gives structure, while the butter adds richness. The eggs help bind everything together. The lemon juice and zest bring that bright, zesty flavor. Using fresh lemon juice makes a big difference. It adds a vibrant taste that bottled juice can’t match. The powdered sugar gives the bars a sweet finish. Make sure to have some extra on hand for dusting. Gather these ingredients before you start. This will make the cooking process smooth and easy. For the full recipe, check out the complete guide to making these delicious lemon bars. 1. Preheat your oven to 350°F (175°C). This is important for even baking. 2. In a medium bowl, mix the flour, powdered sugar, and salt. Use a whisk to combine them well. 3. Pour the melted butter into the bowl. Mix it with a fork until it looks like clumpy dough. 4. Press this dough firmly into the bottom of an 8x8 inch baking dish. This will be your crust. 1. In a separate bowl, whisk together the eggs and granulated sugar. Beat them until smooth and slightly frothy. This takes about 1-2 minutes. 2. Next, add the lemon juice, lemon zest, and baking powder to the egg mixture. Stir until everything is mixed well. 1. Bake the crust in the preheated oven for about 15 minutes. It should turn a light golden brown. 2. Carefully pour the lemon filling over the hot crust. Return the dish to the oven. 3. Bake for an additional 20-25 minutes. The filling should be set and lightly browned when done. 4. Once baked, remove the dish from the oven and let it cool for at least 15 minutes. This helps the bars set up. 5. Transfer the bars to a wire rack to cool completely. Once cool, dust with powdered sugar and cut into squares. For the full recipe, check out the detailed instructions. Enjoy your refreshing lemon bars! - Use room temperature ingredients. This helps the batter mix well. - Fresh lemon juice boosts the taste. It brings out the bright, zesty flavor. When you use room temperature eggs and butter, they mix better. This helps create a smooth filling. Fresh lemon juice is key for a strong lemon flavor. Bottled juice can taste flat. - Dust your bars with powdered sugar. This adds a nice touch and looks pretty. - Garnish with lemon slices and mint leaves. They make your bars pop and look inviting. Once your lemon bars cool, dust them with sugar. Then, place lemon slices on top. Add a few mint leaves for color. This makes your dessert not just tasty but also beautiful. For the full recipe, check out the details above. {{image_4}} You can make these lemon bars even more exciting. One way is to add berries. Fresh blueberries or raspberries pair well with lemon. They add a pop of color and taste. Just fold in one cup of your chosen berries after mixing the lemon filling. Another fun idea is to infuse the bars with herbs. Basil or rosemary works great. Chop a few leaves finely and mix them in with the lemon juice. This adds a unique twist that surprises the taste buds. If you need gluten-free bars, don't worry! You can swap the all-purpose flour for a gluten-free blend. Look for a mix that includes rice flour and starches. This keeps the texture light and tasty. For those who follow a vegan diet, you can replace the eggs. Use flax eggs instead. To make one flax egg, mix one tablespoon of flaxseed meal with two and a half tablespoons of water. Let it sit for about five minutes until it gets thick. This works well in the lemon filling to keep it creamy. Check the [Full Recipe] for the main steps to create these delightful lemon bars. To keep your lemon bars fresh, store them in the refrigerator. - Wrap them well: Use plastic wrap or an airtight container. - Keep them chilled: This helps maintain their texture and flavor. If you want to save some for later, you can freeze lemon bars. - Cool completely: Let them cool fully before freezing. - Cut into squares: This makes it easy to grab one later. - Wrap in plastic: Use freezer-safe wrap to prevent freezer burn. - Place in a container: Use an airtight container for extra protection. Lemon bars stay fresh in the fridge for about one week. - Check for freshness: Look for any signs of mold or off smells. If they have been in the fridge too long, they may go bad. - Signs of spoilage: If they look discolored or smell sour, it’s time to toss them. - Texture changes: A slimy texture means they’re no longer good. Storing them right helps you enjoy their bright flavor longer! For the complete recipe, check out the Full Recipe. To make your lemon bars less tart, adjust the sugar and lemon juice. You can add more sugar to balance the tartness of the lemon juice. Try adding an extra 1/4 cup of sugar to the filling. If you want, you can also reduce the lemon juice. Use about 3 tablespoons instead of 1/4 cup. This way, you keep the lemon flavor while making it sweeter. You can use bottled lemon juice, but fresh is better. Bottled juice often lacks the bright flavor of fresh lemons. Fresh lemon juice also has a more vibrant acidity. This difference makes your bars taste much better. If you must use bottled juice, try to find one with no added sugar or preservatives. To cut lemon bars into neat squares, use a sharp knife. First, let the bars cool completely. This helps them set and makes cutting easier. Dip your knife in warm water before each cut. Wipe the knife clean between cuts for a smoother edge. For even squares, use a ruler or a guide to measure before cutting. These tips will help your bars look great on any plate. You learned how to make easy lemon bars from scratch. We covered essential ingredients, step-by-step instructions, and helpful tips for perfect results. Don’t forget to try variations, like adding fruits or herbs. Proper storage keeps your bars fresh longer. Enjoy your sweet and tangy treat! The fun lies in making them your own. Experiment. Share your creations with friends and family. Happy baking!](https://goldendishy.com/wp-content/uploads/2025/07/78212822-f759-45eb-b990-dd8ea93e2cb8-768x768.webp)