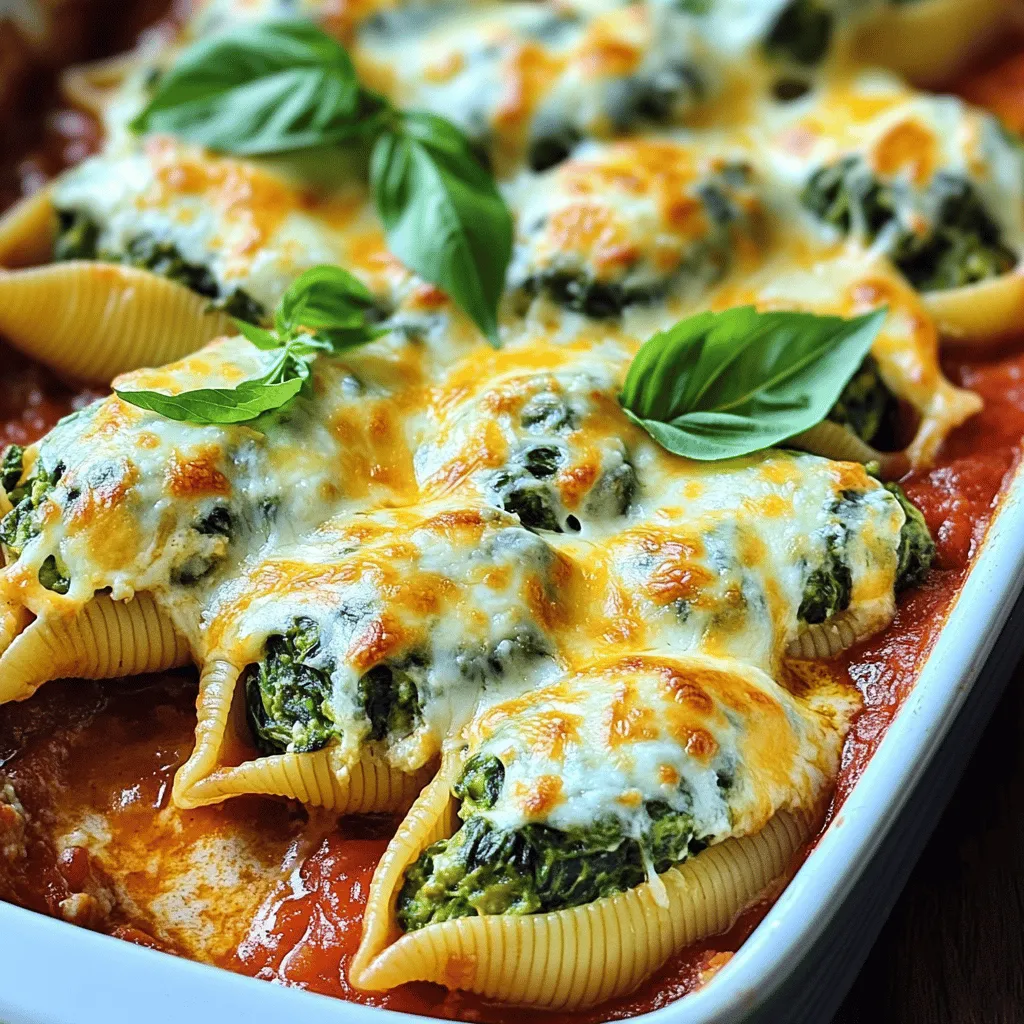
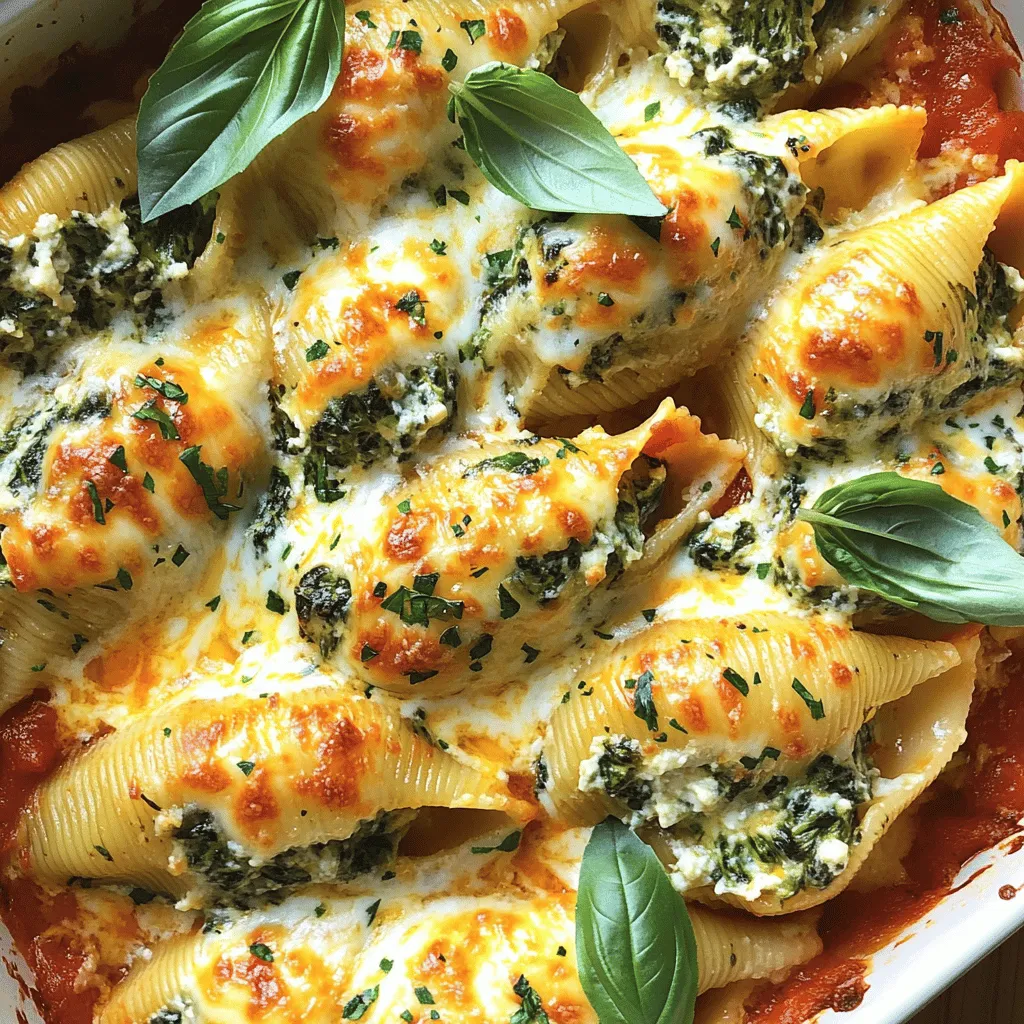
If you crave comfort food that’s simple yet full of flavor, try my Cheesy Spinach Stuffed Shells. This dish combines creamy cheese and fresh spinach wrapped in tender pasta shells, creating a warm embrace for your taste buds. In this post, I’ll guide you through easy steps, share tips for the best ingredients, and offer fun variations. Get ready to enjoy a savory meal that you and your loved ones will cherish!
Ingredients
List of Required Ingredients
To make Cheesy Spinach Stuffed Shells, gather these simple ingredients:
– 20 jumbo pasta shells
– 2 cups fresh spinach, finely chopped
– 1 cup ricotta cheese
– 1 cup shredded mozzarella cheese, divided
– ½ cup grated Parmesan cheese
– 1 large egg, beaten
– 2 garlic cloves, minced
– 1 teaspoon Italian seasoning
– Salt and freshly cracked black pepper to taste
– 2 cups marinara sauce, store-bought or homemade
– Fresh basil leaves for garnish
Substitutions for Fresh Ingredients
If you can’t find fresh spinach, frozen spinach works too. Just thaw and drain it well. You can swap ricotta with cottage cheese for a lighter taste. For the cheese, feel free to use any mild cheese you enjoy. If you want a vegan option, consider using a plant-based ricotta.
Tips for Selecting the Best Ingredients
When choosing the pasta shells, look for ones that are sturdy and free from cracks. Fresh spinach should be bright green and crisp. Avoid any wilted or yellowed leaves. For cheeses, go for high-quality brands. They will elevate the flavor of your dish. When picking marinara sauce, choose one that has no added sugars or preservatives for the best taste.
Step-by-Step Instructions
Preheating the Oven
Start by preheating your oven to 375°F (190°C). This ensures the oven is hot when the shells go in. A hot oven helps the cheese melt perfectly.
Cooking the Jumbo Pasta Shells
In a large pot, bring salted water to a rolling boil. Carefully add the jumbo pasta shells. Cook them according to the package instructions, usually about 8-10 minutes. They should be al dente, meaning firm yet tender. After cooking, drain the shells and set them aside on a clean kitchen towel to cool a bit.
Preparing the Cheesy Spinach Filling
In a large mixing bowl, combine the finely chopped spinach, ricotta cheese, half of the shredded mozzarella cheese, grated Parmesan cheese, beaten egg, minced garlic, Italian seasoning, and a pinch of salt and pepper. Mix everything together until it forms a smooth, creamy filling. This mix is key for flavor.
Stuffing the Pasta Shells
With a teaspoon or a piping bag, fill each cooked pasta shell with the cheesy spinach mixture. Be generous! Place each stuffed shell upright in a large baking dish. Make sure they fit snugly, so they don’t topple over.
Adding Marinara Sauce and Cheese
Pour the marinara sauce evenly over the stuffed shells. Make sure they are well-coated, which helps keep them moist during baking. Then, sprinkle the remaining shredded mozzarella cheese on top. This will create a delicious cheesy crust.
Baking Instructions
Cover the baking dish with aluminum foil. This keeps the moisture in while baking. Bake in the preheated oven for 25 minutes. After this, remove the foil and bake for an extra 10-15 minutes. You want the cheese to be bubbly and golden brown.
Enjoy making this dish for family or friends!
Tips & Tricks
Ensuring Perfectly Cooked Shells
Cook the jumbo pasta shells until they are al dente. This means they should still have a slight bite. Overcooking can make them too soft and hard to fill. I recommend checking the package for cooking time. After you drain them, lay them on a kitchen towel. This helps them cool and prevents sticking.
Storing Leftover Stuffed Shells
If you have any leftovers, you can store them easily. Place the stuffed shells in an airtight container. Make sure to cover them with marinara sauce to keep them moist. They will last in the fridge for up to three days. When ready to eat, you can reheat them in the oven or microwave.
Best Pairings and Serving Suggestions
Cheesy spinach stuffed shells pair well with a simple side salad. A light Caesar or mixed greens salad works great. You can also serve garlic bread on the side for a classic touch. For drinks, a light white wine or sparkling water complements the dish well. Feel free to get creative with your sides!
Variations
Vegetarian Alternatives
You can easily make Cheesy Spinach Stuffed Shells more veggie-friendly. Try adding other vegetables like mushrooms, zucchini, or bell peppers. These flavors blend well with spinach and cheese. You can also use different greens, like kale or Swiss chard. Just make sure to chop them finely and sauté them first. This step helps to reduce their water content and enhances their flavor.
Adding Protein Options
If you want to add protein, ground turkey or chicken works well. Cook the meat in a pan before mixing it into the cheesy filling. For a vegetarian option, consider using chickpeas or lentils. They add protein and a nice texture. You can also use tofu as a plant-based protein source. Just crumble it and mix it with the cheese and spinach filling.
Alternative Sauces and Cheese
While marinara is a classic choice, you can switch it up. A creamy Alfredo sauce adds a rich flavor to the dish. You can also try pesto for a fresh twist. For cheese, mix in some ricotta or goat cheese for a unique taste. Mixing different cheeses can make your dish more exciting. Gorgonzola or feta can add a tangy kick that complements the spinach nicely.
Storage Info
How to Store Leftovers
To store your Cheesy Spinach Stuffed Shells, let them cool first. Place leftovers in an airtight container. This keeps them fresh for up to three days in the fridge. If you have extra marinara sauce, store it separately. This way, the shells stay nice and moist.
Freezing Instructions
You can freeze these stuffed shells too! After baking, let them cool completely. Arrange the shells in a single layer on a baking sheet. Freeze them for about an hour. Once frozen, transfer them to a freezer-safe container. They can last up to three months in the freezer. Just remember to label the container with the date.
Reheating Tips
When you’re ready to eat the frozen shells, remove them from the freezer. Let them thaw in the fridge overnight. Preheat your oven to 350°F (175°C). Place the shells in a baking dish and cover them with foil. Bake for about 25-30 minutes or until heated through. If you want a golden top, remove the foil for the last 10 minutes. Enjoy your meal!
FAQs
How to make Cheesy Spinach Stuffed Shells vegan?
To make Cheesy Spinach Stuffed Shells vegan, replace ricotta cheese with tofu or cashew cream. Use plant-based mozzarella instead of dairy cheese. You can skip the egg or use a flaxseed egg as a binder. This keeps the dish creamy and tasty without animal products.
Can I use frozen spinach instead of fresh?
Yes, you can use frozen spinach. Just thaw it first and drain the excess water. Frozen spinach is convenient and still packs a lot of flavor. It saves time and can still make your dish delicious.
What other cheeses work well in this recipe?
In addition to ricotta and mozzarella, try using goat cheese or feta for a tangy kick. Cream cheese adds a rich taste, too. Mixing different cheeses can create unique flavors. Don’t be afraid to experiment with your favorites!
How long do Cheesy Spinach Stuffed Shells last in the fridge?
These stuffed shells last about 3 to 5 days in the fridge. Store them in an airtight container to keep them fresh. Just reheat them before serving. They make a great quick meal for busy days!
Can I prepare the shells in advance?
Yes, you can prepare the shells ahead of time. Stuff the shells and cover them with sauce. Store them in the fridge for up to 24 hours before baking. This saves time and makes dinner easier.
This blog post covered everything you need for Cheesy Spinach Stuffed Shells. We looked at ingredients, step-by-step instructions, and helpful tips. I shared ways to store leftovers and variations to try. Now you know how to make this dish tasty and fun. Enjoy making these shells your way, and don’t forget to share with friends. Happy cooking!


