Skip to content
About
Contact
Cookie Policy
Copyright Policy
Disclaimer
Search
Home
Dinner
Appetizer
Desserts
Drinks
About
Contact
Privacy Policy
Toggle Menu
Home
/
Dinner
- Page 28
Dinner
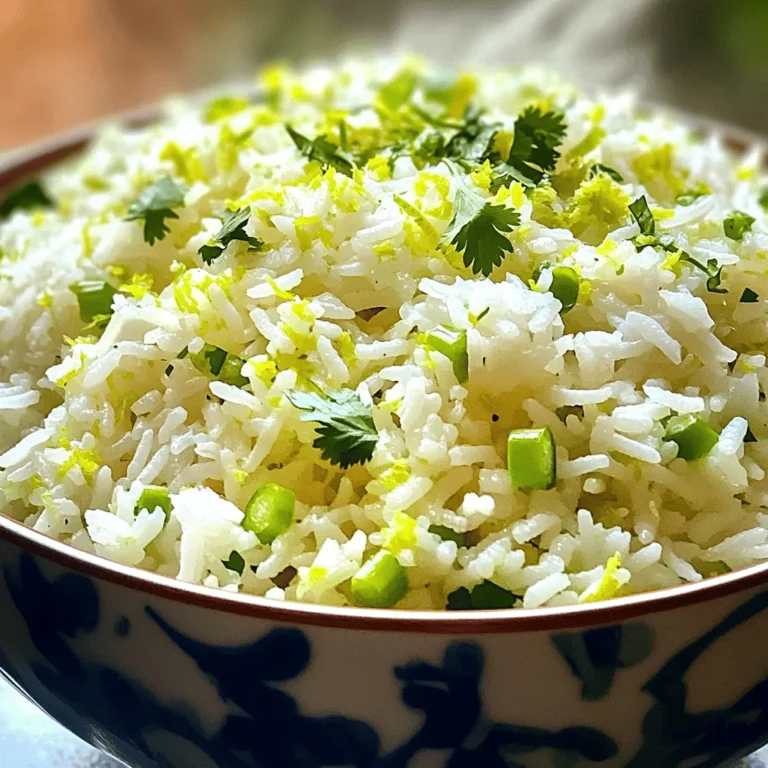
Coconut Lime Rice Flavorful and Easy Side Dish
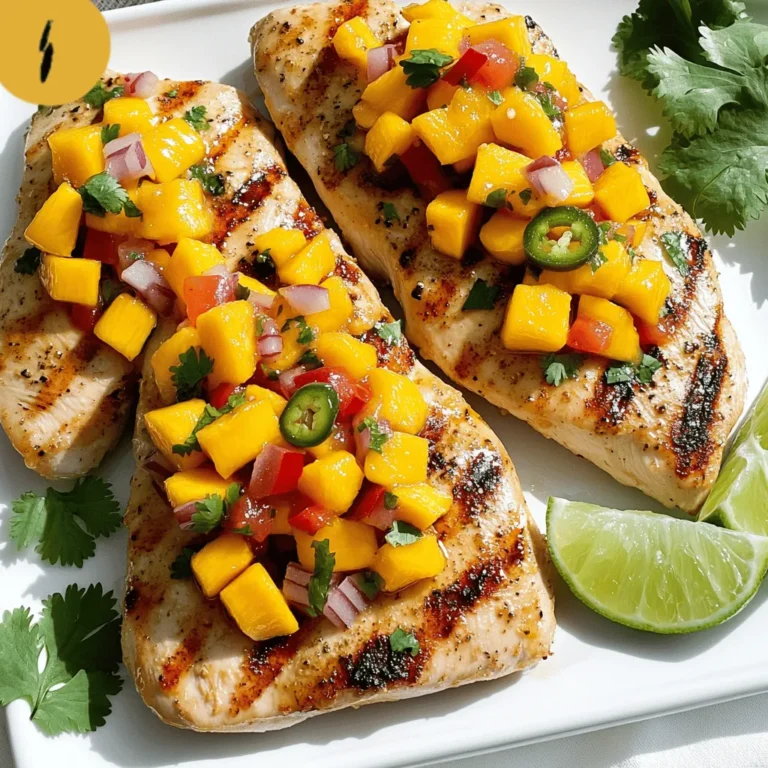
Mango Salsa Chicken Tasty and Quick Weeknight Meal
Crispy Fish Tacos Quick and Easy Weeknight Meal
Chickpea Curry Flavorful and Easy Vegan Delight
Lemon Basil Pasta Salad Fresh and Flavorful Delight
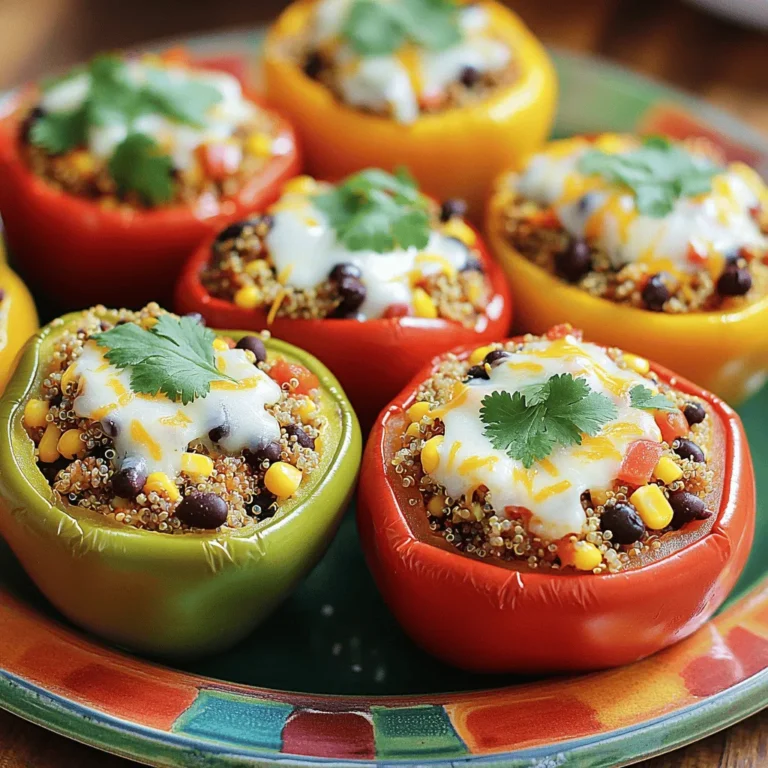
Quinoa Stuffed Bell Peppers Flavorful and Nutritious Meal
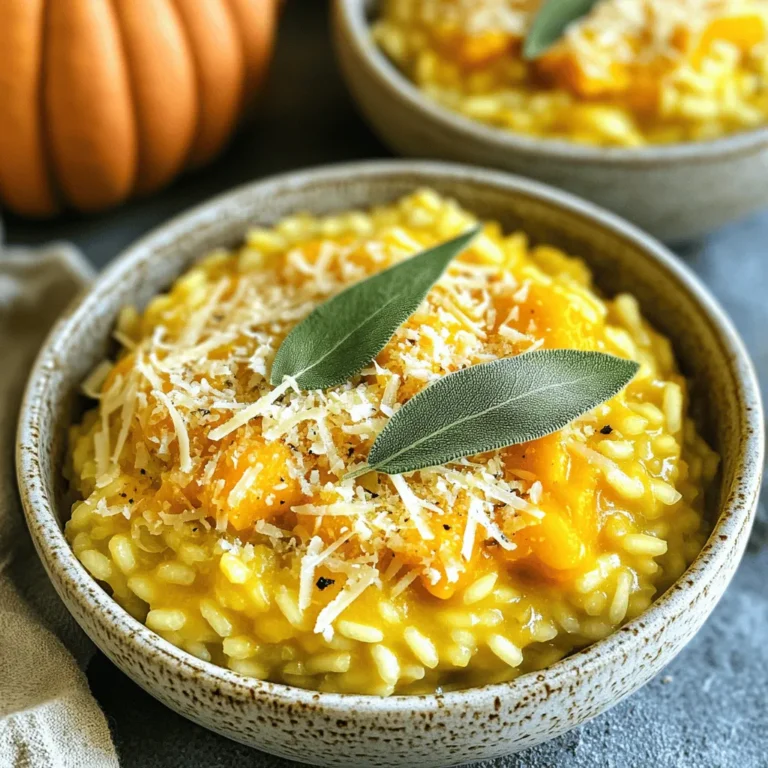
Savory Pumpkin Risotto Creamy and Comforting Recipe
Vegetarian Stuffed Peppers Flavorful and Easy Recipe
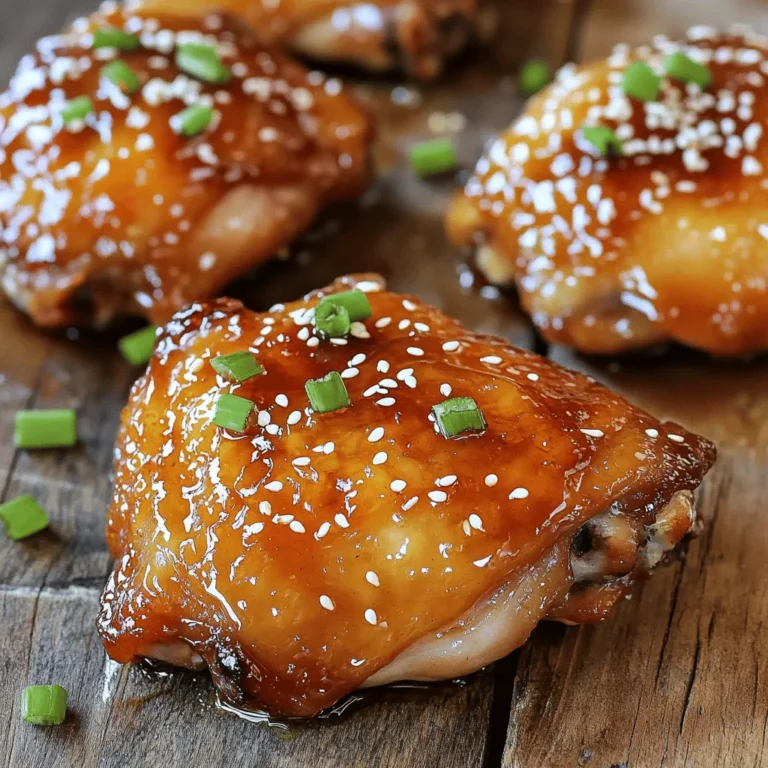
Honey Glazed Chicken Thighs Flavorful and Easy Recipe
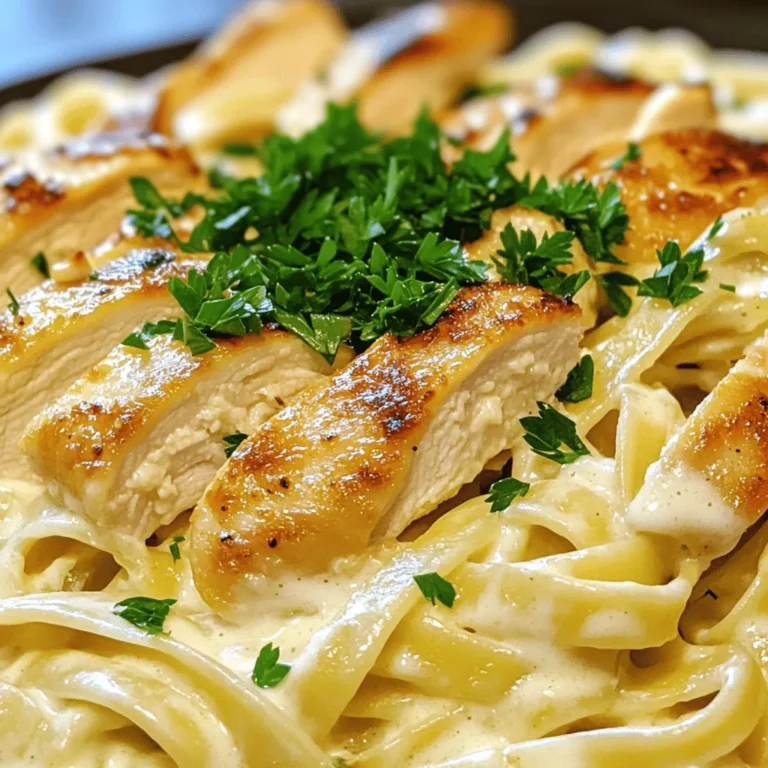
Creamy Chicken Alfredo Easy Dinner Recipe Tonight
Page navigation
Previous Page
Previous
1
…
26
27
28
29
30
…
38
Next Page
Next
Home
Dinner
Appetizer
Desserts
Drinks
About
Contact
Privacy Policy
Toggle Menu Close
Search for:
Search

![To make these crispy fish tacos, gather these key items: - 1 lb white fish fillets (cod or tilapia work great) - 1 cup all-purpose flour - 1 cup cornmeal - 1 teaspoon paprika - 1/2 teaspoon cayenne pepper - 1/2 teaspoon garlic powder - 1/2 teaspoon salt - 1/4 teaspoon black pepper - 2 large eggs, beaten - Vegetable oil, for frying - 8 small corn tortillas The toppings add flavor and texture to your tacos. Here are my favorites: - 1/2 cup red cabbage, thinly sliced - 1 avocado, sliced - Fresh cilantro leaves, for garnish - Lime wedges, for serving To round out your meal, consider these sides: - Fresh salsa for a zesty kick - A drizzle of spicy crema for creaminess - Mexican rice for a hearty addition These ingredients make crispy fish tacos a fun and tasty weeknight meal. For the full recipe, be sure to check out the details above! Start by drying the fish fillets with paper towels. This step helps the coating stick better. Cut the fish into strips that are about 1 inch wide. This size cooks evenly and fits nicely in the tacos. In a medium bowl, mix the flour, cornmeal, paprika, cayenne pepper, garlic powder, salt, and black pepper. Stir until well combined. In another bowl, beat the eggs until smooth. This egg wash will help the coating stick. Heat about 1 inch of vegetable oil in a large skillet over medium-high heat. Check if the oil is hot by dropping in a pinch of the flour mix; if it sizzles, it's ready. Dip each fish strip into the egg wash, letting excess drip off. Then coat it in the flour mixture, pressing lightly to ensure it sticks. Place the coated fish in the hot oil, frying in batches to prevent overcrowding. Cook for 3-4 minutes on each side until golden brown. Transfer the fried fish to a plate lined with paper towels to absorb extra oil. Warm each corn tortilla in a dry skillet for about 30 seconds on each side. This makes them soft and easy to fold. For each tortilla, place 2-3 pieces of crispy fish. Top with sliced red cabbage, avocado, and fresh cilantro. Don’t forget to serve the tacos with lime wedges. A squeeze of lime adds a bright, fresh flavor. For the full recipe, you can check the complete details above. To get that perfect crunch, follow these steps: - Dry the Fish: Start by patting the fish fillets with paper towels. This removes moisture and helps them get crispy. - Use Cornmeal: Mixing cornmeal with flour gives extra texture and crunch. It makes the coating thicker and crispier. - Hot Oil: Make sure the oil is hot enough before frying. If it’s too cool, the fish will absorb oil and turn soggy. - Don’t Overcrowd: Fry the fish in batches. Too many pieces at once cools the oil and affects crispiness. Here are some common mistakes you should steer clear of: - Skipping the Egg Wash: The egg wash helps the coating stick. Don’t skip this step! - Not Heating the Oil Properly: Always test the oil. If it’s not hot, you’ll end up with greasy fish. - Using Wet Fish: Wet fish won’t fry well. Always dry them before coating. - Flipping Too Soon: Let the fish cook fully on one side before flipping. This helps it stay intact and crispy. Enhance your tacos with these tasty garnishes: - Fresh Cilantro: Adds a burst of freshness and color. - Avocado: Creamy avocado pairs well with crispy fish. - Lime Wedges: A squeeze of lime brightens up the flavors. - Salsa or Crema: A drizzle of spicy crema or your favorite salsa adds flavor and moisture. For the full recipe, check out [Full Recipe]. {{image_4}} If you want to try a different protein, shrimp works great. Just peel and devein before cooking. You can also use chicken strips. They need a bit more time to cook, so adjust frying time. Another option is tofu for a different texture. Press it to remove water and cut into strips. For a vegetarian twist, use cauliflower. Cut it into small florets, coat, and fry. It gets nice and crispy. If you want a vegan option, tempeh is fantastic. Slice it thin and marinate for flavor before frying. Just make sure to use a plant-based egg wash or a mixture of flour and water. To boost flavor, add lime zest to the coating mix. It brightens each bite. For spice, increase the cayenne pepper in the coating. You can also create a spicy sauce for drizzling on top. Mix yogurt or mayo with hot sauce for a creamy kick. Fresh herbs like cilantro or parsley can add freshness too. These variations keep the dish exciting, ensuring you can enjoy crispy fish tacos in many ways! Try out the full recipe to explore these options. To keep your crispy fish tacos fresh, store leftovers in an airtight container. Place the fish in one container and the toppings in another. This keeps the fish crispy and the toppings fresh. You can also wrap the tortillas in foil for better storage. To reheat, use the oven or an air fryer for best results. Preheat your oven to 350°F (175°C). Place the fish on a baking sheet and bake for about 10 minutes. If using an air fryer, heat it to 350°F (175°C) and fry for 5 minutes. This way, the fish stays crispy. Cooked fish lasts about 2-3 days in the fridge. Fresh toppings, like cabbage and avocado, can last 1-2 days. Store each item separately. If you have leftover tortillas, they can stay fresh in a sealed bag for up to a week. Always check for signs of spoilage before using any of the ingredients. For the full recipe, check the complete list of ingredients. I recommend using white fish like cod or tilapia. These fish have a mild flavor and cook well. They stay tender inside while getting crispy on the outside. Other good options include haddock or snapper. Yes, you can prepare the fish ahead of time. Cut the fish into strips and coat them. Keep the coated fish in the fridge for up to an hour. This helps the coating stick better when you fry them. If you can't find corn tortillas, flour tortillas are a good choice. You can also use lettuce leaves for a low-carb option. They add a nice crunch and freshness to your tacos. Crispy fish tacos can be gluten-free if you use gluten-free flour. Make sure to check the labels on your ingredients. Corn tortillas are naturally gluten-free, so they work well for this dish. For the best results, use gluten-free breadcrumbs or a gluten-free flour blend for coating the fish. Crispy fish tacos are a fun dish to make at home. We discussed key ingredients, topped it with tasty options, and paired it with sides. The steps from preparing the fish to frying it were simple and clear. Use my tips for crispy results and avoid common mistakes. You can also explore variations for flavors and dietary choices. Proper storage will keep your tacos fresh. Now, enjoy making and sharing your crispy fish tacos! They’re sure to impress.](https://goldendishy.com/wp-content/uploads/2025/06/e15c4a6f-d152-43b4-ae39-d2f9004115b6-768x768.webp)

. {{image_4}} To make your Lemon Basil Pasta Salad heartier, add protein. Grilled chicken is a great choice. Cook it simply with salt and pepper. Shrimp also works well when sautéed until just pink. For a vegetarian twist, use chickpeas or black beans. They add good texture and flavor. You can even sprinkle in some diced tofu for a plant-based option. The key is to balance flavors while keeping it light. Feel free to mix up the veggies in your salad. Instead of cherry tomatoes, try sun-dried tomatoes for a richer taste. Bell peppers can be swapped for zucchini or carrots. You can even toss in some spinach for a nutrient boost. Just remember to use fresh, crisp veggies for the best flavor. The colors will make your dish pop while adding more vitamins. While the lemon vinaigrette shines, other dressings can change the salad's vibe. A balsamic vinaigrette brings a sweet tang, while a creamy dressing adds richness. Consider a pesto for an Italian twist. Just be mindful of the dressing amount; you want to enhance, not overpower. Experimenting with dressings keeps your pasta salad exciting and fresh. For the full recipe, check the details above. After you enjoy your Lemon Basil Pasta Salad, store any leftovers in an airtight container. Keep the salad in the fridge. Make sure it is cool before sealing it. This helps to keep the flavors fresh. If you added feta cheese, cover it with a bit of extra dressing. This keeps it from drying out. Your Lemon Basil Pasta Salad can last up to three days in the fridge. After that, the veggies may lose their crispness. The salad may still taste good, but it won’t be as fresh. Always check for any off smells before eating. This salad is best served cold. If you want to refresh it, add a splash of olive oil and lemon juice. Toss it gently to mix. If you must reheat, do so briefly in the microwave. Heat it for just 15-30 seconds. This will warm it without cooking the veggies. Yes, you can make this pasta salad ahead. It tastes better after sitting in the fridge. I suggest preparing it up to a day in advance. Store it in an airtight container. Just remember to leave out the basil until you serve it. This keeps the basil fresh and bright. If you need gluten-free pasta, there are great choices. Look for pasta made from rice, quinoa, or chickpeas. Brands like Banza or Tinkyada offer tasty options. They hold up well in salads. Cook them according to the package directions for the best results. To make this pasta salad vegan, skip the feta cheese. You can add extra veggies for flavor. Consider using avocado for creaminess. Nutritional yeast can add a cheesy taste, too. Just mix it in with the dressing for a nice touch. For the dressing, all the other ingredients are already vegan-friendly. In this blog post, I shared how to make a refreshing lemon basil pasta salad. We covered key ingredients, step-by-step instructions, and tips for perfecting your dish. You learned how to add variety with proteins and different veggies. Storing leftover salad properly ensures it stays fresh. By answering important FAQs, I aimed to make this recipe easy for you. Enjoy this tasty dish at your next meal or gathering. With these insights, you'll impress everyone with your delicious creation!](https://goldendishy.com/wp-content/uploads/2025/06/6f7717e1-8c71-4a8f-834a-cf8283cfe0e6-768x768.webp)
![- Bell peppers: Choose bright colors like red, yellow, or orange. These colors not only look great but also add natural sweetness. Each pepper holds the filling nicely and provides a tasty bite. - Quinoa: Rinse the quinoa well under cold water. This step removes the bitter coating called saponin. Rinsing ensures your quinoa has a clean, nutty flavor that shines in the dish. - Vegetable broth: Use low-sodium broth for better control of the flavor. It enhances the taste of quinoa and adds depth to the dish. You can also try homemade broth for a fresher taste. - Ground spices: Cumin, smoked paprika, and chili powder are key. Cumin gives an earthy flavor, while paprika adds a hint of smokiness. Chili powder can amp up the heat level, making your dish exciting. - Beans and corn: Black beans add protein and fiber, making the meal hearty. Corn brings sweetness and crunch, creating a balanced texture. Both ingredients make the filling more nutritious and filling. - Cheese alternatives: Depending on your diet, choose cheddar for a classic taste or opt for a dairy-free cheese. Both melt well and enhance the flavors, giving a creamy finish to each stuffed pepper. For the full list of ingredients, check the Full Recipe. Start by preheating your oven to 375°F (190°C). This step matters because the right heat cooks the peppers evenly and makes them tender. While the oven warms up, you can prepare the bell peppers. Cut the tops off and scoop out the seeds and membranes inside. Stand the peppers upright in a baking dish. This helps them stay stable while they bake. Next, it’s time to cook the quinoa. In a medium saucepan, add 1 cup of rinsed quinoa and 2 cups of vegetable broth. Bring it to a boil, then lower the heat. Cover and let it simmer for about 15 minutes. You want the quinoa to be fluffy and all the liquid should be gone. While the quinoa cooks, you can mix the filling. In a large bowl, combine the fluffy quinoa, black beans, corn, diced tomatoes, cumin, smoked paprika, and chili powder. Add salt and pepper to taste. Make sure everything is mixed well to ensure a consistent flavor in every bite. Now comes the fun part—stuffing the peppers! Use a spoon to fill each bell pepper with your quinoa mixture. Pack it down gently to fit as much filling as possible. Once filled, sprinkle a good amount of cheese on top of each pepper. Cover the baking dish with aluminum foil and place it in the oven. Bake for 25 minutes. After that, remove the foil and bake for another 10 minutes. This helps the cheese melt and become bubbly. The peppers should be tender but still hold their shape. Once done, take the dish out and let it cool for a few minutes. Right before serving, add fresh cilantro or parsley on top for a nice touch. For the full recipe, check out the details provided earlier. To achieve fluffy quinoa, rinse it well before cooking. Rinsing removes the bitter coating called saponin. Use a fine mesh strainer for this step. Then, cook the quinoa in the right ratio of water to quinoa. I recommend 2 cups of vegetable broth for every 1 cup of quinoa. Bring it to a boil, then simmer for 15 minutes. This way, the quinoa will be light and fluffy. When baking your stuffed peppers, timing is key. Start by covering the dish with foil for the first 25 minutes. This keeps the moisture in, helping the peppers cook evenly. After that, remove the foil and bake for an extra 10 minutes. This will make the cheese melt perfectly and the peppers tender but not mushy. For presentation, serve your stuffed peppers on a large platter. Sprinkle extra herbs like cilantro or parsley around for a fresh look. A drizzle of olive oil or a squeeze of lime juice adds brightness and flavor. As for side dishes, consider a simple green salad or some roasted vegetables. These pair well with the peppers and add color to your meal. A light white wine or sparkling water complements the dish nicely, enhancing your dining experience. For the full recipe, check out [Full Recipe]. {{image_4}} What can I use instead of black beans? You can swap in other legumes like chickpeas or kidney beans. Each offers unique flavors and textures. Chickpeas add a nutty taste, while kidney beans bring a soft bite. Both boost protein and fiber, making your meal heartier. Can I add meat to my stuffed peppers? Yes! Chicken or turkey works great. Use cooked ground meat for easy mixing. This adds a savory depth to your dish. Just remember to season the meat well for the best flavor. How can I change the spices? Explore with different spices to create new flavors. Try adding oregano for a Mediterranean twist or curry powder for a bold kick. Each spice changes the overall taste, making your stuffed peppers exciting. Can I use different veggies? Absolutely! Seasonal vegetables like zucchini, spinach, or mushrooms can enhance your filling. They add more nutrients and variety. Just chop them finely and mix them in with your quinoa and beans. For the full recipe, check out the details above. After enjoying your quinoa stuffed bell peppers, store leftovers in the fridge. Place them in an airtight container. This keeps them fresh for up to four days. If you plan to eat them later, consider freezing them. To freeze, wrap each pepper in plastic wrap. Then place them in a freezer-safe bag or container. Make sure to remove as much air as possible. Properly stored, they can last for up to three months in the freezer. When it’s time to enjoy your stuffed peppers again, you can reheat them in several ways. The oven is my favorite method. Preheat it to 350°F (175°C). Place the peppers in a baking dish and cover with foil. Bake for about 20 minutes, or until heated through. You can also use the microwave for quick reheating. Simply place a pepper on a microwave-safe plate. Cover it with a paper towel to keep moisture in. Heat it for about 2-3 minutes, checking to avoid overheating. If you prefer the stovetop, heat a skillet over medium heat and add a little water. Place the peppers in the skillet and cover. Heat for about 5-7 minutes, turning occasionally. To keep the texture nice, avoid sogginess. When reheating, do not add extra moisture or cover too tightly. This will help maintain that delightful crunch of the peppers. For the full recipe, visit the [Full Recipe]. How long do quinoa stuffed peppers last in the fridge? Quinoa stuffed peppers can last about 3 to 5 days in the fridge. Store them in an airtight container to keep them fresh. If you want to enjoy them later, just heat them up in the oven or microwave. Can I make quinoa stuffed peppers ahead of time? Yes, you can prepare quinoa stuffed peppers ahead of time. Stuff the bell peppers and store them in the fridge. Bake them when you’re ready to eat. This makes meal prep easy and convenient. What can I substitute for quinoa in this recipe? If you want to swap out quinoa, try using brown rice or couscous. Both options provide a nice texture. Just remember to adjust cooking times as needed for these ingredients. Are quinoa stuffed peppers healthy? Yes, quinoa stuffed peppers are healthy. They’re packed with protein, fiber, and vitamins. Quinoa is a complete protein, making this dish a great choice for a balanced meal. Gluten-free options: Ensuring a safe meal for all Quinoa is naturally gluten-free, so this dish is safe for gluten-sensitive people. Just check your labels for any added ingredients that might contain gluten. Vegetarian vs. vegan: Key differences in ingredients Vegetarian quinoa stuffed peppers include cheese, while vegan ones use dairy-free cheese. Both versions are delicious. Choose based on your dietary needs. Quinoa stuffed bell peppers use fresh ingredients and bold flavors for a tasty meal. First, choose colorful bell peppers and rinse the quinoa for the best taste. Use ground spices and beans to boost nutrition. Follow the steps closely for perfect results, and don’t forget to try different flavors and proteins. Store leftovers well to enjoy later. Healthy and easy, this dish fits any dinner. You can impress friends and family while eating well! So, get cooking and enjoy every bite of your delicious creation.](https://goldendishy.com/wp-content/uploads/2025/06/de4f4195-310c-4430-9b68-8374d14e079c-768x768.webp)