Skip to content
About
Contact
Cookie Policy
Copyright Policy
Disclaimer
Search
Home
Dinner
Appetizer
Desserts
Drinks
About
Contact
Privacy Policy
Toggle Menu
Home
/
Dinner
- Page 25
Dinner
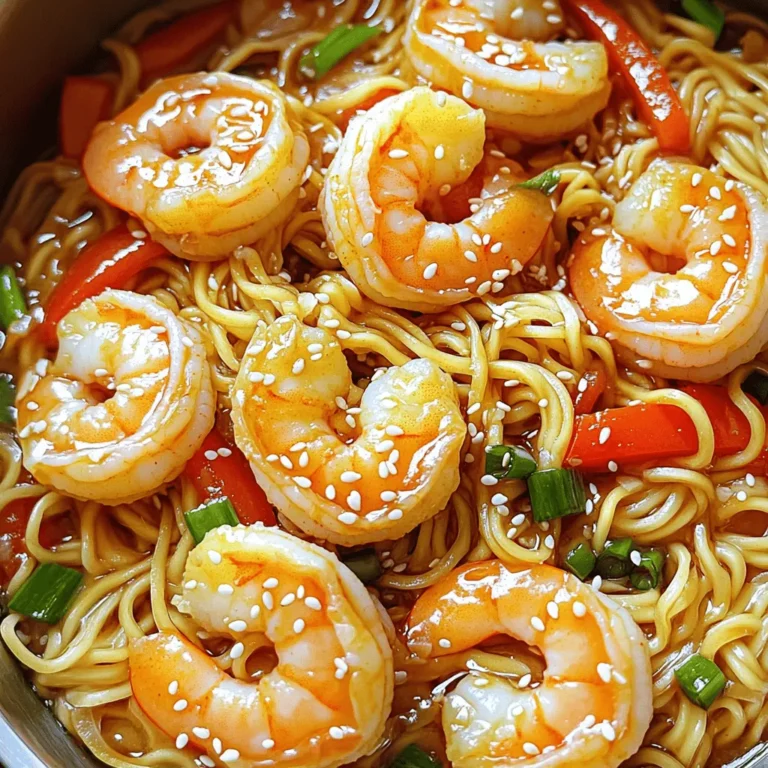
Spicy Garlic Noodles with Shrimp Flavorful Delight
Lemon Basil Chicken Skewers Flavorful Summer Delight
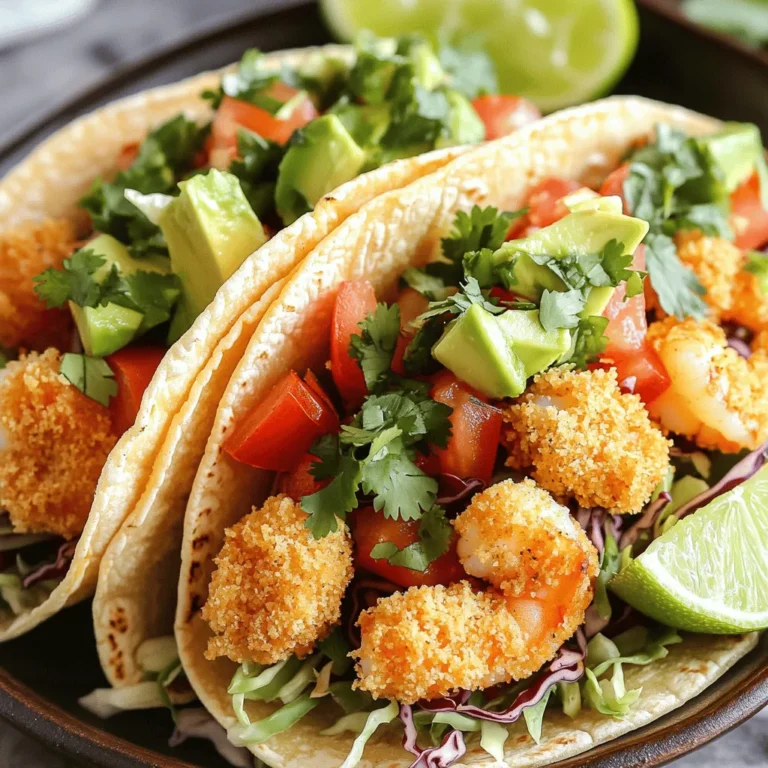
Crispy Baked Shrimp Tacos with Flavorful Toppings
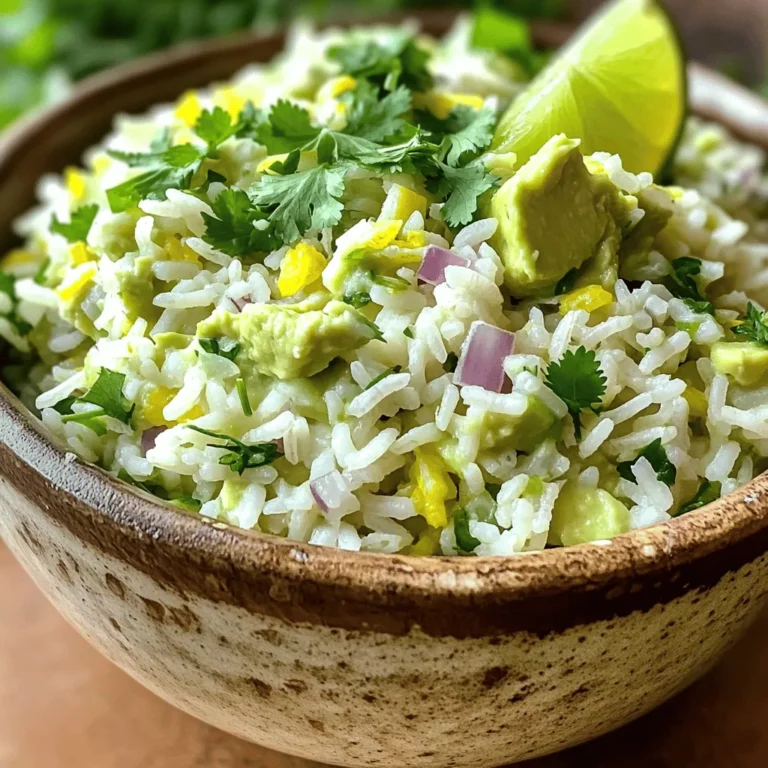
Avocado Lime Rice Flavorful and Simple Side Dish
Spicy Lemon Garlic Chicken Skewers Tasty and Simple
Garlic Butter Grilled Shrimp Tacos Fresh and Flavorful
7. Classic Beef Stroganoff Delicious Comfort Food Recipe
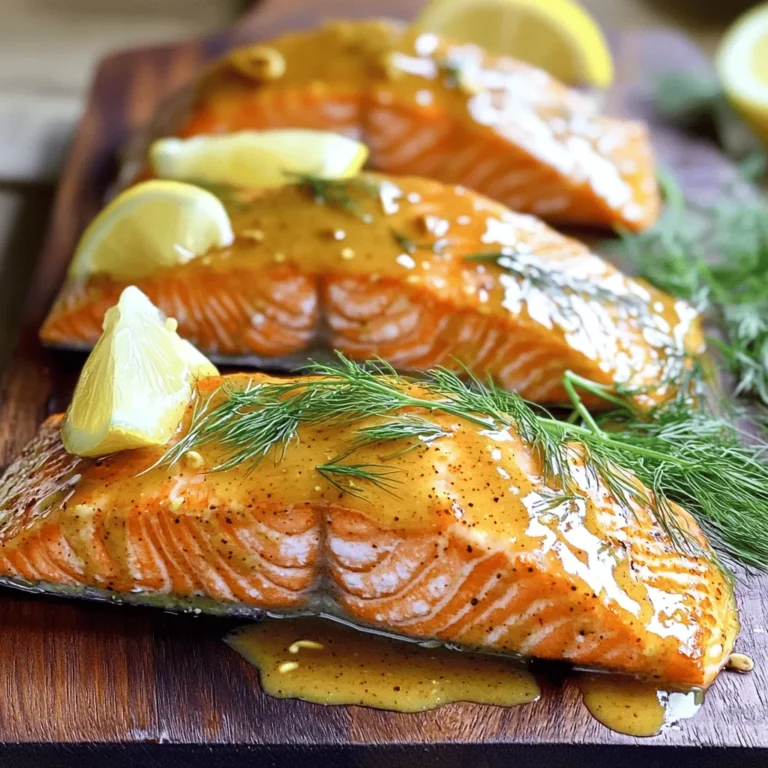
Honey Mustard Glazed Salmon Easy Flavorful Recipe
Mediterranean Quinoa Salad Fresh and Tasty Meal
Powerful Sweet Potato and Black Bean Chili Recipe
Page navigation
Previous Page
Previous
1
…
23
24
25
26
27
…
29
Next Page
Next
Home
Dinner
Appetizer
Desserts
Drinks
About
Contact
Privacy Policy
Toggle Menu Close
Search for:
Search

![- 1 pound boneless, skinless chicken breasts, cut into 1-inch cubes - 1/4 cup fresh basil leaves, finely chopped - Zest from 2 lemons (about 2 tablespoons) - 3 tablespoons freshly squeezed lemon juice The chicken breast serves as a great base. It’s lean, tender, and perfect for grilling. Fresh basil adds a bright, herbal note. The lemon zest and juice provide a refreshing tang that makes this dish stand out. - 2 tablespoons extra virgin olive oil - 2 cloves garlic, finely minced - 1 teaspoon honey (optional, for a touch of sweetness) Olive oil keeps the chicken moist and helps the flavors blend. Garlic adds depth and aroma, while honey can balance the tart lemon if you want a hint of sweetness. - Salt and freshly ground black pepper to taste - Wooden or metal skewers Salt and pepper are essential for enhancing flavors. If you use wooden skewers, soak them in water for 30 minutes. This prevents burning during grilling. For the Full Recipe, check the detailed instructions along with cooking tips. You’ll need these ingredients to create a fantastic summer delight. To start, mix the marinade ingredients in a bowl. Combine: - 1/4 cup fresh basil leaves, finely chopped - Zest from 2 lemons (about 2 tablespoons) - 3 tablespoons freshly squeezed lemon juice - 2 tablespoons extra virgin olive oil - 2 cloves garlic, finely minced - 1 teaspoon honey (optional) - Salt and pepper to taste Whisk these together until they blend well. This step builds flavor. The lemon and basil create a bright, fresh taste that makes the chicken sing. Marination is key for juicy chicken. It helps the meat soak up the marinade's flavors. Once you prepare the marinade, add the cubed chicken to the bowl. Make sure each piece is coated. Cover the bowl tightly with plastic wrap. Let the chicken marinate in the fridge for at least 30 minutes. For best results, aim for 1-2 hours. This allows the chicken to become tender and flavorful. While the chicken marinates, preheat your grill or grill pan over medium-high heat. A hot grill helps create a nice sear on the chicken. Once the chicken is ready, thread the cubes onto skewers. Leave small gaps between pieces for even cooking. Place the skewers on the grill. Cook them for about 10-12 minutes, turning them often. To ensure the chicken is done, use a meat thermometer. The internal temperature should reach 165°F. After grilling, let the skewers rest for a few minutes. This helps keep the chicken moist. For the full recipe, check the section above. Enjoy making your lemon basil chicken skewers! To get juicy chicken, monitor the grill's temperature. Aim for medium-high heat. This helps cook the chicken quickly while keeping it tender. Use a meat thermometer to check the inside. The chicken should reach 165°F. Avoid over-charring by turning the skewers. Rotate them every few minutes for even cooking. If you see dark spots, move the skewers to a cooler part of the grill. This way, the chicken cooks well without burning. You can add more spices and herbs to the marinade. Consider using oregano or thyme for extra zest. A pinch of red pepper flakes can give it a nice kick. Just be careful not to overpower the lemon and basil. For marinating, let the chicken soak for at least 30 minutes. If you have time, marinate it for a few hours. The longer it sits, the more flavor it absorbs. This step makes a big difference in taste. For plating, arrange the skewers on a wooden board or a nice platter. Adding fresh basil leaves and lemon wedges makes it look vibrant. This adds a pop of color and gives a hint of what’s inside. Pair the skewers with side dishes like grilled vegetables or a fresh salad. You can also serve them with rice or quinoa for a filling meal. These sides enhance the overall experience of your lemon basil chicken skewers. Check the Full Recipe for more ideas! {{image_4}} You can change things up with lemon basil chicken skewers. Try adding vegetable skewers. Bell peppers, zucchini, and cherry tomatoes make great choices. They add color and crunch. If you want to swap proteins, shrimp is a tasty option. Shrimp cooks fast and absorbs flavors well. Just marinate them the same way as chicken. Dipping sauces can take your skewers to new heights. A simple garlic aioli pairs well with the fresh flavors. You can also try tzatziki for a cool and creamy contrast. For a spicy kick, sriracha or a sweet chili sauce is perfect. These sauces work with the lemon and basil, enhancing each bite. If you need gluten-free options, check your sauces and marinades. Most of the ingredients are safe, but read labels. For vegan alternatives, use tofu or tempeh instead of chicken. Marinate them just like the chicken for the best taste. You can still enjoy the bright lemon and basil flavors in a plant-based version. For the full recipe, check the [Full Recipe]. Refrigeration Guidelines After cooking, allow the chicken skewers to cool. Place them in an airtight container. Refrigerate within two hours. The chicken can stay fresh for up to four days. Always check for any signs of spoilage before eating. Freezing Tips If you want to keep them longer, freezing is a great option. Wrap the skewers tightly in plastic wrap. Then, place them in a freezer bag. They can last for up to three months in the freezer. When ready to use, thaw them in the fridge overnight before reheating. Best Methods The best way to reheat your skewers is in the oven. Preheat it to 350°F (175°C). Place the skewers on a baking tray for about 10 to 15 minutes. This method helps keep the chicken juicy. You can also reheat them on the grill for a nice char. Maintaining Flavor and Texture To maintain the flavor, add a splash of water or broth while reheating. Cover the skewers with foil to keep moisture in. This prevents the chicken from drying out and keeps it tasty. How Long Can They Last? When stored properly, cooked lemon basil chicken skewers can last for about four days in the fridge. If frozen, they can last up to three months without losing quality. Signs of Spoilage Always check for signs of spoilage. If the chicken smells off or has a slimy texture, it's best to toss it. Color change can also indicate spoilage. Trust your senses; when in doubt, throw it out. If you want to swap chicken, many tasty options exist. You can use: - Turkey breast: It has a mild flavor like chicken. - Tofu: Great for a plant-based option. - Shrimp: Cooks fast and absorbs flavors well. - Pork tenderloin: Offers a different texture and taste. Each of these options works well with the lemon and basil marinade. Adjust cooking times based on the protein you choose. Yes! Preparing the marinade ahead saves time. Here are some tips: - Mix all marinade ingredients in a bowl. - Store it in a sealed container in the fridge for up to 2 days. - When ready, add your chicken and let it soak up those flavors. Make sure to mix well before using. This keeps the flavors fresh and vibrant. To make sure your chicken is safe to eat, use a meat thermometer. Here’s how: - Insert the thermometer into the thickest part of the chicken. - Look for a temperature of 165°F. This means it’s fully cooked. - If you don't have a thermometer, cut a piece open. The meat should be white, not pink. Using a thermometer helps you avoid undercooked chicken, keeping your meal safe and tasty. You now know how to make delicious grilled chicken skewers. Start with fresh chicken, herbs, and a tasty marinade. Marinade time is key for flavor. Grilling tips help you serve juicy chicken every time. You can try different add-ins or sauces for variety. Store leftovers properly to keep them fresh. This recipe is simple yet satisfying, perfect for meals anytime. Enjoy creating your perfect skewers!](https://goldendishy.com/wp-content/uploads/2025/06/c554147d-c949-48f7-8e40-7e32e563b89e-768x768.webp)
. Start by gathering all your ingredients. You will need chicken, garlic, lemon juice, and spices. If you use wooden skewers, soak them in water for at least 30 minutes. This step helps keep them from burning on the grill. In a large bowl, mix the minced garlic, lemon juice, lemon zest, olive oil, smoked paprika, cayenne pepper, ground cumin, salt, and pepper. Whisk these together until they blend well. Then add the chicken cubes. Make sure each piece is coated in the marinade. Cover the bowl and place it in the fridge. Let it marinate for at least 1 hour, or longer if you have time. This will add great flavor to the chicken. Preheat your grill to medium-high heat. If you use a grill pan, heat it over medium on the stove. Once your chicken has marinated, thread the pieces onto the skewers. Leave a small space between each piece. This helps the chicken cook evenly. Grill the skewers for about 10 to 12 minutes. Turn them often to get nice grill marks. Check that the chicken reaches an internal temperature of 165°F (75°C). After grilling, let the skewers rest for a few minutes. This keeps the juices inside. Finally, garnish with fresh parsley before serving. This adds a nice touch to your dish. For the full recipe, check the instructions above. To get the best flavor, use fresh ingredients. Fresh garlic and lemon juice give a bright taste. When mixing the marinade, let the spices blend well. They create a rich flavor. Don't rush the marinating. Allow at least one hour, or better yet, overnight. This soaking time lets the chicken absorb all those tasty flavors. Adjust the cayenne pepper based on your spice level. This way, you can make the dish mild or fiery to fit your taste. One common mistake is not soaking wooden skewers. If you skip this step, they can burn on the grill. Always soak them for at least thirty minutes. Another mistake is overcrowding the skewers. Leave some space between the chicken pieces. This helps them cook evenly. Also, don't rush the resting time after grilling. Letting them rest keeps the juices inside, making the chicken juicy. To make your skewers look great, use a large serving platter. Arrange the skewers neatly. Add fresh lemon wedges around them for color. A sprinkle of chopped parsley on top makes it more inviting. For an extra treat, serve with a yogurt dip or tzatziki. This adds creaminess and coolness to the spicy flavors. These simple steps can elevate your dish and impress your guests. For the complete guide on making these skewers, check the Full Recipe. {{image_4}} You can swap chicken for other proteins. Try shrimp for a quick cook. Beef or pork also works well. Just adjust your cooking time to avoid overcooking. Fish, like salmon, can add a rich flavor. Each protein brings its own taste. For a vegetarian version, use firm tofu. It soaks up flavors well. You can also try mushrooms for a meaty texture. Bell peppers, zucchini, and cherry tomatoes make colorful additions. For a vegan option, skip the chicken and keep the marinade. Mix things up with different marinades. Try adding soy sauce or ginger for an Asian twist. A spicy chili paste can add heat. For a Mediterranean flair, use herbs like oregano and thyme. Experiment with what you like for new tastes. For the full recipe, check out the details above. After enjoying your spicy lemon garlic chicken skewers, let any leftovers cool down. Place them in an airtight container. Store them in the fridge for up to three days. This keeps the chicken fresh and tasty for later meals. To reheat the chicken skewers, preheat your oven to 350°F (175°C). Place the skewers on a baking sheet. Heat for about 10-15 minutes or until they are warm. You can also use a microwave. Heat them on medium power for 1-2 minutes. This way, the chicken stays juicy and delicious. If you want to save the skewers for later, freezing is a great option! Wrap each skewer in plastic wrap or aluminum foil. Place them in a freezer-safe bag. They can last up to three months in the freezer. When you are ready to eat them, thaw them in the fridge overnight. Then, reheat as mentioned above for a tasty meal. For the full recipe, check out the link! You should marinate chicken for at least 1 hour. For the best taste, let it sit overnight. This longer time allows the flavors to soak in well. The garlic and lemon will really shine through. Just remember, the longer the chicken sits in the marinade, the more flavorful it becomes. Yes, you can cook these skewers in the oven. Preheat your oven to 400°F (200°C). Line a baking sheet with foil for easy cleanup. Place the skewers on the sheet and bake for about 15-20 minutes. Make sure to turn them halfway through for even cooking. Check that the chicken reaches 165°F (75°C) inside. These skewers go great with many side dishes. Here are some tasty options: - Grilled vegetables like bell peppers and zucchini - A fresh green salad with lemon vinaigrette - Rice or quinoa to soak up the juices - Garlic bread for a crunchy contrast Each of these sides will add a nice balance to the meal. To change the spice level, simply adjust the cayenne pepper. For less heat, use half a teaspoon or skip it. If you want more spice, add an extra teaspoon. You can also use spicy marinades or hot sauce for extra kick. Always taste as you go, so you can find your perfect level of heat. For the full recipe, check the earlier section. Enjoy cooking! You learned how to make Spicy Lemon Garlic Chicken Skewers. We covered the main ingredients, marinade, and garnishes. I provided step-by-step instructions for grilling. You also got tips for perfect flavor and common mistakes to avoid. There are variations, like using different proteins and marinades. Lastly, I shared storage info and answered key FAQs. Try these skewers for your next cookout. Enjoy the bold flavors and easy prep!](https://goldendishy.com/wp-content/uploads/2025/06/b1f94ef8-81fb-4621-8ae2-1513b5b656e4-768x768.webp)
![- 1 pound fresh shrimp, peeled and deveined - 3 tablespoons unsalted butter, divided - 4 cloves garlic, finely minced - 1 teaspoon smoked paprika - 1 teaspoon ground cumin - Salt and freshly ground black pepper, to taste - 8 small corn tortillas - 1 cup red cabbage, finely shredded - 1 ripe avocado, sliced into thin wedges - Fresh cilantro leaves, roughly chopped, for garnish - Lime wedges, cut into quarters, for serving To make these garlic butter grilled shrimp tacos, you need fresh shrimp. I recommend getting shrimp that are firm and have a nice sheen. Make sure they are peeled and deveined for easy eating. Butter is key for adding richness. Use unsalted butter so you can control the saltiness. Garlic adds a wonderful aroma and flavor. Mince it finely for the best taste. For spices, smoked paprika brings a deep, smoky flavor. Ground cumin adds warmth. Be sure to season with salt and black pepper to taste. Corn tortillas are the perfect wrap. They are soft and add a nice corn flavor. Red cabbage gives a crunchy texture and a pop of color. Sliced avocado adds creaminess. Fresh cilantro gives a burst of freshness. Finally, lime wedges add a zesty kick. To see the full recipe, check out the [Full Recipe]. To start, melt 2 tablespoons of unsalted butter in a large skillet. Use medium heat. Once the butter is melted, add 4 cloves of minced garlic. Sauté the garlic for 1-2 minutes. It should smell great and turn a light golden color. Be careful not to burn the garlic! Next, stir in 1 teaspoon of smoked paprika and 1 teaspoon of ground cumin. Add a pinch of salt and fresh black pepper to taste. Mix well. This creates a tasty marinade for the shrimp. Now, add 1 pound of peeled and deveined shrimp to the skillet. Cook the shrimp for 3-4 minutes. Stir occasionally to make sure they cook evenly. You will know they are done when they turn opaque and pink. This buttery garlic mixture makes them extra delicious! While the shrimp cooks, take another skillet and heat it over medium-high heat. Warm each of the 8 small corn tortillas for about 30 seconds on each side. You want them to be soft and flexible. Look for slight char marks on the tortillas. This adds great flavor! To build your tacos, take a warm tortilla and layer some cooked shrimp in the center. Then, top it with shredded red cabbage and avocado slices. The cabbage adds crunch, while the avocado gives creaminess. Finish off your tacos by adding fresh cilantro on top. Serve them with lime wedges on the side for a zesty touch. For a nice presentation, arrange the tacos on a colorful platter. You can add extra cilantro and lime wedges to make it look even better. Enjoy every bite with a squeeze of lime! When picking shrimp, you have two main choices: fresh or frozen. Fresh shrimp can taste better, but frozen shrimp is often just as good. If you choose frozen shrimp, look for those that are flash-frozen right after harvest. This keeps them fresh and tasty. Size matters too! For tacos, I suggest using medium to large shrimp. They hold up well in the taco and give you a satisfying bite. Aim for shrimp that are about 21 to 30 per pound. To boost the flavor, you can swap the spices. Try adding chili powder or even a pinch of cayenne for heat. If you want a smoky taste, smoked paprika works wonders. You can also mix in some lime zest for a bright kick. To elevate your tacos, think about toppings. Mango salsa adds sweetness, while jalapeños bring heat. A drizzle of sour cream or a splash of hot sauce can make your tacos sing. Do not overcook your shrimp. They cook quickly and should only take 3-4 minutes. When they turn pink and opaque, they are done. Overcooking makes them tough and rubbery. For the tortillas, warmth is key. Heat them in a hot skillet for about 30 seconds on each side. This gives them a nice char and keeps them soft. You can also wrap them in a clean towel to keep them warm while you assemble your tacos. {{image_4}} You can switch the shrimp for other proteins. Chicken is a great option. Use boneless chicken breasts cut into bite-sized pieces. Season them like the shrimp. Cook until golden brown and juicy. Fish also works well. Choose firm fish like mahi-mahi or cod. Grill or pan-fry the fish until flaky. For a vegetarian twist, try veggies or tofu. Grilled bell peppers, onions, and zucchini make a colorful filling. Tofu absorbs flavors well, so marinate it before grilling. Want to spice things up? Add jalapeños or your favorite hot sauce. Slice jalapeños and mix them in with the shrimp. This adds a nice kick. You can change the toppings too. Mango salsa adds sweetness and freshness. Just mix diced mango, red onion, and lime juice. Another tasty option is crema. This creamy sauce balances the spices. Mix sour cream with lime juice and a pinch of salt. Serve your tacos with tasty sides. A fresh salad pairs well. Try a simple cucumber and tomato salad. Rice and beans are classic choices too. Cilantro lime rice adds bright flavor. For drinks, grab a cold beer or a zesty margarita. A light, fruity drink will complement the meal. Explore the full recipe for more ideas. To keep your garlic butter grilled shrimp tacos fresh, store them in an airtight container. Place the shrimp and toppings in separate containers. This helps maintain the flavors and textures. For the tortillas, wrap them in foil or plastic wrap. This keeps them soft and prevents them from drying out. Use them within three days for the best taste. To reheat the shrimp, place them in a skillet over low heat. Add a splash of water or a bit of butter to keep them moist. Heat for about five minutes, stirring gently. For the tortillas, warm them in a dry skillet for about 30 seconds each side. This method helps keep them soft and adds a nice char. Avoid using the microwave, as it may make them chewy. Yes, you can freeze grilled shrimp! Cool the shrimp completely before placing them in a freezer-safe bag. Squeeze out as much air as possible to prevent freezer burn. They can last up to three months in the freezer. When you're ready to use them, thaw overnight in the fridge. For meal prep, consider freezing the shrimp without the seasonings. This way, you can add fresh spices when you cook them later. You can tell when shrimp are cooked by looking for a few signs. First, they change color from grey to bright pink. Second, they curl into a C shape. Finally, perfectly cooked shrimp feel firm to the touch. If they are tough or rubbery, they may be overcooked. The cooking time is usually 3-4 minutes, but this can vary with size. Yes, you can prepare some parts of the tacos in advance. Cook the shrimp and store them in the fridge for up to two days. You can also warm the tortillas just before serving. If you want to save time, chop the cabbage and avocado ahead of time. Just remember to squeeze lime juice on the avocado to keep it fresh and green. Some great sides to serve with shrimp tacos include: - Cilantro lime rice - Black beans - Corn salad - Chips with salsa - Grilled vegetables These sides balance the flavors of the shrimp tacos and make the meal more complete. You can also serve a light salad to add freshness. You learned how to make delicious shrimp tacos from scratch. We covered fresh ingredients, step-by-step cooking, and tasty toppings. Remember, fresh shrimp and warm tortillas make a big difference. You can customize flavors with spices or different proteins. Enjoy serving them with a refreshing drink on the side. Proper storage will keep your leftovers tasty too. Whether you’re cooking for one or many, these tacos are a hit. Enjoy your cooking and get ready for a yummy meal.](https://goldendishy.com/wp-content/uploads/2025/06/f6806160-83d3-4aa8-a207-34a87a11273f-768x768.webp)

![To make a fresh Mediterranean quinoa salad, gather these key ingredients: - 1 cup quinoa, thoroughly rinsed - 2 cups vegetable broth (preferably low-sodium) - 1 bell pepper (either red or yellow), finely diced - 1 medium cucumber, diced into bite-sized pieces - 1 cup cherry tomatoes, halved - 1/4 of a medium red onion, finely chopped - 1/2 cup Kalamata olives, pitted and sliced - 1/2 cup feta cheese, crumbled - 1/4 cup fresh parsley, finely chopped - 1/4 cup extra virgin olive oil - 2 tablespoons freshly squeezed lemon juice - 1 teaspoon dried oregano - Sea salt and freshly cracked black pepper to taste These ingredients blend well together. Each one adds a unique flavor. The quinoa forms the base, while the vegetables add crunch and color. Kalamata olives give it a salty twist, and feta cheese adds creaminess. You can customize your salad with these optional add-ins: - Avocado for creaminess - Grilled chicken for protein - Chickpeas for extra fiber - Spinach or arugula for leafy greens - Sun-dried tomatoes for a tangy kick These add-ins can enhance the salad's taste and texture. Feel free to experiment with what you love! This salad is a healthy choice. It is packed with nutrients. Here’s a quick look at its benefits: - Quinoa: High in protein and fiber - Vegetables: Rich in vitamins and minerals - Olive oil: A source of healthy fats - Feta cheese: Adds calcium and flavor One serving provides a balanced mix of protein, healthy fats, and carbs. Eating this salad can support your health while satisfying your taste buds. For the full recipe, check out Mediterranean Quinoa Salad Delight! To start, rinse 1 cup of quinoa under cold water. This step removes the bitter coating. Next, combine the rinsed quinoa and 2 cups of vegetable broth in a medium saucepan. Bring this mixture to a rolling boil over medium-high heat. Once boiling, reduce the heat to a gentle simmer. Cover the saucepan and let it cook for about 15 minutes. The quinoa is ready when it absorbs all the liquid and becomes fluffy. After cooking, fluff it with a fork and transfer it to a large mixing bowl. Let it cool for a few minutes. While the quinoa cools, prepare the vegetables. Dice 1 bell pepper and 1 medium cucumber. Halve 1 cup of cherry tomatoes. Finely chop 1/4 of a medium red onion, and slice 1/2 cup of Kalamata olives. In the same large bowl with the quinoa, add all these diced vegetables along with 1/2 cup of crumbled feta cheese. Gently stir to mix everything together. For the dressing, take a separate small bowl. Whisk together 1/4 cup of extra virgin olive oil, 2 tablespoons of freshly squeezed lemon juice, and 1 teaspoon of dried oregano. Add sea salt and freshly cracked black pepper to taste. Whisk until the dressing is well combined and emulsified. Pour the dressing over the quinoa and vegetable mixture. Toss everything together until the quinoa and veggies are well coated with the dressing. Finally, fold in 1/4 cup of finely chopped fresh parsley. Be careful not to break the feta or overcrowd the grains. Cover the bowl and let the salad sit at room temperature for at least 30 minutes. This time helps the flavors blend beautifully. For the full recipe, check out the Mediterranean Quinoa Salad Delight. To cook quinoa, rinse it well in cold water. This removes bitterness. Use a ratio of 1 part quinoa to 2 parts vegetable broth. Boil the mixture, then reduce the heat to simmer. Cover and cook for about 15 minutes. When done, fluff it gently with a fork. Let it cool before mixing it with other ingredients. To boost flavors, add fresh herbs like basil or mint. You can also toss in some garlic or lemon zest for a zing. Experiment with different olives or cheese types. Each will give a unique twist. Don't forget to season with salt and pepper to taste. Serve the salad in a large bowl for sharing. For individual servings, use small plates. Garnish with lemon wedges and extra parsley for color. A drizzle of olive oil on top adds shine and flavor. You can also pair it with grilled chicken or fish for a complete meal. Find the full recipe in the article to enjoy a fresh and tasty meal. {{image_4}} You can easily boost the protein in your Mediterranean quinoa salad. Adding cooked chicken gives a hearty touch. Simply grill or roast chicken breasts, then slice them up and mix them in. If you prefer a meatless option, chickpeas work great. Use canned chickpeas for quick prep. Rinse and drain them before adding. While the olive oil and lemon dressing is tasty, you can try other dressings too. A balsamic vinaigrette adds a sweet tang. For a creamy twist, mix Greek yogurt with lemon juice and herbs. This will make the salad richer and even more satisfying. Swap in seasonal veggies for fresh flavor. In the spring, add sweet peas or asparagus. In summer, try zucchini or fresh corn. Autumn brings squash or roasted root vegetables. Winter is great for kale or Brussels sprouts. These swaps keep your salad exciting and varied all year round. Feel free to check the Full Recipe for more details! After enjoying your Mediterranean quinoa salad, store leftovers in the fridge. Place the salad in a bowl and cover it tightly with plastic wrap or a lid. This helps keep the salad fresh and tasty. If you want to save some for later, portion it out into meal prep containers. When storing your salad, use airtight containers. Glass containers work great because they don't stain or retain odors. If you prefer plastic, choose BPA-free containers. Ensure they are deep enough to hold the salad without squishing it. If you have a dressing, keep it separate until you are ready to eat to avoid sogginess. Your Mediterranean quinoa salad will last in the fridge for about 3 to 5 days. If you notice any change in smell or color, it’s best to toss it out. Reheating is not recommended for salads with fresh veggies. Instead, enjoy the salad cold or at room temperature. If you want to warm it up, heat the quinoa-only portion in a microwave for about 30 seconds, but avoid reheating the veggies and feta. For the full recipe, check [Full Recipe]. Quinoa is a tiny seed rich in protein, fiber, and vitamins. It is gluten-free and very nutritious. It helps in building muscles and keeps you full longer. Quinoa contains all nine essential amino acids, making it a complete protein. This is great for vegans and vegetarians. It also has antioxidants that help fight inflammation. Eating quinoa may support heart health and improve digestion. Yes, you can make this salad ahead of time. It tastes even better after sitting for a few hours. Just keep it in the fridge for up to three days. The flavors meld together nicely. If you add the dressing later, it stays fresh longer. Just remember to mix it before serving to spread the flavors. To make this salad vegan, skip the feta cheese. You can use avocado instead for creaminess. You can also add extra olives or nuts for texture. The dressing is already vegan with olive oil and lemon juice. This way, you keep it tasty without any animal products. This salad pairs well with many dishes. You can serve it with grilled chicken or fish for protein. It also goes nicely with roasted vegetables or hummus. For a lighter meal, enjoy it with pita bread. This salad is great as a side or a main dish. The Mediterranean quinoa salad is a tasty and healthy dish. We covered key ingredients, from quinoa and fresh veggies to possible add-ins. I shared easy steps for preparing the salad and tips for cooking quinoa just right. You learned about variations and how to store leftovers properly. Remember, this salad is very flexible; you can change the protein and dressing as you like. Enjoy this dish for its flavor and nutrition. It’s simple, refreshing, and great for any meal!](https://goldendishy.com/wp-content/uploads/2025/06/0bb42d2e-6f0a-4b63-945d-06b8684c6b2f-768x768.webp)
![- 2 medium sweet potatoes, peeled and cut into ½-inch cubes - 1 can (15 oz) black beans, drained and thoroughly rinsed - 1 can (14 oz) diced tomatoes, including their juices - 1 medium onion, finely chopped - 2 cloves garlic, minced - 1 red bell pepper, diced - 2 tablespoons olive oil - 2 tablespoons chili powder - 1 teaspoon ground cumin - ½ teaspoon smoked paprika - 1 cup vegetable broth - Salt and pepper, to taste To make my sweet potato and black bean chili pop with flavor, I focus on fresh ingredients. The sweet potatoes provide a creamy texture and a hint of sweetness. I use black beans for protein and fiber, which makes this dish filling. The diced tomatoes add acidity and moisture, balancing the flavors. Aromatics like onion, garlic, and red bell pepper create a fragrant base. Olive oil helps to sauté these ingredients, unlocking their full taste. I season the chili with chili powder, cumin, and smoked paprika. These spices bring warmth and depth to the dish. Vegetable broth adds richness, making the chili hearty and satisfying. Don’t forget to season with salt and pepper to taste; this step enhances every bite. - Fresh cilantro - Avocado slices For extra flavor, I love to add fresh cilantro on top. It gives the chili a fresh kick. Avocado slices add a creamy touch, making each bowl even more delicious. The chili is packed with nutrients. One serving has about 300 calories. It offers a good mix of proteins, carbs, and healthy fats. Each ingredient brings its own health benefits: - Sweet Potatoes: High in vitamins A and C, they support your immune system. - Black Beans: Rich in fiber, they aid digestion and keep you full. - Diced Tomatoes: Loaded with antioxidants, they help fight inflammation. - Aromatics: Onions and garlic have heart health benefits. - Olive Oil: Contains healthy fats that support brain health. Enjoying this chili not only warms your belly but also fuels your body with great nutrition. For the full recipe, you can check out my Sweet Potato and Black Bean Chili. How to Prepare and Cut Sweet Potatoes To start, grab two medium sweet potatoes. Use a peeler to remove the skin. Cut them into ½-inch cubes. This size helps them cook evenly. Place the cubes in a bowl of water to prevent browning. Tips for Cooking Aromatics For the aromatics, chop one medium onion finely. Mince two cloves of garlic. Dice one red bell pepper. These add flavor and depth. Heat two tablespoons of olive oil in a large pot over medium heat. Once hot, add the onion. Sauté for about 3-4 minutes until soft. Detailed Instructions for Sautéing and Simmering Next, stir in the minced garlic and diced bell pepper. Cook for an additional two minutes until fragrant. Now, add the sweet potato cubes. Stir well and cook for about five minutes. This helps to soften them before the chili cooks. Sprinkle in two tablespoons of chili powder, one teaspoon of ground cumin, and ½ teaspoon of smoked paprika. Season with salt and pepper. Stir until the sweet potatoes are coated with the spices. Then, pour in a can of diced tomatoes and one cup of vegetable broth. Timing for Each Step Bring the mixture to a gentle boil. Then, lower the heat and cover the pot. Let it simmer for 25-30 minutes, or until the sweet potatoes are fork-tender. After this, add one can of drained and rinsed black beans. Simmer for another 5-10 minutes to warm them through. Adjusting Seasoning Before Serving Taste the chili and adjust seasoning as needed. Add more salt or pepper if you like. This helps enhance the flavors. Presentation Recommendations Ladle the hot chili into deep bowls. Drizzle a little olive oil over the top for richness. Garnish with freshly chopped cilantro. If you love creaminess, add slices of avocado on top. For the full recipe, check out the details above. To make the best sweet potato chili, start with the sweet potatoes. Cut them into small, even cubes. This helps them cook faster and evenly. I always peel them for a smoother taste. Cook them until they are soft but not mushy. This gives your chili the right texture. When cooking aromatics like onion and garlic, avoid burning them. Use medium heat and stir often. If they start to brown too fast, lower the heat. This way, you keep their sweet flavor. A little patience goes a long way. To make your chili even better, try adding more spices. A pinch of cayenne or a splash of hot sauce can add a kick. You can also add smoked paprika for a deeper flavor. Each spice brings something unique to the table. Experiment and find what you like best! If you want heat, add jalapeños or other fresh peppers. Dice them small to mix in well. Start with a small amount, then taste and adjust. You can always add more, but it’s hard to take it out! For a complete meal, serve your chili with bread or rice. I love cornbread with mine for a classic touch. It adds a nice crunch and sweetness. You can also serve it over rice for a filling option. Want to add a fresh touch? Serve with lime wedges and sour cream. They brighten the dish and cool the heat. If you want a healthy twist, add avocado slices on top. They give a creamy finish and pair well with the chili. For the full recipe, visit the link provided. Enjoy your cooking adventure! {{image_4}} You can easily switch up the beans in this chili. Try using pinto beans or kidney beans for a new twist. They offer a different taste but still pair well with sweet potatoes. If you prefer a meat option, ground turkey or beef can be added. Just brown the meat before adding other ingredients. For vegan or vegetarian choices, this recipe is perfect as is. It uses no animal products. You can add tofu or tempeh for extra protein if desired. Both options blend well with the flavors of the chili. You can make this chili in a slow cooker. Just add all your ingredients into the cooker. Set it on low and let it cook for 6-8 hours. If you want a quicker option, use an Instant Pot. Cook on high pressure for 10 minutes, then let it release naturally. Both methods create a rich flavor. Feel free to add seasonal vegetables to your chili. Zucchini, corn, or bell peppers can enhance the dish. They bring freshness and crunch to each bite. When the weather changes, you can adapt the chili. In colder months, add warming spices like cinnamon or nutmeg. On hot days, serve it chilled or over a salad for a refreshing twist. For the full recipe, click here: [Full Recipe]. To keep your chili fresh, store it in an airtight container. Place it in the fridge as soon as it cools down. This helps keep flavors strong. Sweet potato and black bean chili lasts about 3 to 5 days in the fridge. If you want to save some for later, freezing is a great option. Portion out your chili into smaller containers. Make sure to leave some space at the top, as it will expand when frozen. Sweet potato and black bean chili can last up to 3 months in the freezer. When you're ready to eat it, thaw it in the fridge overnight. For reheating, you can use the stove or microwave. If using the stove, heat on low until warm. Stir occasionally to prevent sticking. In the microwave, heat in short bursts, stirring in between. Always check the temperature. It should be hot all the way through. Chili is perfect for meal prep. You can make a big batch for the week. Serve it with rice or quinoa for a complete meal. You can also use the chili in other dishes. Try it in burritos, tacos, or even over a baked potato. This adds variety to your meal plan without much extra work. Check out the Full Recipe for more details on making this delicious dish! What can I serve with Sweet Potato and Black Bean Chili? You can enjoy this chili with warm cornbread, rice, or tortilla chips. A fresh salad also pairs well. For a complete meal, add avocado slices on top for creaminess. How spicy is this chili? This chili has a mild spice level. The chili powder adds flavor without too much heat. If you like it spicy, add some chopped jalapeños or hot sauce. Can I use fresh tomatoes instead of canned? Yes, you can use fresh tomatoes. Dice about four medium tomatoes. Just remember to adjust the liquid since fresh tomatoes have less juice than canned ones. How can I make this chili gluten-free? The ingredients in this chili are naturally gluten-free. Just check your chili powder and broth labels to ensure they are gluten-free. Is Sweet Potato and Black Bean Chili healthy? Yes, this chili is very healthy! Sweet potatoes are full of vitamins and fiber. Black beans offer protein and iron. Together, they make a nutritious meal. Can I eat it on a plant-based diet? Absolutely! This chili is plant-based and vegan-friendly. It’s a great choice for anyone looking to eat more plant-based meals. Enjoy it with confidence! This blog covered making a delicious Sweet Potato and Black Bean Chili. We discussed essential ingredients, health benefits, and cooking steps. You learned about tips for perfecting your chili and suggested variations to keep it fresh. Proper storage and meal prep ideas ensure you enjoy it later. Remember, this chili is flexible and healthy. Experiment with flavors and ingredients for your taste. Enjoy your cooking journey!](https://goldendishy.com/wp-content/uploads/2025/06/98b7eb11-b0dd-4c6d-9f71-53ea28c64add-768x768.webp)