Skip to content
About
Contact
Cookie Policy
Copyright Policy
Disclaimer
Search
Home
Dinner
Appetizer
Desserts
Drinks
About
Contact
Privacy Policy
Toggle Menu
Home
/
Dinner
- Page 22
Dinner
Loaded Baked Gnocchi Savory and Easy Dinner Delight
Jalapeno Cheddar Cornbread Flavorful and Simple Recipe
Easy Eggplant Parmesan Simple and Delicious Recipe
Vegan Chickpea Salad Sandwich Fresh and Flavorful Meal
Cheesy Stuffed Meatballs Flavorful and Simple Recipe
Easy Chicken and Waffles Quick and Tasty Recipe
Easy Shrimp Fried Rice Flavorful and Quick Meal
Classic Cheeseburger Casserole Tasty and Easy Recipe
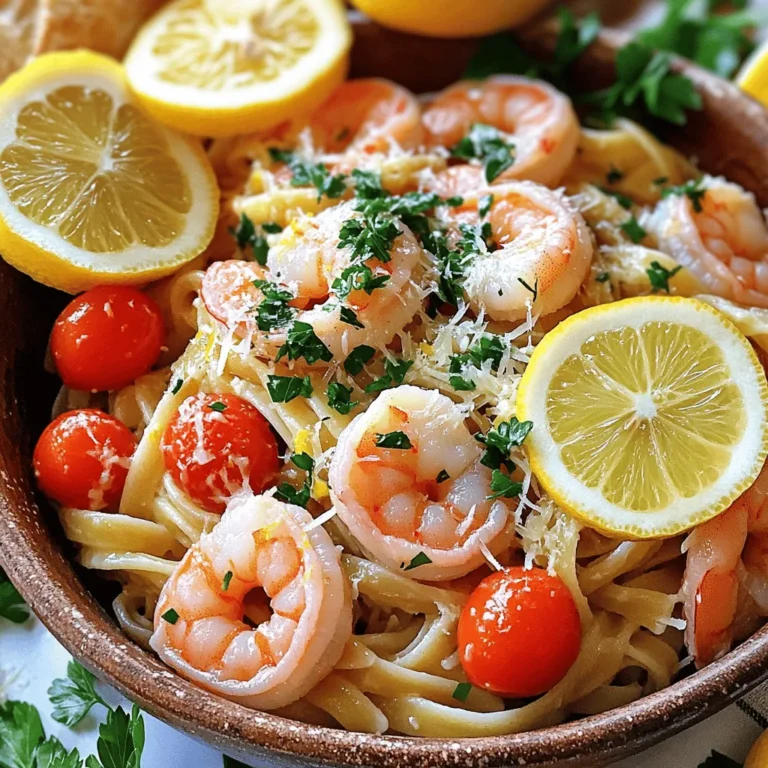
Lemon Garlic Shrimp Pasta Simple and Flavorful Dish
Vegan Buffalo Cauliflower Tacos Crisp and Tangy Treat
Page navigation
Previous Page
Previous
1
…
20
21
22
23
24
…
29
Next Page
Next
Home
Dinner
Appetizer
Desserts
Drinks
About
Contact
Privacy Policy
Toggle Menu Close
Search for:
Search

![- 1 pound (450g) potato gnocchi - 2 cups marinara sauce - 1 cup ricotta cheese - 1 cup shredded mozzarella cheese - 1/2 cup grated Parmesan cheese - 1 cup baby spinach, roughly chopped - 1/2 cup cherry tomatoes, halved - 1 tablespoon olive oil - 1 teaspoon garlic powder - Salt and pepper to taste - Fresh basil leaves for garnish Cooking gnocchi is simple. You only need a few key ingredients to make this dish shine. Start with potato gnocchi. It gives a soft, fluffy texture. Marinara sauce adds a rich flavor. Ricotta cheese adds creaminess. Mozzarella and Parmesan bring that cheesy goodness. Don’t forget the fresh spinach. It adds color and nutrition. Cherry tomatoes offer a juicy burst in each bite. Olive oil helps everything meld together. Garlic powder adds depth. Finally, you can season with salt and pepper to your liking. - Alternative cheeses for different flavors: You can swap ricotta for cottage cheese. Use provolone or gouda instead of mozzarella for a twist. - Gluten-free gnocchi options: Look for gnocchi made with rice or corn flour. They work just as well! - Seasonal vegetables to replace spinach or tomatoes: Try bell peppers or zucchini in place of spinach. Fresh asparagus or roasted squash can replace tomatoes too. These substitutions keep the dish fresh and exciting. You can adjust based on what you have or what is in season. Check out the Full Recipe for more details on how to create this loaded baked gnocchi dish! - Preheat the oven to 400°F (200°C). - In a large pot, bring salted water to a boil. - Carefully add the potato gnocchi to the boiling water. - Cook until the gnocchi float, about 2-3 minutes. - Use a slotted spoon to transfer them to a colander. - In a big mixing bowl, combine the drained gnocchi with marinara sauce. - Add ricotta cheese, chopped baby spinach, and garlic powder. - Season with a pinch of salt and pepper. - Gently fold the mixture so all gnocchi get coated. - Take a baking dish and grease it with olive oil. - Transfer the gnocchi mixture to the dish, spreading it evenly. - Top the mix with mozzarella and Parmesan cheese. - Scatter halved cherry tomatoes over the cheese layer. - Drizzle olive oil on top for a nice glaze. - Bake in the preheated oven for 20-25 minutes. - Look for bubbly and golden cheese. - Once baked, remove the dish and let it cool. - Garnish with fresh basil leaves before serving. This loaded baked gnocchi dish is a savory delight that brings comfort and joy. For the full recipe, check out the detailed instructions. Enjoy your cooking! To get that perfect gooey cheese texture, use a mix of cheeses. I like ricotta for creaminess and mozzarella for stretch. Bake the dish until the cheese bubbles and starts to brown. Keep an eye on it to avoid burning. For an even golden-brown top, spread the cheese evenly. A light drizzle of olive oil helps too. You can customize this dish for different diets. For a vegan version, swap the cheese with plant-based options. Low-carb eaters can use cauliflower gnocchi instead of potato gnocchi. Try adding different seasonings. Red pepper flakes add heat, while Italian herbs bring freshness. You can also toss in cooked meats for more flavor. Serve the loaded gnocchi in colorful bowls for a nice look. This helps show off the melted cheese and bright tomatoes. Garnish with fresh basil leaves for a pop of color. A sprinkle of cracked black pepper can add an extra touch. For an elegant finish, drizzle a bit of olive oil on top. For the full recipe, check out the [Full Recipe]. {{image_4}} You can change up the flavor by using different sauces. Pesto sauce gives a fresh taste. It pairs well with the gnocchi's soft texture. Spinach-based sauces add a nice green color and taste. They also boost the nutrition. You can also try a cream or Alfredo sauce. This makes the dish rich and creamy. Each sauce brings its own twist to the meal. Adding proteins makes your loaded baked gnocchi heartier. You can use chicken for a classic touch. Sliced sausage adds a nice zing. If you want a plant-based option, mushrooms work great. They soak up flavors and add depth. Tofu is another good choice for a vegetarian boost. These proteins will fill you up and keep the dish exciting. Want to spice things up? You can add heat with red pepper flakes or jalapeños. They give the dish a nice kick. If you prefer smoky flavors, try smoked paprika or bacon bits. These flavors create a unique twist. You might even consider adding a sweet element, like caramelized onions. This balances the savory notes and adds depth. Each of these enhancements can make your dish special. To keep your loaded baked gnocchi fresh, let it cool. Then, place it in an airtight container. This helps prevent moisture loss. You can also use a glass dish with a lid. Make sure to store it in the fridge. This way, it stays safe to eat for later. When reheating, use the oven for the best results. Preheat it to 350°F (175°C). Place the gnocchi in an oven-safe dish, cover it with foil, and heat for about 15-20 minutes. You can also use a microwave, but it may not keep the texture. If you want to freeze it, do so before baking. Wrap it tightly in plastic wrap, then in foil. It can last up to three months in the freezer. In the fridge, loaded baked gnocchi lasts about three to four days. Check for any changes in smell or color to spot spoilage. If you see mold or it smells off, it’s best to throw it away. Enjoy your delicious meal, and don’t hesitate to check out the Full Recipe for more on this tasty dish! Baked gnocchi is done when the cheese is bubbly and golden. It should smell amazing too! Check the edges for a nice brown color. The dish usually takes 20-25 minutes in the oven. Yes, you can make Loaded Baked Gnocchi ahead! Prepare it and store it in the fridge. Just cover it well. When ready to eat, bake it straight from the fridge. You may need to add a few extra minutes to the cooking time. Great side dishes include a simple green salad or garlic bread. You can also serve roasted veggies for a healthy touch. Pairing with a light soup can make it a cozy meal too. Absolutely! Frozen gnocchi works well for this recipe. Just cook it according to the package instructions. Then, follow the steps in the Full Recipe to make it tasty. Yes, Loaded Baked Gnocchi is perfect for meal prep! You can portion it out for easy lunches or dinners. Just store it in airtight containers in the fridge. Enjoy it throughout the week! Loaded Baked Gnocchi is a fun dish you can easily make. You learned about the great ingredients, simple steps to prepare, and ways to customize it. Remember to enjoy experimenting with flavors and textures. You can adapt it to fit your taste. Whether you're storing leftovers or reheating, you can keep it fresh. This dish not only warms your belly but also sparks creativity in your kitchen. Dive in and enjoy making this delicious meal!](https://goldendishy.com/wp-content/uploads/2025/06/a4704798-2aa5-49c0-949b-2886f6a00168-768x768.webp)
. You learned how to make Jalapeno Cheddar Cornbread step by step. This recipe includes a complete ingredient list, tips for substitutions, and ways to adjust spice levels. You also discovered how to achieve the best texture and flavor. Finally, I shared variations, storage info, and answers to common questions. Now, enjoy this tasty cornbread at your next meal. It pairs well with soups or stews and is perfect for sharing. Happy baking!](https://goldendishy.com/wp-content/uploads/2025/06/9d5f618c-dadf-46fc-a447-7ca9d5a4ec71-768x768.webp)
![For this tasty dish, you need some key items: - 2 medium eggplants, sliced into ¼-inch rounds - 1 teaspoon salt (for sweating the eggplant) - 1 cup all-purpose flour - 3 large eggs, beaten - 2 cups breadcrumbs (whole wheat adds a nutty touch) - 3 cups marinara sauce (store-bought or homemade) - 2 cups shredded mozzarella cheese - 1 cup grated Parmesan cheese - 2 tablespoons fresh basil, chopped (plus extra for garnish) - 1 teaspoon garlic powder - Olive oil for frying These ingredients form the heart of your eggplant parmesan. The eggplant brings a rich texture, while the cheeses add creaminess. Besides the main ingredients, consider these seasonings: - Fresh basil adds a fragrant touch. - Oregano gives a hint of earthiness. - Red pepper flakes can add some heat. These seasonings will elevate your dish. Feel free to experiment! If you want to mix it up, try these cheese alternatives: - Provolone for a different flavor. - Goat cheese for creaminess and tang. - Vegan cheese for a plant-based version. These options can change the taste while keeping it delicious. Feel free to swap cheeses based on your preference! For the full recipe, check out the detailed instructions. Start with the eggplant. Slice it into ¼-inch rounds. Sprinkle salt on the slices. This helps to draw out moisture and bitterness. Put the slices in a colander for about 30 minutes. After that, rinse them under cold water. Use paper towels to pat them dry. Now, let’s set up your breading station. You need three shallow dishes. Fill one with flour, the second with beaten eggs, and the third with breadcrumbs mixed with garlic powder. Organizing these dishes makes the breading easy. It’s time to bread the eggplant. Take a slice and coat it in flour first. Shake off any extra flour. Next, dip it into the eggs. Make sure it is fully covered. After that, roll it in the breadcrumb mix until it is well-coated. Place the breaded slices on a plate. Heat olive oil in a large skillet over medium heat. You want enough oil to cover the bottom of the pan. Fry the eggplant slices in batches. Cook each side until golden brown, which takes about 3-4 minutes. Once cooked, put them on a paper towel-lined plate to drain any excess oil. To assemble, spread a thin layer of marinara sauce in a large baking dish. Layer half of the fried eggplant slices on the sauce. Sprinkle a third of the mozzarella and half of the Parmesan cheese on top. Add another layer of marinara sauce. Repeat these layers with the remaining eggplant, mozzarella, and Parmesan. Don’t forget the chopped basil between the layers. Cover the dish with aluminum foil. Place it in your preheated oven at 375°F (190°C). Bake for about 25 minutes. After that, carefully remove the foil. Bake uncovered for another 15 minutes. This will make the top bubbly and golden brown. Let the dish cool for a few minutes before slicing. Serve it hot and garnish with fresh basil. Enjoy your cheesy eggplant delight. For the full recipe, check out the details above. To get the best flavor, start with fresh eggplants. Look for shiny, firm ones. Salt helps to draw out moisture and bitterness. After sweating the eggplant, rinse it well. This step makes your dish taste better. Use a good marinara sauce. Homemade sauce adds depth, but store-bought works too. Mixing cheeses also boosts flavor. Try a blend of mozzarella and Parmesan for a creamy texture. One common mistake is skipping the sweating step. This can lead to a soggy dish. Also, don’t rush the frying process. Cook eggplant slices until they are golden brown. If you overcrowd the pan, they won’t fry evenly. Another pitfall is not letting the dish rest after baking. Allow it to cool for a few minutes. This helps the layers set nicely. Serve your Easy Eggplant Parmesan hot from the oven. Garnish with fresh basil for a pop of color. A side salad complements this dish well. You can also serve it with crusty bread. For a twist, pair it with a light red wine. This adds a nice touch to your meal. If you want leftovers, try layering it in a sandwich for lunch the next day. Enjoy your cheesy eggplant delight! {{image_4}} You can make Easy Eggplant Parmesan even more veggie-friendly. Try adding layers of sautéed mushrooms or spinach. Both add flavor and nutrients. You can also swap out eggplant for zucchini or butternut squash. These alternatives taste great and keep the dish fresh and exciting. If you need a gluten-free version, use gluten-free breadcrumbs. You can also use crushed rice cereal or ground almonds. These options still give that crunchy texture without the gluten. Just ensure your marinara sauce is gluten-free, too. Get creative with your toppings! You can add roasted red peppers or artichoke hearts for extra flavor. For a spicy kick, sprinkle some red pepper flakes on top before baking. If you love herbs, consider adding fresh oregano or thyme. These small changes can make a big difference in taste. For the full recipe, check out the [Full Recipe]. To keep your Easy Eggplant Parmesan fresh, let it cool first. Then, transfer it to an airtight container. You can store it in the fridge for up to three days. If you have many leftovers, consider dividing them into smaller portions. This way, you can easily grab a serving when you're hungry. When it's time to enjoy your leftovers, reheating properly is key. For the best results, use the oven. Preheat it to 350°F (175°C). Place the eggplant in an oven-safe dish. Cover it with foil to keep it moist. Heat for about 20 minutes or until it's hot. You can also microwave it, but the oven gives a better texture. If you want to save your Easy Eggplant Parmesan for later, freezing is a great option. First, let it cool completely. Then, wrap it tightly in plastic wrap and foil. This helps prevent freezer burn. You can freeze it for up to three months. When ready to eat, thaw it overnight in the fridge before reheating. Enjoy your delicious meal anytime! You can use crushed crackers or ground oats instead of breadcrumbs. Both options add a nice crunch. If you want a gluten-free choice, use almond flour or gluten-free breadcrumbs. These alternatives work well and keep the dish tasty. Yes, you can prepare this dish a day ahead. Just follow the recipe steps but stop before baking. Cover the dish and store it in the fridge. When you are ready, bake it straight from the fridge. This saves time and still tastes great! The eggplant is cooked when it is soft and golden brown. If you press it gently, it should feel tender. Look for a bubbly top with a nice golden color. This means it’s ready to serve and enjoy! Absolutely! You can mix cheeses like provolone or fontina for added flavor. If you want it to be creamier, try adding ricotta. Just remember to balance the flavors to keep it delicious. For the best taste, use a blend of cheeses. This blog post covered the key ingredients and steps for easy eggplant parmesan. You learned about preparation, seasoning, and cooking methods. I shared tips to avoid common mistakes and offered serving suggestions. We discussed variations for different diets and how to store leftovers. Eggplant parmesan is simple and delicious. You can customize it to fit your taste. Enjoy making this dish with confidence!](https://goldendishy.com/wp-content/uploads/2025/06/85579090-c8c1-4217-8fdf-70085deda6dc-768x768.webp)
. To start, you need to mash the chickpeas. Use a fork or a potato masher. Mash until you have a chunky texture. You want to leave some whole chickpeas. This gives your sandwich a nice bite and texture. Next, add the tahini, lemon juice, and Dijon mustard to the chickpeas. Mix everything well. You should have a creamy base. Now, chop the red onion, celery, and grate the carrot. Fold these veggies into the chickpeas. The crunch from the veggies adds great flavor and color to your salad. Now it's time to season your chickpea mixture. Add salt and black pepper to taste. Adjust the flavors to your liking. If you want more tang, add lemon juice. If you prefer creaminess, add more tahini. For the bread, lightly toast it if you want a crunch. Spread a generous amount of the chickpea salad on two slices of bread. Add a few crisp lettuce leaves on top. If you like, add thin slices of tomatoes and cucumbers. Place the other slices of bread on top. Cut each sandwich in half for easy eating. You can serve them right away or wrap them in parchment paper for later. For a nice touch, arrange the sandwiches on a wooden board or plate. Enjoy this fresh and flavorful meal! For the complete recipe, check the Full Recipe above. To prepare chickpeas, start with rinsing and draining. Use a fine mesh strainer for this task. Rinsing removes excess sodium from canned chickpeas. Draining helps avoid excess water that can make your salad soggy. You want the chickpeas dry but not overly crushed. Adjusting seasoning is key for a tasty salad. Start with salt and pepper. Taste your mixture before serving. Add more lemon juice for brightness. If you want creaminess, add more tahini. These simple changes can enhance the dish. Make your meal look nice with a few easy tips. Use a rustic wooden board or a bright plate. This adds charm to your presentation. Garnish with fresh dill on top of the sandwich. Serve with colorful veggie sticks on the side. It makes for an eye-catching and healthy display. For the full recipe, check the section above. {{image_4}} You can change up the chickpeas in this sandwich. Try using black beans or lentils instead. Both options give a different taste and texture. For extra creaminess, swap tahini with vegan mayonnaise. This will make the mix smooth and rich. You can even blend both for a unique flavor. Herbs and spices can change the taste of your sandwich. Instead of dill, use parsley or cilantro for a fresh kick. You can also add garlic powder or smoked paprika for depth. For a spicy twist, throw in some chopped jalapeños or a dash of hot sauce. These additions can bring a fun zing to your meal. When it comes to bread, you have many choices. Whole grain bread is great, but you can also use gluten-free options. Try wraps made from rice or corn for a lighter touch. This makes for a fun, portable meal. Each bread type changes the sandwich's feel, so choose what you love! To keep leftovers fresh, store your chickpea salad in an airtight container. Make sure to refrigerate it right away. This helps keep the flavors intact for up to three days. When ready to eat, just give it a good stir. You can enjoy it cold or make a fresh sandwich. If you want to store the chickpea salad for longer, freezing is a great option. Place the chickpea salad mixture in a freezer-safe container. Leave some space at the top to allow for expansion. It will stay good for about three months. When you're ready to eat it, let it thaw in the fridge overnight. To refresh your sandwich after storage, you can add a bit of olive oil or lemon juice. This helps bring back the moisture and flavor. If you want, you can toast the bread again for a crunchy bite. This simple step makes your sandwich taste fresh and delicious again. Enjoy your meal! To make this sandwich gluten-free, choose gluten-free bread. Many stores offer great options. Look for brands made from rice or almond flour. You can also try lettuce wraps instead of bread. This keeps it fresh and light too! Yes, you can. Make the chickpea salad a day ahead. Store it in an airtight container in the fridge. It stays good for about three days. Just remember to add fresh toppings right before serving for best flavor. Chickpeas are packed with protein and fiber. They help keep you full and satisfied. This sandwich is low in fat and high in vitamins. The veggies add crunch and nutrients. Tahini brings in healthy fats and flavor. Overall, this sandwich is a tasty way to eat healthy! This blog covered how to make a tasty chickpea salad sandwich. We explored main ingredients, step-by-step instructions, and storage tips. You learned how to adjust flavors and choose the right bread. Remember, you can customize the recipe with different herbs or legumes. Enjoy this easy meal any day! It’s healthy, quick, and delicious. I hope you try it soon. Your taste buds will thank you!](https://goldendishy.com/wp-content/uploads/2025/06/7c039c45-1f39-49ec-9b48-b25c6f87980b-768x768.webp)