Skip to content
About
Contact
Cookie Policy
Copyright Policy
Disclaimer
Search
Home
Dinner
Appetizer
Desserts
Drinks
About
Contact
Privacy Policy
Toggle Menu
Home
/
Dinner
- Page 17
Dinner
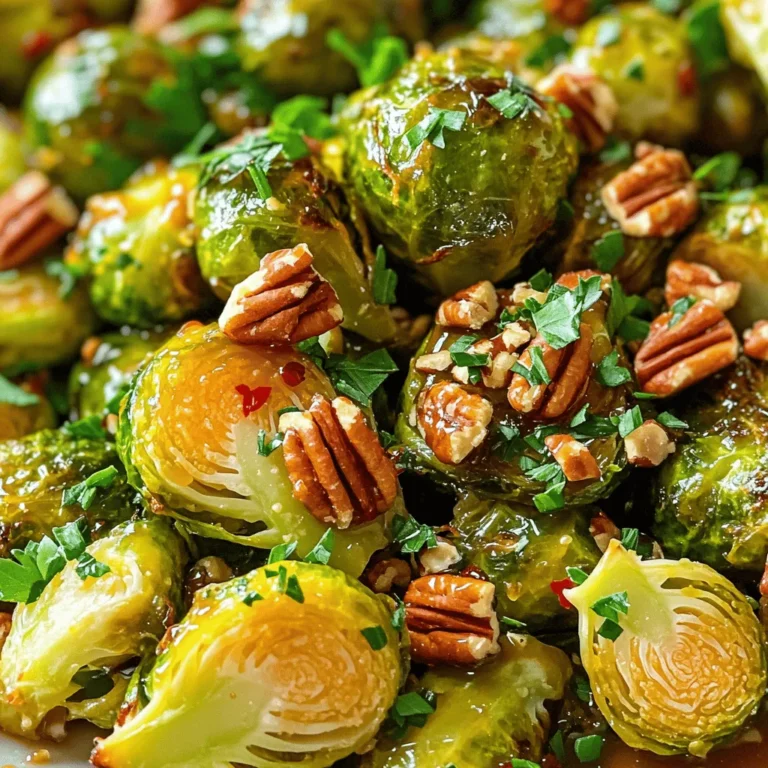
Maple Dijon Roasted Brussels Flavorful and Simple Dish
Garlic Butter Shrimp Skewers Flavorful and Easy Recipe
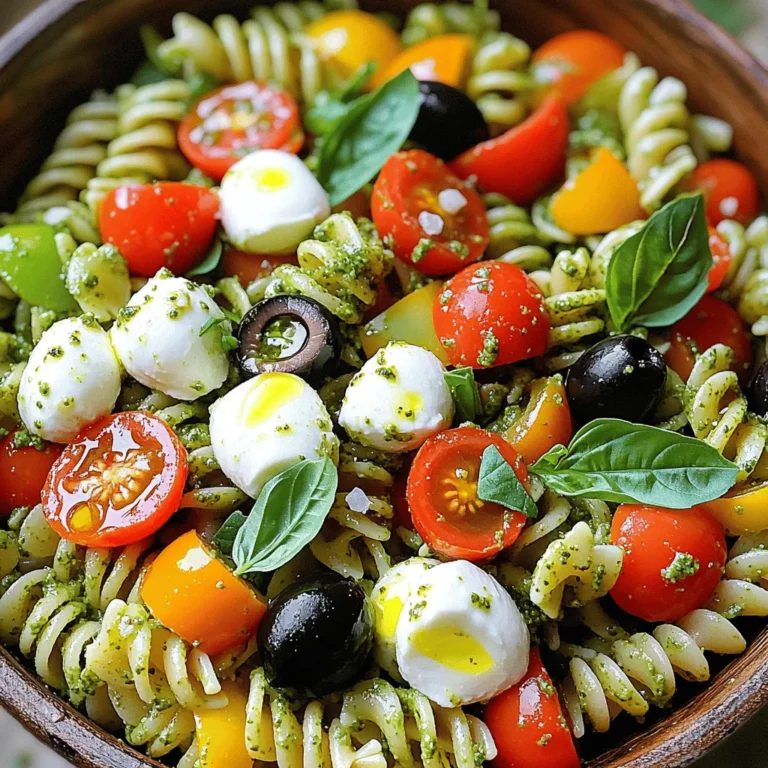
Pesto Pasta Salad Flavorful and Easy Summer Dish
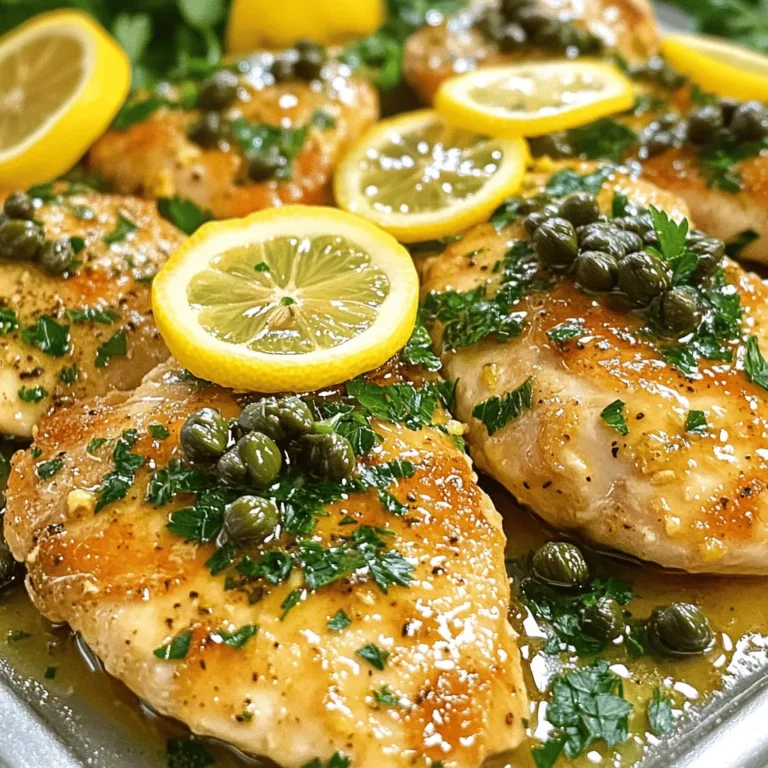
Simple Chicken Piccata Quick and Tasty Weeknight Meal
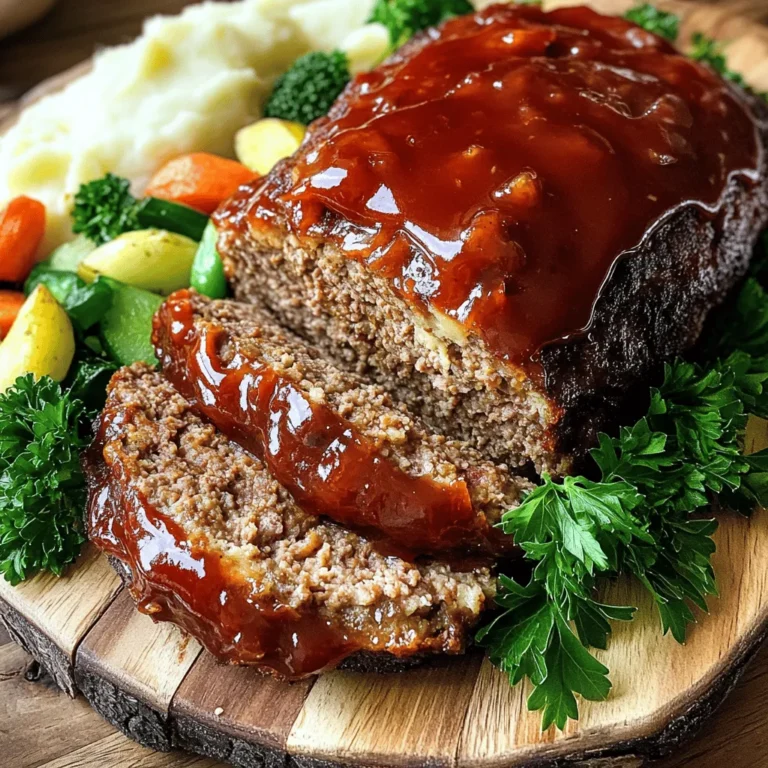
Classic Meatloaf Juicy and Flavorful Family Dinner
Healthy Roasted Veggie Bowl Packed with Flavorful Goodness
Easy Chicken Tortilla Soup Quick and Flavorful Meal
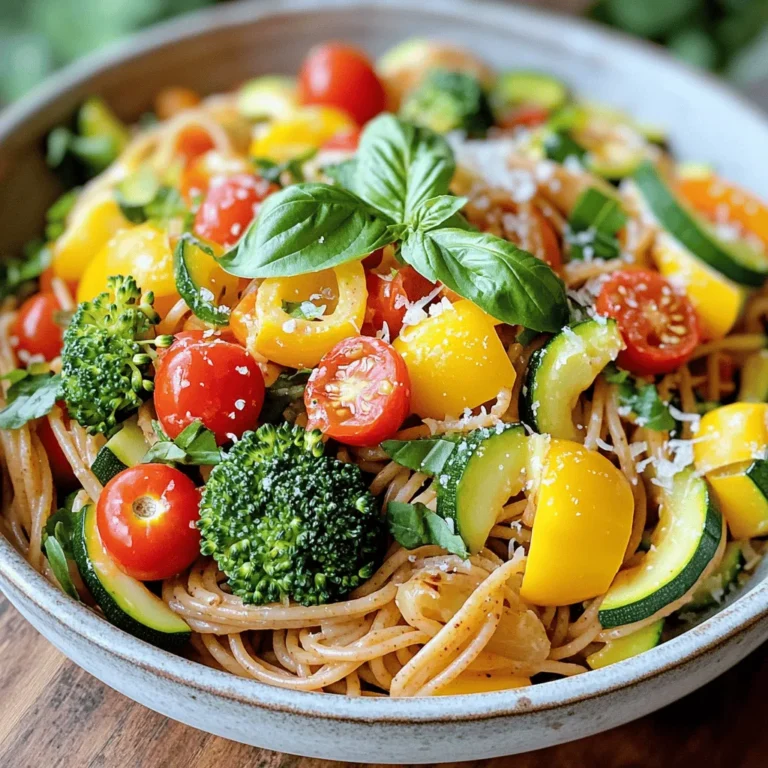
Simple Pasta Primavera Fresh and Flavorful Recipe
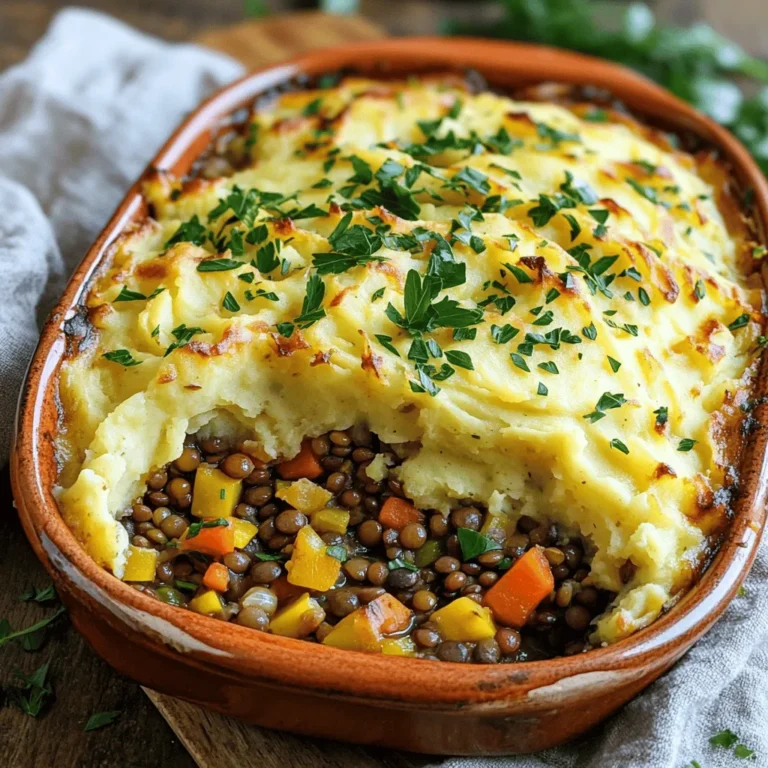
Vegan Lentil Shepherd’s Pie Hearty Comfort Meal
Roasted Butternut Squash Soup Simple and Creamy Dish
Page navigation
Previous Page
Previous
1
…
15
16
17
18
19
…
30
Next Page
Next
Home
Dinner
Appetizer
Desserts
Drinks
About
Contact
Privacy Policy
Toggle Menu Close
Search for:
Search

![To make Garlic Butter Shrimp Skewers, you'll need: - 1 pound large shrimp, peeled and deveined - 4 tablespoons unsalted butter - 4 cloves garlic, minced - 1 teaspoon red pepper flakes (adjust based on desired spiciness) - 1 tablespoon fresh parsley, finely chopped - 1 tablespoon freshly squeezed lemon juice - Salt and pepper to taste - 1 teaspoon smoked paprika - Skewers (either wooden, soaked, or metal) When choosing shrimp, fresh is often best. Look for shrimp that smell like the ocean, not fishy. The shells should be shiny and clean. If fresh shrimp isn’t available, frozen shrimp is a great option. Frozen shrimp can be just as good if they are properly handled. - Check for a firm texture. - Avoid shrimp that are mushy or have black spots. - If buying frozen, look for shrimp with no added ingredients. Using quality ingredients makes a big difference. For butter, I recommend brands like Kerrygold or Plugrá. They offer rich flavor that enhances the dish. For spices, consider McCormick or Penzeys. They have high-quality spices that bring out the best in your garlic butter. Using fresh herbs, like parsley, also boosts the flavor. Look for herbs that are bright and fragrant. This ensures your Garlic Butter Shrimp Skewers taste amazing! For the full recipe, check out the complete instructions above. Start by gathering your ingredients. If you use wooden skewers, soak them in water for at least 30 minutes. This step stops them from burning. While they soak, you can mince the garlic. Use a sharp knife to chop the garlic finely. The smaller the pieces, the better the flavor will blend. Next, melt 4 tablespoons of unsalted butter in a medium saucepan over medium heat. As it melts, add the minced garlic and red pepper flakes. Stir it often for about 1-2 minutes. Watch closely; you want the garlic fragrant but not browned. Once ready, remove the pan from heat. Add 1 tablespoon of lemon juice and chopped parsley. Then season with salt, pepper, and smoked paprika to taste. Mix well to create a rich garlic butter flavor. Now, it’s time to grill! Add the shrimp to a large bowl. Pour half of the garlic butter mixture over them. Toss gently to coat each shrimp. Thread 4-5 shrimp onto each skewer. Preheat your grill or grill pan over medium-high heat. Lightly grease the grill with oil. This helps prevent sticking. Place the skewers on the grill. Cook for about 2-3 minutes on each side. You’ll know they are done when the shrimp turn pink and opaque. Brush on some of the reserved garlic butter mixture while grilling for extra flavor. Once cooked, drizzle any remaining garlic butter over the skewers before serving. This dish is ready to impress! For the full recipe, check out the section above. To make perfect shrimp skewers, focus on time and heat. Grill the shrimp for about 2-3 minutes on each side. Use medium-high heat to get a nice sear. If your grill is too hot, the shrimp may cook too fast and become tough. Always keep an eye on them. One common mistake is not soaking wooden skewers. Soak them for at least 30 minutes. This stops them from burning. Another mistake is overcooking the shrimp. They should be pink and opaque when done. If they curl too much, they may be overcooked. Lastly, don’t forget to brush on more garlic butter while grilling. It boosts the flavor! You can easily enhance the flavor of your shrimp skewers. Add fresh herbs like basil or cilantro for a burst of freshness. Consider using spices like cumin or coriander for a warm twist. A dash of lemon zest can also brighten the dish. Feel free to play around with flavors to find your favorite mix. For a detailed recipe, check out the [Full Recipe]. {{image_4}} You can swap shrimp for other proteins. Chicken is a great choice. Use boneless, skinless chicken breast. Cut it into bite-sized pieces. Just marinate it in the same garlic butter mix. You can also use fish. Salmon or swordfish work well. They add a rich flavor. Follow the same steps for grilling. Adding veggies to your skewers makes a full meal. Bell peppers, zucchini, and cherry tomatoes are perfect. They add color and crunch. Cut all veggies into similar sizes. This way, they cook evenly with the shrimp. Thread them onto the skewers with the shrimp. This adds a tasty twist to your dish. You can change up the flavors easily. For a spicy kick, add more red pepper flakes. If you love herbs, try fresh basil or thyme. Mix these herbs into the garlic butter. For a citrus twist, add lime juice instead of lemon. You can even add zest from the citrus fruits. This will bring a fresh taste to your skewers. Enjoy experimenting with different flavors from the Full Recipe! Store leftover shrimp skewers in an airtight container. Let them cool to room temperature first. Place a piece of parchment paper between layers to avoid sticking. Keep them in the fridge for up to three days. To reheat, gently warm the skewers in a skillet over low heat. Add a little butter or oil to keep them moist. Heat for about 3-5 minutes until warm. You can also use a microwave, but be careful not to overcook. Heat for 30 seconds at a time, checking often. If you want to freeze shrimp skewers, first wrap them tightly in plastic wrap. Then, place them in a freezer bag. Remove as much air as possible. They can last up to three months in the freezer. When ready to eat, thaw in the fridge overnight before reheating. For the full recipe, check out the details above. Enjoy your garlic butter shrimp skewers! The best skewers for grilling shrimp are metal or soaked wooden skewers. Metal skewers handle high heat well and are reusable. Soaking wooden skewers for at least 30 minutes prevents them from burning. Both types work great for Garlic Butter Shrimp Skewers. Shrimp are fully cooked when they turn pink and opaque. They also curl into a "C" shape. If they look gray or have a rubbery texture, they need more time. For the best results, grill shrimp for about 2-3 minutes on each side. Yes, you can prepare Garlic Butter Shrimp Skewers ahead of time. Marinate the shrimp in the garlic butter mixture and store them in the fridge. They can stay fresh for up to 24 hours. Just grill them right before serving for the best taste. To sum up, this guide covered Garlic Butter Shrimp Skewers in detail. We explored key ingredients, cooking steps, and tips for the perfect dish. Remember, choosing good shrimp and seasoning well makes a difference. Enjoy grilling with variations like chicken or veggies to switch things up. Proper storage ensures your leftovers stay tasty. Follow these steps for delicious results every time. Your journey to perfect skewers starts here—enjoy every bite you take!](https://goldendishy.com/wp-content/uploads/2025/06/728f68f4-b8bf-4bba-b9a3-49ab34a89912-768x768.webp)

![To make Easy Chicken Tortilla Soup, gather these key ingredients: - 2 tablespoons olive oil - 1 medium onion, finely diced - 2 cloves garlic, minced - 1 bell pepper (any color), finely diced - 2 medium tomatoes, diced - 4 cups low-sodium chicken broth - 1 teaspoon ground cumin - 1 teaspoon chili powder - 1 teaspoon smoked paprika - 1 pound cooked chicken breast, shredded - 1 can (15 oz) black beans, thoroughly rinsed and drained - 1 cup corn (fresh or frozen) - Salt and freshly ground black pepper, to taste These ingredients create a rich flavor base for your soup. The spices, like cumin and chili powder, add warmth. Using low-sodium broth helps control salt levels. For a delightful finish, consider adding these garnishes: - Tortilla chips, for garnish and added crunch - Fresh cilantro, roughly chopped, for garnish - 1 ripe avocado, diced, for garnish - Lime wedges, for serving These garnishes enhance the soup's look and taste. The crunch of tortilla chips contrasts nicely with the tender soup. A squeeze of lime adds a zesty touch. To prepare this soup, have these tools on hand: - A large pot - A sharp knife - A cutting board - A measuring spoon - A ladle for serving Having the right tools makes cooking easier. A large pot holds all the ingredients while they cook together. A sharp knife and cutting board help you chop veggies quickly. For the full recipe, check out the [Full Recipe]. Gather your ingredients before you start. This makes cooking easier and faster. You will need: - 2 tablespoons olive oil - 1 medium onion, finely diced - 2 cloves garlic, minced - 1 bell pepper (any color), finely diced - 2 medium tomatoes, diced - 4 cups low-sodium chicken broth - 1 teaspoon ground cumin - 1 teaspoon chili powder - 1 teaspoon smoked paprika - 1 pound cooked chicken breast, shredded - 1 can (15 oz) black beans, thoroughly rinsed and drained - 1 cup corn (fresh or frozen) - Salt and freshly ground black pepper, to taste - Tortilla chips, for garnish and added crunch - Fresh cilantro, roughly chopped, for garnish - 1 ripe avocado, diced, for garnish - Lime wedges, for serving 1. Heat the olive oil in a large pot over medium heat. 2. Add the diced onion and sauté for about 3-4 minutes until it turns soft. 3. Stir in the minced garlic and diced bell pepper. Cook these for 2 more minutes. 4. Now, add diced tomatoes, chicken broth, cumin, chili powder, smoked paprika, and shredded chicken. Mix well. 5. Raise the heat until it boils, then reduce it and let it simmer for 15 minutes. 6. After simmering, stir in the black beans and corn. Heat for another 5-7 minutes. 7. Taste and season with salt and pepper as needed. Adjust spices if you want more heat. Ladle the hot soup into bowls. Top with crumbled tortilla chips for crunch. Add diced avocado and fresh cilantro for color and flavor. Serve with lime wedges on the side. Squeeze lime juice over the soup before eating for a zesty kick! For the full recipe, check the section above. Enjoy your tasty chicken tortilla soup! To make your chicken tortilla soup taste amazing, focus on fresh ingredients. Use ripe tomatoes and fresh herbs. They add a burst of flavor. Toast your spices in the olive oil to release their aromas. This small step can boost the taste of your soup. Consider adding a splash of lime juice for brightness. It really makes a difference! If you like heat, add more chili powder or a diced jalapeño. For milder soup, use less spice. Remember to taste as you cook. You can add more spice later if needed. Also, consider serving hot sauce on the side. This way, everyone can adjust the heat to their liking. To speed up cooking, use pre-cooked chicken. Shredded rotisserie chicken works well. It saves time and adds flavor. Chop your veggies small for quicker cooking. Use a sharp knife for safety and ease. Lastly, keep your broth warm before adding it to the pot. This helps your soup come together faster. For the full recipe, check out the earlier section. {{image_4}} You can easily make a vegetarian version of chicken tortilla soup. Swap out the chicken for hearty vegetables. Use black beans for protein and fiber. Sweet corn adds a nice crunch. You can also add diced zucchini or bell peppers for more flavor. Use vegetable broth instead of chicken broth. This keeps the soup light yet filling. Top it with tortilla chips, avocado, and cilantro for the best taste. This version is perfect for a healthy meal. If you love heat, then spicy chicken tortilla soup is for you. Start with the original recipe and add more spices. Include diced jalapeños or serrano peppers for a kick. You can also add some cayenne pepper or hot sauce to the pot. Adjust the spice level to your liking. Serve it with sour cream to cool down the heat. This soup is sure to warm you up on a chilly night. For a creamy twist, turn your chicken tortilla soup into a creamy delight. After cooking the soup, stir in some heavy cream or sour cream. This gives the soup a rich and smooth texture. You can also blend a portion of the soup for extra creaminess. Just blend it in a blender and stir it back in. This version is comforting and perfect for those who enjoy a velvety finish. Don't forget to garnish with tortilla chips and avocado for a crunchy contrast. For the full recipe, check out the details above! After making Easy Chicken Tortilla Soup, allow it to cool. Use an airtight container. Store the soup in the fridge for up to three days. Make sure to keep it covered to preserve flavor. When you're ready to enjoy leftovers, pour the soup into a pot. Heat it over medium heat until warm. Stir it often to prevent sticking. You can also use the microwave. Place the soup in a bowl and cover it loosely. Heat for about 2-3 minutes, stirring halfway. Always check the temperature before eating. If you want to save some soup for later, freezing is perfect. Let the soup cool completely. Pour it into freezer-safe bags or containers. Leave some space for the soup to expand. Seal tightly and label with the date. You can freeze it for up to three months. When you want to eat it, thaw it overnight in the fridge before reheating. This method helps keep all the flavors intact. Enjoy the full recipe and indulge in this delightful dish! I recommend using cooked chicken breast for this soup. It stays tender and juicy. You can use leftover rotisserie chicken or poach chicken breasts to save time. Shredded chicken blends well with the soup flavors. Yes, you can make this soup in a slow cooker. Start by sautéing the onion and garlic in a pan. Then add all the ingredients to the slow cooker. Set it on low for 6-8 hours or high for 3-4 hours. This method lets the flavors meld nicely. Chicken Tortilla Soup stays fresh for about 3-4 days in the refrigerator. Store it in an airtight container. Make sure it cools before you put it in the fridge. If you want it to last longer, consider freezing it. You can find the Full Recipe for more details on storage. This blog post covered everything you need for easy chicken tortilla soup. We explored essential ingredients, tools, and garnishes. You learned the clear steps for prep and cooking, plus tips for flavor and spice. Variations let you customize the soup to your taste. Lastly, we discussed how to store and reheat leftovers. Now, you can enjoy this tasty meal any time. Get creative with flavors and make it your own!](https://goldendishy.com/wp-content/uploads/2025/06/e0a7fe5b-d8f8-4d99-83cb-06f3f9771105-768x768.webp)