Skip to content
About
Contact
Cookie Policy
Copyright Policy
Disclaimer
Search
Home
Dinner
Appetizer
Desserts
Drinks
About
Contact
Privacy Policy
Toggle Menu
Home
/
Dinner
- Page 11
Dinner
Lemon Dill Chicken Orzo Soup Flavorful and Easy Recipe
Teriyaki Chicken Stir Fry Easy and Flavorful Recipe
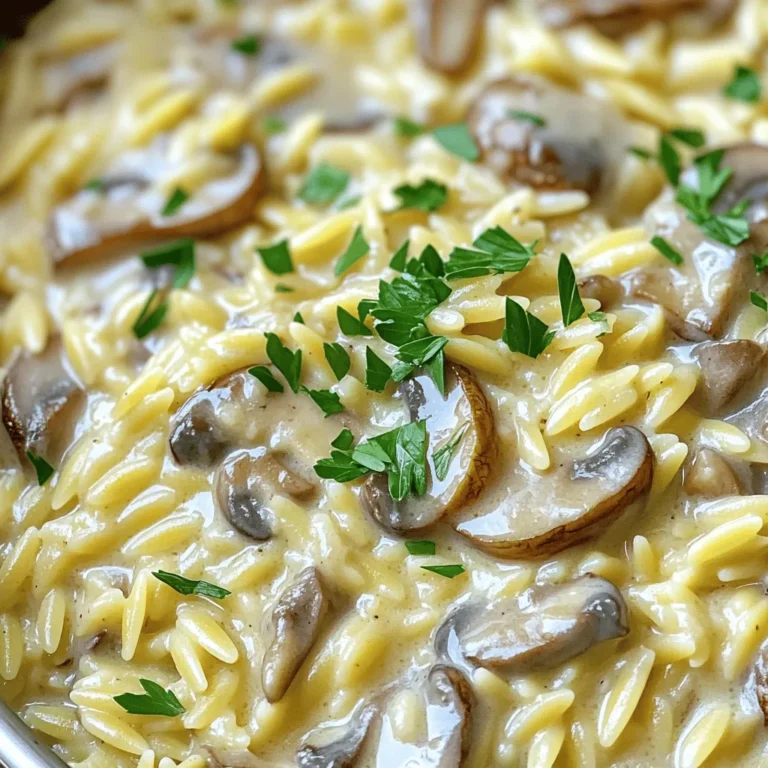
Creamy Mushroom Orzo Flavorful and Simple Meal
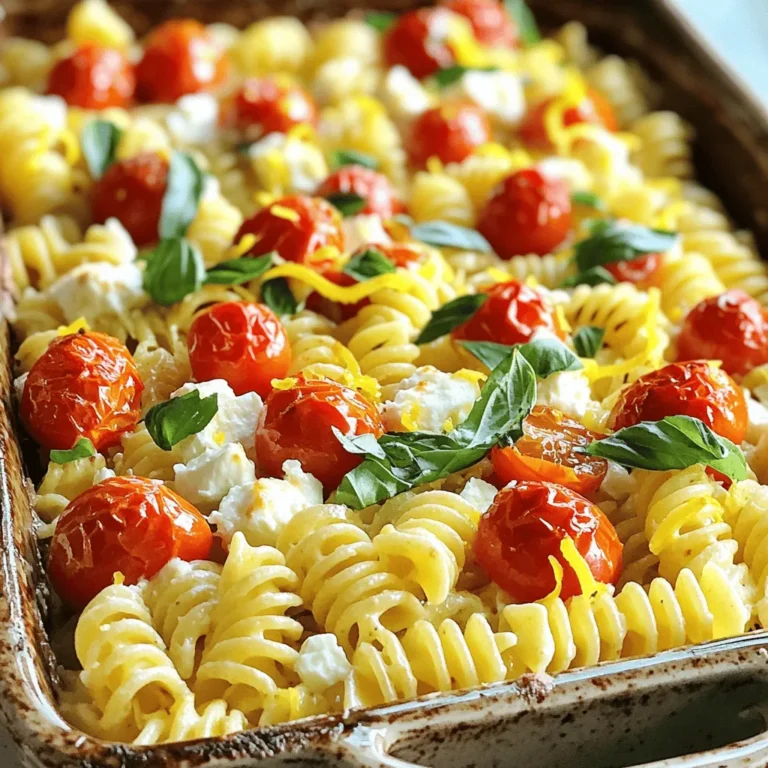
Baked Feta Pasta with Tomatoes Easy and Flavorful Dish
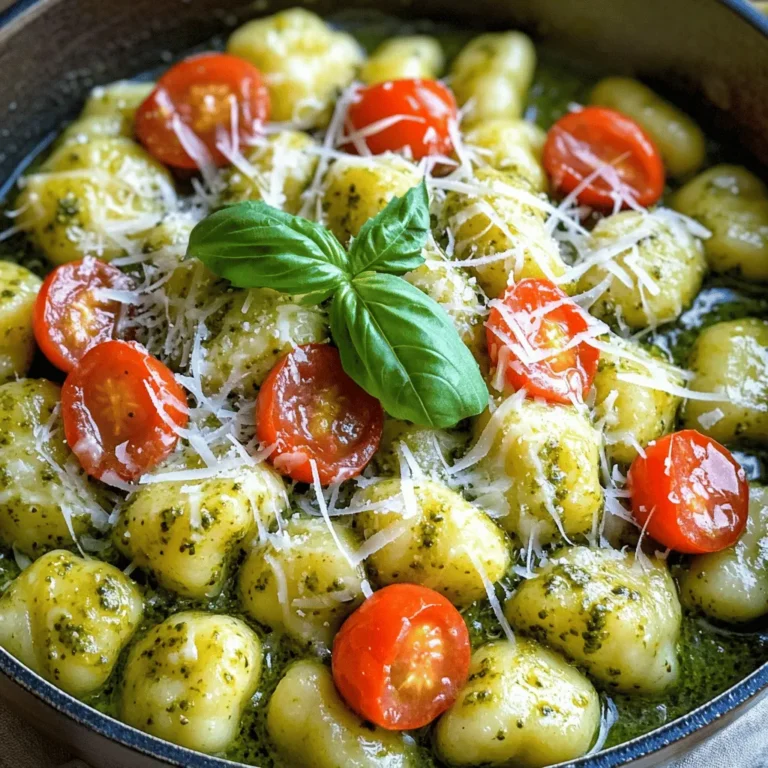
Creamy Pesto Gnocchi Flavorful Easy Dinner Dish
Cajun Shrimp Alfredo Flavorful Creamy Delight
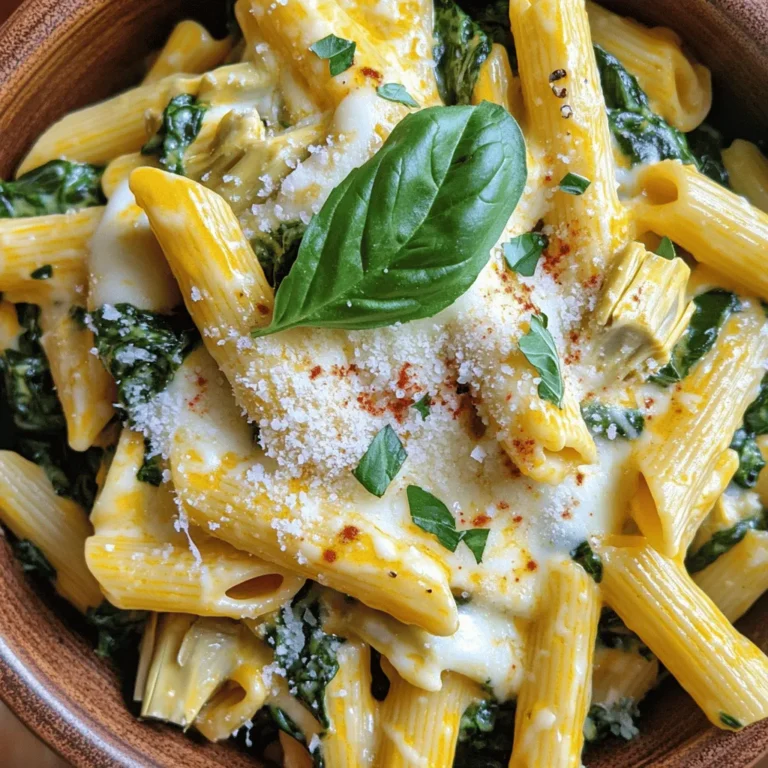
Cheesy Spinach Artichoke Pasta Flavorful Comfort Meal
Savory One Pot Creamy Mushroom Orzo Recipe
Creamy Butternut Squash Pasta Flavorful and Easy Dish
Vegan Pumpkin Alfredo Comforting and Creamy Dish
Page navigation
Previous Page
Previous
1
…
9
10
11
12
13
…
38
Next Page
Next
Home
Dinner
Appetizer
Desserts
Drinks
About
Contact
Privacy Policy
Toggle Menu Close
Search for:
Search

![- 8 oz fettuccine pasta - 1 lb large shrimp, peeled and deveined - 2 tablespoons Cajun seasoning - 2 tablespoons olive oil - 3 cloves of garlic, minced - 1 cup heavy cream - 1 cup grated Parmesan cheese - 1/2 cup cream cheese, softened - Salt and pepper to taste - 2 tablespoons chopped fresh parsley (for garnish) - Zest of 1 lemon (for brightness) When I make Cajun Shrimp Alfredo, I love how rich and creamy it is. The fettuccine pasta serves as a perfect base for the dish. You can choose any pasta you like, but fettuccine offers a great texture that holds the sauce well. The shrimp is the star of this recipe. I always prefer large shrimp because they have a great bite and flavor. Make sure to peel and devein them for the best experience. The Cajun seasoning adds a warm kick that makes this dish pop. For the sauce, I use both heavy cream and cream cheese. They blend together to create a smooth and thick sauce. Parmesan cheese adds that salty, nutty flavor that ties everything together. Fresh garlic enhances the aroma, making your kitchen smell divine while cooking. I finish the dish with fresh parsley and lemon zest. The parsley brings a bright color, while the lemon zest adds a hint of freshness. This combination makes every bite a flavorful delight. You can find the Full Recipe to guide you through the cooking process. Enjoy creating this scrumptious meal! Start by bringing a large pot of salted water to a boil. The salt helps flavor the pasta. Once the water is boiling, add 8 ounces of fettuccine. Cook the pasta until it is al dente, which usually takes about 8 to 10 minutes. You want it firm, not mushy. After cooking, drain the pasta but save 1/2 cup of the water for later. Next, take 1 pound of large shrimp, peeled and deveined. In a bowl, sprinkle 2 tablespoons of Cajun seasoning over the shrimp. Toss them well so every piece is coated. This gives the shrimp a nice, bold taste. Heat 2 tablespoons of olive oil in a large skillet over medium-high heat. When hot, add the shrimp and sauté for 2 to 3 minutes per side. Cook until they turn pink and opaque. Once done, remove them from the skillet and set aside. In the same skillet, lower the heat a bit. Add 3 cloves of minced garlic to the skillet. Sauté the garlic for about 30 seconds. You want it fragrant but not burnt. Then, pour in 1 cup of heavy cream. Stir gently and let it come to a gentle simmer. Add in 1/2 cup of softened cream cheese, stirring until it melts. Now, gradually mix in 1 cup of grated Parmesan cheese. Stir vigorously to make the sauce creamy. If it’s too thick, add some of the reserved pasta water until you reach the right consistency. Now it’s time to bring everything together. Return the sautéed shrimp to the skillet with the creamy sauce. Add the cooked fettuccine next. Toss all the ingredients gently so the pasta and shrimp are well-coated. Taste and season with salt and pepper as needed. For a bright touch, add the zest of 1 lemon, mixing it in for extra flavor. Enjoy this flavorful creamy delight! For a complete recipe, check out the [Full Recipe]. - Avoid overcooking shrimp: Cook shrimp for only 2-3 minutes per side. They should be pink and opaque. Overcooked shrimp can turn rubbery. Keep a close eye on them as they cook. - How to achieve a silky sauce: To make a smooth sauce, stir the heavy cream gently as it heats. Add cream cheese and Parmesan slowly. If the sauce is too thick, use reserved pasta water to thin it out. - Suggesting additional spices: Try adding a pinch of cayenne for extra heat. Smoked paprika can add a nice depth. Experiment with flavors that excite your taste buds. - Importance of fresh herbs for garnishing: Fresh parsley adds color and brightness to the dish. You can also use basil or chives for a different twist. Fresh herbs make every plate look and taste better. - Pairing with a side salad or garlic bread: A crisp side salad balances the rich flavors of the Alfredo. Garlic bread is a perfect complement too. It helps soak up the creamy sauce. - Creative plating ideas: Swirl the fettuccine into a nest on the plate. Top it with shrimp and a sprinkle of parsley. Adding lemon zest on top gives it a fresh look and flavor. For added flair, drizzle some sauce around the plate. For the complete process of making this dish, check out the Full Recipe. {{image_4}} For those with dietary needs, there are great options. You can use gluten-free pasta. Many brands offer tasty versions made from rice or corn. These options cook well and hold sauce nicely. If you need a dairy-free choice, try cashew cream or almond milk. These alternatives give a creamy texture that works well in Alfredo. Both options keep your dish rich and full of flavor. Cajun seasoning can be adjusted to fit your taste. If you love spice, add more seasoning. For a milder dish, use less. You can also mix in smoked paprika for a smoky flavor. Adding vegetables can boost nutrition. Bell peppers, spinach, or zucchini blend well into the sauce. They add color, taste, and extra vitamins. Just sauté them with the shrimp for a quick mix. If you prefer a different protein, chicken works great. Simply swap shrimp for diced chicken breast. Cook it the same way until golden and cooked through. Tofu is another excellent option for a vegetarian twist. Firm tofu absorbs flavors well. Just cube it and sauté until crispy. For a seafood twist, try adding fish. Salmon or scallops can add rich flavor. Cook them gently to keep them tender. These variations keep the dish fun and tasty while catering to different diets. Enjoy mixing it up! For the full recipe, check out Cajun Shrimp Alfredo Delight. To keep your Cajun Shrimp Alfredo fresh, store leftovers in the fridge. Use airtight containers to avoid moisture loss. It’s best to cool the dish before sealing it. This helps maintain the creamy texture. Try to eat the leftovers within 2 to 3 days for the best taste. When reheating, use low heat on the stove or microwave. Stir the dish gently to avoid breaking the creamy sauce. Add a splash of milk or cream to refresh the texture. This will help revive the dish and keep it smooth. Remember to heat just until warm, so you don’t overcook the shrimp. If you want to freeze Cajun Shrimp Alfredo, cool it completely first. Use freezer-safe containers and leave some space for expansion. The dish will last about 2 to 3 months in the freezer. When you’re ready to eat, thaw it in the fridge overnight. Reheat slowly on the stove, adding a bit of cream if needed for a creamy finish. Cajun Shrimp Alfredo is a creamy pasta dish with bold flavors. It features fettuccine pasta and shrimp coated in a rich Alfredo sauce. The Cajun seasoning adds warmth and a bit of spice. This dish balances creamy texture with savory notes from garlic and cheese. You will taste hints of lemon zest, which brighten the flavors. It's a perfect mix of comfort food and exciting cuisine that can impress anyone. To add extra heat to your Cajun Shrimp Alfredo, try these options: - Use more Cajun seasoning than the recipe calls for. - Add a pinch of cayenne pepper or crushed red pepper flakes. - Incorporate diced jalapeños or fresh chili peppers into the shrimp. - Serve with a drizzle of hot sauce on top for a spicy kick. Yes, you can use frozen shrimp. Here are some best practices: - Thaw the shrimp in cold water for about 15-20 minutes before cooking. - Pat them dry with a paper towel to remove excess moisture. - Ensure you sauté them until fully cooked, which usually takes 2-3 minutes per side. Using frozen shrimp can save time and still give you great flavor. To keep your Alfredo sauce smooth and creamy: - Use low heat when making the sauce. - Stir continuously to help the cheese melt evenly. - Gradually add the cream and cheese, mixing well each time. - If the sauce gets too thick, slowly add reserved pasta water until it reaches the desired texture. Following these tips will help maintain a silky sauce that clings perfectly to your pasta. Cajun Shrimp Alfredo is a rich and tasty dish that you can easily make at home. You learned about key ingredients, cooking steps, and helpful tips. Variations allow you to adapt this dish to your diet or taste. Proper storage ensures your leftovers stay delicious. Remember, you can always customize flavors and ingredients to suit your needs. Enjoy creating this meal and impressing your family or friends. It’s all about the simple joys of cooking and sharing great food.](https://goldendishy.com/wp-content/uploads/2025/07/5d1dc84f-c815-4e1a-a64f-ea492bbf0a6c-768x768.webp)
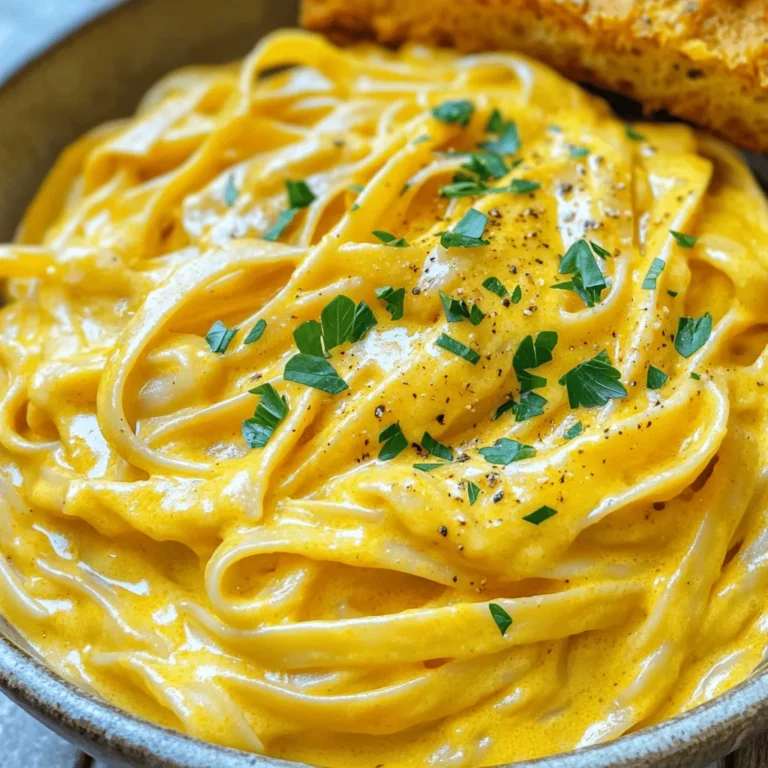
![- 12 oz fettuccine or pappardelle pasta - 2 cups butternut squash, peeled and cubed - 1 tablespoon olive oil The base of this dish is fettuccine or pappardelle pasta. I love these shapes as they hold the creamy sauce well. You will also need fresh butternut squash. It gives the dish a warm color and sweet flavor. Using olive oil helps with roasting and adds richness to the pasta. - 1 small onion, diced - 2 cloves garlic, minced - 1 teaspoon freshly grated nutmeg Onions and garlic add depth to the sauce. Dicing the onion makes it cook evenly. Minced garlic gives a punch of flavor. Nutmeg brings warmth and a hint of spice, making the dish cozy and inviting. - 1 cup vegetable broth - 1 cup coconut milk (or heavy cream for a non-vegan option) - ½ cup grated Parmesan cheese (optional) For the sauce, you need vegetable broth for a savory base. Coconut milk adds creaminess and a hint of sweetness. If you prefer, heavy cream works too. Adding Parmesan cheese can enhance the flavor, but it's optional. - Salt and freshly cracked pepper to taste - Fresh sage leaves for garnish Season with salt and cracked pepper to bring everything together. Fresh sage leaves add a lovely touch. They not only look nice but also add an aromatic flavor that complements the dish well. These ingredients create a lovely balance of flavors in the creamy butternut squash pasta. For the full recipe, check out the detailed instructions to make this delicious meal. - Preheat your oven to 400°F (200°C). - Toss the cubed butternut squash in olive oil, salt, and pepper. - Spread the squash on a baking sheet. Roast for 20-25 minutes. The squash should be tender and have a light caramel color. - Bring a large pot of salted water to a boil. - Add the pasta and cook it as per package instructions. - Before draining, reserve 1 cup of the pasta water. This helps adjust your sauce later. - Heat olive oil in a large skillet over medium heat. - Add diced onion and sauté until soft, about 5 minutes. - Stir in minced garlic and cook for about 1 minute. - Blend the roasted squash with the sautéed onion, garlic, vegetable broth, and coconut milk. Use an immersion blender or a regular blender. - Return the blended sauce to the skillet and heat on low. - Add the cooked pasta and gradually mix in the reserved pasta water. - Stir well until the pasta is coated with the sauce. - If you like, stir in the Parmesan cheese. - Taste and adjust seasoning with salt and pepper as needed. - Plate the pasta in shallow bowls for a nice look. - Garnish with fresh sage leaves and drizzle a little olive oil on top. For a detailed guide, check out the Full Recipe. Enjoy your creamy butternut squash pasta! To get a creamy consistency, blend the roasted butternut squash well. You want it smooth. Use an immersion blender for easy mixing. If it’s too thick, add a splash of pasta water. This helps the sauce cling to the noodles. Want to add more flavor? Try spices like cinnamon or a pinch of chili powder. Fresh herbs, such as thyme or rosemary, can boost taste too. You can also add veggies like spinach or kale for added nutrition. They cook quickly and blend well with the sauce. Pair creamy butternut squash pasta with a simple salad. A mix of greens with a light vinaigrette works well. For drinks, a glass of white wine like Sauvignon Blanc complements the dish nicely. If you prefer non-alcoholic options, try sparkling water with a slice of lemon. These sides enhance the meal and make it even more enjoyable. For the full recipe, check out [Full Recipe]. {{image_4}} You can easily adjust creamy butternut squash pasta to fit different diets. For a vegan option, swap heavy cream with coconut milk and skip the cheese. This change still gives you a creamy sauce that tastes great. If you need gluten-free pasta, use rice or corn-based noodles. These options keep the dish light and tasty. Experimenting with different ingredients can make this dish exciting. Instead of butternut squash, try using acorn or delicata squash. Each type has its unique flavor and texture. For cheese, you can use feta for a tangy twist or goat cheese for a creamy finish. These swaps let you create new flavor combinations that keep things fresh. To make this dish more seasonal, add roasted vegetables like Brussels sprouts or carrots. This not only enhances the flavor but also adds color. Making creamy butternut squash pasta in fall is perfect. You can enjoy the warmth of the season with every bite. Try using spices like cinnamon or cloves for a cozy feel. For the full recipe, check out the complete guide and enjoy the rich flavors! To store leftover creamy butternut squash pasta, let it cool first. Then, place it in an airtight container. Glass or BPA-free plastic containers work best. Make sure to seal them tightly to keep the air out. This helps keep the pasta fresh and tasty. Store the container in the fridge for up to four days. Yes, you can freeze this dish! To do this, use a freezer-safe container. Leave some space at the top for expansion. It is best to freeze the pasta without the cheese added. This helps keep the texture right. When you are ready to eat, move the container to the fridge to thaw overnight. To reheat, use a skillet over low heat. Add a splash of vegetable broth or water to help it warm up evenly. In the fridge, creamy butternut squash pasta lasts for about four days. After that, the taste and quality may drop. Always check for signs of spoilage. If the pasta smells sour or has a strange texture, it’s best to throw it away. Enjoy your creamy butternut squash pasta fresh! For the full recipe, visit [Full Recipe]. It takes about 40 minutes to make creamy butternut squash pasta. The prep time is 10 minutes. Cooking the dish takes about 30 minutes. You will spend 20-25 minutes roasting the squash. Boiling the pasta adds another 10-12 minutes. This dish is quick and easy for a weeknight meal! Yes, you can use many types of pasta. Fettuccine and pappardelle work well for this sauce. You can also try penne or rigatoni for a fun twist. Each shape holds the sauce differently, so feel free to experiment! Absolutely! To make it nut-free, use coconut milk instead of cream. If you want a non-vegan option, use heavy cream instead. You can skip any nuts in the garnish. This keeps the dish creamy and delicious without nuts. You can serve this dish with many sides. A crisp green salad pairs well. Try a side of garlic bread for extra comfort. For dessert, pumpkin pie or apple crisp can be great choices. These options enhance the cozy vibe of the meal. To reheat, use a skillet over low heat. Add a splash of water or broth to the pasta. This helps keep the sauce creamy. Stir until heated through. You can also use the microwave, but stir halfway for even heating. Enjoy your leftovers just as much! This creamy butternut squash pasta combines hearty flavors and texture. We roasted the squash and blended it with garlic and onion to create a rich sauce. You learned how to make it creamy, adjust seasoning, and even swap ingredients. In the end, this dish is versatile and perfect for any meal. Enjoy experimenting with flavors and sharing this delightful recipe with friends and family.](https://goldendishy.com/wp-content/uploads/2025/07/000431ad-92db-4f90-88d6-bb841745a08c-768x768.webp)