Skip to content
About
Contact
Cookie Policy
Copyright Policy
Disclaimer
Search
Home
Dinner
Appetizer
Desserts
Drinks
About
Contact
Privacy Policy
Toggle Menu
Home
/
Dinner
- Page 10
Dinner
Garlic Parmesan Dinner Rolls Fluffy and Delicious Treat
Spicy Ramen Noodle Stir Fry Quick and Tasty Recipe
Cheesy Broccoli Rice Casserole Simple and Delicious Dish
Sweet Chili Tofu Stir Fry Quick and Tasty Meal
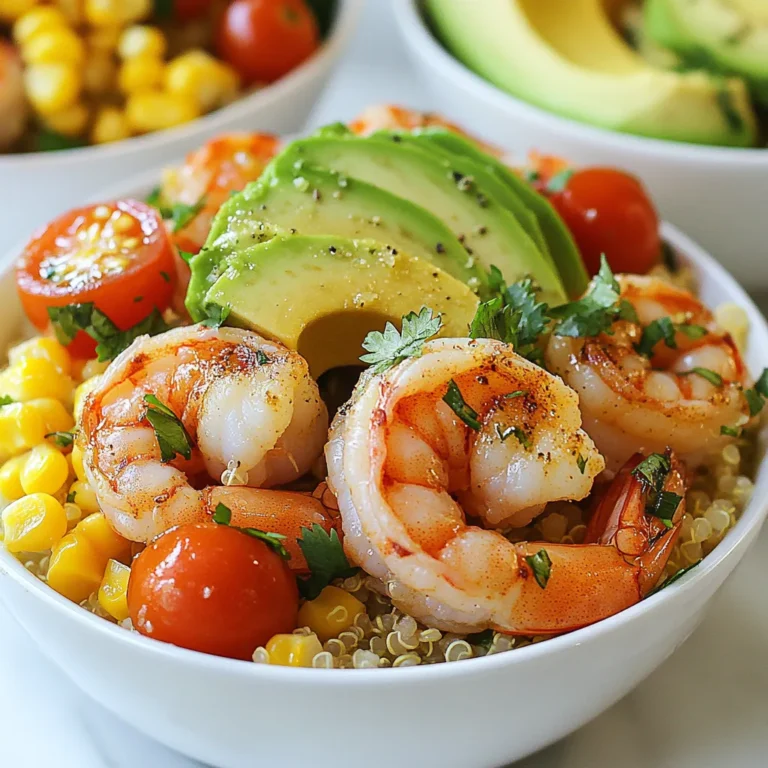
Cilantro Lime Shrimp Bowls Fresh and Flavorful Meal
Creamy Stovetop Mac and Cheese Delight in Minutes
Instant Pot Mac and Cheese Creamy Comfort Food
Sweet Honey Cornbread Simple and Flavorful Recipe
Jalapeño Cheddar Cornbread Flavorful and Easy Recipe
Easy Skillet Cornbread Simple and Tasty Recipe
Page navigation
Previous Page
Previous
1
…
8
9
10
11
12
…
38
Next Page
Next
Home
Dinner
Appetizer
Desserts
Drinks
About
Contact
Privacy Policy
Toggle Menu Close
Search for:
Search


![- 2 packs of instant ramen noodles (discard the flavor packets) - 2 tablespoons vegetable oil - 1 small onion, thinly sliced - 3 cloves garlic, minced - 1 cup bell peppers (a mix of red, green, and yellow), julienned - 1 cup broccoli florets (washed and trimmed) - 1 medium carrot, peeled and julienned - 1 cup snap peas (trimmed) - 2 tablespoons soy sauce - 1 tablespoon sriracha (adjust to your spice preference) - 1 tablespoon sesame oil - 1 teaspoon ginger, freshly grated - Salt and pepper to taste - 2 green onions, finely chopped (for garnish) - Sesame seeds (for garnish) - Large pot for boiling noodles - Frying pan or wok - Colander for draining Using fresh ingredients makes a big difference in flavor. I love using colorful veggies. They not only taste great but also look amazing in the bowl. You can customize the vegetables based on what you have. If you want to use leftover veggies, go for it! For the equipment, a large pot is a must for cooking the noodles. A frying pan or a wok works well for stir-frying. They heat evenly, which helps cook everything fast. A colander is handy for draining the noodles after cooking. This recipe is all about speed and flavor. You can find the full recipe to follow the steps easily. Just gather your ingredients and equipment, and let’s get cooking! 1. First, fill a large pot with water and bring it to a boil. Make sure to use enough water to cover the noodles. 2. Once boiling, add the ramen noodles. Cook them according to the package instructions, usually around 3-4 minutes. 3. After cooking, drain the noodles in a colander. Shake off any extra water and set them aside for later. 1. In a large frying pan or wok, heat 2 tablespoons of vegetable oil over medium-high heat. Wait until the oil shimmers. 2. Add the thinly sliced onion. Sauté for about 2 minutes until the onion becomes soft and fragrant. 3. Next, stir in 3 cloves of minced garlic, 1 cup of julienned bell peppers, and 1 teaspoon of freshly grated ginger. Cook for 2-3 minutes until the peppers soften. 4. Now, add 1 cup of broccoli florets, 1 medium julienned carrot, and 1 cup of snap peas. Stir-fry for 3-4 minutes. The veggies should stay bright and slightly crisp. 1. Lower the heat to medium. Gently add the cooked ramen noodles to the pan. Toss everything together carefully. 2. Drizzle 2 tablespoons of soy sauce, 1 tablespoon of sriracha, and 1 tablespoon of sesame oil over the mixture. Toss again for about 2 minutes. Ensure everything gets heated through and coated well. 3. Season with salt and pepper to taste. Toss once more to mix the seasoning evenly. 4. Turn off the heat and serve your stir-fry. Garnish with finely chopped green onions and a sprinkle of sesame seeds. For the full recipe, have a look at the detailed instructions above. Enjoy your cooking! You can change the spice level to match your taste. Start with one tablespoon of sriracha. If you like more heat, add more sriracha gradually. You can also try other spicy options. Chili flakes or hot sauce work great too. For a crunchy veggie texture, add them at the right time. Start with onions and garlic, then add bell peppers. Next, include broccoli, carrots, and snap peas. This order keeps them crisp. Stir-fry each batch for about three minutes. Do not overcook them. Serving is key to making your dish pop. Use deep bowls to showcase the vibrant colors. A sprinkle of sesame seeds adds flair. You might also offer extra sriracha on the side. This lets guests spice it up as they like. {{image_4}} You can add protein to your spicy ramen noodle stir fry for extra flavor and nutrition. If you enjoy meat, try using: - Chicken: Cut into thin strips and cook until golden. - Shrimp: Toss in fresh or frozen shrimp that cooks quickly. For a vegetarian or vegan option, consider these protein sources: - Tofu: Press and cube it, then sauté until crispy. - Tempeh: Slice it thin and stir-fry for a nutty taste. If you want to switch things up, you have other noodle options. Try these: - Udon: Thick and chewy, they add a hearty touch. - Rice noodles: They cook quickly and have a nice texture. If you need a gluten-free choice, look for rice noodles or gluten-free ramen. Many brands offer tasty options that fit your diet. To make your dish even better, think about adding more spices and sauces. Here are some ideas: - Chili paste: If you want more heat, add a spoonful. - Garlic powder: A pinch can enhance the garlic flavor. You can also use homemade sauces for a unique twist. Try mixing soy sauce with lime juice or sesame oil with chili flakes for exciting new flavors. This is a great way to personalize your meal and impress your guests! For the full recipe, check out the [Full Recipe]. To keep your ramen stir fry fresh, store leftovers in an airtight container. Make sure the dish cools to room temperature before sealing. This practice helps prevent moisture and keeps it tasty. You can store it in the fridge for up to three days. When ready to enjoy your leftovers, you have two great options. You can use a microwave or a skillet. - Microwave: Place the stir fry in a microwave-safe bowl. Add a splash of water to keep it moist. Heat it for 1-2 minutes, stirring halfway through. - Skillet: Heat a small amount of oil in a skillet over medium heat. Add your stir fry and cook for about 3-5 minutes. Keep stirring to ensure even heating. Both methods work well, but the skillet can help revive the stir fry's original texture better. Enjoy your meal again without losing any flavor! For more delicious ideas, check out the Full Recipe. Yes, you can. Instant ramen noodles are great, but you can try others too. Here are some options: - Udon noodles: These are thick and chewy. They hold sauce well. - Rice noodles: They are light and gluten-free. Just soak them in hot water. - Soba noodles: These are made from buckwheat. They add a nutty taste. When using different noodles, adjust cooking times as needed. You can easily ramp up the heat in this dish. Here are some ideas: - Add more sriracha: Increase the amount to suit your taste. - Include red pepper flakes: Sprinkle these in while cooking for extra kick. - Use fresh chilies: Slice them thin and toss them in with the veggies. - Try spicy sesame oil: This adds flavor and heat in one step. Experiment with these options until you find your perfect spice level! Absolutely! This recipe is perfect for meal prep. Here are some tips: - Cook the noodles and veggies in advance. Store them separately. - Mix everything together just before eating for the best taste. - Store in airtight containers in the fridge for up to three days. Reheat in a skillet for great flavor. You can also add fresh toppings when serving. For the full recipe, check out the details. You can create a tasty spicy ramen noodle stir fry with simple steps and fresh ingredients. We covered the main ingredients and useful equipment needed for success. I shared tips for adjusting spice levels and achieving that perfect crunch in your stir-fry. Explore variations to customize your dish with proteins or alternative noodles. Remember to store leftovers properly and reheat them well. Enjoy your cooking adventures while making this vibrant and flavorful meal!](https://goldendishy.com/wp-content/uploads/2025/07/9da77702-1484-4444-86e3-cca5584db0f1-768x768.webp)


![- 2 cups elbow macaroni - 4 cups water - 1 teaspoon salt - 2 tablespoons unsalted butter - 1 cup sharp cheddar cheese, shredded - 1 cup Monterey Jack cheese, shredded - 1/2 cup cream cheese, softened - 1 teaspoon garlic powder - 1 teaspoon onion powder - 1/4 teaspoon black pepper - 1/4 teaspoon smoked paprika - Fresh parsley, chopped - Chives, chopped To make delicious Instant Pot mac and cheese, you need a few key ingredients. First, the elbow macaroni is your base. It holds the sauce well and cooks up perfectly. Water helps cook the pasta and creates steam. The salt adds flavor to the mix. Unsalted butter enriches the dish, making it creamy. Next, the cheese! Cheddar cheese gives that classic flavor, while Monterey Jack adds creaminess. Cream cheese helps bind everything together. For seasonings, garlic powder and onion powder bring depth. Black pepper adds a bit of heat. Smoked paprika gives a nice smoky touch. Finally, if you want to garnish, fresh parsley and chives add color and flavor. These ingredients come together to create a comforting dish that feels like a hug in a bowl. You can find the full recipe [here]. Start by adding the elbow macaroni into the Instant Pot. Next, pour in 4 cups of water. Sprinkle in 1 teaspoon of salt for flavor. Make sure all the macaroni is covered in water. Secure the lid tightly on the Instant Pot. Set the pressure release valve to the sealing position. Select the manual high-pressure setting. Adjust the timer to cook for 4 minutes. When the cooking cycle ends, do a quick pressure release. Carefully turn the valve to venting. Wait until the pressure is fully released. Open the lid slowly, being cautious of steam. Stir the noodles gently to separate any that are stuck together. Add 2 tablespoons of butter right away. Then, mix in 1 cup of sharp cheddar cheese, 1 cup of Monterey Jack cheese, and 1/2 cup of softened cream cheese. Next, add 1 teaspoon of garlic powder, 1 teaspoon of onion powder, 1/4 teaspoon of black pepper, and 1/4 teaspoon of smoked paprika. Stir well until the cheese melts into a creamy sauce. If your mac and cheese is too thick, add a splash of water or milk. Stir until it reaches your desired creamy consistency. Taste your mac and cheese and adjust the seasoning as needed. You can add a pinch more salt or pepper if you want. Serve your dish hot and enjoy the creamy comfort of this Instant Pot mac and cheese. For the full recipe, check the details above. To make your mac and cheese shine, choose a mix of cheeses. I love sharp cheddar for its bold taste and Monterey Jack for creaminess. Together, they create a rich flavor that sings. For a twist, add a bit of gouda or parmesan for depth. Preventing sticking is key. Make sure to stir the pasta before cooking. Adding a touch of oil helps too. This keeps the macaroni from clumping together in the pot. Cook in larger batches to save time. The Instant Pot can handle it! You can double the recipe easily. This way, you have leftovers for quick meals later. Just store them in the fridge. Clean-up can be quick if you act fast. Rinse the pot right after use. Soaking it for a few minutes also helps. Use a soft sponge to keep it scratch-free. For a stunning display, serve your mac and cheese in a beautiful bowl. Top it with extra cheese or crispy breadcrumbs for texture. Fresh herbs like parsley or chives add color and flavor too. Pair your dish with a simple salad or garlic bread. This makes a balanced meal that everyone will enjoy. {{image_4}} You can switch up the cheese for fun. Try using Gouda for a rich taste. It melts well and adds creaminess. Parmesan also works great. It gives a salty, nutty kick. If you're dairy-free, nut cheese is a good choice. It can make your dish creamy while keeping it plant-based. Want to make your mac and cheese more exciting? Add veggies! Broccoli or spinach mixes in nicely. They boost both flavor and nutrition. You can also throw in proteins like chicken or bacon. These ingredients add heartiness and make the dish more filling. If you like heat, spice it up! Add jalapeños for a fresh kick. Hot sauce can also bring the heat. Another fun idea is using smoky chipotle. It gives a deep, smoky flavor that pairs well with cheese. These spicy twists can take your mac and cheese to the next level. For the full recipe, check out the instructions above. Enjoy creating your perfect bowl of mac and cheese! After you make your Instant Pot mac and cheese, let it cool down first. This helps keep the creamy texture. Once cooled, place it in an airtight container. I like to use glass containers for easy reheating. Store it in the fridge for up to three days for the best taste. When it’s time to enjoy those leftovers, you can reheat them in two ways. The microwave is quick and easy. Just place a portion in a bowl and cover it. Heat for one minute, stir, and heat again if needed. The stovetop method keeps the texture nice. Add a splash of milk to a pan, stir in the mac and cheese, and heat on medium until hot. You can freeze mac and cheese for later! Let it cool completely, then spoon it into freezer-safe bags. Press out as much air as possible before sealing. It can stay fresh for about three months. To thaw, move it to the fridge overnight. After thawing, reheat it using the stovetop method for a creamy finish. To make Instant Pot Mac and Cheese, you start by adding elbow macaroni to the pot. Pour in water and add salt. Then, secure the lid and cook on high pressure for 4 minutes. After that, release the pressure quickly. Open the lid and stir the pasta. Add butter and mix in your cheeses. Finally, stir in the seasonings until smooth. You can find the full recipe for more details. Yes, you can use gluten-free macaroni. Just substitute regular pasta with gluten-free options. The cooking time may stay the same, but check the package for specific instructions. Some gluten-free pasta might need a little less time, so watch closely. This way, you can enjoy a creamy dish without gluten. If your mac and cheese is too thick, don’t worry! You can fix it easily. Add a splash of water or milk to the pot. Stir well until it reaches your desired creaminess. If it still seems thick, add a bit more liquid. This will help create that perfect velvety texture. You learned how to make Instant Pot mac and cheese with ease. We covered ingredients, cooking steps, and tips for perfect flavor. You can customize your dish with different cheeses and add-ins. Remember to store leftovers properly to enjoy later. Now it’s your turn to create a creamy, cheesy delight. Experiment with flavors and share your results! Enjoy your cooking journey.](https://goldendishy.com/wp-content/uploads/2025/07/fbbf4859-6ee8-4460-a645-018ee95cc89f-768x768.webp)


. In this post, we covered essential ingredients for cornbread, substitutions, and tips for fresh picks. I shared step-by-step instructions to ensure your cornbread turns out great. We discussed ways to perfect texture, enhance flavor, and explore different variations. Proper storage and reheating tips help keep your cornbread fresh for later. Remember, cornbread can be sweet or savory, so choose what you love. Get creative and enjoy the process! Your next batch will be delicious and fun to make.](https://goldendishy.com/wp-content/uploads/2025/07/3215032b-f688-44a5-9882-4fc644314e18-768x768.webp)