Skip to content
About
Contact
Cookie Policy
Copyright Policy
Disclaimer
Search
Home
Dinner
Appetizer
Desserts
Drinks
About
Contact
Privacy Policy
Toggle Menu
Home
/
Desserts
- Page 9
Desserts
Berry Coconut Overnight Oats Simple and Tasty Recipe
Peanut Butter Oreo Pie Tasty Dessert to Savor
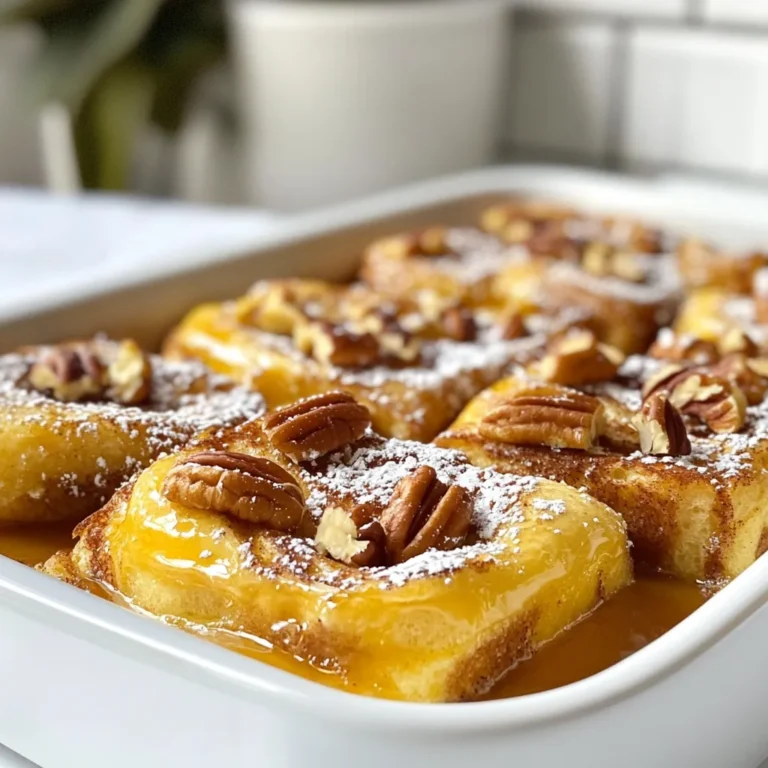
Strawberry Cheesecake French Toast Irresistible Delight
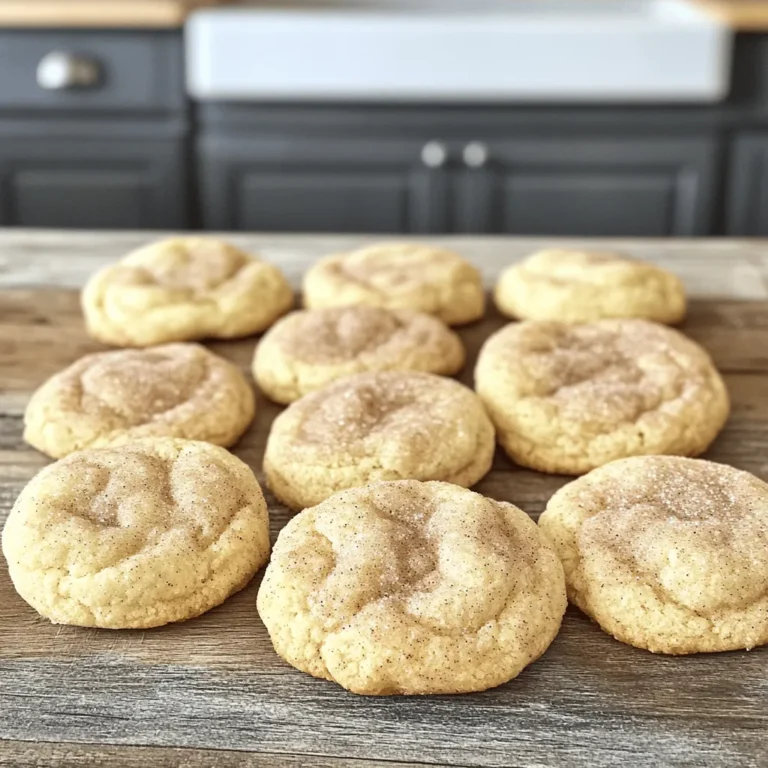
Classic Snickerdoodle Cookies Tasty and Easy Treat
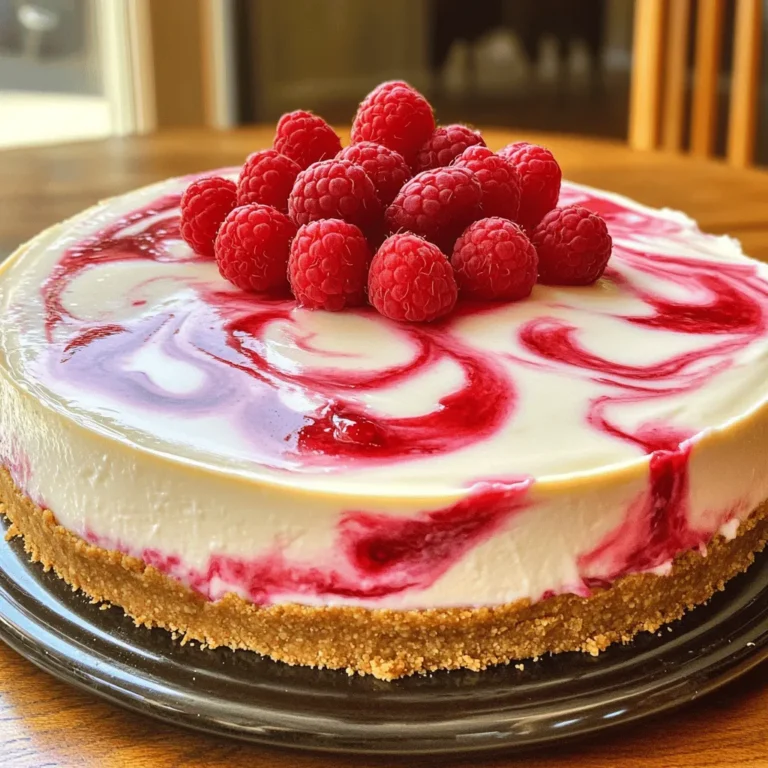
Raspberry Swirl Cheesecake Delightfully Creamy Dessert
Keto Chocolate Chip Cookies Easy and Tasty Treat
Cinnamon Roll French Toast Casserole Fluffy Delight
Rainbow Fruit Pizza Delightful and Easy Recipe
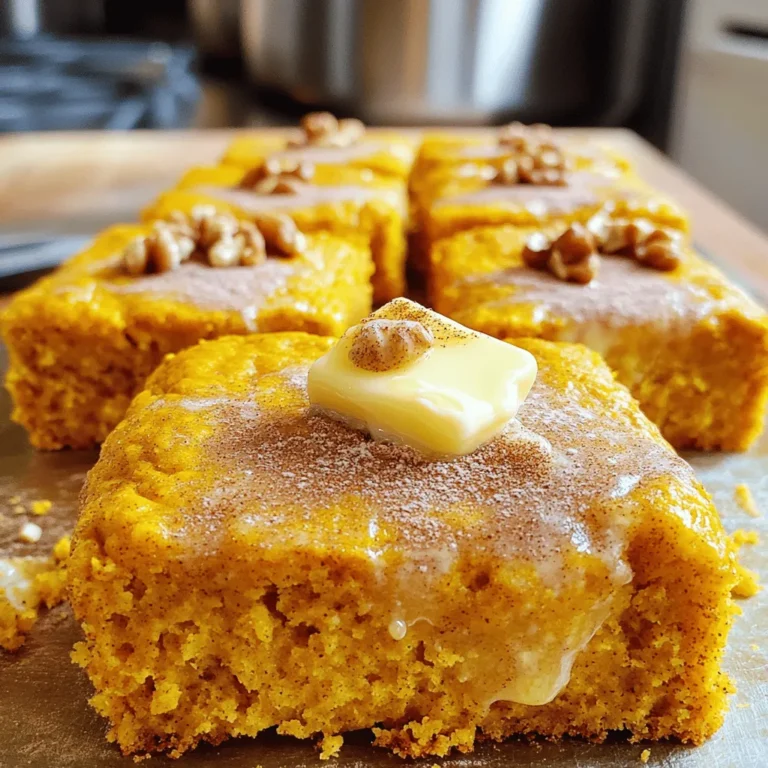
Pumpkin Cornbread Perfect for Any Occasion
Cinnamon Roll Scones Soft and Flavorful Treat
Page navigation
Previous Page
Previous
1
…
7
8
9
10
11
…
22
Next Page
Next
Home
Dinner
Appetizer
Desserts
Drinks
About
Contact
Privacy Policy
Toggle Menu Close
Search for:
Search


. To keep your scones fresh, let them cool completely. Place them in an airtight container. You can store them at room temperature for up to three days. If you live in a humid area, refrigerate them to prevent spoilage. Use parchment paper between layers to keep them from sticking. Reheat your scones for the best taste. Preheat your oven to 350°F (175°C). Place the scones on a baking sheet. Heat them for about 5 to 10 minutes, or until warm. You can also use a microwave. Heat them for 15 to 20 seconds. This warms them quickly but may make them soft. To freeze scones, wrap each one in plastic wrap. Place them in a freezer bag or airtight container. Label with the date for easy tracking. They can last up to three months in the freezer. When ready to eat, thaw them in the fridge overnight. Reheat as mentioned above for a fresh taste. Check the Full Recipe for more tips on making these treats! To make cinnamon roll scones, follow this simple process. First, mix the dry ingredients in a bowl. This includes flour, sugar, baking powder, salt, and cinnamon. Next, cut in cold butter until the mix looks crumbly. Then, whisk buttermilk, melted butter, and vanilla in another bowl. Combine the wet and dry mixes gently. Pat the dough into a rectangle, brush melted butter, and sprinkle brown sugar for the swirl. Roll it up, slice it, and bake. For the full recipe, check the details above. Yes, you can use milk instead of buttermilk. If you do, add a splash of lemon juice or vinegar. This helps the milk mimic buttermilk's tangy flavor. It also makes the scones soft and fluffy. However, buttermilk adds a richer taste. Serve cinnamon roll scones warm for the best taste. Drizzle the icing over the top just before serving. You can also sprinkle a little cinnamon on top for added flavor. Pair them with coffee or tea for a relaxing treat. They look great on a nice platter. Cinnamon roll scones last for about two days at room temperature. To keep them fresh longer, store them in an airtight container. You can also refrigerate them for up to a week. Just warm them in the oven before serving to regain that fresh-baked taste. Yes, you can make cinnamon roll scones ahead of time. Prepare the dough, and cut the scones. Then, place them on a baking sheet and freeze until firm. After that, transfer them to a bag or container. When you’re ready, bake them straight from the freezer, adding a few extra minutes to the baking time. This way, you enjoy fresh scones anytime! Making scones is simple and fun. You learned about ingredients, tools, and baking steps. I shared tips to help you avoid mistakes and find the best flavors. You also discovered flavor variations and storage methods. Scones can be your tasty treat for any occasion. With a few easy steps, you can impress your friends. Enjoy baking, and don’t forget to share your tasty results!](https://goldendishy.com/wp-content/uploads/2025/07/878de396-77ac-4fc1-b8cf-b56551936fe1-768x768.webp)