Skip to content
About
Contact
Cookie Policy
Copyright Policy
Disclaimer
Search
Home
Dinner
Appetizer
Desserts
Drinks
About
Contact
Privacy Policy
Toggle Menu
Home
/
Desserts
- Page 14
Desserts
Lemon Blueberry Cheesecake Bars Delightful and Fresh
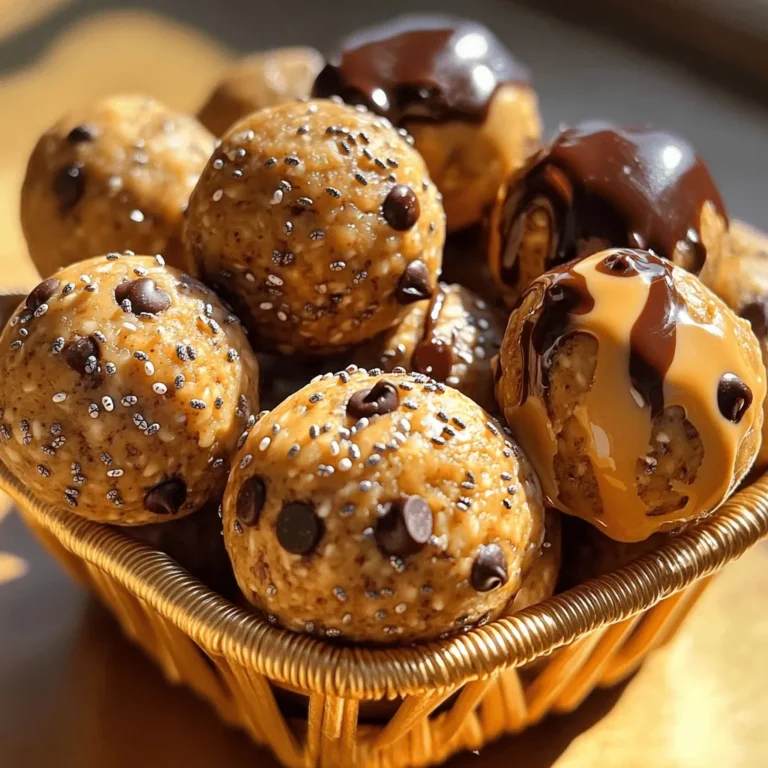
Chocolate Coconut Energy Balls Nutritious Snack Guide
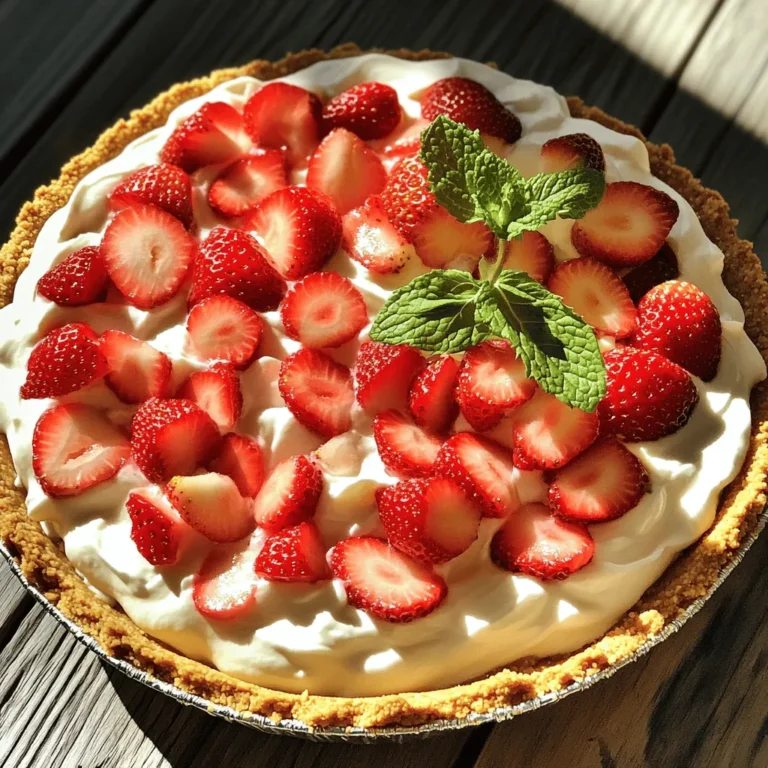
No-Bake Strawberry Cream Pie Simple and Delicious Treat
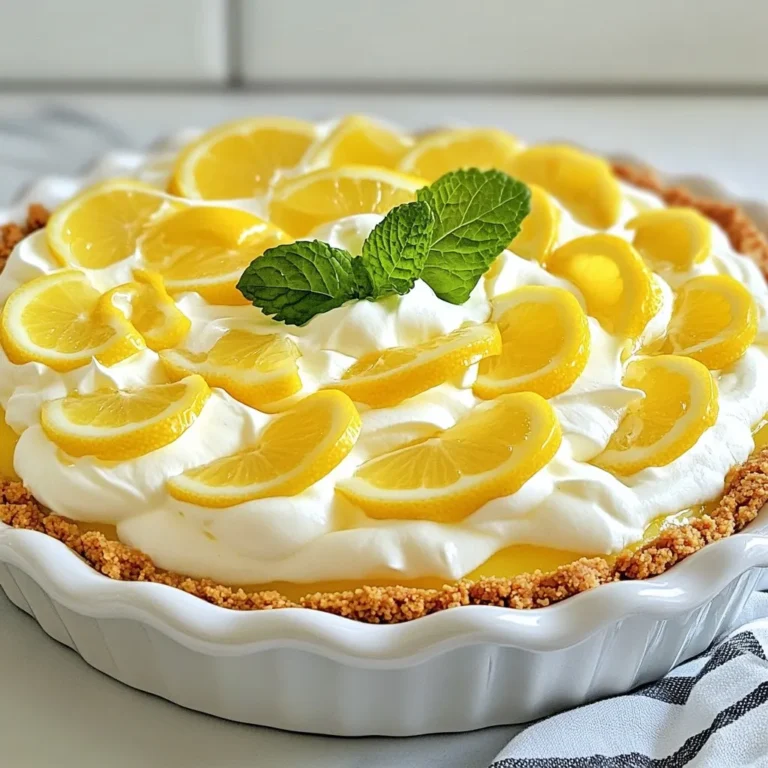
No-Bake Lemon Icebox Pie Fresh and Flavorful Dessert
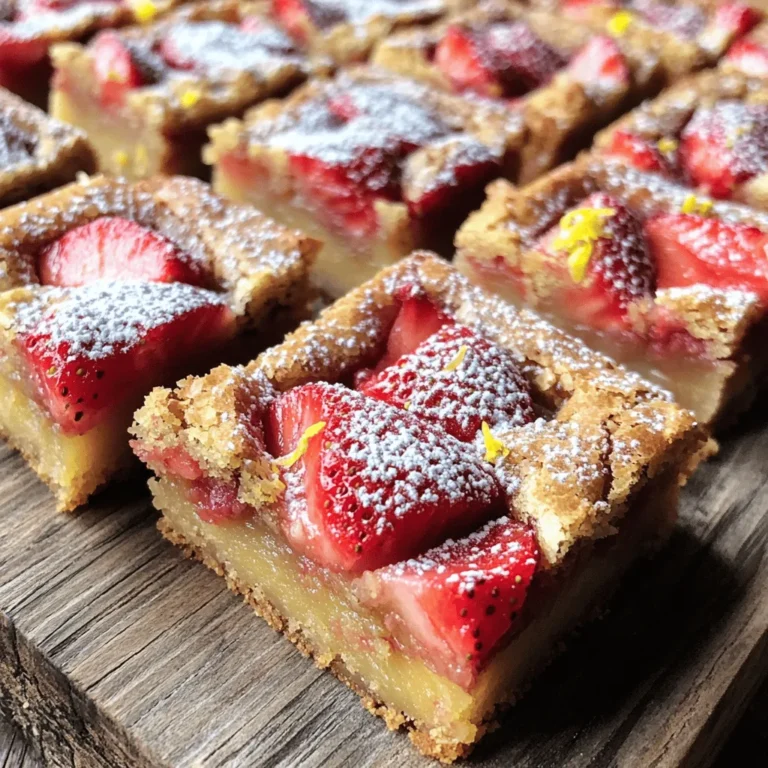
Strawberry Lemon Blondies Delightful and Easy Recipe
Healthy Pumpkin Energy Bites Fuel Your Day
Lemon Blueberry Overnight Oats Flavorful and Healthy
Healthy Chocolate Avocado Brownies Rich and Simple Treat
Blueberry Peach Crumble Bars Irresistible Dessert Treat
Peanut Butter Protein Balls Healthy Energizing Snack
Page navigation
Previous Page
Previous
1
…
12
13
14
15
16
…
22
Next Page
Next
Home
Dinner
Appetizer
Desserts
Drinks
About
Contact
Privacy Policy
Toggle Menu Close
Search for:
Search

![- 1 ½ cups graham cracker crumbs - ½ cup unsalted butter, melted - 2 tablespoons granulated sugar - 16 oz cream cheese, softened to room temperature - 1 cup granulated sugar - 3 large eggs, at room temperature - 1 teaspoon pure vanilla extract - 2 tablespoons fresh lemon zest - ½ cup freshly squeezed lemon juice - 1 cup fresh blueberries - Powdered sugar for dusting (optional) The key to great Lemon Blueberry Cheesecake Bars lies in using fresh, high-quality ingredients. The combination of cream cheese and lemon creates a creamy texture with a bright flavor. The blueberries add bursts of sweetness and color. - If you need a gluten-free option, try almond flour or gluten-free cookies for the crust. - For a vegan version, you can use plant-based cream cheese. Look for brands that offer a similar taste. - If you want to cut sugar, use coconut sugar or a sugar substitute like stevia. These substitutions help you customize the recipe to fit your needs while keeping it delicious. For the full recipe, check the detailed instructions above. 1. First, preheat your oven to 350°F (175°C). This step is key for even baking. 2. Next, prepare an 8x8 inch baking pan. Line it with parchment paper. Let the paper hang over the sides. This helps when lifting the bars out later. 3. In a medium mixing bowl, combine 1 ½ cups of graham cracker crumbs, ½ cup melted unsalted butter, and 2 tablespoons of granulated sugar. Mix until it looks like damp sand. 4. Press this mixture firmly into the bottom of the pan. This forms your crust. Bake it for 8-10 minutes until it turns lightly golden. Remove it from the oven and let it cool slightly. 1. In a large bowl, use an electric mixer to beat 16 oz of softened cream cheese with 1 cup of granulated sugar. Mix until it is smooth and creamy. This should take about 2-3 minutes. 2. Add 3 large eggs, one at a time. Mix on low speed after each egg. Avoid overmixing to keep air bubbles out. 3. Now, stir in 1 teaspoon of vanilla extract, 2 tablespoons of fresh lemon zest, and ½ cup of freshly squeezed lemon juice. Make sure everything blends well. 4. Gently fold in 1 cup of fresh blueberries with a spatula. Be careful not to crush them; you want them whole in the bars. 1. Pour the cheesecake mixture over the cooled crust in the pan. Spread it evenly using a spatula. 2. Bake the mixture in the preheated oven for 25-30 minutes. The center should look set but still jiggle slightly. It will firm up more as it cools. 3. Once baked, take the pan out and let it cool to room temperature. After it cools, refrigerate for at least 4 hours. For best results, leave it overnight. 4. When you’re ready to serve, lift the cheesecake out of the pan using the parchment paper. Cut into squares and enjoy! You can dust the tops with powdered sugar for a nice touch. For the full recipe and more details, check out the [Full Recipe]. Avoiding cracks in the cheesecake To prevent cracks, do not overmix the batter. Overmixing adds air, which can create bubbles. Also, use room temperature ingredients. Cold cream cheese can make lumps. Bake the bars at a lower temperature for a longer time. A water bath can help keep the heat even. Achieving the perfect texture For a creamy texture, blend the cream cheese until smooth. Mix in the eggs one at a time. This keeps the batter light and fluffy. Do not rush this step. After baking, let the bars cool slowly to room temp. Chill them in the fridge for at least four hours. Creative ways to present the bars Cut the bars into squares and place them on a nice plate. You can garnish with fresh blueberries and lemon slices for color. A drizzle of lemon glaze adds shine and flavor. Serve them with a dollop of whipped cream for extra flair. Complementary toppings and sides Top each bar with a sprinkle of powdered sugar for sweetness. A scoop of vanilla ice cream pairs well, too. You can also serve with a side of lemon curd for a zesty punch. Fresh mint leaves add a pop of color and freshness. Fixing undercooked bars If the bars are too soft, return them to the oven. Bake for an additional 5-10 minutes. The center should have a slight jiggle but not be runny. Make sure to let them cool before checking the texture. Preventing overbaking Keep an eye on your bars as they bake. If the edges start to brown too much, cover them with foil. Use a toothpick to check doneness. It should come out mostly clean but with a bit of moist filling clinging to it. {{image_4}} You can mix up the flavors in your cheesecake bars easily. Swap blueberries for other berries like raspberries or strawberries. You can even use a mix of berries for a fun twist. If you love chocolate, add some chocolate chips. This makes the bars sweeter and richer. If you need gluten-free options, use gluten-free graham crackers for the crust. They work just as well and taste great. For those on a dairy-free diet, try using vegan cream cheese. It gives you a similar creamy texture without the dairy. Change the fruits based on what’s in season. In summer, use fresh peaches or cherries for a juicy taste. In the fall, think about adding pumpkin or apple flavors. You can also dress up the bars for holidays. Try adding whipped cream or holiday-themed sprinkles for fun. These variations let you enjoy lemon blueberry cheesecake bars in new ways. Don't forget to check out the Full Recipe for more details! To store leftover Lemon Blueberry Cheesecake Bars, place them in an airtight container. This keeps them fresh and tasty. You can also cover them with plastic wrap. Store them in the fridge for up to five days. For the best flavor, eat them within the first two days. You can freeze these cheesecake bars for longer storage. First, cut them into squares. Wrap each square in plastic wrap, then place them in a freezer-safe bag. They will last about three months in the freezer. When you're ready to enjoy them, take out the bars and place them in the fridge overnight to thaw. You can also let them sit at room temperature for about 30 minutes before serving. If you plan to serve these bars at a gathering, make them a day ahead. This allows the flavors to blend nicely. To keep the bars fresh, store them in the fridge until you're ready to serve. For a beautiful touch, dust the tops with powdered sugar just before serving. This keeps the bars looking fresh and inviting even a day later. For the full recipe, check out the Lemon Blueberry Cheesecake Bars section. Lemon Blueberry Cheesecake Bars are a creamy and tangy dessert. They combine smooth cheesecake with fresh blueberries and zesty lemon. The base is a crispy graham cracker crust that adds crunch. These bars are easy to slice and serve, making them perfect for gatherings. You can enjoy them chilled, which enhances the flavors. Each bite is a delightful mix of sweet and tart. Yes, you can make these bars ahead of time. They taste even better when chilled overnight. Prepare the bars and let them cool to room temperature. Place them in the fridge for at least four hours. If you want to make them days in advance, store them in an airtight container. Just remember to cut them into squares before serving. This way, you save time on the day of your event. You can tell when cheesecake bars are done by looking for a few signs. The edges should be set, while the center may jiggle slightly. This jiggle means they will firm up as they cool. Another sign is a light golden color around the edges. If you see cracks forming, they may be overbaked. Keep an eye on them during the last few minutes of baking. Yes, there are several substitutes for eggs in this recipe. You can use unsweetened applesauce; a quarter cup replaces one egg. Another option is silken tofu, blended until smooth. Use about one quarter cup for each egg needed. You can also try using flaxseed meal mixed with water. One tablespoon of flaxseed meal mixed with three tablespoons of water equals one egg. These alternatives keep your cheesecake rich and creamy. In this blog post, we covered how to create delicious lemon blueberry cheesecake bars. We started with the ingredients, explored substitutions, and shared step-by-step instructions. Tips for serving, variations, and storage were also discussed. These tips help ensure your cheesecake turns out perfectly every time. Remember, baking is fun, and experimenting with flavors leads to great treats. Enjoy your baking journey and share your creations with friends and family!](https://goldendishy.com/wp-content/uploads/2025/07/2e10f80d-a440-4f9c-b53b-c6e4b2946195-768x768.webp)


![To make Lemon Blueberry Overnight Oats, you need: - 1 cup rolled oats - 1 cup milk (dairy or any plant-based alternative) - 1/2 cup Greek yogurt (or plant-based yogurt) - 1/2 cup fresh blueberries (or frozen, thawed) - Zest of 1 medium lemon - 2 tablespoons fresh lemon juice - 1 tablespoon maple syrup (optional for sweetness) - 1/2 teaspoon pure vanilla extract - Pinch of salt - Toppings: extra fresh blueberries, sliced almonds, and chia seeds You can switch out some ingredients if needed: - Use almond milk or oat milk instead of dairy milk. - Swap Greek yogurt for coconut yogurt for a dairy-free option. - Replace maple syrup with honey or agave for sweetness. - If you don’t have fresh blueberries, frozen ones work great too. Each ingredient plays a key role in this recipe: - Rolled oats provide the base. They soak up the liquid and become soft. - Milk adds creaminess and helps oats absorb flavors. - Greek yogurt offers protein and a nice texture. - Blueberries add sweetness and antioxidants. - Lemon zest and juice bring brightness and a fresh taste. - Maple syrup sweetens the dish naturally. - Vanilla extract enhances the overall flavor. - Salt balances the sweetness. - Toppings like almonds and chia seeds add crunch and nutrients. These ingredients come together to create a tasty and healthy breakfast. For the full recipe, refer to the earlier section. First, gather all your ingredients. You need rolled oats, milk, Greek yogurt, blueberries, lemon zest, lemon juice, maple syrup, vanilla extract, and salt. This simple mix brings bright flavors to your morning. It takes just ten minutes to prep. In a medium bowl, combine the rolled oats, Greek yogurt, and milk. Add in the lemon zest, lemon juice, maple syrup, vanilla extract, and a pinch of salt. Use a spoon or spatula to mix everything well. Make sure the oats soak up the liquid. This step is key for the best texture. Once mixed, gently fold in the fresh blueberries. Be careful not to mash them. Now, divide the oat mixture into two glass jars or containers. Make sure each jar has an even amount. Seal the jars tightly and place them in the fridge. Let them chill overnight or for at least four hours. This waiting time allows the oats to soften and soak in all those tasty flavors. In the morning, stir the oats. If they are too thick, add a splash of milk. Top with extra blueberries, sliced almonds, and chia seeds. Enjoy this delicious, healthy breakfast! For the full recipe, check out the provided instructions. To get the best texture, use rolled oats. They soak well and stay chewy. Mix your oats with yogurt and milk in a bowl. This makes them creamy. You can add lemon zest and juice for a bright taste. If you want more sweetness, a little maple syrup works great. Stir the mixture until it is smooth, and the oats are well covered. Don’t forget to gently fold in the blueberries. This keeps them intact, adding bursts of flavor. When serving, use clear jars to show off the colors. A sprinkle of sliced almonds gives a nice crunch. You can top it with extra blueberries for freshness. A few chia seeds add a fun texture and more nutrients. For a zesty look, place a lemon slice on the jar’s edge. This makes your oats not just tasty but also pretty! To boost nutrition, consider adding nuts or seeds. Almonds and chia seeds are great options. They add healthy fats and protein. You can also swap regular yogurt for Greek yogurt for extra protein. If you want a vegan option, use plant-based yogurt and milk. This keeps it creamy and dairy-free. By adding these ingredients, you can make your overnight oats even healthier while still enjoying the delicious flavor. For the complete recipe, check out the Full Recipe section. {{image_4}} You can switch the blueberries for other fruits. Try strawberries, raspberries, or peaches. Each fruit brings its own flavor and texture. You can also mix fruits for a fun twist. Just keep the same amount of fruit to match the recipe. If you want a different sweet taste, use honey or agave syrup. You can also skip sweeteners altogether if you prefer a tart flavor. Adjust the amount to suit your taste. Remember, the fruit adds natural sweetness too! Add spices for extra flavor. Cinnamon or nutmeg can give warmth. You might also try adding a teaspoon of almond extract for a nutty twist. If you like it creamy, add more Greek yogurt. For crunch, mix in nuts or seeds. These simple changes can make your oats unique and delicious. For the full recipe, check out the instructions above! Store your lemon blueberry overnight oats in airtight containers. This keeps them fresh and prevents spills. Glass jars work great. They also show off the beautiful layers. Always seal them tightly. Your oats will stay good in the fridge for up to five days. The flavors will blend better as they sit. Check for any off smells before eating. If they look or smell funny, toss them out. You can eat these oats cold, right from the fridge. If you prefer them warm, heat them in the microwave. Add a splash of milk if they seem too thick. Heat for about 30 seconds, then stir. Enjoy your creamy, zesty oats! Check the [Full Recipe] for details on how to make them. Yes, you can use quick oats. They will cook faster than rolled oats. Quick oats may make your mixture creamier. However, they might lose some texture. Rolled oats offer a nice chewiness. I have found that rolled oats work best for overnight oats. These oats last about 3 to 5 days in the fridge. Store them in airtight containers. This keeps them fresh and tasty. Just stir before eating. You may need to add a splash of milk if they seem thick. Yes, you can easily make these oats vegan. Use plant-based milk and yogurt. Maple syrup is a great sweetener. This keeps the recipe delicious. You won’t lose any flavor. Check the Full Recipe for more tips! This article covered the key ingredients and their roles in making Lemon Blueberry Overnight Oats. We explored step-by-step methods for mixing and chilling. Tips and tricks helped improve texture and flavor. Variations allow customization to suit your taste. Lastly, we discussed storage details to keep your oats fresh. Overall, making overnight oats is easy and flexible. Enjoy experimenting with different flavors and ingredients!](https://goldendishy.com/wp-content/uploads/2025/06/368f6847-7d49-481c-8601-ff06e206830f-768x768.webp)
![- 1 ripe avocado, peeled and pitted - 1/2 cup unsweetened cocoa powder - 1/2 cup maple syrup or honey - 1/4 cup almond butter or peanut butter - 1/2 cup whole wheat flour - 1/2 teaspoon baking soda - 1/4 teaspoon salt - 1 teaspoon pure vanilla extract - 1/2 cup dark chocolate chips The key ingredient here is the avocado. Why choose avocado for brownies? It adds creaminess and healthy fats. This makes the brownies moist without extra oil. Next, we have cocoa powder. It gives the brownies a rich chocolate taste. The maple syrup or honey acts as a natural sweetener. I prefer maple syrup for its unique flavor. Almond butter or peanut butter brings a nutty taste. Whole wheat flour adds fiber, making these brownies healthier. Baking soda helps the brownies rise. Salt enhances all the flavors. Finally, dark chocolate chips are a must for that gooey chocolate burst. Using avocado offers many perks. It is rich in vitamins and healthy fats. These fats can help lower bad cholesterol. The fiber in avocado also aids digestion. Cocoa powder is full of antioxidants. It can improve heart health while making brownies delicious. Maple syrup is a lower glycemic option. It can provide a steady energy boost without a sugar crash. Switching to whole wheat flour adds more nutrients. It has more fiber than white flour. This helps keep you full longer. If you need gluten-free options, use almond flour instead of whole wheat. It works well and keeps the taste rich. For a vegan-friendly version, replace honey with maple syrup. Use a nut butter that fits your diet. You can also find dairy-free chocolate chips easily. These easy swaps ensure everyone can enjoy these healthy chocolate avocado brownies! - Preheat your oven to 350°F (175°C). - Line an 8x8 inch baking pan with parchment paper. Leave some paper hanging over the edges. This helps with easy removal later. - Take your ripe avocado and mash it in a bowl. You want it smooth and creamy. You can also use a food processor for this step. - In the same bowl, add maple syrup (or honey), almond butter, and vanilla extract. Mix until everything is blended well. - In a different bowl, whisk together cocoa powder, whole wheat flour, baking soda, and salt. Make sure these dry ingredients are mixed well. - Gradually add the dry mix to the wet mix. Stir gently until just combined. It’s okay to have a few lumps; this helps keep the brownies soft. - Fold in dark chocolate chips so they are evenly spread in the batter. - Pour the batter into your prepared pan. Use a spatula to smooth it out evenly. - Place the pan in your oven. Bake for 20-25 minutes. - To check if they are done, insert a toothpick into the center. It should come out with a few moist crumbs but not wet batter. - Once baked, let the brownies cool in the pan on a wire rack for 15 minutes. Use the parchment paper to lift them out. Let them cool further before cutting into squares. Enjoy making these Healthy Chocolate Avocado Brownies with the [Full Recipe]. To make your brownies just right, avoid overmixing. When you combine wet and dry ingredients, mix gently. A few lumps are okay. This keeps your brownies soft and fudgy. Even baking is also key. Make sure to spread the batter evenly in the pan. This helps them bake at the same time. For a lovely presentation, dust the brownies with cocoa powder or powdered sugar. You can also serve them with fresh berries. A dollop of yogurt adds creaminess and balances the rich chocolate. These simple touches make your brownies look great on any plate. You can boost the taste of your brownies easily. Try adding spices like cinnamon or a pinch of sea salt. A splash of almond or peppermint extract gives a fun twist. Using flavored chocolate chips adds another layer of taste. Think about using orange or hazelnut chips for a unique flavor profile. Check out the Full Recipe for more ideas! {{image_4}} To make these brownies gluten-free, swap whole wheat flour for almond flour or coconut flour. These options keep the texture rich and moist while avoiding gluten. Just remember to adjust the amount, as almond flour is more absorbent. For a vegan twist, replace honey with maple syrup. You can also use a plant-based nut butter, like almond or sunflower seed butter, instead of peanut butter. This keeps the flavor intact without any animal products. You can add a fresh twist to these brownies by mixing in mint extract. Use about 1 teaspoon of pure mint extract for a refreshing flavor. This makes mint chocolate avocado brownies that are perfect for any mint lover! Another fun option is to create a peanut butter swirl. Drop spoonfuls of peanut butter into the brownie batter before baking. Use a knife to swirl it around for a beautiful marbled look. This adds a delicious peanut flavor that pairs well with chocolate. If you want to change the serving size, you can easily convert the recipe. For a smaller batch, halve the ingredients. Use a smaller pan, like 6x6 inches, and keep an eye on the baking time. Smaller brownies will bake faster. You can also bake these brownies in a larger pan for thinner squares. A 9x13 inch pan works well, but adjust the baking time to about 15-20 minutes. Check for doneness with a toothpick, just like before. For the full recipe, check out the details above! To keep your brownies fresh, store them in an airtight container. This prevents air from making them dry. You can also place a slice of bread in the container. The bread helps maintain moisture. Always let brownies cool before storing. This avoids steam build-up, which can make them soggy. If you want to freeze brownies, first cut them into squares. Wrap each piece tightly in plastic wrap. Then, place them in a freezer-safe bag or container. This helps avoid freezer burn. When you're ready to eat them, just take out a piece and let it thaw at room temperature. You can also warm them in the microwave for a few seconds. Brownies last about 3-4 days at room temperature. If you see any mold, throw them away. To keep them fresh longer, refrigerate or freeze them. Refrigeration can extend their life to about a week. For best taste, enjoy them within a few days. For the full recipe, check out the provided details. Can I use ripe bananas instead of avocado? Yes, you can use ripe bananas. They add sweetness and moisture. However, the flavor changes slightly. Bananas may make the brownies taste fruitier. If you love banana, give it a try! How can I make these brownies less sweet? To reduce sweetness, cut back on the maple syrup or honey. You can also swap some sweetener for unsweetened applesauce. This keeps the texture but lowers the sugar. What is the best way to test brownies for doneness? The best way is to use a toothpick. Insert it in the center. If it comes out with a few moist crumbs, the brownies are done. If it has wet batter, bake a bit longer. Can these brownies be made without flour? Yes, you can make them without flour. Use a blend of nut flour or almond flour instead. This gives a nutty flavor and keeps the brownies moist. How many calories are in a serving? Each brownie has about 100 calories. This can change based on the ingredients you use. For example, using less sweetener or different nut butter may alter the calorie count. What are good dairy-free alternatives for chocolate chips? Look for dairy-free dark chocolate chips. Many brands make these with coconut or almond milk. You can also chop up a dairy-free chocolate bar for chunks. In this article, I covered a delicious brownie recipe that uses healthy ingredients. You learned about the key components, their nutritional benefits, and how to adapt the recipe for dietary needs. I shared step-by-step instructions for baking these brownies to perfection. With tips on flavor and texture, you can create the best version. Remember to store your leftovers properly to keep them fresh. Enjoy baking these brownies, knowing they are a tasty treat that can fit your diet!](https://goldendishy.com/wp-content/uploads/2025/06/19347e51-2d6e-4328-baa5-83086a8293f2-768x768.webp)
![- 2 cups fresh blueberries, rinsed and drained - 2 cups ripe peaches, diced (approximately 3 medium-sized peaches) - 1 tablespoon freshly squeezed lemon juice - 1/2 cup granulated sugar (adjust based on your sweetness preference) - 1 tablespoon cornstarch - 1 teaspoon pure vanilla extract - 1 1/2 cups rolled oats - 1 cup all-purpose flour - 1/2 cup packed brown sugar - 1/2 teaspoon baking powder - 1/4 teaspoon fine salt - 1/2 cup unsalted butter, melted and slightly cooled - 1 teaspoon ground cinnamon (optional, for added warmth) These simple ingredients create a tasty balance of sweet and tart flavors. The fresh blueberries and ripe peaches shine in each bite. You can change the sugar to fit your taste. I often add a bit more if the fruit is not very sweet. I love using oats for texture; they give a nice chewiness. This recipe is so flexible. You can swap out fruit or adjust flavors based on what you have at home. For example, try adding a pinch of nutmeg for a warm spice twist. This recipe takes only 15 minutes to prepare. It bakes in about 30 to 35 minutes. You will get about 12 bars from this batch, perfect for sharing with friends or family. If you want the full recipe, check the section below. - Preheat your oven to 350°F (175°C). - Grease a 9x13-inch baking dish or line it with parchment paper. - In a medium mixing bowl, combine 2 cups of fresh blueberries, 2 cups of diced peaches, 1 tablespoon of lemon juice, 1/2 cup of granulated sugar, 1 tablespoon of cornstarch, and 1 teaspoon of vanilla extract. - Gently mix the ingredients until the fruit is coated. Let it sit for a few minutes to enhance the flavor. - In a large mixing bowl, whisk together 1 1/2 cups of rolled oats, 1 cup of all-purpose flour, 1/2 cup of brown sugar, 1/2 teaspoon of baking powder, 1/4 teaspoon of salt, and 1 teaspoon of cinnamon if desired. - This mixture will give your bars that perfect crumb texture. - Pour 1/2 cup of melted butter into the dry mixture and stir until it looks like coarse crumbs. - Reserve about 1 cup of this crumb mixture for later. - Press the remaining crumb mixture into the bottom of your greased dish to form the crust. - Spread the fruit mixture evenly over the crust, then sprinkle the reserved crumbs on top. - Bake in your preheated oven for about 30-35 minutes. - Look for golden brown color and bubbling filling to know it's done. - Once baked, let the bars cool on a wire rack for 15-20 minutes before slicing into squares. - This cooling time helps the bars set well for easy serving. Enjoy making these Blueberry Peach Crumble Bars with the [Full Recipe]. - Check for doneness by ensuring the filling is bubbling and the top is golden brown. - Letting the bars cool completely aids in easier slicing. This step prevents squishing the filling and keeps the layers intact. - Use frozen blueberries or peaches if fresh ones are unavailable. Frozen fruit works well and saves time. - Substitute brown sugar with coconut sugar for a healthier option. Coconut sugar adds a nice depth to the flavor. - Serve warm or at room temperature. This allows the flavors to shine. - Pair with vanilla ice cream or whipped cream. This adds a creamy texture that balances the tartness of the fruit. For an extra touch, garnish with fresh blueberries or peach slices. You can find the Full Recipe above for detailed instructions on making these delightful bars! {{image_4}} You can mix things up with different fruits. For a fresh twist, switch blueberries and peaches for raspberries and apples. The tartness of raspberries pairs well with sweet apples. You can also try plums or cherries. Both add their unique flavors and keep the bars fun and exciting. Want to make these bars gluten-free? No problem! Just replace all-purpose flour with a gluten-free flour blend. Many good mixes are available at stores. Also, ensure that your oats are certified gluten-free. This small change lets everyone enjoy this tasty dessert. For a vegan version, swap unsalted butter for coconut oil or vegan butter. Both options work well and keep the bars rich and tasty. If your recipe includes eggs, you can use flax eggs instead. To make a flax egg, mix one tablespoon of ground flaxseed with two and a half tablespoons of water. Let it sit for five minutes. This creates a great egg substitute that still binds everything together. Store your Blueberry Peach Crumble Bars in an airtight container. They stay fresh at room temperature for up to 3 days. This makes them great for quick snacks or dessert. To keep them longer, refrigerate the bars. They will stay fresh for up to a week. For even longer storage, you can freeze the bars. Wrap them tightly in plastic wrap or aluminum foil. They can be frozen for up to 3 months. When you're ready to enjoy your frozen bars, reheating is easy. Simply pop them in the microwave for a few seconds. You can also warm them in the oven at 350°F (175°C). This brings back their delicious taste and texture. For the full recipe and tips, check out the detailed instructions above. Enjoy your tasty treat! Yes, you can make these bars a day in advance. Just store them in the fridge. This helps the flavors blend nicely. Look for bubbling filling and a golden brown topping. This shows they are ready to eat. Yes, you can add chopped nuts like almonds or walnuts. They give the bars extra crunch and flavor. I love pairing them with a scoop of ice cream or yogurt. It makes a delicious treat. Store them in an airtight container at room temperature. You can also refrigerate them for up to a week. - Blueberry Peach Crumble Bars 🫐 To make these delicious Blueberry Peach Crumble Bars, you need simple, fresh ingredients. Here’s what you will need: - 2 cups fresh blueberries, rinsed and drained - 2 cups ripe peaches, diced (approximately 3 medium-sized peaches) - 1 tablespoon freshly squeezed lemon juice - 1/2 cup granulated sugar (adjust based on your sweetness preference) - 1 tablespoon cornstarch - 1 teaspoon pure vanilla extract - 1 1/2 cups rolled oats - 1 cup all-purpose flour - 1/2 cup packed brown sugar - 1/2 teaspoon baking powder - 1/4 teaspoon fine salt - 1/2 cup unsalted butter, melted and slightly cooled - 1 teaspoon ground cinnamon (optional, for added warmth) These ingredients come together to create a wonderful balance of sweet and tart flavors. The fresh blueberries and peaches mix well with the lemon juice. This adds a nice zing to the bars. The sugar and cornstarch help create a thick, juicy filling. The crumble topping is a blend of oats, flour, and sugars. It gives the bars a crunchy texture that pairs perfectly with the soft fruit layer. The butter adds richness, while the cinnamon gives a warm, cozy vibe to each bite. If you want to try this recipe, check the Full Recipe for step-by-step instructions. You'll love making and sharing these bars! These Blueberry Peach Crumble Bars are easy to make and full of flavor. You learned about the key ingredients, simple steps, and different variations. Remember, you can swap fruits or adjust sweetness to fit your taste. Store leftovers in a container for later. Enjoy these bars warm or with ice cream for a tasty treat. Happy baking!](https://goldendishy.com/wp-content/uploads/2025/06/77e155cd-d820-4acd-a50c-b849e6ba2e1e-768x768.webp)