Skip to content
About
Contact
Cookie Policy
Copyright Policy
Disclaimer
Search
Home
Dinner
Appetizer
Desserts
Drinks
About
Contact
Privacy Policy
Toggle Menu
Home
/
Appetizer
- Page 9
Appetizer
Loaded Veggie Quesadillas Flavorful and Simple Meal
Lemon Herb Grilled Zucchini Tasty and Simple Recipe
Crispy Sweet Potato Rounds Flavorful and Easy Snack
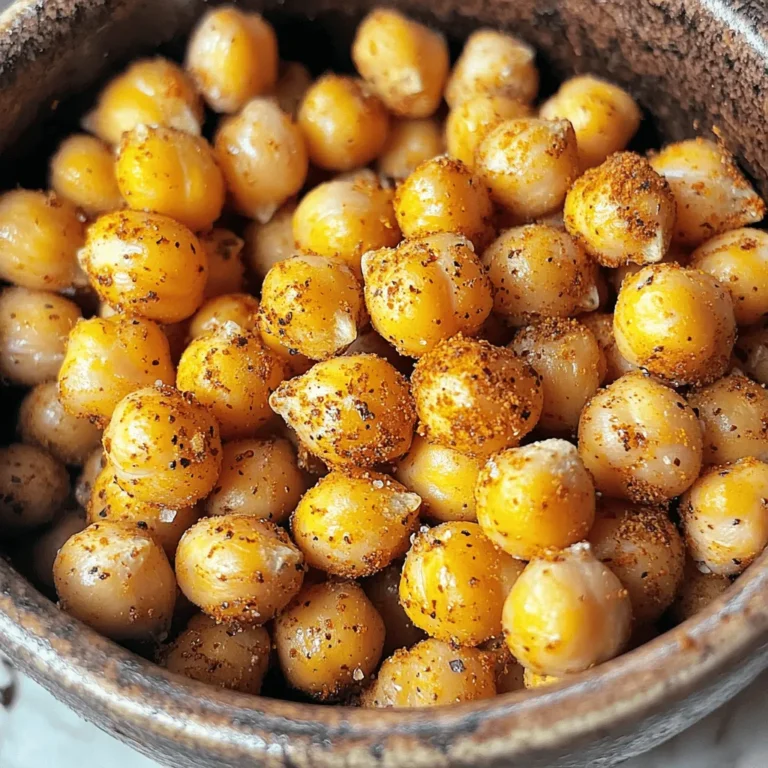
Crispy Air Fryer Chickpeas Packed with Flavorful Spice
Avocado Egg Salad Creamy and Flavorful Dish
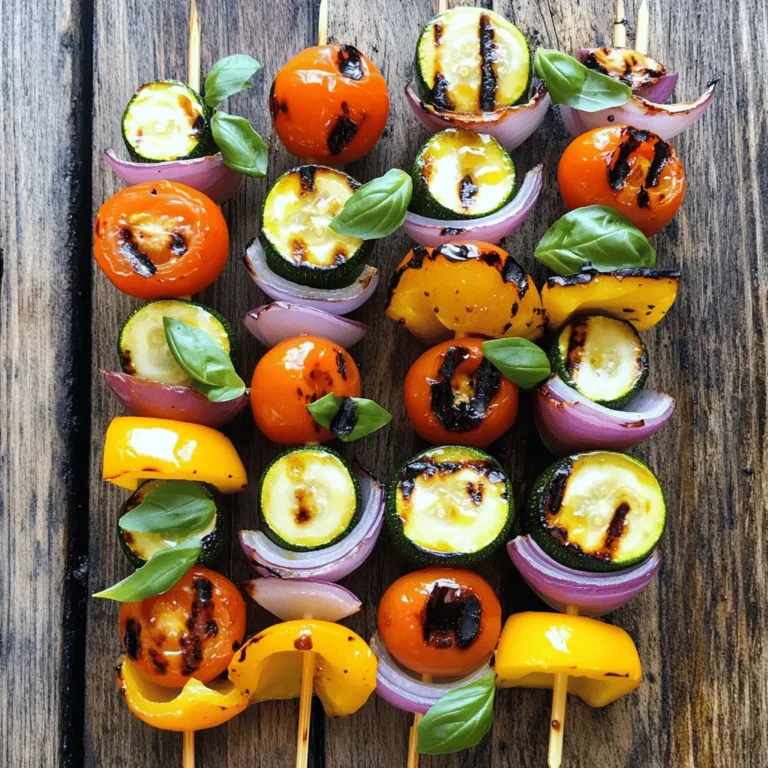
Grilled Vegetable Skewers Delightful and Colorful Treat
Roasted Garlic Cauliflower Bites Savory Snack Idea
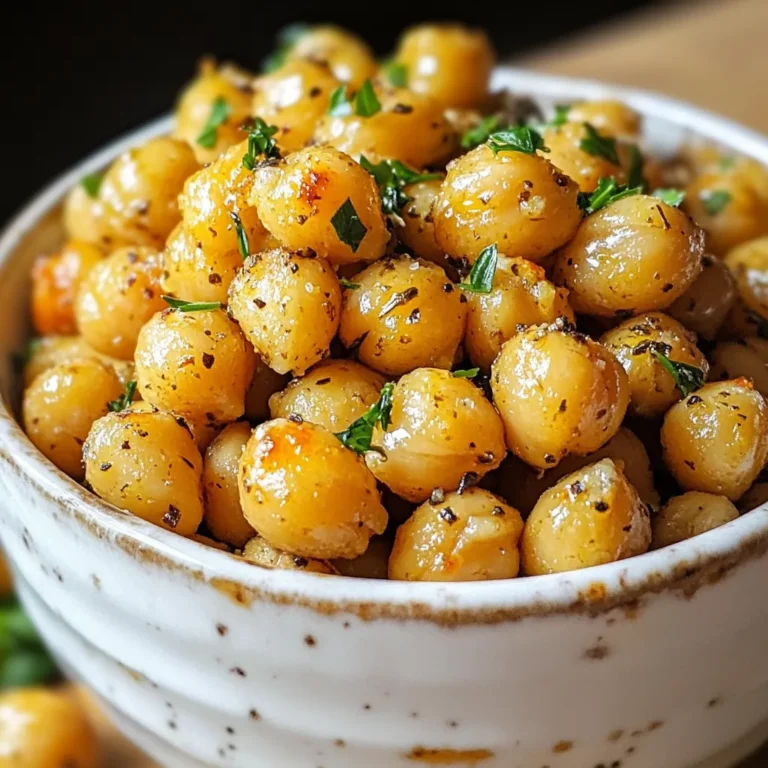
Garlic Herb Roasted Chickpeas Tasty and Crunchy Snack
Grilled Peach Burrata Salad Fresh and Flavorful Dish
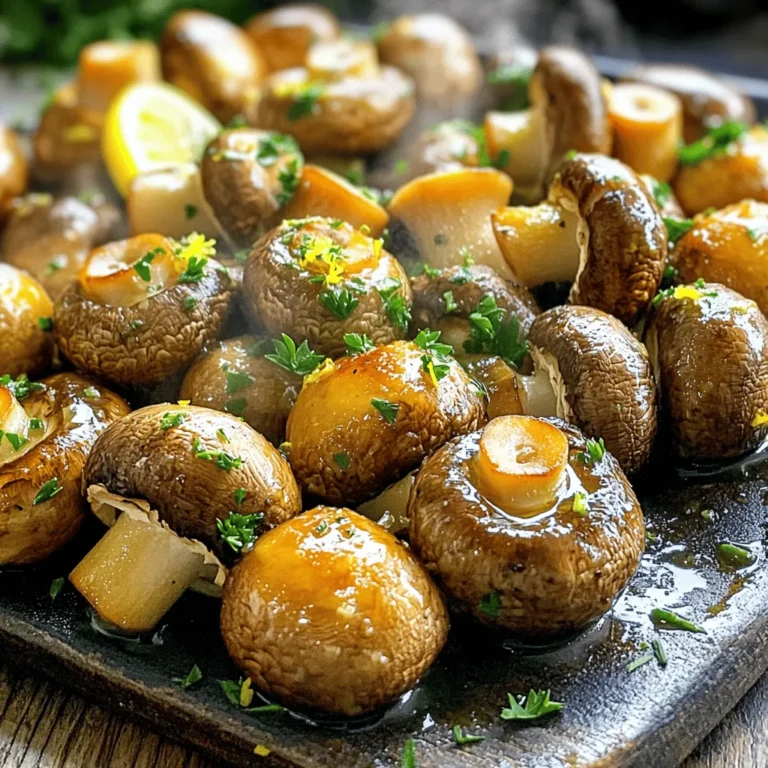
Garlic Butter Roasted Mushrooms Savory and Simple Dish
Page navigation
Previous Page
Previous
1
…
7
8
9
10
11
…
19
Next Page
Next
Home
Dinner
Appetizer
Desserts
Drinks
About
Contact
Privacy Policy
Toggle Menu Close
Search for:
Search

. 1. Heat olive oil in a large skillet over medium heat. 2. Add finely chopped red onion to the skillet. 3. Sauté the onion for 2-3 minutes until it becomes soft. 4. Now, add diced red and green bell peppers to the skillet. 5. Cook for 3-4 minutes until the peppers soften. 6. Stir in corn kernels and black beans. 7. Season with ground cumin, smoked paprika, garlic powder, salt, and pepper. 8. Mix well and cook for 5 more minutes until hot. 1. Heat another skillet over medium heat. 2. Place a tortilla in the skillet and sprinkle ¼ cup of cheese on it. 3. Layer ½ cup of the veggie mixture over the cheese. 4. Top with another ¼ cup of cheese for extra flavor. 5. Fold the tortilla in half, covering the filling. 6. Cook for 3-4 minutes until golden brown on one side. 7. Flip the quesadilla gently using a spatula. 8. Cook for another 3-4 minutes until crispy and cheese melts. - Keep the heat at medium for a crispy texture. - Use a spatula to flip the quesadilla easily. - Check for doneness by ensuring both sides are golden brown. These simple steps make it easy to create loaded veggie quesadillas at home. For the full recipe, refer to the recipe section above. Enjoy the process! Choosing the right cheese is key. I love a mix of cheddar and mozzarella. This mix melts well and adds great flavor. You want the cheese to stretch and pull when you take a bite. Balancing spices and seasonings is also important. Start with the basics like salt and pepper. Then, add spices like cumin and smoked paprika. Adjust them to fit your taste. A little heat can come from red pepper flakes if you like it spicy. Day-to-day storage tips help keep your quesadillas fresh. Place leftovers in an airtight container. Keep them in the fridge for up to three days. You can also wrap them tightly in foil or plastic wrap. Reheating suggestions for best flavor include using the oven or skillet. For the oven, preheat to 350°F. Heat the quesadillas for about 10 minutes. In a skillet, cook them over medium heat. This method keeps them crispy and delicious. Plating ideas can make your meal pop. Arrange the quesadillas in a fan shape on a colorful plate. This makes them look fun and inviting. Adding colorful garnishes like fresh cilantro adds a nice touch. You can also sprinkle some diced tomatoes or avocado on top. These small changes make your meal look gourmet. Enjoy your loaded veggie quesadillas! For the full recipe, check out the Loaded Veggie Quesadillas 🥑 section. {{image_4}} You can make loaded veggie quesadillas even more fun. Here are some easy ideas. Want some extra protein? You can add grilled chicken or tofu. Just cook them first, then slice and add to your quesadilla mix. If you like seafood, try shrimp. Cook them quickly and toss them in for a tasty twist. Spices can change the game. Try different spices like chili powder or oregano. They add depth and warmth. You can also add sauces or marinades. A dash of hot sauce or a sprinkle of lime juice can elevate your quesadillas. Need gluten-free options? Use gluten-free tortillas. They work great and taste just as good. If you're vegan, swap out the cheese for a plant-based version. There are many tasty dairy-free cheeses out there that melt well. You can find the full recipe for loaded veggie quesadillas to get started on these variations. To keep your uncooked quesadillas fresh, wrap them tightly in plastic wrap. This keeps out moisture and air. You can also place them in an airtight container. If you want to freeze them, stack the quesadillas with parchment paper in between. This prevents them from sticking together. Uncooked quesadillas can stay in the freezer for up to three months. After cooking, let the quesadillas cool completely. Then, wrap them in foil or place them in a container. Store them in the fridge for up to four days. I find they taste best within the first two days. If you notice any odd smell or mold, it’s best to toss them. To reheat, use an oven or a skillet. For the oven, preheat to 350°F (175°C). Place the quesadilla on a baking sheet and heat for about 10 minutes. If using a skillet, add a little oil and heat over medium heat for about 3-4 minutes on each side. Leftover quesadillas can also become a fun breakfast. Chop them up and add them to scrambled eggs for a tasty twist. For more ideas, check out the Full Recipe. Making loaded veggie quesadillas is quick and easy. It takes about 10 minutes to prep. Cooking them takes around 15 minutes. In total, you can make them in about 25 minutes. This makes them a great choice for busy days or quick meals. Yes, you can prep loaded veggie quesadillas in advance. To do this, cook the veggie mixture and let it cool. Then, assemble the quesadillas but do not cook them. Store them in an airtight container in the fridge for up to two days. You can also freeze them for a month. When ready to eat, just cook them straight from the fridge or freezer. This makes meal prepping super easy! You can mix and match many veggies in quesadillas. Some great options include: - Spinach or kale for a green boost - Mushrooms for a savory taste - Zucchini or squash for extra texture - Jalapeños for a spicy kick - Tomatoes for freshness Feel free to get creative! Each veggie adds its own flavor and texture. You can make quesadillas that fit your taste perfectly. For more ideas, check out the Full Recipe. These loaded veggie quesadillas are fun and easy to make. We explored essential ingredients like black beans, bell peppers, and corn. I’ve shared tips for perfect texture, storing leftovers, and creative garnishes. Remember, you can customize them with protein or spices to suit your taste. In the end, these quesadillas are more than just food; they bring flavor and joy. Enjoy making them your own!](https://goldendishy.com/wp-content/uploads/2025/06/a7c52493-2108-4a2f-8f90-ee80e7df7b2a-768x768.webp)
![- 4 medium zucchinis, sliced into 1/2-inch thick rounds - 4 tablespoons extra virgin olive oil - 2 tablespoons freshly squeezed lemon juice - 1 teaspoon freshly grated lemon zest - 2 teaspoons dried oregano - 1 teaspoon garlic powder - 1 teaspoon sea salt - 1/2 teaspoon freshly cracked black pepper - 2 tablespoons fresh parsley, finely chopped (for garnish) You can use other oils for grilling. Avocado oil or sesame oil works well. If you have fresh herbs, use them instead of dried ones. Fresh oregano or basil adds great flavor. Adjust the amount based on your taste. When selecting zucchinis, look for ones that are firm and shiny. Avoid any that feel soft or have blemishes. Choose smaller zucchinis for a sweeter taste. Check for seasonal zucchinis in late summer. They are often at their best during this time. To make the marinade, start with a large bowl. Add the olive oil, lemon juice, and lemon zest. Next, sprinkle in the dried oregano, garlic powder, sea salt, and black pepper. Whisk everything together until mixed well. This blend of flavors makes your zucchini taste great. Marinating time is key. Let the zucchini sit in the marinade for 10 to 15 minutes. This helps the zucchini soak up the zesty flavors. Skipping this step means missing out on rich taste. First, preheat your grill to medium-high heat, about 400°F (200°C). A hot grill gives your zucchini nice grill marks and a smoky flavor. When ready, carefully place the marinated zucchini rounds on the grill. Cook them for 3 to 4 minutes on each side. Watch for tender slices with grill marks. This means they are perfectly grilled. When done, transfer the zucchini to a serving platter. Arrange them in a fan shape for a pretty look. For garnish, sprinkle fresh parsley on top. This adds a pop of color and a burst of flavor. You can also drizzle extra olive oil and sprinkle sea salt for extra taste. Enjoy your Lemon Herb Grilled Zucchini! For the complete recipe, check the [Full Recipe]. To avoid sticking on the grill, start with a clean grill. Oil the grates well before adding zucchini. This creates a non-stick surface. Use a paper towel dipped in oil to wipe the grates. For even cooking, cut zucchini into uniform pieces. I recommend 1/2-inch thick rounds. This size cooks well without burning. Grill over medium-high heat for best results. You can boost flavor with fresh herbs like basil or thyme. They add a nice twist. For a bit of heat, try red pepper flakes or sliced jalapeños. Both pair well with the lemony taste. The best grill types for zucchini are gas or charcoal grills. Both give great flavor and heat. A grill basket can help keep slices from falling through the grates. Use tongs for safe flipping. For a great grilling experience, have a spatula and a timer handy. These tools help track cooking time and make flipping easy. For the complete process, check the Full Recipe. {{image_4}} You can change the flavors of your grilled zucchini by trying different herbs and spices. Instead of oregano, use thyme or basil for a fresh twist. You can also add a pinch of red pepper flakes for a little heat. Mixing in some smoked paprika can give your dish a nice depth. Incorporating other citrus flavors makes the marinade even more fun. Try lime or orange juice instead of lemon. Both options add a unique taste that pairs well with zucchini. You can also mix lemon with lime for a zesty combo. Grilled zucchini pairs well with many other vegetables. Bell peppers, eggplant, and asparagus are great choices. You can slice them into similar sizes for even cooking. Cooking times vary, so keep an eye on your veggies. Zucchini takes about 3-4 minutes per side. Bell peppers need about 5-7 minutes, while eggplant may take up to 8 minutes. This way, you can enjoy a colorful mix on your plate. Grilled zucchini makes a tasty side dish for many meals. It pairs well with proteins like grilled chicken, fish, or steak. You can also serve it alongside grains like quinoa or couscous for a filling meal. For fun side dish ideas, try serving grilled zucchini with a yogurt sauce. A sprinkle of feta cheese or a handful of nuts can also add a nice touch. For more flavor, drizzle balsamic glaze over the top. For a complete guide to making this dish, check out the Full Recipe. To store leftover grilled zucchini, let it cool first. Place it in an airtight container. This keeps it fresh and prevents odors from mixing. You can store it in the fridge. It usually lasts for about 3 to 5 days. Reheating grilled zucchini can be tricky. The best method is to use a skillet. Heat the skillet over medium-low heat. Add a small drizzle of olive oil. Place the zucchini in the skillet. Cook it for about 2 to 3 minutes on each side. This keeps the texture nice and firm. You can also add it to pasta or salads for a tasty twist. Yes, you can freeze grilled zucchini! To do this, let it cool completely first. Then, arrange the slices in a single layer on a baking sheet. Freeze them for about 1 to 2 hours. Once frozen, transfer the slices to a freezer bag. Remove as much air as possible. Grilled zucchini can last for up to 3 months in the freezer. When ready to use, thaw it in the fridge overnight. You can also toss it directly into soups or stews. For the full recipe, check out the Lemon Herb Grilled Zucchini recipe. To cut zucchini for grilling, slice it into 1/2-inch thick rounds. This thickness helps the zucchini cook evenly and stay firm. You can also cut them into long strips if you prefer a different shape. Just ensure your slices are uniform. This way, they will grill at the same rate. For added flavor, you can cut the zucchini lengthwise and brush the cut sides with olive oil. Yes, you can prepare Lemon Herb Grilled Zucchini ahead of time. To do this, marinate the zucchini slices a few hours before grilling. You can store them in the fridge for up to 24 hours in the marinade. This will enhance the flavor. Just remember to grill them right before serving for the best taste and texture. If grilling later, store the grilled zucchini in an airtight container. Grilled zucchini is very healthy. It is low in calories and high in vitamins. Zucchini is a great source of vitamin C, which boosts your immune system. It also contains potassium, which helps with heart health. Plus, grilling keeps the zucchini's nutrients intact while adding a nice smoky flavor. Enjoy it as a side dish or in salads. You can find the full recipe in the main article. In this article, we covered the key ingredients for Lemon Herb Grilled Zucchini and preparation steps. You learned how to marinate, grill, and enhance flavors. I shared tips for choosing fresh zucchini and creative variations. Remember, fresh ingredients lead to the best taste. Enjoy experimenting with different herbs or vegetables. Grilled zucchini is not just simple but also healthy and tasty. Now, you are ready to impress at your next meal!](https://goldendishy.com/wp-content/uploads/2025/06/34b028ee-fd33-4782-b46e-eaef12af4b53-768x768.webp)
. This link has all the details you need to make this tasty snack. We covered all the steps to make crispy sweet potato rounds. You learned the key ingredients, preparation, and baking tips. Remember to space the slices for crispiness and try different seasonings for variety. Store leftovers properly for the best flavor. If you have questions, refer to the FAQs for more help. Enjoy creating a delicious snack or side dish that impresses everyone!](https://goldendishy.com/wp-content/uploads/2025/06/bfac51d6-fd22-4fd5-a48f-0e12de6b57a8-768x768.webp)
![- 4 large eggs - 1 ripe avocado, mashed - 2 tablespoons Greek yogurt - 1 tablespoon Dijon mustard - 1 small red onion, finely chopped - 1 celery stalk, finely chopped - 1 tablespoon fresh lemon juice - 1 tablespoon fresh dill, chopped (or 1 teaspoon dried dill) - Salt and pepper to taste Gather these simple ingredients for a creamy and flavorful dish. The eggs provide protein, while the avocado brings richness. Greek yogurt adds a tangy creaminess that makes this salad stand out. Don't forget the Dijon mustard for a zesty kick. The red onion and celery add crunch and flavor. The fresh lemon juice brightens the dish and keeps it fresh. Dill offers a wonderful herbal note that complements the other flavors. For the full recipe, you can check out my detailed guide on making Avocado Egg Salad. This dish is not just easy but also very satisfying. Enjoy the blend of textures and tastes in every bite! - Place eggs in a saucepan with cold water. - Bring to a boil, then simmer for 9-12 minutes. Boiling eggs is simple. The cold water helps cook them evenly. If you like your yolks soft, aim for 9 minutes. For firmer yolks, 12 minutes works best. - Transfer to a bowl of ice water. - Peel under running water. After boiling, cool the eggs fast. The ice water stops the cooking. Let them sit for about 5-7 minutes. When peeling, run the eggs under water. This helps the shell come off easily. - Combine mashed avocado, Greek yogurt, Dijon mustard, and lemon juice. In a mixing bowl, mash the ripe avocado. Add Greek yogurt for creaminess, Dijon mustard for kick, and lemon juice for zest. Mix until smooth and creamy. - Add chopped eggs, onion, celery, and dill. - Fold gently to combine. Now, add the chopped eggs, onion, celery, and dill to the avocado mix. Use a spatula to fold everything together. Be gentle so the eggs stay in chunks. That’s how you get the perfect texture. For the full recipe, check out the details above! To make the best Avocado Egg Salad, start with the eggs. For a soft yolk, boil for 9 minutes. For a firm yolk, go for 12 minutes. Timing is key! After boiling, cool the eggs quickly. An ice bath is great for this. It stops the eggs from cooking further and makes peeling easy. For that rich and creamy texture, I use Greek yogurt instead of mayo. Greek yogurt adds protein and a tangy taste. If you want even more creaminess, check your avocado. A perfectly ripe avocado will give a smooth texture. If it's too firm, let it ripen a bit. Spice it up! A pinch of paprika or a dash of cayenne can add a kick. Fresh herbs can also change the game. Try adding dill, parsley, or chives for a flavor boost. Each herb brings a unique taste and aroma that makes this dish shine. These tips will help you create a delicious Avocado Egg Salad. For the complete recipe, check the [Full Recipe]. Enjoy your cooking! {{image_4}} You can easily swap ingredients to fit your diet. To make it vegan, use chickpeas instead of eggs. Just mash them up and mix well. They provide a nice texture and protein. For a lighter option, substitute Greek yogurt with low-fat yogurt. This keeps the salad creamy while cutting down on calories. Want to spice things up? Try adding diced bell peppers. They add crunch and a pop of color. You can also sprinkle in spices like paprika or garlic powder. These enhance the flavor and give your salad a unique twist. Experimenting with different herbs can also elevate your dish. How you serve this salad makes a big difference. You can spread it on toast or crackers for a quick snack. It also works great as a filling for sandwiches or wraps. This makes it perfect for lunch or picnics. You can even serve it in lettuce leaves for a light meal. Each option offers a new way to enjoy your creamy, flavorful dish. For the full recipe, check out Avocado Egg Salad with a Zesty Twist. To keep your avocado egg salad fresh, store it in the fridge. Use an airtight container to prevent air from spoiling the ingredients. This salad stays good for about 2-3 days. After that, the avocado may brown, and the flavor might fade. Always check for any off smells or changes in texture before eating leftovers. Freezing avocado egg salad is not recommended. The texture of avocado changes when frozen. If you freeze it, it may become mushy once thawed. Instead, prepare only what you need. If you have to freeze it, use an airtight container. This will help protect it from freezer burn. This salad is best served cold. If you must reheat it, do so gently. Use a microwave on low power for a short time. Stir it frequently to help maintain its texture. However, I suggest enjoying it cold for the best flavor and creaminess. If you want to mix things up, serve it on toasted bread or in a wrap. Enjoy the zesty taste! Yes, you can make Avocado Egg Salad ahead of time. It tastes even better after chilling. To prepare in advance, follow these tips: - Cook and cool the eggs, then chop them. - Mix the avocado, yogurt, mustard, and lemon juice. - Combine right before serving to keep the eggs fresh. - Store in an airtight container in the fridge for up to 24 hours. If you want creaminess, here are some substitutes: - Sour cream for a tangy flavor. - Silken tofu if you prefer a vegan option. - Cream cheese for a rich texture. Each option will change the taste a bit, so choose what you like best. To check if your avocado is ripe, look for these signs: - The skin should be dark green or black. - Gently press the avocado; it should yield slightly. - If it feels hard, it’s not ripe yet. Choose avocados that feel soft but not too mushy for the best results. Yes, store-bought mayonnaise works well in this recipe. Use it if you prefer a classic taste. Here’s how: - Replace Greek yogurt with an equal amount of mayo. - Mix it with the avocado and mustard for a creamy blend. This will give your egg salad a rich flavor. To make Avocado Egg Salad fit dietary needs, try these suggestions: - For nut-free, just stick to the original recipe. - For lactose-free, use a dairy-free yogurt or mayo. - For vegan, swap eggs with mashed chickpeas for protein. These options keep your dish tasty and inclusive. In this blog post, I shared a simple recipe for Avocado Egg Salad. We reviewed key ingredients, including eggs, avocado, and Greek yogurt. You learned steps to boil and mix the ingredients perfectly. I also offered tips for adding flavor and making dietary swaps. This dish is fun, healthy, and easy to make. Try it your way and enjoy the flavors! Whether you eat it in a wrap or on toast, it will be a hit. Prepare it fresh or store leftovers; you won't regret it.](https://goldendishy.com/wp-content/uploads/2025/06/e93c3c70-9342-49f9-9c4a-33a1a85bd889-768x768.webp)
![- 1 medium head of cauliflower, cut into bite-sized florets - 4 cloves fresh garlic, finely minced - 3 tablespoons extra virgin olive oil - 1 teaspoon smoked paprika - 1 teaspoon fine sea salt - ½ teaspoon freshly ground black pepper The main ingredients create a base of flavor. Cauliflower gives a nice texture and absorbs the garlic well. Garlic adds a strong taste that enhances the dish. Olive oil helps with roasting and adds richness. Smoked paprika brings depth, while salt and pepper balance the flavors. - 2 tablespoons grated Parmesan cheese - Fresh parsley, finely chopped You can add Parmesan cheese for a cheesy twist. It melts nicely and adds a savory note. Fresh parsley adds color and freshness on top. These add-ins make the bites even more delightful. - Baking sheet - Mixing bowl - Parchment paper A baking sheet is essential for roasting. Use a mixing bowl to combine all the ingredients. Parchment paper helps with easy cleanup and prevents sticking. These tools make the cooking process smooth and simple. You can find the Full Recipe above for more details. 1. Preheat the Oven: Start by preheating your oven to 425°F (220°C). This heat helps make the bites crispy and golden. 2. Prepare the Cauliflower: Cut one medium head of cauliflower into bite-sized florets. Make sure they are all similar in size. This helps them cook evenly. 1. Combine Cauliflower and Seasonings: In a large mixing bowl, add the cauliflower florets. Then, add 4 minced garlic cloves, 3 tablespoons of olive oil, 1 teaspoon of smoked paprika, 1 teaspoon of sea salt, and ½ teaspoon of black pepper. 2. Ensure Even Coating: Toss everything together well. You want the florets to be fully coated with the olive oil and seasonings. This gives them great flavor. 1. Arrange on Baking Sheet: Line a baking sheet with parchment paper for easy cleanup. Spread the cauliflower in a single layer. Make sure the florets have space. This helps them roast well. 2. Roast Duration and Tips: Place the sheet in the oven. Roast for 25-30 minutes. Keep an eye on them. Toss the florets halfway through. This helps them cook evenly. If you like cheese, sprinkle 2 tablespoons of grated Parmesan cheese on top in the last 5 minutes. This adds a nice touch. Enjoy the full recipe for all the details and tips for these delicious bites! Ensuring Tender Florets To get tender florets, cut them into uniform pieces. This helps them cook at the same rate. Toss them well with oil and seasonings. The olive oil locks in moisture and adds a nice flavor. Roasting at 425°F (220°C) gives the perfect balance of crispiness and tenderness. Avoiding Soggy Cauliflower Space the florets on the baking sheet. If they are too close, steam will build up and make them soggy. Use parchment paper to keep them from sticking. This also helps with cleanup. Remember to toss them halfway through roasting for even cooking. Adding Spices Spices can elevate the taste of your cauliflower bites. I love using smoked paprika for depth. You can also try garlic powder, cayenne, or cumin for a twist. Start with small amounts and adjust to your taste. Using Different Oils While olive oil is great, try other oils for different flavors. Avocado oil works well for high heat. You can also use sesame oil for a nutty taste. Just ensure the oil has a high smoke point to avoid burning. Serving Suggestions Serve the roasted garlic cauliflower bites on a rustic wooden platter. This adds warmth to your meal. You can also arrange them in a circle with a bowl of dipping sauce in the center. This invites guests to dig in. Garnishing Techniques Garnish with fresh parsley for a pop of color. You can also sprinkle some lemon zest on top for a refreshing zing. If you used Parmesan, let some shavings fall over the bites to enhance the look and flavor. For the complete recipe, check the [Full Recipe]. {{image_4}} Vegan Alternatives You can easily make these bites vegan. Just skip the Parmesan cheese. The garlic and spices keep the taste rich and satisfying. You can also add nutritional yeast for a cheesy flavor without dairy. Gluten-Free Options This recipe is naturally gluten-free! You can enjoy it without any worry. Always check labels on packaged spices or sauces to ensure they are gluten-free. Spice Variations Want a kick? Add cayenne pepper or chili powder. For a milder flavor, use paprika or turmeric. You can also try curry powder for an exotic twist. Herb Infusions Fresh herbs make a big difference. Add rosemary or thyme for earthy notes. Basil or cilantro can brighten the dish. Mix and match to find your favorite combination. Air Fryer Instructions Using an air fryer makes these bites super crispy. Set your air fryer to 400°F (200°C). Cook them for about 15-20 minutes, shaking the basket halfway through. Grilling Method Grilling adds a smoky flavor. Toss the cauliflower in a grill basket. Grill over medium heat for about 10-15 minutes. Turn occasionally for even cooking. Enjoy the charred bits! Store any leftovers in an airtight container. This helps keep them fresh. You can place them in the fridge. They stay good for about 3 to 5 days. If you see any signs of spoilage, throw them away. You have two options for reheating: oven or microwave. The oven keeps the bites crispy. Preheat it to 350°F (175°C) and heat for about 10 minutes. The microwave is faster, but it can make them soggy. If using a microwave, heat in 30-second intervals. You can freeze roasted cauliflower bites if you want to save some. Let them cool completely first. Place them in a freezer-safe bag. They can last up to 3 months in the freezer. When ready to eat, thaw them in the fridge overnight. Reheat in the oven for the best texture. To make your roasted garlic cauliflower bites crispy, follow these tips: - Cut the cauliflower into small, even pieces. - Make sure to coat every floret with olive oil. - Spread the florets out on the baking sheet, leaving space between them. - Roast at a high temperature, around 425°F (220°C). - Toss the cauliflower halfway through cooking to ensure even roasting. - If you want extra crunch, broil for the last few minutes. Yes, you can use frozen cauliflower. However, it’s best to thaw it first. Pat it dry with a towel. This helps remove excess moisture, which can make your bites soggy. The cooking time may be shorter, so check for doneness a few minutes early. A great dipping sauce pairs well with roasted garlic cauliflower bites. Here are some tasty options: - Ranch dressing for a classic taste. - Garlic aioli for a creamy twist. - Spicy sriracha for a kick of heat. - Hummus for a healthy choice. Feel free to try different sauces to find your favorite! To adjust the recipe for more servings, simply multiply the ingredients. For example: - Use two heads of cauliflower for eight servings. - Keep the same ratio for olive oil and seasonings. - Roast in batches if your baking sheet is too small. This way, you’ll still get delicious, crispy bites! For the complete instructions, check the Full Recipe. Roasted garlic cauliflower is easy to make and very tasty. We covered the main ingredients, like cauliflower and garlic, and shared tips for perfect texture and flavors. You learned about storage and reheating methods to keep your dish fresh. Try different variations to suit your tastes or dietary needs. Enjoy this dish as a side or snack. It’s healthy, fun, and simple. You'll love making it again and again!](https://goldendishy.com/wp-content/uploads/2025/06/58dc371e-82c7-47cc-93f2-9c36524126f6-768x768.webp)
![- 2 ripe peaches, halved and pitted - 1 tablespoon extra virgin olive oil - Kosher salt and freshly cracked black pepper, to taste - 4 cups fresh arugula or a mix of leafy greens - 8 oz creamy burrata cheese - ¼ cup toasted almonds, roughly chopped - ¼ cup balsamic glaze - Fresh basil leaves, for garnish When you make this Grilled Peach Burrata Salad, you need just a few key ingredients. Each one plays a big role in the flavor and texture. The peaches bring sweetness, while the burrata adds creaminess. The arugula gives a nice peppery bite. The toasted almonds add crunch, and the balsamic glaze ties everything together with a sweet tang. You can even add fresh basil leaves for a pop of color and taste. I love how simple ingredients can create such a beautiful dish. - Calories: Approximately 300 per serving - Fats: 22g - Protein: 8g - Carbohydrates: 20g This salad is not just tasty; it also offers health benefits. Peaches are low in calories and high in vitamins A and C. They support eye health and boost your immune system. Arugula is rich in vitamins and minerals. It helps with digestion and adds fiber. Burrata is creamy and delicious, providing protein and healthy fats. Almonds are good for your heart and give you energy. Overall, this dish is a great choice for a healthy meal or snack. You can enjoy this salad while knowing it’s good for you! For the complete recipe, check out the [Full Recipe]. - Preheat grill or grill pan to medium-high heat. - Brush peach halves with olive oil, salt, and pepper. To start, I heat my grill or grill pan to medium-high heat. This helps the peaches caramelize nicely. While my grill heats up, I prepare the peaches. I cut them in half and remove the pit. Then, I brush the cut sides with olive oil. A sprinkle of salt and pepper adds a touch of flavor and enhances the natural sweetness of the peaches. - Grill peaches cut side down for 4-5 minutes. - Remove and set aside to cool. Next, I place the peaches cut side down on the grill. I let them cook for 4 to 5 minutes. I look for those beautiful grill marks, which mean they are ready. Once grilled, I carefully remove them and set them aside to cool. The grilling process brings out the peaches' natural sugars, making them even sweeter. - Create a base of arugula in the serving bowl. - Tear and place burrata on greens. - Slice and arrange peaches around burrata. - Add almonds and drizzle with balsamic glaze. - Garnish with basil leaves. Now for the fun part—assembly! I take a large serving bowl and create a bright base of arugula. The fresh greens add a peppery bite. I then gently tear the burrata cheese into pieces, placing them on top of the greens. The creamy texture of burrata pairs perfectly with the grilled peaches. Next, I slice the peaches into wedges and artfully arrange them around the burrata. I love the contrast of the warm peaches and the cool cheese. I then scatter toasted almonds over the salad. They add a nice crunch to each bite. Finally, I drizzle balsamic glaze all over the salad. This adds a sweet and tangy touch that ties all the flavors together. I finish with fresh basil leaves for color and aroma. This salad is a true delight, and you can find the Full Recipe for all the details above! To achieve perfect grill marks on your peaches, start with a clean grill. Preheat it to medium-high heat. Brush your peach halves with olive oil. This helps them avoid sticking and gives them a nice sear. Place the peaches cut side down. Let them cook for about 4-5 minutes without moving them. This ensures nice grill lines and caramelization. If you don’t have a grill, you can use a griddle or stovetop pan. Heat it well and follow the same oiling and cooking steps. You can still get great flavor without a grill! To boost the flavor of your grilled peaches, try adding some spices. A pinch of cinnamon can add warmth. Fresh thyme or rosemary adds a nice herbal touch. You can sprinkle these on before grilling. If you need an alternative to balsamic glaze, try honey or maple syrup. Drizzle these over the salad for a sweet touch. A splash of lemon juice can also add brightness to the dish. For a beautiful display, serve the salad on a large, shallow platter. This lets the colors pop. You can also use individual bowls for a personal touch. Drizzle extra balsamic glaze on the plate for added flair. Garnishing is key! Use fresh basil leaves to add color and aroma. Consider adding edible flowers for an extra visual boost. These small touches make your salad stand out and look professional. {{image_4}} You can change the salad by adding protein. Grilled chicken adds a nice, savory touch. Shrimp also works well, bringing a sweet flavor. If you want a plant-based option, try tofu. For cheese, you can swap burrata for feta. Feta gives a nice salty kick. Goat cheese is another great choice. It brings creaminess and a tangy flavor. You can also switch up the dressing. A honey vinaigrette adds sweetness and pairs well with peaches. A citrus dressing, made with lemon or lime, brightens the dish and adds zest. If you want to make this salad vegan, skip the cheese. You can use a vegan cheese option or leave it out. A simple olive oil and vinegar mix works well too. In the summer, use fresh peaches. But when peaches are out of season, try nectarines. They have a similar taste and texture. Plums are another great choice, adding a sweet and juicy bite. As the seasons change, adapt your salad to use what’s fresh. In fall, add roasted squash for warmth. In winter, try pomegranate seeds for a burst of color and flavor. Each season offers new ways to enjoy this salad. To keep your grilled peach burrata salad fresh, store leftovers in a sealed container. This helps prevent drying and keeps flavors strong. You can store it in the fridge for up to three days. The peaches will soften, but they still taste great. The burrata may lose some creaminess but remains delicious. I do not recommend freezing the salad. The texture of peaches and burrata changes when frozen. If you must freeze, store only the grilled peaches. Wrap them in plastic and place in an airtight bag. When ready to use, thaw them in the fridge overnight. To refresh your salad, take it out of the fridge and let it sit for a few minutes. This helps bring back the flavors. If the greens look wilted, consider adding fresh arugula. You can also drizzle a bit more balsamic glaze for added flavor. Gently mix the salad to combine the ingredients, then serve. This will make it look and taste great again. You can prep the salad in parts. Grill the peaches and store them in the fridge. You can also wash and dry the greens. Keep the burrata cheese wrapped until you're ready to serve. Assemble everything just before you eat. This keeps the salad fresh and tasty. If you do not have burrata, try using fresh mozzarella. It has a similar creamy texture. Goat cheese is another good choice. It adds a tangy flavor that pairs well with peaches. Yes, this salad is naturally gluten-free. All the ingredients listed are free from gluten. Just make sure any balsamic glaze you use is gluten-free. Some brands may add gluten, so check the label. Fresh basil is a great choice for this salad. It adds a sweet and aromatic touch. Mint is another option that gives a refreshing flavor. You can also try arugula for a spicy kick. Use these herbs to boost the taste of your dish. This blog post detailed a delicious grilled peach and burrata salad. We covered the ingredients, from juicy peaches to creamy burrata and flavorful arugula. You learned how to prepare, grill, and assemble this fresh dish easily. We also shared tips for grilling and creative variations. Remember, you can adapt this salad for every season, and it stores well for later use. Enjoy experimenting with flavors and presentations to make it your own. This salad is sure to impress at any meal!](https://goldendishy.com/wp-content/uploads/2025/06/bc92e29d-8312-48fc-8428-fe4367025cca-768x768.webp)