Skip to content
About
Contact
Cookie Policy
Copyright Policy
Disclaimer
Search
Home
Dinner
Appetizer
Desserts
Drinks
About
Contact
Privacy Policy
Toggle Menu
Home
/
Appetizer
- Page 6
Appetizer
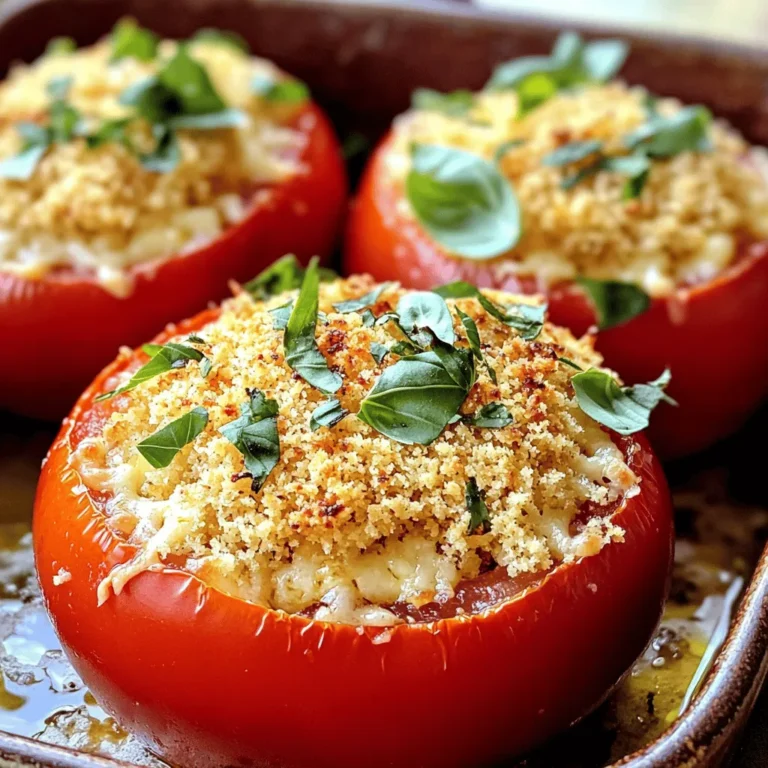
Baked Parmesan Tomatoes Tasty and Simple Recipe
Garlic Parmesan Corn on the Cob Tasty Summer Side
Classic Potato Salad Flavorful and Easy Recipe Guide
Easy Cucumber Slaw Quick and Fresh Side Dish
Greek Zucchini Fritters Tasty and Simple Dish
Crispy Garlic Okra Chips for a Flavorful Snack
Zucchini and Feta Pie Flavorful and Easy Recipe
Peach and Basil Flatbread Flavorful Summer Delight
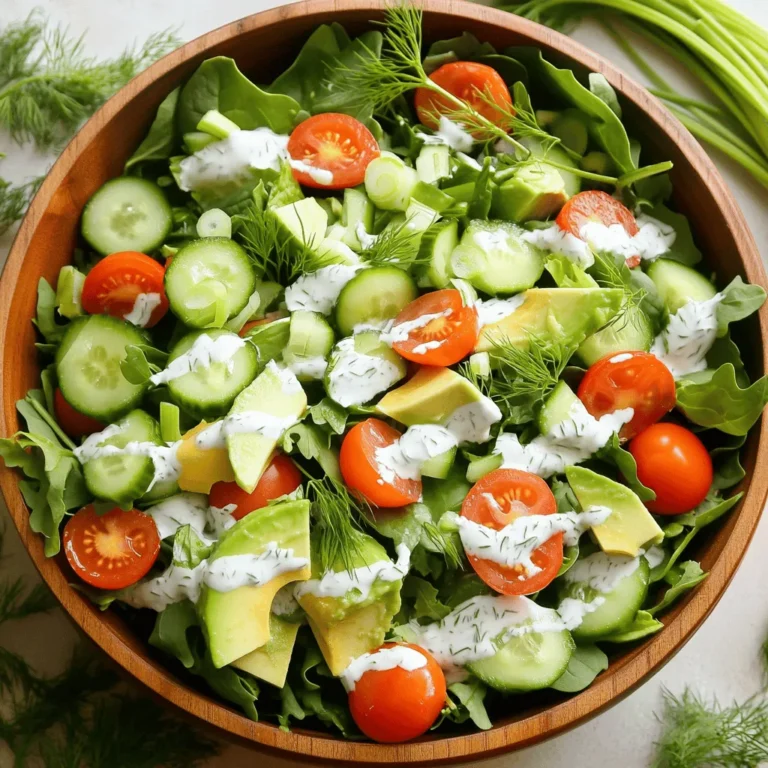
Simple Green Goddess Salad Vibrant and Fresh Delight
Spinach Artichoke Dip Flavorful Party Delight
Page navigation
Previous Page
Previous
1
…
4
5
6
7
8
…
19
Next Page
Next
Home
Dinner
Appetizer
Desserts
Drinks
About
Contact
Privacy Policy
Toggle Menu Close
Search for:
Search

. To start, you need to preheat your grill or oven. If you choose to grill, set it to medium-high heat. This will help create a nice char on the corn. If baking sounds better, preheat your oven to 400°F (200°C). Both methods work well, giving you tasty corn. Next, prepare the garlic butter mixture. In a mixing bowl, combine melted unsalted butter, minced garlic, smoked paprika, sea salt, and black pepper. Whisk this mix together until all the ingredients blend well. The aroma will fill your kitchen, making it hard to wait for the corn! Now, it’s time to coat the corn. Take each ear of corn and brush it with your garlic butter mix. Make sure to cover every kernel. This ensures each bite bursts with flavor. For grilling, place the corn on the grill grates. Rotate it every 2-3 minutes until charred and tender, about 10-12 minutes total. If baking, wrap the corn in aluminum foil and bake for 20-25 minutes, turning halfway. After cooking, sprinkle grated Parmesan cheese on top while it’s still hot. Optionally, drizzle with fresh lemon juice for added flavor. Finally, garnish your corn with chopped parsley for a bright finish. Enjoy your Garlic Parmesan Corn on the Cob! For a complete guide, check out the Full Recipe. Grilling corn on the cob can be fun and easy. First, soak the husked corn in water for 15 minutes before grilling. This helps keep the corn moist. When you're ready, heat your grill to medium-high. Place the corn directly on the grates. Rotate the corn every 2-3 minutes. This gives it even cooking and a nice char. In about 10-12 minutes, the corn will be bright and tender. For the best garlic flavor, use fresh garlic. Mince the cloves finely to release the oils. Mix it well with the melted butter before brushing it on the corn. If you want a stronger taste, let the garlic sit in the butter for a bit. This helps the flavors blend. You can also add a touch of garlic powder if you like more depth. If you prefer a bit of heat, add a pinch of cayenne pepper to your garlic butter. For those who enjoy a milder taste, skip the pepper entirely. You can also adjust the smoked paprika amount. Start with less, then taste as you go. Everyone has different spice levels, so make it your own. Remember, you can always add more spice, but you can’t take it out! For the full recipe, check out the Garlic Parmesan Corn on the Cob section. {{image_4}} To change up the flavor, you can add more spices. Try adding chili powder for heat. You can also mix in some Italian herbs, like oregano or basil. They give a fresh lift. If you love herbs, fresh cilantro is a great choice. Just chop it fine and add it to your garlic butter mix. This will make your corn taste even better! Parmesan is great, but other cheeses can work too. For a creamier taste, use feta cheese. It adds a nice tang. If you want something sharper, try aged cheddar. It gives a bold kick. You can even use vegan cheese if you prefer. Just make sure it melts well. Each cheese choice will give your corn a unique twist. Serving corn on the cob can be fun and playful. Try cutting the corn into smaller pieces for easy sharing. You can also serve it on skewers for a fun touch. Drizzle it with a spicy sauce for extra flavor. If you want a fancy look, sprinkle some microgreens on top. They add color and freshness. For the full recipe, check out the detailed steps to make this dish shine! After enjoying your Garlic Parmesan Corn on the Cob, you may have some left. It’s best to store it in an airtight container. Let the corn cool to room temperature first. Wrap each ear in plastic wrap or foil for extra protection. This keeps it fresh and tasty for later. Store the container in the fridge. It can last about 3 to 4 days. When you’re ready to enjoy the leftover corn, reheating it is simple. You can use the microwave, grill, or oven. For the microwave, place the corn on a plate and cover it with a damp paper towel. Heat in short bursts of 30 seconds. Check to see if it’s warm. If using the grill, wrap the corn in foil to avoid drying out. Heat for about 5 to 7 minutes. For the oven, preheat to 350°F (175°C) and bake wrapped corn for 10 to 15 minutes. Freezing is a great option if you want to save the corn for a long time. Husk the corn and cut the kernels off the cob if you prefer. Place the kernels in a freezer bag, removing as much air as possible. Label the bag with the date. You can also freeze whole cobs. Wrap each cob in plastic wrap and place it in a freezer bag. The corn can last up to 6 months in the freezer. When you’re ready to use it, thaw in the fridge overnight before reheating. You can pair Garlic Parmesan Corn on the Cob with many easy side dishes. Some great options include: - Grilled chicken or fish - Fresh salad with vinaigrette - Coleslaw for crunch - Roasted potatoes for heartiness - Tomato and mozzarella salad for freshness These sides complement the sweet, buttery flavor of the corn. They also create a colorful plate. Yes, you can make Garlic Parmesan Corn on the Cob in the oven. Preheat your oven to 400°F (200°C). Wrap the corn tightly in aluminum foil to keep it moist. Bake for 20-25 minutes. Turn the foil halfway through cooking. This method gives you tender corn, full of flavor. To prevent the corn from sticking to the grill, follow these tips: - Preheat the grill to medium-high heat. - Brush the grill grates with oil before placing the corn. - Make sure to coat the corn with the garlic butter mixture. This keeps it moist and adds flavor. - Rotate the corn every few minutes to avoid sticking. These steps help you achieve perfectly grilled corn every time. Enjoy your cooking! Making Garlic Parmesan Corn on the Cob is simple and fun. We covered the best ingredients, tools, and methods. Preheating is key, and the garlic butter really adds flavor. You learned grilling tips and how to customize with herbs or spices. Don't forget about storage and reheating for later. Enjoy your delicious corn, and share it with friends. Each bite can bring smiles, making it worth the effort. Now, get cooking!](https://goldendishy.com/wp-content/uploads/2025/07/bd43f489-c25e-441e-8123-0082a4d55c21-768x768.webp)
. Prep Time: 15 minutes Total Time: 1 hour 30 minutes Servings: 6 This potato salad is great for summer meals. You can serve it at picnics, barbecues, or potlucks. I love to garnish it with extra dill and chives for a colorful touch. Enjoy! In this post, I shared how to make a classic potato salad. We covered the ingredients, tips for cooking the potatoes, and mixing the dressing. I showed you how to add flavors and enhance your dish. Remember, you can store leftovers correctly or even try tasty variations. Potato salad is easy to make and perfect for any meal. Enjoy your cooking adventure!](https://goldendishy.com/wp-content/uploads/2025/07/3d114334-7953-4aa3-9cf8-99466b57d4b6-768x768.webp)
![For a delightful Easy Cucumber Slaw, you need simple, fresh ingredients. Here’s what you will gather: - Cucumbers - Carrot - Red bell pepper - Green onions - Fresh cilantro - Dressing components: - Rice vinegar - Honey or maple syrup - Sesame oil - Soy sauce - Seasoning: - Salt - Pepper - Sesame seeds This vibrant mix of veggies adds color and crunch. The dressing ties everything together with its sweet and tangy flavor. Each ingredient plays a role in making this slaw both refreshing and satisfying. You can find the full recipe for preparation details. Enjoy making this easy side dish that complements any meal! To start, gather your fresh veggies. You need 2 large cucumbers, 1 medium carrot, 1 red bell pepper, and 3 green onions. First, slice the cucumbers into thin rounds. Next, julienne the carrot into thin strips. Then, slice the red bell pepper into strips. Finally, chop the green onions into small pieces. Place all the veggies in a large mixing bowl. Next, let’s make the dressing. In a small bowl, combine 1/4 cup of rice vinegar, 1 tablespoon of honey or maple syrup, 1 tablespoon of sesame oil, and 1 teaspoon of soy sauce. Whisk this mixture until it is smooth and well combined. This dressing will add a delightful flavor to your slaw. Now it’s time to put everything together. Pour the dressing over the mixed vegetables in the large bowl. Toss gently to coat all the veggies evenly. Add 1/4 cup of freshly chopped cilantro and season with salt and freshly cracked pepper to taste. Mix it all again with gentle motions. Let the slaw sit for at least 10 minutes. This resting time helps the flavors blend nicely. Just before serving, sprinkle sesame seeds on top for extra crunch. Enjoy your Easy Cucumber Slaw! For the full recipe, please check the link. Letting the slaw sit is key. After you mix the veggies and dressing, rest it for at least 10 minutes. This time helps the flavors blend. The cucumbers soften just a bit, making every bite tasty. The longer you wait, the better the slaw tastes. You can even let it sit for up to 30 minutes if you want a stronger flavor. Presentation makes a big difference. Serve the slaw in a bright, shallow bowl. This way, the colors of the veggies shine. Add a few sprigs of cilantro on top. This adds extra green and freshness. You can also serve the slaw with a side of lime wedges. This gives guests a chance to add a zesty kick. Want to boost the taste? Consider adding lime juice. Just a squeeze before serving brightens the whole dish. You could also add sliced jalapeños for some heat. If you like crunch, try adding chopped nuts like peanuts or cashews. For a sweet twist, mix in some diced mango or pineapple. These small changes can make your Easy Cucumber Slaw unique and exciting. {{image_4}} You can mix in many other vegetables for added crunch and flavor. Try adding shredded cabbage for a nice texture. Radishes also bring a peppery bite that pairs well with cucumbers. You might enjoy diced tomatoes, which can add some juiciness. You can swap in green bell peppers for a milder taste. Even thinly sliced snap peas can add a fun pop! Feel free to experiment based on what you have at home. The dressing can change the whole vibe of the slaw. For a creamier option, mix in some Greek yogurt or mayo. You can also try a zesty citrus dressing with lime or lemon juice. If you want a spicy kick, add some chili paste or Sriracha. A sesame peanut dressing can give a rich, nutty flavor. By changing the dressings, you can create a new dish each time! If you're vegan, simply use maple syrup instead of honey. This slaw is already gluten-free if you choose gluten-free soy sauce. You can also leave out the soy sauce for a fresh taste. If you want a low-carb version, try using spiralized zucchini instead of cucumbers. These options make this slaw friendly for many diets, so everyone can enjoy it! To keep your Easy Cucumber Slaw fresh, store it in an airtight container. This keeps moisture out and prevents sogginess. If you have leftover slaw, ensure it cools to room temperature first. Once cooled, seal it tightly and place it in the fridge. I recommend eating it within three days for the best taste. For the best quality, consume the slaw within three days. After that, the cucumbers can become too soft. If you notice any signs of spoilage, like an off smell or sliminess, it’s best to throw it away. The quicker you eat it, the fresher it will taste. You don’t need to reheat cucumber slaw. It’s best enjoyed cold. If you want to freshen it up after storage, add a little more dressing or a splash of vinegar. This will revive the flavors and keep it crisp. Enjoy it straight from the fridge for a refreshing bite! For the full recipe, check out the [Full Recipe]. For the best slaw, I recommend using English cucumbers. They are long and slender, with thin skin and few seeds. Their taste is mild and crisp, which makes them perfect for salads. You can also use Persian cucumbers. They are smaller, crunchy, and sweet. Avoid regular garden cucumbers, as they can be bitter and watery. The right cucumber gives your slaw a fresh flavor. Yes, you can prep your cucumber slaw the night before. Just cut the cucumbers and other veggies, and store them in an airtight container. Keep the dressing separate until you are ready to serve. Mixing them right before serving keeps the veggies crisp and fresh. This way, you save time and still get great taste. Cucumber slaw can last about 2 to 3 days in the fridge. To keep it fresh, store it in an airtight container. As time passes, the cucumbers may release water. If that happens, just drain the excess liquid before serving. Always check for any off smells or changes before eating. Enjoy your slaw while it’s still at its best! This blog post covered the key ingredients and steps to make a fresh cucumber slaw. I shared tips for storage, serving, and variations that keep it tasty. Remember that resting the slaw boosts its flavor. Whether you use different veggies or dressings, make it your own. Storing leftovers properly helps maintain freshness. Enjoy your slaw as a side dish or snack. It’s easy, fun, and delicious! Happy cooking!](https://goldendishy.com/wp-content/uploads/2025/07/45f43f4c-bd14-4cdb-930e-3d5f55452c18-768x768.webp)
![- 2 medium zucchinis, grated - 1 cup feta cheese, crumbled - 1/2 cup all-purpose flour - 1 teaspoon salt - 1/2 teaspoon black pepper - 1/2 teaspoon garlic powder - 1/2 cup fresh dill, chopped - 1/2 cup green onions, finely chopped - 2 large eggs - Olive oil, for frying To make Greek zucchini fritters, you need fresh and simple ingredients. Start with two medium zucchinis. Grate them finely and set them aside. This step is crucial because zucchini holds a lot of water. Next, grab a cup of feta cheese. Crumble it into small pieces to add a salty, creamy punch. You will also need half a cup of all-purpose flour. This helps bind the fritters together. For seasoning, use one teaspoon of salt, half a teaspoon of black pepper, and half a teaspoon of garlic powder. This mixture will give your fritters a nice flavor. Don’t forget the herbs! A half cup of fresh dill and a half cup of finely chopped green onions add freshness. Finally, you need two large eggs to hold everything together. For frying, have olive oil on hand. These ingredients come together to create a dish that is tasty and simple. For the full recipe, check the detailed instructions. First, grate the zucchinis into a large bowl. Sprinkle 1 teaspoon of salt over the grated zucchini. Let it rest for about 10 minutes. This step helps pull out moisture from the zucchini, which is key for great fritters. After 10 minutes, take a clean kitchen towel. Wrap the zucchini and squeeze it gently. Remove as much liquid as you can. This makes the fritters crispier. In another bowl, mix the squeezed zucchini with crumbled feta cheese, chopped dill, and finely chopped green onions. Add the flour, eggs, black pepper, and garlic powder. Stir everything well until you have a smooth batter. Now, heat about 1/4 inch of olive oil in a skillet over medium heat. The oil should be hot enough that a small drop of batter sizzles when added. Using a spoon, drop spoonfuls of the batter into the hot oil. Flatten each fritter slightly with the back of the spoon. Be careful not to overcrowd the pan; fry in batches if needed. Cook for about 3-4 minutes on each side. You want them to be golden brown and crispy. Once done, place the fritters on a plate lined with paper towels to soak up extra oil. Serve them warm. For extra flavor, top with more crumbled feta and a dollop of Greek yogurt or tzatziki sauce. Enjoy your tasty Greek Zucchini Fritters! For the full recipe, check [Full Recipe]. To make great Greek zucchini fritters, start by squeezing out excess moisture from the grated zucchini. After salting, let the zucchini sit for ten minutes. This helps draw out the water. Next, use a clean towel to squeeze the zucchini until it feels dry. If you skip this step, the fritters might turn out soggy. Adjust cooking time for crispiness. Fry the fritters for three to four minutes on each side. If your fritters are not crispy, try increasing the heat slightly. But be careful! Too high a heat can burn them. Garnishing can elevate your fritters. Try crumbled feta cheese on top. Fresh dill adds a nice touch too. A dollop of Greek yogurt or tzatziki sauce pairs perfectly. These add creaminess and flavor. For side dishes, think about serving a light salad. A fresh cucumber salad or a simple tomato salad works well. These sides balance the rich flavors of the fritters. Using the right frying pan is key. A non-stick skillet helps with even cooking. It also makes flipping the fritters easier. For shaping and flipping, have a spatula handy. A spoon works well for dropping the batter into the oil. If you want uniform fritters, use an ice cream scoop. This helps you get the same size every time. For the full recipe, check out the details above. Enjoy your cooking! {{image_4}} You can switch up the cheese in your fritters. Goat cheese adds a tangy flavor that pairs well with zucchini. If you want a milder taste, use mozzarella. Fresh herbs can also change the taste. Adding parsley gives a fresh touch, while mint adds a sweet note. Experiment with both for a unique twist! You can bake your fritters instead of frying them. This method cuts down the oil and keeps them light. Preheat your oven to 400°F (200°C). Place the fritters on a baking sheet and lightly spray them with oil. Bake for around 20 minutes, flipping halfway for an even cook. If you own an air fryer, use it for a crispier finish. Set your air fryer to 375°F (190°C). Cook the fritters in a single layer for about 10 minutes. Shake the basket halfway through to ensure they cook evenly. Serve your fritters on a bed of fresh salad. This adds crunch and freshness to your meal. You can top them with diced tomatoes, cucumber, and a drizzle of olive oil. Pair your fritters with different dipping sauces. Tzatziki is a classic choice, but you can try a spicy yogurt dip or a sweet chili sauce. These sauces will elevate the flavors and make your dish even more enjoyable. For the full recipe, check out the complete guide on Greek Zucchini Fritters! To store your Greek zucchini fritters, first let them cool completely. Place them in an airtight container. This keeps them fresh and tasty. Refrigerate the fritters for up to three days. If you want to keep them longer, freezing is a great option. To reheat your fritters, use an oven or skillet. Preheat your oven to 350°F (175°C). Place the fritters on a baking sheet for about 10 minutes. This will keep them crispy. If you use a skillet, add a bit of olive oil. Heat on medium until they are warm and crispy. Avoid microwaving, as this can make them soggy. You can freeze the fritters before or after cooking. To freeze before cooking, shape the fritters and place them on a baking sheet. Freeze them for about an hour. Then, transfer them to a freezer bag. To freeze after cooking, let them cool completely first. Then, store them in an airtight container. For thawing, place them in the fridge overnight. Reheat them in the oven or skillet for best results. Enjoy your Greek zucchini fritters any time! For the complete recipe, check the Full Recipe. To keep your zucchini fritters from falling apart, you must remove excess moisture. Grate the zucchinis and sprinkle them with salt. Let them rest for about 10 minutes. This helps draw out water. Afterward, use a clean towel to squeeze out the liquid. The drier the zucchini, the better the fritters will hold together. Next, bind the mixture well. Use enough flour and eggs to hold everything together. The flour acts as a glue, while the eggs provide structure. If your batter feels too loose, add a bit more flour until it thickens. Yes, you can make the batter ahead of time. Store it in the fridge for up to two hours. This way, you save time when you are ready to fry. Just remember that fresh batter is best for frying. If you wait too long, the zucchini may release more moisture. Give the batter a quick stir before cooking. Greek zucchini fritters are great with several sides. You can serve them with Greek yogurt or tzatziki sauce. These dips add a cool and creamy contrast. A simple salad with tomatoes and cucumbers pairs well too. For a heartier meal, try serving them with grilled chicken or lamb. To make gluten-free zucchini fritters, swap the all-purpose flour for a gluten-free flour blend. You can also use almond flour or chickpea flour. These options work well and provide a nice flavor. Just keep in mind that different flours absorb moisture differently. You may need to adjust the amount based on your chosen flour. Start with the same amount and tweak as needed for the right batter consistency. For the best results, follow the Full Recipe for guidance. In this article, we explored making delicious Greek zucchini fritters. You learned about key ingredients, preparation steps, and helpful tips. I also shared variations to suit your taste and how to store leftovers. These fritters are easy to make and can be adjusted for different diets. Enjoy the tasty result and impress your family or friends. Happy cooking!](https://goldendishy.com/wp-content/uploads/2025/07/cb7a2661-c5f6-4b7c-b480-ad49d75e704d-768x768.webp)
![- 1 pound fresh okra - 2 tablespoons extra virgin olive oil - 1 teaspoon garlic powder - 1 teaspoon smoked paprika - 1/2 teaspoon ground cumin - 1/2 teaspoon salt - 1/4 teaspoon freshly ground black pepper - 1/4 teaspoon cayenne pepper (optional) - 2 tablespoons freshly grated Parmesan cheese (optional) Gathering the right ingredients is key to making crispy garlic okra chips. Fresh okra offers a unique taste and great texture. When you pick out okra, look for bright green pods that are firm and smooth. The olive oil serves as the base for your spices. It helps to crisp the okra and adds a rich flavor. Garlic powder brings a punch of taste without any hassle. Smoked paprika adds depth and a slight smokiness, which pairs well with the okra. Ground cumin gives the chips an earthy note. Salt and pepper enhance all the flavors, while cayenne pepper adds a spicy kick if you want it. Finally, Parmesan cheese can add richness, making the chips even more delicious. - Calories per serving: About 120 calories - Key vitamins and minerals: High in vitamins A and C, magnesium, and fiber - Health benefits of okra: Okra is low in calories and packed with nutrients. It supports digestion, boosts heart health, and provides antioxidants. Eating crispy garlic okra chips is not just tasty; it's also good for you. Enjoy this snack guilt-free while getting your nutrition. For the full recipe, check out the [Full Recipe] section! 1. Preheat your oven to 425°F (220°C). This step helps the okra get crispy. 2. Line a large baking sheet with parchment paper. This prevents sticking and makes cleanup easy. 3. Trim the ends of the okra pods, cutting off just the stem. 4. Cut the okra into halves or thirds. Aim for even sizes so they cook well. 1. In a large bowl, mix the extra virgin olive oil, garlic powder, smoked paprika, ground cumin, salt, black pepper, and optional cayenne pepper. Stir until you have a smooth paste. 2. Add the cut okra to the bowl. Toss gently but well. Make sure each piece gets coated with the paste. 1. Spread the okra in a single layer on the baking sheet. Don’t overcrowd the pan. This will keep them crispy. 2. Bake in the preheated oven for 20-25 minutes. Flip the chips halfway through to brown them evenly. 3. If you want to add Parmesan cheese, sprinkle it on during the last 5 minutes. This makes a tasty cheesy crust. 4. Once golden brown and crispy, take the baking sheet out of the oven. Let the okra cool slightly before serving for the best crunch. You can find the full recipe above to guide you through this process. To make crispy garlic okra chips, cut the okra evenly. This helps all pieces cook the same. Aim for pieces that are about the same size. When they are even, they will brown nicely. Also, avoid overcrowding the baking sheet. If you put too many pieces on one pan, they will steam instead of crisp. Spread them out and use two sheets if needed. Using fresh ingredients makes a big difference. Fresh okra has a better taste and texture. Also, feel free to adjust the spices. If you love garlic, add more garlic powder. For a kick, increase the cayenne pepper. Taste the mixture as you go. This way, you can make the flavor just right for you. Pair these chips with dips for extra flavor. A creamy ranch or spicy aioli works well. You can also serve them with salsa for a fresh twist. For presentation, use a bright bowl. Garnish with parsley or lime slices for a pop of color. This makes your dish look even more appetizing. Enjoy your crispy garlic okra chips as a fun snack or side dish. Check out the Full Recipe for more details! {{image_4}} You can easily change the taste of your okra chips. For spicy garlic okra chips, add cayenne pepper or chili powder. This will give them a nice kick. You might also try mixing in some smoked paprika for a deeper flavor. If you prefer fresh herbs, add chopped rosemary or thyme. These herb-infused options brighten the dish and add a lovely aroma. If you’re looking for vegan alternatives, skip the cheese. The chips will still taste great without it. You can also use nutritional yeast for a cheesy flavor. For gluten-free options, you’re in luck! This recipe is naturally gluten-free. Just ensure that any additional spices used are also gluten-free. Crispy okra chips are not just for snacking. Use them in salads for extra crunch. They can also be a fun topping on soups. Try mixing them into a grain bowl for added flavor. You can even crush them and use them as a crispy coating for chicken or fish. The possibilities are endless! Check out the Full Recipe for more details on how to make these tasty snacks. To keep your crispy garlic okra chips fresh, store them in airtight containers. This method helps keep moisture out and maintains that delightful crunch. When stored properly, they can last for about 3-5 days at room temperature. For best results, place them in a cool, dark spot in your kitchen. If you live in a warm climate or want to make them last longer, consider storing them in the refrigerator. This will help retain their flavor and texture for about a week. Just remember to let them cool completely before sealing them up. Want to enjoy okra chips later? You can freeze them! First, let the chips cool fully. Then, place them in a single layer on a baking sheet and pop them in the freezer for a few hours. Once frozen, transfer them to a freezer-safe bag. This way, you can enjoy them anytime. When you’re ready to eat your frozen okra chips, don’t thaw them. Just bake them straight from the freezer at 425°F (220°C) for about 10-15 minutes. This will help them regain their crispy texture. For the best flavor, eat your crispy garlic okra chips within the first couple of days. They taste freshest right after baking. If you notice any signs of spoilage, like an off smell or a soft texture, it’s best to toss them. Keeping an eye on your snacks ensures you always enjoy them at their best! To make Crispy Garlic Okra Chips, start with fresh okra. Preheat your oven to 425°F. Wash and dry your okra. Cut the okra into halves or thirds. In a bowl, mix olive oil, garlic powder, smoked paprika, cumin, salt, black pepper, and optional cayenne pepper. Toss the cut okra in this mix until well coated. Spread the okra on a baking sheet. Bake for 20-25 minutes, flipping halfway. Enjoy a tasty snack! For the full recipe, check the section above. Yes, you can use frozen okra, but it may change the texture. Frozen okra tends to be softer after cooking. This means your chips may not be as crisp. If you use frozen okra, thaw it first and pat it dry. This helps reduce moisture. For best results, fresh okra gives the best crunch. You can find pre-made garlic okra chips at many grocery stores. Look in the snack aisle or natural food sections. Brands like Southern Style and Veggie Chips offer tasty options. You can also check online retailers like Amazon or health-focused sites. Always read labels for the best flavor and quality. To add spice to your chips, try these tips: - Add more cayenne pepper for heat. - Mix in chili powder or red pepper flakes. - Use spicy seasoning blends like Cajun or taco seasoning. - Experiment with fresh jalapeños for a bold twist. These changes will give your chips a fiery kick! This blog covered the fun and tasty world of crispy okra. You learned about the ingredients, from fresh okra to spices, and how they bring flavor. The step-by-step guide made cooking easy and clear. Our tips will help you achieve the best crunch and taste. You can even try different flavors and modify the recipe to fit your diet. Remember to store your okra properly for the best taste. Now, it's time to enjoy your crispy okra chips, whether as a snack or a side dish!](https://goldendishy.com/wp-content/uploads/2025/07/49c08959-fe34-4929-8f55-872212e9bd7e-768x768.webp)
![- 3 medium zucchinis, grated - 200g feta cheese, crumbled - 1 cup Greek yogurt Zucchini brings moisture and a light taste. Feta adds saltiness and creaminess. Greek yogurt keeps the pie rich and tangy. This trio creates a tasty base for the pie. - 1 cup all-purpose flour - 1 teaspoon baking powder - 1 teaspoon dried oregano - 1 teaspoon garlic powder - Salt and pepper to taste The flour gives the pie structure. Baking powder helps it rise and become fluffy. Oregano adds a hint of herb, while garlic powder brings depth. Salt and pepper enhance all the flavors. - 1 tablespoon olive oil (for greasing) - 1 tablespoon sesame seeds (for topping) - 1/2 cup fresh dill, chopped (optional for garnish) Olive oil keeps the pie from sticking. Sesame seeds add crunch and a nutty flavor. Fresh dill makes the dish pop with color and fragrance. You can skip the dill but it really brightens the pie. Explore the full recipe to get all the steps for this delightful dish! 1. Preheat the Oven: Set your oven to 180°C (350°F). This ensures your pie bakes evenly. 2. Grease the Pie Dish: Use 1 tablespoon of olive oil to lightly grease a round pie dish. This helps the pie not stick. 3. Drain the Zucchini: Grate 3 medium zucchinis and sprinkle them with salt. Let them sit for 10 minutes. Gather the zucchini in a clean kitchen towel and squeeze out the extra water. This step is key to avoiding a soggy pie. 1. Combine Wet Ingredients: In a separate bowl, whisk together 1 cup of Greek yogurt and 3 large eggs. Mix until smooth. 2. Add Dry Ingredients: To the wet mixture, add 200g of crumbled feta cheese, 1 cup of all-purpose flour, 1 teaspoon of baking powder, 1 teaspoon of dried oregano, and 1 teaspoon of garlic powder. Stir in the drained zucchini, then season with salt and pepper. 3. Mix Thoroughly: Use a spatula to combine everything well. You want a thick and smooth batter. 1. Transfer the Batter: Pour your zucchini mixture into the greased pie dish. Smooth the top with a spatula for an even layer. 2. Top with Sesame Seeds: Evenly sprinkle 1 tablespoon of sesame seeds across the top. This adds a nice crunch. 3. Baking Time and Temperature: Place the dish in the oven and bake for 35-40 minutes. The top should be golden brown and a toothpick inserted should come out clean. Follow these steps for a tasty Zucchini and Feta Pie! For the complete recipe, check out the [Full Recipe]. Draining Zucchini Effectively Draining zucchini is key for great texture. First, grate the zucchini and sprinkle a pinch of salt on top. Let it sit for 10 minutes. This step draws out excess moisture. Next, gather the zucchini in a clean kitchen towel. Squeeze hard to remove the water. This helps avoid a soggy pie. Avoiding Sogginess To keep your pie firm, use the drained zucchini right away. If you let it sit too long, it can release moisture again. Bake your pie soon after mixing. This keeps the crust crispy and the filling light. Seasoning Tips Zucchini can be mild, so season well. Use salt and pepper generously. Adding garlic powder brings warmth to the flavor. Dried oregano adds a nice herb taste. Feel free to experiment with spices! Optional Ingredients to Add Consider adding chopped onions for extra flavor. Fresh herbs like basil or parsley can brighten the dish. You can also mix in sun-dried tomatoes for a sweet touch. These additions can make your pie even more delicious. Pairing Suggestions Zucchini and feta pie pairs well with fresh salads. A simple green salad with lemon dressing works great. You can also serve it with a yogurt dip for a creamy contrast. Presentation Tips Cut the pie into wedges and place them on a colorful platter. Garnish with fresh dill for a pop of color. For an extra touch, add a dollop of Greek yogurt on the side. This adds creaminess and flavor. Enjoy sharing this tasty dish! {{image_4}} Alternative Cheeses You can easily swap feta cheese. Try goat cheese for a tangy twist. Ricotta adds creaminess and pairs well too. These options keep the dish flavorful and fun. Gluten-Free Options For a gluten-free version, replace all-purpose flour with almond flour or a gluten-free blend. This change maintains the pie's texture and taste, perfect for those avoiding gluten. Adding Fresh Herbs Fresh herbs can enhance your zucchini and feta pie. Basil, parsley, or chives are great choices. These herbs add brightness and depth to your dish. Just chop them finely and mix in before baking. Spices to Consider Consider adding spices for extra flavor. A pinch of cayenne pepper gives heat. Paprika adds smokiness, while cumin lends an earthy note. Experiment with these spices to find your favorite flavor combo. Hot vs. Cold This pie tastes great both hot and cold. Serve it warm right from the oven for a comforting meal. If you prefer, let it cool and serve at room temperature for a lighter option. Appetizer vs. Main Course You can serve zucchini and feta pie as an appetizer or a main dish. Cut it into small wedges for a fun starter. For a main course, pair it with a salad or roasted veggies to make a filling meal. - Refrigeration Tips: Store your zucchini and feta pie in the fridge. Let it cool completely first. Wrap it tightly in plastic wrap. This keeps it fresh for up to three days. You can also place it in an airtight container. This helps prevent moisture loss. - Best Containers to Use: Use glass or plastic containers that seal well. They help keep your pie tasting great. If you have a large piece, a pie dish with a lid is perfect. Just make sure it’s completely sealed to avoid drying out. - Oven vs. Microwave: The oven is best for reheating. Preheat it to 180°C (350°F). Place the pie on a baking sheet to catch any drips. Heat for about 10-15 minutes. This keeps the crust crispy. The microwave is quicker but can make the pie soggy. If you use the microwave, heat in short bursts, checking often. - Maintaining Texture: To keep the pie’s texture, cover it with foil in the oven. This helps it heat evenly. In the microwave, add a cup of water in the microwave. This adds moisture and helps avoid dryness. - How to Freeze Zucchini Pie: To freeze, wrap individual slices in plastic wrap. Then, place them in a freezer bag. Squeeze out the air before sealing. You can also freeze the whole pie. Just wrap it tightly in two layers of plastic wrap. - Thawing and Reheating: When ready to eat, thaw slices in the fridge overnight. For a whole pie, leave it on the counter for a few hours. Reheat using the oven to keep the crust crispy. Enjoy your tasty pie even after freezing! Yes, you can! Other veggies work well in this pie. Try adding spinach for a fresh taste. Bell peppers add a nice crunch. Grated carrots give a touch of sweetness. Just make sure the veggies are not too watery. Drain them like you do with zucchini. Definitely! Zucchini and feta pie is great for meal prep. Once cooled, slice it and store it in the fridge. Use an airtight container to keep it fresh. It lasts up to five days. This pie pairs well with a simple salad. A mixed green salad adds freshness. You can also serve it with a dollop of Greek yogurt. For drinks, try a light white wine or sparkling water. Check the top for a golden brown color. Insert a toothpick into the center. If it comes out clean, your pie is ready. If it’s still wet, bake it a few more minutes. Yes, you can! Prepare the pie and keep it in the fridge. Bake it the next day for fresh flavors. You can also freeze it before baking. Thaw overnight in the fridge before baking. For a complete guide, check the Full Recipe for all the details! Zucchini and Feta Pie is easy to make and full of flavor. We explored key ingredients, step-by-step instructions, and helpful tips for the best results. You can vary the recipe to fit your taste. Enjoy it hot or cold, as a main dish or appetizer. Proper storage keeps it fresh. With these insights, you can serve this dish with confidence. Try it out, and impress your family and friends with your skills. Happy cooking!](https://goldendishy.com/wp-content/uploads/2025/07/7ca7cda4-3dfb-4b99-98f1-545ca5d8f2b3-768x768.webp)
![Creating Peach and Basil Flatbread is simple and fun. Here’s what you need: - Pre-made flatbread or naan - Ripe peaches - Fresh mozzarella cheese - Fresh basil leaves - Olive oil - Balsamic glaze (optional) - Salt and pepper - Red pepper flakes (optional) Each ingredient adds its own flair. The flatbread or naan forms a sturdy base. Ripe peaches bring sweetness. Fresh mozzarella melts beautifully, creating a rich layer. Fresh basil adds a burst of flavor that ties everything together. Olive oil enhances the taste and helps with crispness. Balsamic glaze can heighten the sweet and tangy notes. Remember to season with salt and pepper for balance. If you like some heat, sprinkle red pepper flakes on top. This mix of ingredients makes for a delightful summer treat. You can find the full recipe to guide you through the steps. 1. Preheat your oven to 425°F (220°C). This helps the flatbread bake evenly. 2. Line a baking sheet with parchment paper. This keeps the flatbread from sticking. Place your flatbread or naan on the lined sheet. 3. Brush the flatbread with olive oil using a spoon or brush. This adds flavor and helps it crisp up. 4. Spread the shredded mozzarella cheese evenly over the flatbread. This creates a creamy base. 5. Layer the thinly sliced peaches on top of the cheese. Make sure each slice is well-placed for the best taste. 6. Season with salt, pepper, and red pepper flakes if you like some heat. This adds extra flavor. 1. Bake the flatbread in the oven for 10-12 minutes. Keep an eye on it until the cheese melts and bubbles. 2. Watch for the cheese to brown lightly. This gives the flatbread a nice, toasty flavor. 1. After baking, take the flatbread out of the oven. Sprinkle the torn basil leaves on top while it's hot. This brings out the fresh aroma. 2. If you want, drizzle balsamic glaze over the flatbread for extra flavor. This adds a sweet and tangy twist. 3. Let the flatbread cool for a couple of minutes. Then slice it up for sharing or enjoying by yourself. This method makes a Peach and Basil Flatbread that bursts with flavor, perfect for summer. For the complete recipe, check [Full Recipe]. - Selecting ripe peaches for the best flavor Choose peaches that feel slightly soft but are not mushy. Look for a rich color, usually yellow or orange, indicating ripeness. The aroma should be sweet and fragrant. These factors ensure your flatbread bursts with juicy flavor. - Cheese melting tips for a creamy texture Use fresh mozzarella for the best melt. Shred it yourself for a creamier texture. Spread the cheese evenly on the flatbread, ensuring each bite has that gooey goodness. Bake until bubbly and golden for added richness. - Seasoning tricks for additional flavor enhancement Season your flatbread with salt and pepper. Add red pepper flakes for a spicy kick if you like heat. A drizzle of balsamic glaze at the end gives a sweet tang. These little touches elevate the dish. - Best sides or drinks to pair with the dish Serve with a fresh green salad or a cool cucumber salad. A chilled white wine or sparkling water pairs nicely. These sides balance the sweetness of the peaches and the creaminess of the cheese. - Presentation tips to impress guests Use a wooden board or a large platter for serving. Garnish with extra basil leaves for color. A small bowl of balsamic glaze on the side invites guests to add more if they wish. This presentation makes the dish even more tempting. For the full recipe, you can check out the details above. Enjoy creating your Peach and Basil Flatbread! {{image_4}} You can change the cheese to create new flavors. Goat cheese adds a tangy taste. Feta cheese brings a salty bite. Both pair well with peaches. You can also add proteins to make it heartier. Prosciutto gives a nice savory touch. Grilled chicken adds a juicy element. Both options enhance the flatbread's flavor. Try different toppings to switch things up. Arugula adds peppery notes. Toasted nuts give a crunchy texture. Both add depth and interest to each bite. You can also explore different herbs. Mint offers a refreshing twist, while thyme adds warmth. Each herb changes the flatbread's character, making it unique. For the full recipe, check the details above to get started on this delightful dish! To keep your Peach and Basil Flatbread fresh, store leftovers in the fridge. Wrap the flatbread in plastic wrap or foil. This helps to prevent it from drying out. You can also place it in an airtight container for extra protection. The flatbread lasts for about 2 to 3 days in the fridge. After that, the quality may decline. When reheating, the oven works best for keeping that crispy texture. Preheat your oven to 350°F (175°C). Place the flatbread directly on the oven rack or on a baking sheet. Heat for about 5 to 8 minutes until warm. If you use a microwave, the flatbread may become soggy. To maintain crispness, heat it in short bursts and check often. Enjoy your flatbread just like it was fresh from the oven! How do I know when the peaches are ripe enough? Look for peaches that are slightly soft to the touch. The color should be a warm golden hue. A sweet aroma is a good sign of ripeness too. If they feel hard, give them a few more days at room temperature. Can I use frozen flatbread or naan for this recipe? Yes, you can use frozen flatbread or naan. Just thaw them first. You may need to adjust baking time. Keep an eye on the cheese to avoid burning. What can I substitute for mozzarella cheese? If you don’t have mozzarella, try goat cheese or feta. They add a tangy flavor. You can also use provolone for a similar texture. How do I make this flatbread in advance? You can prepare the flatbread up to the baking step. Assemble it and store it in the fridge. Bake it when you are ready to serve. This keeps the flatbread fresh and tasty. For the best results, use it within a day. In this blog post, we explored how to make delicious Peach and Basil Flatbread. I shared key ingredients, easy steps, and tips for the best results. Remember to use ripe peaches and choose your cheese wisely. You can even mix in proteins or herbs for unique flavors. Storing leftovers properly keeps them fresh. With easy reheating tips, you can enjoy your flatbread again. Try this recipe for a tasty treat and impress your friends and family! Happy cooking!](https://goldendishy.com/wp-content/uploads/2025/07/1088bccc-4c8b-4254-a72a-0cec77bef739-768x768.webp)