Skip to content
About
Contact
Cookie Policy
Copyright Policy
Disclaimer
Search
Home
Dinner
Appetizer
Desserts
Drinks
About
Contact
Privacy Policy
Toggle Menu
Home
/
Appetizer
- Page 15
Appetizer
Crispy Roasted Chickpeas Healthy and Easy Snack Recipe
Grilled Vegetable Skewers Tasty and Simple Recipe
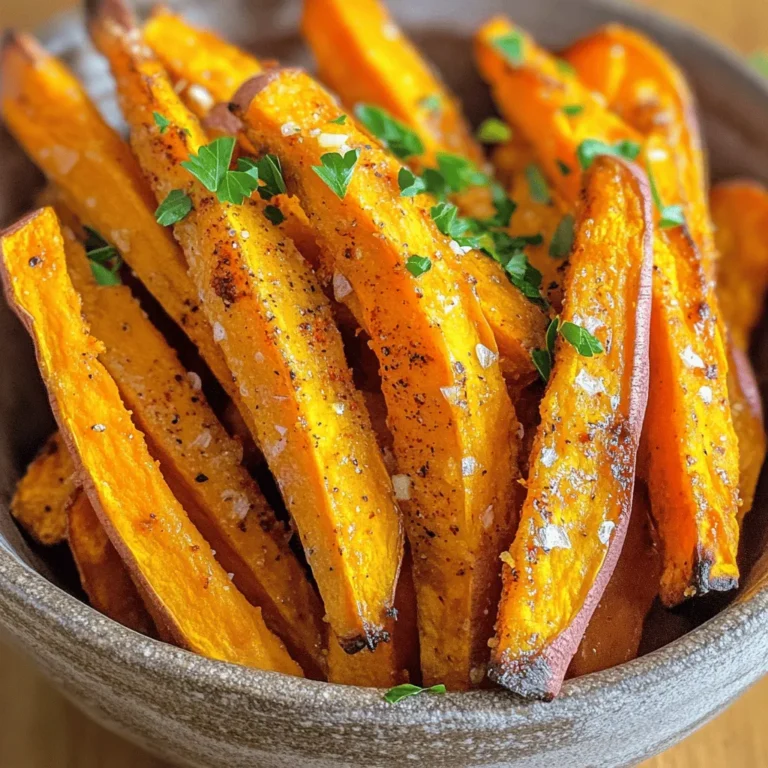
Baked Sweet Potato Fries Crispy and Flavorful Snack
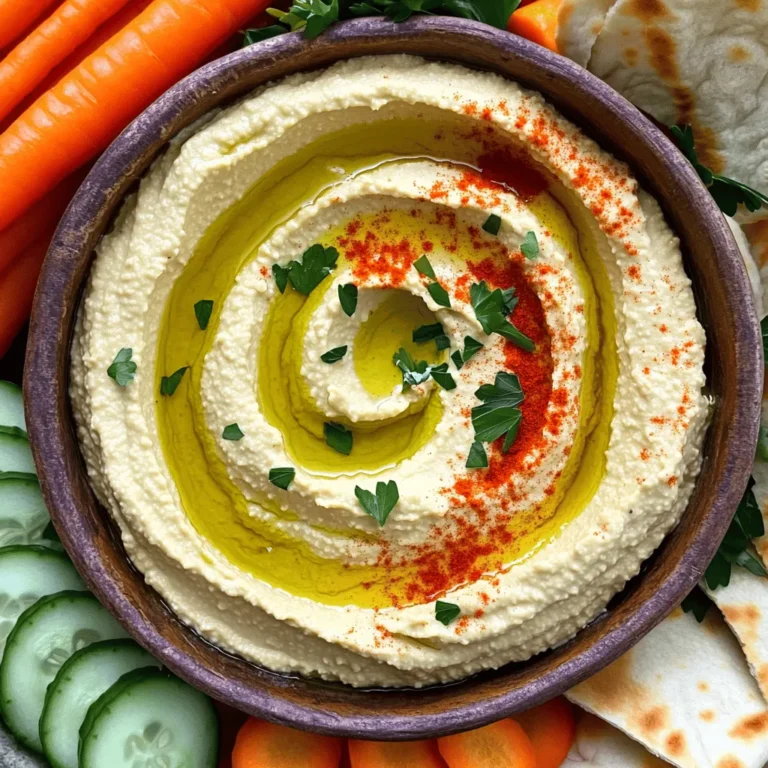
Lemon Garlic Hummus Simple and Flavorful Dip Recipe
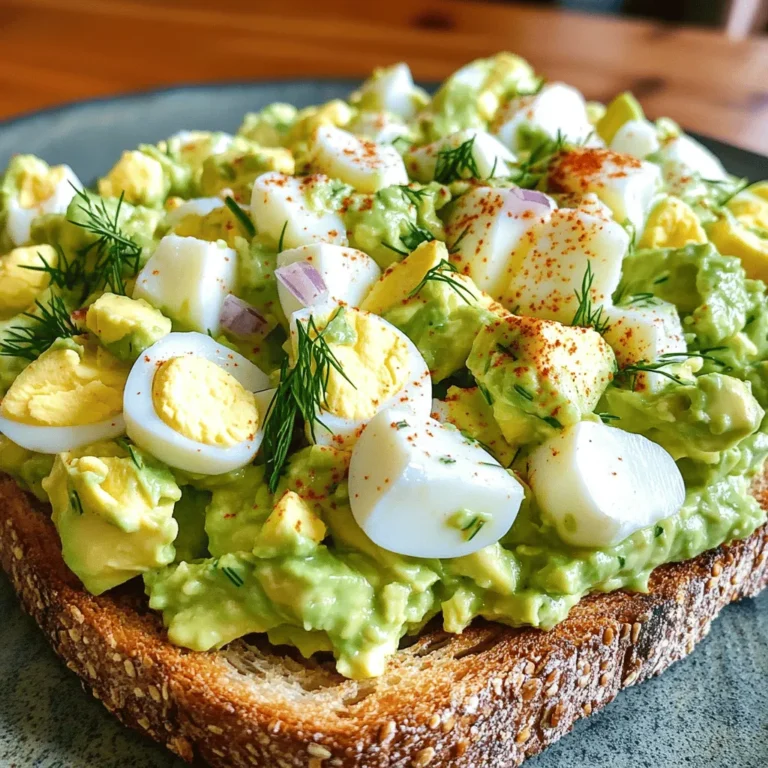
Avocado Egg Salad Easy and Creamy Delight Recipe
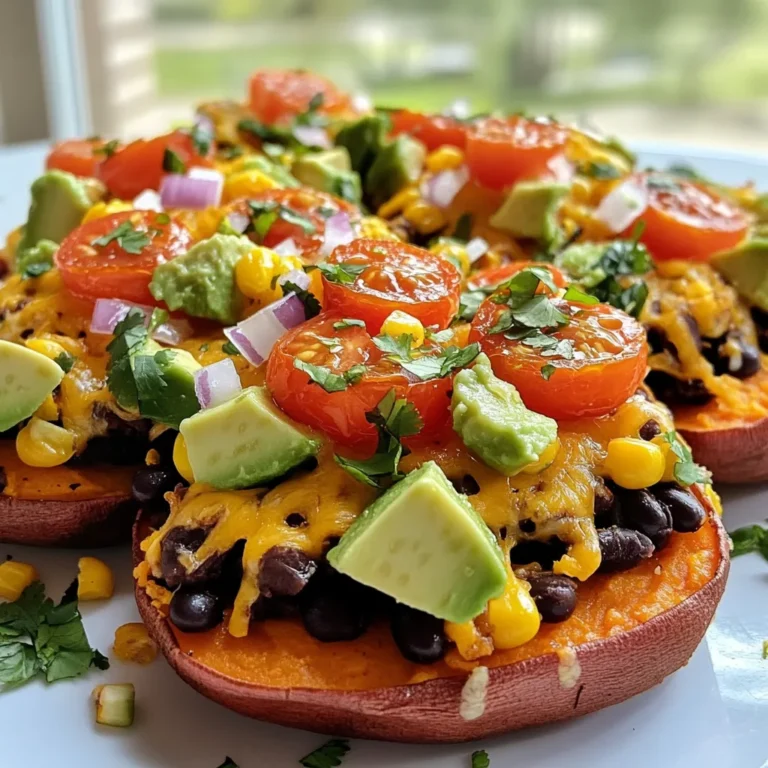
Loaded Sweet Potato Nachos Crunchy and Flavorful Delight
Peach Avocado Salsa Fresh and Flavorful Dip Recipe
Honey Mustard Chicken Tenders Crispy and Flavorful Meal
Balsamic Roasted Vegetable Salad Flavorful and Fresh
Savory Zucchini Fritters Crispy and Flavorful Snack
Page navigation
Previous Page
Previous
1
…
13
14
15
16
17
…
19
Next Page
Next
Home
Dinner
Appetizer
Desserts
Drinks
About
Contact
Privacy Policy
Toggle Menu Close
Search for:
Search


. Enjoy mixing and matching these ideas! To store leftover grilled vegetable skewers, let them cool first. Place them in an airtight container. You can keep them in the fridge for up to three days. If you want to keep them longer, freezing is a better choice. When you're ready to eat leftovers, you have a few options for reheating. You can use the microwave for quick heat. Place the skewers on a plate and cover them with a damp paper towel. Heat for 30 seconds to 1 minute. You can also reheat them on the grill. This method helps keep the smoky flavor. Just grill them for about 5 minutes over low heat, turning occasionally. If you want to freeze grilled vegetable skewers, first remove the veggies from the skewers. Place the veggies in a single layer on a baking sheet. Freeze them for an hour, then transfer them to a freezer-safe bag. This way, they won't stick together. You can store them in the freezer for up to three months. When you're ready to use them, just thaw them overnight in the fridge. You can then reheat as mentioned above. Enjoy your flavorful grilled veggies anytime! For a full recipe, check out the vibrant grilled vegetable skewers. Yes, you can use frozen vegetables for skewers. However, fresh vegetables are better. Frozen veggies have more water. This can make them mushy when grilled. If you use frozen, thaw them first. Pat them dry to remove excess moisture. This helps keep them firm and tasty. You can tell the vegetables are done by looking at them. They should be tender and have nice grill marks. When a fork goes in easily, they are ready. Each vegetable cooks a bit differently. Zucchini and bell peppers may take less time than mushrooms. Keep an eye on them while grilling. Many dips go well with grilled vegetable skewers. Here are a few great options: - Hummus - Tzatziki - Garlic aioli - Ranch dip - Pesto Each dip adds a new flavor. You can mix and match to find what you love best. Enjoy exploring these tasty options! Grilling vegetable skewers is fun and easy. We covered tasty ingredients, from fresh veggies to zesty marinades. You learned step-by-step methods for marinating and grilling. I shared tips for the best grilling and how to achieve those perfect marks. Explore variations to suit your taste and consider storage tips for leftovers. Remember, this dish is adaptable. You can create a healthy meal that fits your style. Now, it’s your turn to fire up the grill and enjoy delicious skewers!](https://goldendishy.com/wp-content/uploads/2025/06/ba27ef34-bcc3-4460-8414-05014c8a22e5-768x768.webp)
![For the best peach avocado salsa, gather these fresh ingredients: - 2 ripe peaches, diced - 2 ripe avocados, peeled and diced - 1/2 medium red onion, finely chopped - 1 small jalapeño pepper, minced - 1/4 cup fresh cilantro leaves - Juice from 2 fresh limes - 1 tablespoon honey (optional) - Salt and freshly cracked black pepper Each ingredient brings its own flavor. Ripe peaches add sweetness, while avocados give creaminess. Red onion adds a sharp bite, and jalapeño provides heat. Cilantro brightens everything up, and lime juice gives freshness. Honey is optional, but it can enhance the sweetness if desired. This mix creates a vibrant salsa perfect for any occasion. When selecting your peaches, choose ones that yield slightly to pressure. They should be fragrant and free from bruises. For avocados, look for ones that are dark and firm but not rock hard. Freshness in these ingredients is key to a tasty dip. You can find the full recipe at the end of this section. Enjoy making this salsa! To make this peach avocado salsa, follow these simple steps. Each step brings you closer to a fresh and tasty dip. - Combine diced peaches and avocados Start by adding the diced peaches and avocados to a medium bowl. Use a spatula to mix them gently. Be careful not to mash the avocados. You want nice chunks for the perfect texture. - Add red onion and jalapeño Next, sprinkle in the finely chopped red onion and minced jalapeño. Mix them in lightly. This adds crunch and a little heat to the salsa. - Fold in cilantro gently Now, add the freshly chopped cilantro. Fold it into the mixture carefully. This keeps the avocados and peaches intact while adding a fresh flavor. - Squeeze lime juice and add honey Squeeze the juice from the limes over the salsa. This brightens the flavors. If you'd like a touch of sweetness, drizzle in the honey. Mix gently to coat everything evenly. - Season with salt and pepper Taste your salsa and season with salt and freshly cracked black pepper. Adjust according to your preference. Toss everything gently to combine the seasonings. - Let sit for flavor development For the best taste, let your salsa sit at room temperature for about 10 minutes. This allows the flavors to blend well together. If you want to see the full recipe, check out the [Full Recipe]. Enjoy making this vibrant, fresh dip! Choosing ripe peaches and avocados is key to a great salsa. Look for peaches that yield slightly to pressure. They should smell sweet and juicy. For avocados, pick ones that feel soft but not mushy. This ensures a creamy texture in your dip. Adjusting heat levels with jalapeño is easy. For less heat, remove the seeds and inner ribs. This part holds most of the spice. If you like it spicy, leave some seeds in. Start with a small amount and add more as needed. Enhancing sweetness with honey can balance the flavors. If your peaches aren't as sweet as you'd like, a tablespoon of honey works wonders. Mix it in gently so you don’t mash the fruit. This extra touch can make your salsa shine. Best pairings for your salsa include chips, grilled chicken, or fish. Tortilla chips add a nice crunch. For a healthy twist, serve it with grilled chicken or fish. The mild flavors of the salsa complement these dishes well. Presentation tips can help impress your guests. Serve the salsa in a rustic bowl. Top it with extra cilantro leaves for a fresh look. A colorful spread makes your table inviting and fun. You can even add lime wedges on the side for a pop of color. For the full recipe, check out the Peach Avocado Salsa section above. {{image_4}} You can get creative with your salsa by switching up ingredients. - Using mango instead of peaches: Mango adds a sweet twist. It gives a tropical flair to your salsa. Simply replace diced peaches with diced mango in equal amounts. - Adding diced bell peppers for crunch: For extra texture, you can add bell peppers. Diced red, yellow, or green peppers work well. They will add a nice crunch and color to your dish. - Incorporating garlic for additional flavor: If you love garlic, try adding a clove of minced garlic. It enhances the flavor profile and gives your salsa a savory kick. Making simple changes can fit different diets. - Making it vegan-friendly: This salsa is already vegan! Use natural sweeteners like agave instead of honey for a completely plant-based option. - Gluten-free serving options: All ingredients are gluten-free. Serve with gluten-free tortilla chips or fresh veggies. This makes it a great snack for everyone. For more details on making this delicious dip, check out the Full Recipe. To keep your peach avocado salsa fresh, place it in an airtight container. This helps prevent air exposure. It is best to refrigerate it right away. The cool temperature slows down spoilage. You can store it in the fridge for 2 to 3 days. After that, the avocados may brown and change in texture. If you notice browning, you can mix in a bit of lime juice to refresh it. Freezing salsa can be a great way to save extra. To freeze it effectively, put the salsa in a freezer-safe bag. Make sure to remove as much air as possible. This helps prevent freezer burn. You can freeze it for up to 3 months. When you want to use it, take it out and thaw in the fridge overnight. Once thawed, the texture may change slightly. It's still safe to eat and can be used in cooked dishes, like tacos or soups. For the best taste, try to use thawed salsa within a week. Peach avocado salsa shines with many dishes. It pairs wonderfully with tortilla chips, making it a great snack. You can also use it to top grilled chicken or fish for a fresh twist. It adds a burst of flavor to tacos or quesadillas too. This salsa can elevate any summer barbecue or picnic, making your meal feel bright and fun. Homemade peach avocado salsa stays fresh in the fridge for about three days. Store it in an airtight container to keep it from browning. After this time, the flavors may fade, and the texture can change. Always check for any off smells before eating. If it looks or smells funny, it’s best to toss it. Yes, you can easily adjust the spice in your salsa. If you want it milder, remove the seeds from the jalapeño. You can also skip the jalapeño entirely for a sweet salsa. For more heat, add extra minced jalapeño or even some crushed red pepper. Taste as you go to find your perfect balance. Making Peach Avocado Salsa is simple and fun. We covered fresh ingredients, step-by-step prep, and useful tips. Plus, we explored tasty variations and smart storage options. This salsa enhances any dish, from chips to seafood. Remember, you can change ingredients to match your taste. Enjoy sharing this bright, flavorful mix at your next meal. With a few tweaks, your salsa can shine every time.](https://goldendishy.com/wp-content/uploads/2025/06/096320e8-25bc-4efd-9183-2f1d952cbb9e-768x768.webp)

![To create this vibrant salad, gather these fresh ingredients: - 1 medium zucchini, sliced into half-moons - 1 bell pepper (red or yellow for sweetness), chopped into bite-sized pieces - 1 small eggplant, diced into uniform cubes - 1 cup cherry tomatoes, halved for a burst of sweetness - 1 red onion, cut into wedges for flavor - 3 tablespoons balsamic vinegar for a tangy kick - 2 tablespoons extra-virgin olive oil for richness - 1 tablespoon honey to balance the acidity - Sea salt and freshly cracked pepper to taste - 1 teaspoon dried oregano for an aromatic touch - 1 cup mixed greens (arugula, spinach, or your favorites) - ¼ cup feta cheese, crumbled (optional, for creaminess) - Fresh basil leaves for a fragrant garnish Not all ingredients need to be set in stone. Here are some smart swaps: - Use yellow squash instead of zucchini. The texture remains similar. - Any color bell pepper works well; green adds a more bitter taste. - Swap eggplant for mushrooms for a different texture and flavor. - Try different vinegars, like red wine vinegar, if balsamic is not available. - Maple syrup can replace honey for a vegan option. - For a dairy-free choice, omit feta cheese or use a vegan alternative. Choosing the right veggies makes a big difference. Here’s how to select the best: - Look for firm zucchini with shiny, smooth skin. Avoid soft spots. - Choose bell peppers that feel heavy and have smooth skin. - For eggplant, pick ones that are shiny and feel heavy for their size. - Cherry tomatoes should be plump and free from blemishes. - Pick red onions that are firm and have a vibrant color. - Visit local farmers' markets for the freshest produce whenever possible. These small choices can bring your Balsamic Roasted Vegetable Salad to life. For the complete recipe, check the [Full Recipe]. First, set your oven to 425°F (220°C). This high heat helps the veggies roast nicely. While the oven heats, grab a large mixing bowl. Add your sliced zucchini, chopped bell pepper, diced eggplant, halved cherry tomatoes, and red onion wedges. Mix them well. This step ensures every bite is packed with flavor. Next, take a small bowl. In it, combine 3 tablespoons of balsamic vinegar, 2 tablespoons of extra-virgin olive oil, and 1 tablespoon of honey. Add a pinch of sea salt and freshly cracked pepper. Finally, mix in 1 teaspoon of dried oregano. Whisk these ingredients together until smooth. This vinaigrette will bring a tangy and sweet kick to your salad. Now, line a baking sheet with parchment paper. Spread your mixed vegetables in a single layer. Make sure they are not crowded, as this helps them roast evenly. Place the baking sheet in the oven and roast for 20-25 minutes. Stir the vegetables halfway through. This mix ensures they cook evenly and get that lovely caramelization. Once the veggies are tender and golden, take them out and let them cool for a few minutes. In a large serving bowl, add your fresh mixed greens. Then, toss in the roasted vegetables. Gently mix until the greens and vegetables blend well. If you like, sprinkle ¼ cup of crumbled feta on top. Finally, add fresh basil leaves for a fragrant touch. Enjoy your colorful and tasty salad! For the full recipe, check out the details provided above. To get the best flavor, cut your vegetables into similar sizes. This step helps them roast evenly. Place them in a single layer on the baking sheet. Crowding the pan can cause steaming instead of roasting. Stir the vegetables halfway through cooking. This simple action helps them brown nicely on all sides. Always dress your salad right before serving. This keeps the greens fresh and crunchy. Use just enough dressing to coat the veggies. A light touch prevents sogginess. When mixing, toss gently to avoid bruising the greens. If you prefer more flavor, add more balsamic vinegar or a splash of lemon juice. Fresh herbs can elevate your salad. Try adding chopped parsley or cilantro for a fresh twist. You can also add a pinch of red pepper flakes for a kick. Experiment with spices like cumin or paprika for unique flavors. These additions can make your salad truly special and memorable. {{image_4}} You can mix and match veggies to suit your taste. Try adding carrots for sweetness or broccoli for crunch. Swap in asparagus for a fresh twist. You can even use sweet potatoes for a hearty base. The options are endless! Each veggie brings its own flavor and texture. You can create a new salad every time. Want to make this salad filling? Add proteins like grilled chicken or shrimp. Chickpeas or black beans also work well for plant-based options. They boost the protein without altering the salad's great taste. If you want a creamy touch, add avocado slices. These options turn your salad into a complete meal. This salad is easy to make vegan and gluten-free. Just skip the feta cheese or use a plant-based alternative. Use gluten-free grains like quinoa for added texture. You can also mix in nuts or seeds for crunch. These simple swaps keep your salad tasty while meeting dietary needs. Enjoy the fresh flavors without worry! For the full recipe, check out the Balsamic Roasted Vegetable Salad. Store leftover Balsamic Roasted Vegetable Salad in an airtight container. Make sure the salad is cool before sealing it. This keeps the flavors fresh and prevents sogginess. Try to eat the leftovers within three days for the best taste. I recommend using glass containers for storing your salad. Glass is non-reactive and helps keep the food fresh longer. If you prefer plastic, choose BPA-free containers. Make sure they fit your salad snugly to limit air exposure. To reheat roasted vegetables, place them on a baking sheet. Heat your oven to 350°F (175°C) and roast for about 10-15 minutes. This keeps the veggies crispy and warm. You can also reheat them in a skillet over medium heat for a few minutes. Just stir often to avoid burning. If you want to add a little moisture, a splash of balsamic vinegar can help revive the flavors. Enjoy your meal! Yes, you can make this salad ahead. Roast the veggies and prepare the salad. Keep the roasted veggies and greens separate. Store them in the fridge. Mix them just before serving for the best taste and texture. Mixed greens work great with roasted veggies. I love using arugula, spinach, or kale. They add crunch and a fresh taste. You can choose any greens you enjoy. Just pick ones that won’t wilt fast. Balsamic roasted vegetables last about 3 to 5 days in the fridge. Store them in an airtight container. The flavors will deepen over time, making them even tastier. Just reheat them before serving for a warm dish. You can use frozen vegetables, but fresh is best. Frozen veggies may release more water while cooking. If using frozen, roast them a bit longer. This helps them get nice and crispy. Balsamic roasted vegetable salad is easy and fun to make. We covered the ingredients, step-by-step instructions, and tips for the best results. You can customize this salad with different veggies or proteins. Proper storage keeps leftovers fresh, and I shared FAQs to answer common questions. Try this salad for a tasty and healthy meal. Enjoy making it your own!](https://goldendishy.com/wp-content/uploads/2025/06/26f5156f-9b75-49f6-aa69-260bfc3a782d-768x768.webp)