Skip to content
About
Contact
Cookie Policy
Copyright Policy
Disclaimer
Search
Home
Dinner
Appetizer
Desserts
Drinks
About
Contact
Privacy Policy
Toggle Menu
Home
/
Appetizer
- Page 10
Appetizer
Grilled Veggie Skewers Flavorful and Easy Recipe
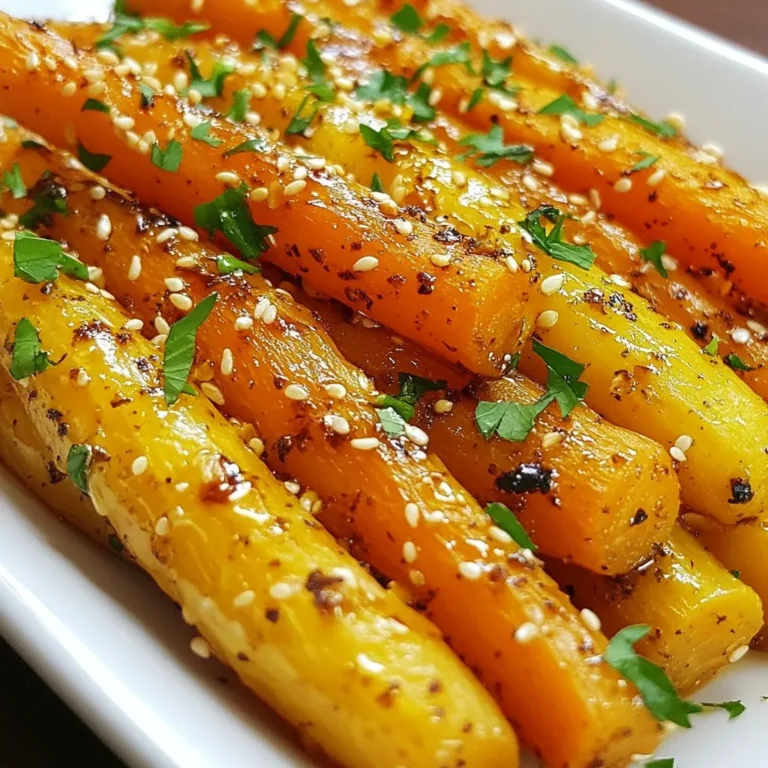
Honey Sesame Roasted Carrots Simple Flavorful Dish
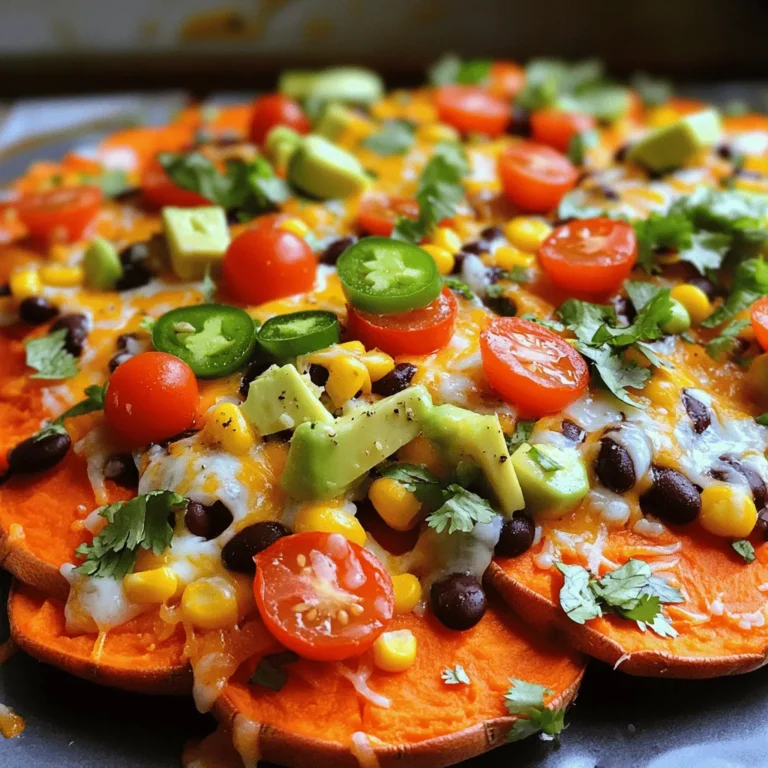
Loaded Sweet Potato Nachos Flavor-Packed Delight
Crispy Baked Eggplant Chips Irresistibly Crunchy Snack
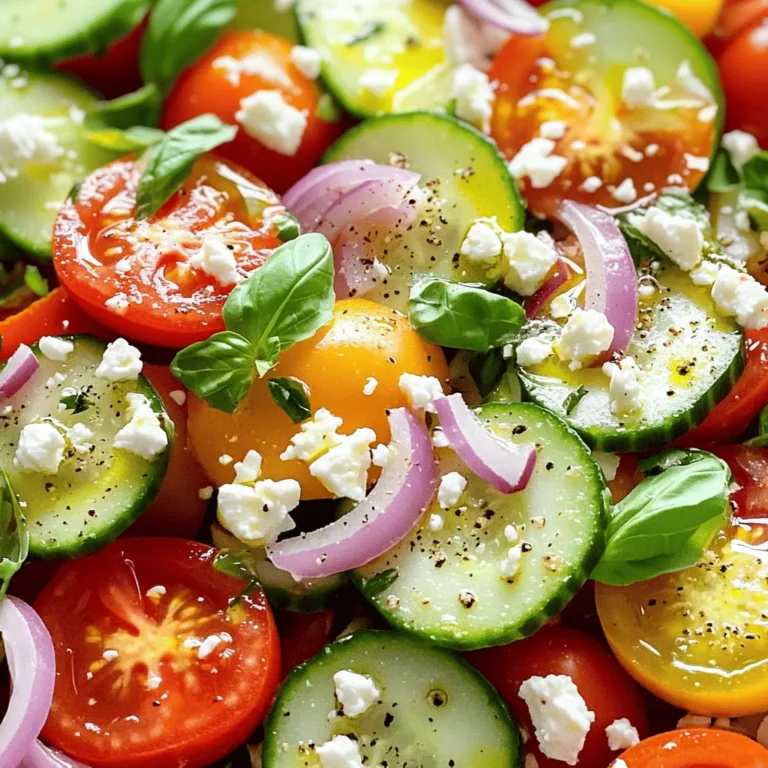
Fresh Tomato Cucumber Salad Vibrant and Easy Recipe
Cranberry Orange Energy Bites Easy and Nutritious Snack
Easy Mango Salsa Fresh and Flavorful Recipe Guide
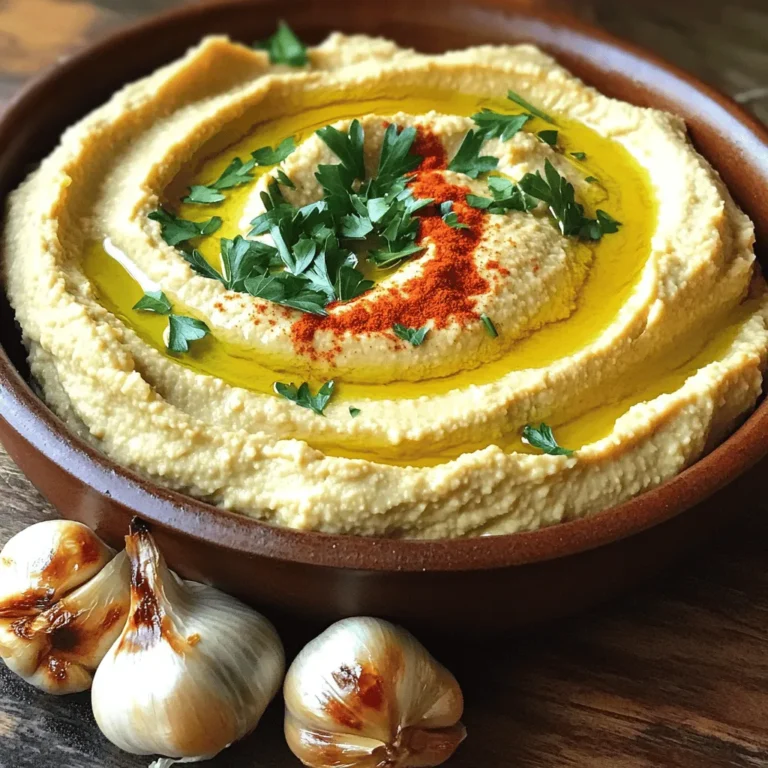
Roasted Garlic Hummus Creamy and Flavorful Spread
Savory Buffalo Chicken Meatballs Easy and Flavorful
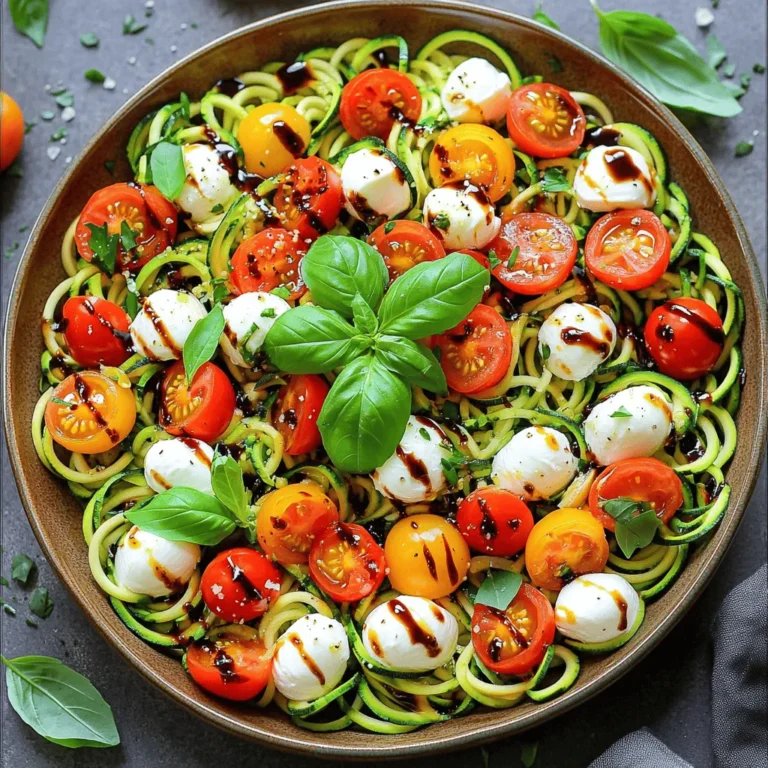
Caprese Zoodle Salad Fresh and Flavorful Delight
Page navigation
Previous Page
Previous
1
…
8
9
10
11
12
…
19
Next Page
Next
Home
Dinner
Appetizer
Desserts
Drinks
About
Contact
Privacy Policy
Toggle Menu Close
Search for:
Search

![- Bell pepper (red, yellow, or green) - Zucchini and yellow squash - Red onion and cherry tomatoes - Mushrooms When I make grilled veggie skewers, I choose a mix of colorful vegetables. They not only look great but also taste fantastic. Bell peppers are a must. You can pick red, yellow, or green. Each type adds a sweet taste. Zucchini and yellow squash are next. Their soft texture and mild flavor work well on the grill. I like to cut them into thick rounds. This helps them hold their shape while cooking. Red onions add a nice bite. I cut them into wedges so they cook evenly. Cherry tomatoes are fun and juicy. I use them whole, so they burst with flavor when grilled. Finally, I love mushrooms. They soak up the marinade and get smoky when grilled. - Olive oil, garlic powder, smoked paprika - Salt and black pepper To bring out the flavors, I use a simple marinade. I drizzle extra virgin olive oil over the veggies. It helps the spices stick and adds richness. I sprinkle garlic powder for a savory kick and smoked paprika for a hint of smoke. Don’t forget to add salt and black pepper. They enhance all the natural flavors. I mix everything well, so each piece is coated. This step is crucial for a tasty outcome. - Fresh basil leaves After grilling, I like to add fresh basil leaves. They give a burst of color and flavor. Just tear them up and sprinkle on top of the skewers. This final touch makes the dish even more inviting. For the full recipe, check out the [Full Recipe]. First, we need to get our grill ready. Preheating is key to good grilling. It helps to cook the veggies evenly and gives them nice grill marks. Set your grill to medium-high heat. This temperature is perfect for cooking our colorful skewers. Let’s prep our vegetables. Start by cutting them into pieces. Cut the bell pepper into 1-inch chunks. Slice the zucchini and yellow squash into thick rounds. Cut the red onion into wedges. Keep the cherry tomatoes whole and use whole mushrooms or half them if they are large. Next, we’ll mix the veggies. Place all the cut veggies in a big bowl. Drizzle them with olive oil and sprinkle in garlic powder, smoked paprika, salt, and black pepper. Now, toss everything gently with your hands or a spatula. Make sure each piece is well-coated with the seasoning. This step adds a lot of flavor! Now comes the fun part: assembling the skewers. Take a skewer and start threading the veggies. Alternate the types of veggies to create a colorful mix. This not only looks great but also adds different flavors in every bite. Be careful when handling the skewers. The ends can be sharp, so keep your hands clear when you thread the veggies. Once you finish, your skewers are ready for the grill. For the full recipe, check out the details above. Grilling veggie skewers is simple and fun. Aim for a medium-high heat. This ensures your veggies cook well. Grill them for about 10-12 minutes. Turn them often to get nice grill marks. You want them tender but not mushy. To boost flavor, try adding spices like cumin or dill. A splash of lemon juice also brightens the taste. For a smoky flavor, use smoked paprika or a dash of liquid smoke. Marinades can add depth, too. A blend of olive oil, vinegar, and herbs works great. For a beautiful presentation, stand skewers upright in a holder. You can also lay them on a platter. Drizzle with olive oil and sprinkle fresh herbs. Pair the skewers with dips like hummus or tzatziki. These add flavor and make serving easier. Check out the Full Recipe for more ideas! {{image_4}} You can mix and match veggies for your skewers. Seasonal vegetables make great choices. In summer, try zucchini and corn. In fall, use butternut squash and Brussels sprouts. You can also add eggplant for a nice smoky taste. Asparagus gives a nice crunch and fresh flavor. If you can’t grill, you can bake or roast your skewers. For oven-baking, preheat your oven to 400°F (200°C). Place the skewers on a baking sheet. Bake for about 20 minutes. Keep an eye on them to ensure they don’t burn. Roasting gives a rich taste and helps the flavors blend well. This recipe is easy to adapt for different diets. For a vegan version, stick to the veggies and oil. If you need gluten-free options, all ingredients in this recipe work well. Just make sure to check labels on sauces or seasonings. You can enjoy tasty skewers that fit your needs by making small swaps. For the full recipe, check the details above. To keep your grilled veggie skewers fresh, use airtight containers. Store them in the fridge right after they cool down. Make sure to eat them within three days for the best taste and quality. If you notice any moisture, add a paper towel inside the container to soak it up. You can reheat skewers in the microwave or on the grill. For the microwave, place them on a plate and cover them with a damp paper towel. Heat in short bursts to avoid overcooking. To reheat on the grill, warm it up and place the skewers back on for a few minutes. This keeps the texture nice and doesn't make them soggy. To freeze skewers, wrap them tightly in plastic wrap and place them in a freezer bag. Make sure to remove as much air as possible. They can last for up to three months in the freezer. When you’re ready to eat them, thaw them in the fridge overnight. Reheat on the grill or in the oven to restore their flavor and texture. For the full recipe, check out the details above. I prefer metal skewers for grilling. They heat up quickly and help cook the veggies evenly. They are also reusable, making them eco-friendly. Wooden skewers are lighter but can burn easily. If you use wooden skewers, you need to soak them in water first. This helps prevent them from catching fire. Both types work well, so choose what you like best. Yes, you can use frozen vegetables. They are convenient and save time. However, frozen veggies may not have the same texture as fresh ones. They can become mushy when cooked. If you choose to use them, thaw them first. Pat them dry to remove extra moisture before grilling. This helps keep them from steaming and allows for better grilling. To prevent sticking, coat your vegetables with olive oil. This adds flavor and creates a barrier. Preheat your grill well before adding the skewers. A hot grill helps to sear the veggies quickly. Turn them gently with tongs. Avoid using a fork, as this can pierce the vegetables and let juices escape. Keep an eye on them, so they don't burn. Soaking wooden skewers is a good idea. It prevents them from burning on the grill. Soak them for at least 30 minutes before using. This helps them stay intact while grilling. If you skip soaking, watch them closely as they cook. You might need to turn down the heat to avoid burning. Soaking is a simple step that makes grilling easier. This blog post guides you on making vibrant vegetable skewers. We covered key ingredients, including bell peppers, zucchini, and cherry tomatoes. I shared tips for preparing the grill and veggies, along with assembling skewers safely. Remember optimal grilling time and temperature for the best results. You can try different vegetables or cooking methods for variety. Don’t forget about storing leftovers properly for later enjoyment. With the right techniques, you’ll create tasty skewers that impress. Your grilling skills can elevate any meal!](https://goldendishy.com/wp-content/uploads/2025/06/899b9bee-2fb2-475c-b5a5-3b543ce01d01-768x768.webp)

![To make Cranberry Orange Energy Bites, you need the right mix of flavors and textures. Here’s what you will need: - 1 cup rolled oats - 1/2 cup almond butter - 1/4 cup honey or maple syrup - 1/2 cup dried cranberries, finely chopped - Zest of 1 medium orange - 1/4 cup freshly squeezed orange juice - 1/4 cup chia seeds - 1/2 teaspoon ground cinnamon - Pinch of sea salt - Optional: 1/4 cup chopped nuts or seeds These ingredients come together to create a tasty and healthy snack. The oats provide fiber and energy. Almond butter adds protein and a creamy texture. Honey or maple syrup gives a touch of sweetness, while dried cranberries add a chewy burst of flavor. The zest and juice of the orange brighten the bites, making them refreshing. Chia seeds add crunch and healthy omega-3s. You can also mix in nuts or seeds for extra texture. They can make your bites even more filling. You can find the full recipe for the perfect energy bites in the recipe section above. - Mixing the Base Ingredients Start by taking a large bowl. Add 1 cup of rolled oats, 1/2 cup of almond butter, and 1/4 cup of honey or maple syrup. Mix with a sturdy spoon until everything blends well. This base forms the heart of your energy bites. - Adding Flavorful Components Next, stir in 1/2 cup of finely chopped dried cranberries, the zest of 1 medium orange, and 1/4 cup of freshly squeezed orange juice. Also, add 1/4 cup of chia seeds, 1/2 teaspoon of ground cinnamon, and a pinch of sea salt. Keep mixing until you see a uniform color and texture. - Achieving the Right Texture Use your hands or a spatula to mix the ingredients thoroughly. You want a sticky but manageable consistency. If it feels too dry, add a bit more orange juice. If it’s too wet, sprinkle in extra oats until it feels just right. - Rolling Into Balls After you’ve mixed everything, cover the bowl with plastic wrap or a lid. Chill the mixture in the fridge for about 30 minutes. Once chilled, take portions and roll them into 1-inch balls. You should get about 15 to 20 bites. - Optional Coating with Nuts or Seeds For added crunch and flavor, roll some of the balls in chopped nuts or seeds. This step is optional, but it gives a nice touch to each bite. - Chilling the Mixture After rolling, arrange the energy bites on a plate. You can chill them for an extra 10 to 15 minutes to firm them up even more. This makes them easier to eat. - Presentation Tips For a pretty display, stack the energy bites or place them in a rustic jar. You can sprinkle some extra orange zest on top for color and aroma. Enjoy your tasty, nutritious snack! Check the [Full Recipe] for more details. - Best Practices for Freshness: Store energy bites in an airtight container. This keeps them moist and tasty. - Duration of Shelf Life: These bites last up to 1 week in the fridge. After that, they may dry out. - Freezing Energy Bites for Later Use: You can freeze these bites. Place them in a single layer on a tray. Once frozen, store them in a bag. They can last for up to 3 months. - Preparing in Bulk: Make a double batch! This way, you always have a quick snack ready. - Overmixing or Undermixing: Mix just enough to combine all ingredients. Too much mixing can make them tough. - Adjusting Consistency: If the mixture is too dry, add more juice. If too wet, mix in more oats. Always aim for a sticky but manageable mixture. For the full recipe, check out Cranberry Orange Energy Bites. {{image_4}} You can mix things up by adding different nuts. Walnuts, almonds, or pecans give a nice crunch. Just chop them finely and fold them into the mix. You can use about 1/4 cup of your choice. Incorporating other fruits can also change the flavor. Try using dried apricots, raisins, or figs. They add sweetness and texture. Just chop them to match the size of the cranberries. If you want a vegan option, swap honey for maple syrup. This keeps the bites sweet without using animal products. Almond butter is already vegan, so you’re set there! For gluten-free substitutions, choose certified gluten-free oats. Most oats are naturally gluten-free but can get cross-contaminated. Make sure to check the label. Using different nut butters can change the taste and texture. Peanut butter or cashew butter works great. Just use the same amount as almond butter. Adjusting crunchiness with seeds is another fun option. Add chia seeds or flaxseeds for some extra bite. You can also toss in sunflower seeds for a nut-free crunch. The cranberry orange energy bites are packed with nutrients. Each ingredient brings unique health benefits. - Rolled oats offer fiber, which helps digestion and keeps you full. - Almond butter is a great source of healthy fats and protein. - Dried cranberries add antioxidants that fight free radicals. - Chia seeds are rich in omega-3s and help with heart health. - Orange juice boosts your immune system with vitamin C. These bites provide energy and nutrients to fuel your day. They are perfect for a quick boost before a workout or during a busy afternoon. How many bites should you eat for a snack? I suggest two to three bites. This gives you enough energy without overdoing it. Each bite is satisfying. Dietary recommendations may vary. Listen to your body. If you feel hungry after two bites, enjoy another! Balance is key. Each bite contains about 70 calories. This makes it easy to track your snack intake. If you want fewer calories, consider adjusting the recipe. You can reduce the honey or use less nut butter. This way, you can fit these bites into your dietary goals without losing flavor. For more details, check the full recipe. Enjoy these tasty energy bites while staying mindful of your nutrition! Cranberry orange energy bites can last up to one week in the fridge. Store them in an airtight container to keep them fresh. If you want to keep them longer, you can freeze them. They can last up to three months in the freezer. Just thaw them in the fridge before enjoying. Yes, you can substitute almond butter with other nut butters. Peanut butter, cashew butter, or sunflower seed butter work well. Each will give a unique taste. Make sure to choose one that fits your dietary needs. You can use the mixture for various snacks. Try spreading it on toast or mixing it into yogurt. You can also make energy bars by pressing the mixture into a pan and slicing it. This way, you have more options for your snack. To make them sweeter, you can add more honey or maple syrup. You can also mix in some chocolate chips or dried fruits like dates. Adjust the sweetness based on your taste. This way, you can create a snack that you love. Yes, there are many alternatives for honey or maple syrup. You can use agave nectar, brown rice syrup, or coconut nectar. Each of these will add a different sweetness. Just make sure to adjust the amount based on how sweet you want your bites to be. For the full recipe, check out the recipe section above. These Cranberry Orange Energy Bites are simple to make and taste great. You mix healthy ingredients, shape them into bites, and enjoy a tasty snack. Remember to store them properly to keep them fresh. You can also tweak ingredients for your tastes or diet. With these tips and flavor ideas, you’ll enjoy these bites any time you need a quick boost. Get creative and make this snack your own!](https://goldendishy.com/wp-content/uploads/2025/06/5774e534-56b3-4e6d-8a48-215f930e3d22-768x768.webp)