Caramelized Onion Tart Simple and Delicious Recipe

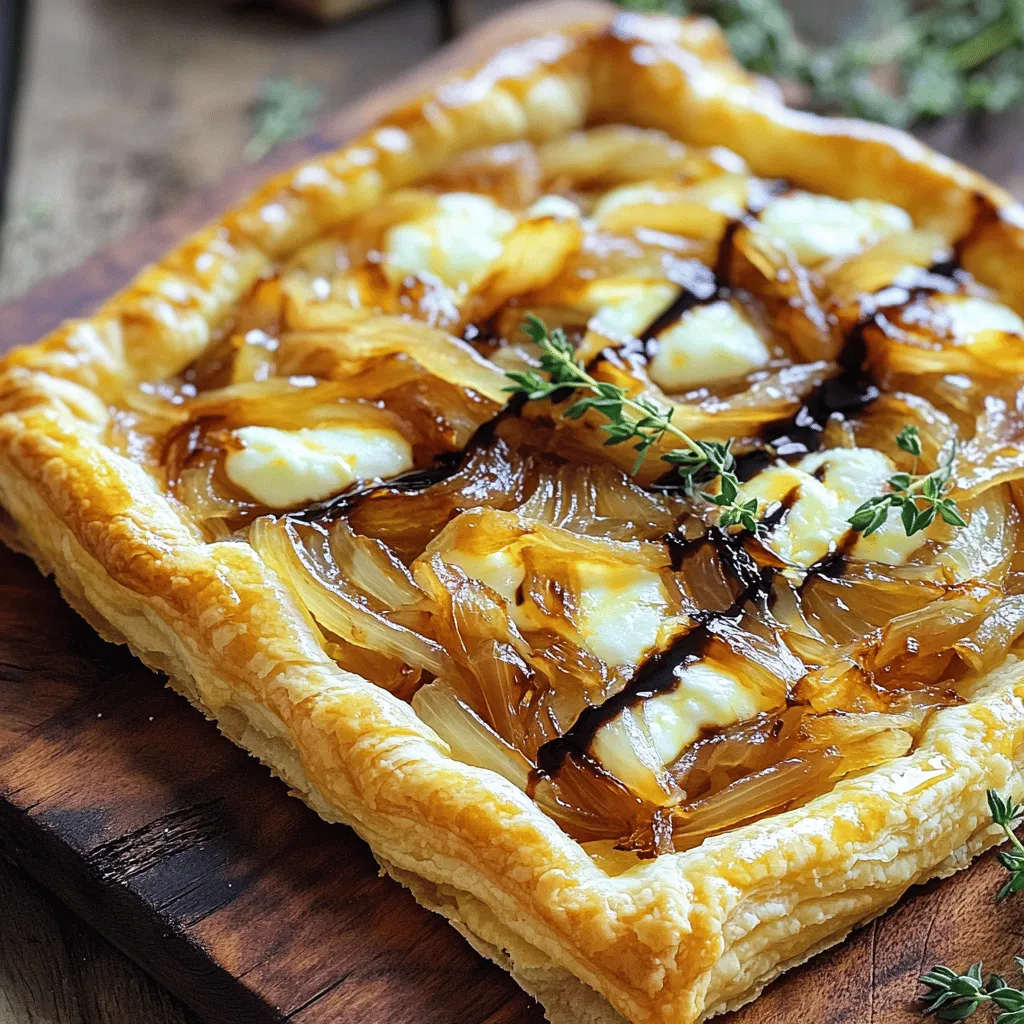
If you’re looking for a delicious and simple dish, this caramelized onion tart is perfect. You’ll find rich, sweet onions paired with a crispy crust that will impress anyone. It’s easy to make, and I’ll walk you through each step. Plus, I’ll share some tips and variations to make it your own. Let’s get started on creating a dish that will shine at any meal!
Ingredients
List of Ingredients
– 4 large yellow onions, finely sliced
– 2 tablespoons olive oil
– 2 tablespoons unsalted butter
– 1 teaspoon sugar
– 1 teaspoon salt
– 1 teaspoon fresh thyme leaves (or ½ teaspoon dried thyme)
– 1 cup ricotta cheese
– 1 cup shredded mozzarella cheese
– 1 pre-made puff pastry sheet (thawed)
– Freshly cracked black pepper, to taste
– Balsamic glaze (for drizzling, optional)
Optional Ingredients
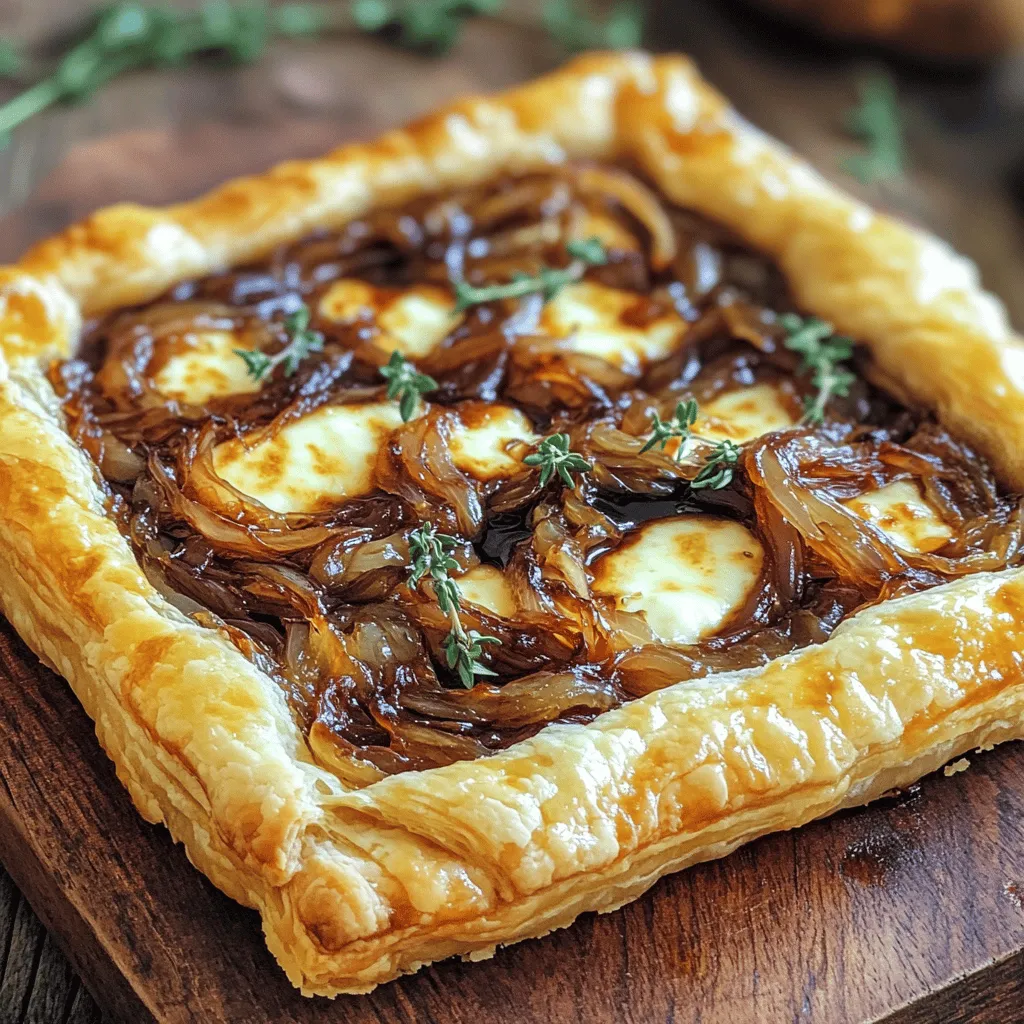
You can add a pinch of red pepper flakes for heat. A sprinkle of Parmesan cheese can enhance the flavor. Try adding sautéed mushrooms for depth. You can also use goat cheese instead of ricotta for a tangy twist.
Ingredient Substitutions
If you don’t have yellow onions, use sweet onions. For a dairy-free option, swap ricotta with cashew cheese. You can replace mozzarella with any cheese that melts well, like Gouda. If you lack fresh thyme, dried herbs will work great too.
Step-by-Step Instructions
Prepping the Onions
To start, take your large yellow onions and slice them thinly. I like to use a sharp knife for this step. In a large skillet, melt the butter with the olive oil over medium heat. Once it’s hot, add the sliced onions, sugar, and salt. Stir often to prevent sticking. Cook for about 25-30 minutes. You want the onions to turn a nice golden brown. During the last five minutes, mix in the fresh thyme leaves. Take the skillet off the heat and let the onions cool a bit.
Preparing the Pastry
Now it’s time to work on the puff pastry. Take your thawed pastry sheet and place it on a lightly floured surface. Roll it out gently with a rolling pin to remove any creases. Next, transfer it to a baking sheet lined with parchment paper. You can shape the pastry into a rectangle or a circle based on your preference. Trim the edges if you want a neat look.
Assembling and Baking the Tart
In a small bowl, mix the ricotta cheese with a pinch of black pepper. Spread this mixture evenly over the puff pastry, leaving a small border around the edges. Now, it’s time for the caramelized onions. Spoon them over the ricotta layer, spreading them out evenly. Finally, sprinkle the shredded mozzarella cheese on top.
Place the tart in the preheated oven at 400°F (200°C). Bake for about 20-25 minutes. You want the pastry to turn golden brown and the cheese to bubble. Once done, take it out and let it cool for a few minutes. If you like, drizzle some balsamic glaze over the tart. Slice it into wedges and serve warm or at room temperature. Enjoy your delicious creation!
Tips & Tricks
Perfecting the Caramelization
To get the best flavor from the onions, use low heat. This avoids burning. Stir the onions often. It helps them cook evenly. The sugar in the recipe enhances the natural sweetness. You want soft, brown onions. This may take 25-30 minutes. Be patient! The longer they cook, the deeper the flavor.
Serving Suggestions
This tart is great warm or at room temperature. Serve it as an appetizer or a side dish. Pair it with a fresh salad for a nice balance. A light vinaigrette works well to cut through the richness. For a twist, add a dollop of sour cream on top.
Presentation Tips
Make the tart shine by serving it on a wooden board. Add sprigs of fresh thyme for color. This gives a rustic look that feels inviting. Slice the tart into wedges for easy serving. A drizzle of balsamic glaze adds a beautiful touch. Your guests will be impressed with the look and taste!

Variations
Adding Cheese Blends
You can spice up the tart by adding different cheese blends. Creamy goat cheese pairs well with caramelized onions. You can also use sharp cheddar for a bold taste. Mixing cheeses adds depth and richness to each bite. Try a blend of mozzarella and gouda for a smoky flavor. Cheese not only enhances taste but also improves texture.
Herb Infusions
Fresh herbs can elevate your tart. Basil and rosemary add a nice twist. You can mix in chopped parsley for a fresh note. Consider using sage for an earthy flavor. Infusing herbs into the onion mixture adds more aroma and depth. Always adjust the amount based on your personal preference. Herbs can transform a simple dish into something special.
Vegetable Additions
You can add other vegetables for extra nutrition and flavor. Spinach or kale works well, adding color and health benefits. Roasted red peppers bring sweetness and a pop of color. Mushrooms add a lovely umami taste. Just sauté them briefly before adding to the tart. Mix and match your favorites to create a unique version. These additions make your tart hearty and satisfying.
Storage Info
Storing Leftovers
To store your caramelized onion tart, first let it cool. Wrap it tightly in plastic wrap or foil. Place it in the fridge. It will stay fresh for up to three days. Make sure to keep it covered to prevent it from drying out.
Freezing the Tart
You can freeze the tart for later use. After cooling, wrap it well in plastic wrap, then in foil. This helps prevent freezer burn. The tart will last up to three months in the freezer. When you’re ready to eat it, let it thaw in the fridge overnight.
Reheating Instructions
To reheat your tart, preheat the oven to 350°F (175°C). Remove the plastic wrap but keep the foil on. Place the tart in the oven for about 15-20 minutes. This warms it through and keeps the crust crisp. You can also microwave individual slices for about 1-2 minutes, but the crust may not be as crispy. Enjoy your delicious tart!
FAQs
Can I make this tart in advance?
Yes, you can make this tart ahead of time. Prepare the tart up to the baking step. Cover it and store it in the fridge for one day. When ready to bake, simply remove it from the fridge and let it sit at room temperature for 15 minutes. Then bake it as directed. This saves time and gives you a warm treat later.
What can I serve with caramelized onion tart?
Caramelized onion tart pairs well with many sides. Here are some great options:
– Mixed green salad with a light vinaigrette
– Roasted vegetables for added flavor
– A bowl of creamy soup, like tomato or potato
– Fresh fruit, such as sliced pears or apples
These sides balance the rich flavors of the tart, enhancing your meal.
How do I know when the onions are properly caramelized?
You can tell onions are caramelized when they are soft and golden brown. This process takes about 25-30 minutes. Stir the onions often to prevent burning. If they stick to the pan, add a splash of water. The sugar in the onions will bring out a sweet flavor, which is key to a great tart.
This blog post covered all you need to know for a perfect caramelized onion tart. We discussed key ingredients, how to prepare them, and tips to enhance flavor. Remember, the right techniques can make a big difference. Whether you add cheese or herbs, there are many tasty variations. Store leftovers properly, and reheating is simple. This tart is not just a treat; it’s a creative dish you can share. Enjoy your cooking and impress friends with this delicious recipe!


![- 1 can (15 oz) chickpeas, drained and rinsed - 2 ripe avocados - 1 tablespoon fresh lemon juice - 1 clove garlic, finely minced Chickpeas and avocados are the stars of this dish. Chickpeas give a nice, hearty feel. They are rich in protein and fiber. Ripe avocados add creaminess and healthy fats. Lemon juice brightens the mix, while garlic adds depth. - 1/4 teaspoon ground cumin - Salt and freshly ground black pepper - 4 slices of whole grain bread Cumin brings warmth to the mix. Salt and pepper help enhance the flavors. Whole grain bread gives a hearty base that complements the toppings well. Choose bread that toasts nicely for the best crunch. - 1 small red onion, finely chopped - 1/2 cup cherry tomatoes, halved - Fresh cilantro or parsley, chopped - Extra virgin olive oil for drizzling Toppings add fun and flavor. Red onion gives a sweet bite, while cherry tomatoes add freshness. Fresh herbs like cilantro or parsley add color and taste. A drizzle of olive oil adds richness that ties everything together. For the full recipe, check the [Full Recipe]. 1. Start by opening the can of chickpeas. Drain and rinse them well. This helps remove extra sodium and gives a cleaner taste. 2. In a medium bowl, use a fork or potato masher to lightly mash the chickpeas. Aim for a mix of chunky and smooth. This texture makes the spread more fun to eat. 3. Next, scoop out the ripe avocados and add them to the bowl. The creaminess of the avocado balances the chickpeas perfectly. 4. Pour in the fresh lemon juice and add the minced garlic. This gives your mixture a zesty kick. 5. Sprinkle in the ground cumin, salt, and black pepper. Adjust the seasonings based on your taste. Mix everything together until it’s creamy but still a bit chunky. 1. Take your slices of whole grain bread. Lightly toast them in a toaster or on a skillet. Aim for a golden brown color. 2. For a perfect crunch, keep an eye on the bread while toasting. Too light and it’s soft; too dark and it burns. You want that nice, crispy bite. 1. Once your bread is ready, take a generous scoop of the chickpea-avocado mixture. Spread it evenly over each slice of toast. 2. Now, chop the red onion finely and halve the cherry tomatoes. Scatter these colorful toppings over the spread for a fresh crunch. 3. Drizzle a touch of extra virgin olive oil over the top. This adds richness and a lovely finish. 4. Finish with a sprinkle of fresh cilantro or parsley. This not only looks great but also adds a burst of flavor. For the full recipe, check out the [Full Recipe]. Enjoy your vibrant and flavorful chickpea avocado toast! To make your chickpea avocado toast burst with flavor, start by adjusting the seasonings. Everyone's taste is different, and you may want more lemon or salt. Adding spices can also elevate the taste. Fresh ingredients are key. Ripe avocados give a creamy texture that blends beautifully with chickpeas. Use freshly squeezed lemon juice for the best zing. When mashing chickpeas, aim for a mix of chunky and smooth. This gives a nice texture that feels great on the palate. Use a fork or potato masher for this. Avoid over-mashing; you want some bits to stay whole. Ripe avocados are essential too. If they are too firm, the mixture won’t be creamy. Look for avocados that yield slightly when pressed. Presentation matters when serving your toast. Arrange the toasts on a wooden or elegant platter. This adds a rustic charm. You can also place extra cherry tomatoes around the toasts. This makes the dish look colorful and fresh. Drizzle olive oil on top for a glossy finish. A sprinkle of herbs adds a pop of green and invites your guests to dig in. {{image_4}} You can easily change the flavor of your chickpea avocado toast. Start by adding spices like smoked paprika or chili flakes. They give a warm kick that brings out the creaminess of the avocado. You might also try adding fresh herbs like basil or dill. These herbs add a fresh twist and brighten up your dish. Explore different toppings to make your toast unique. Adding protein like feta cheese crumbles or a poached egg can boost flavor and nutrition. For extra crunch, consider adding thinly sliced radishes or refreshing cucumbers. These toppings not only add texture but also enhance the color of your dish. Chickpea avocado toast is great for brunch or a light lunch. You can serve it with a side salad or crispy sweet potato fries for a hearty meal. Pair it with a refreshing iced tea or a glass of lemonade to complete the experience. Each bite is a fresh and flavorful delight that you can enjoy any time of day. Check out the Full Recipe for more tips! To keep your chickpea mixture fresh, store it in an airtight container. This helps lock in flavors. Always refrigerate the mixture right after you finish your meal. For the toasted bread, keep it separate from the chickpeas. Wrap the slices in foil or place them in a zip-top bag. This prevents the bread from getting soggy. Yes, you can freeze the chickpea-avocado mixture! Just place it in a freezer-safe container. Leave some space at the top, as it will expand. When you're ready to use it, take it out and thaw it in the fridge overnight. For serving, give it a quick stir. This helps bring back its creamy texture. You can refrigerate leftovers for about three days. After that, the quality drops. Always check for signs of spoilage. If the mixture smells off or looks discolored, it’s best to toss it. Keep an eye out for any mold or an unusual texture. It’s better to be safe than sorry when it comes to food! For chickpea avocado toast, I love using whole grain bread. Its dense texture holds the spread well. Sourdough also works great; it adds a tangy taste. If you want something softer, try multigrain bread. Look for bread that is sturdy enough to support the toppings without getting soggy. Yes, this recipe is vegan! Both chickpeas and avocados are plant-based. You can enjoy this dish without any animal products. Just ensure that your bread is vegan-friendly too. Most whole grain and multigrain breads are vegan. To make this recipe gluten-free, choose gluten-free bread. Many stores offer a variety of gluten-free options now. Check the label to ensure it’s truly gluten-free. Also, all other ingredients in this recipe are gluten-free. You can enjoy this delicious toast without worry. Chickpeas are high in protein and fiber. They help keep you full and satisfied. Avocados provide healthy fats, which are good for your heart. Together, they make a nutritious combo. In terms of calories, this dish is balanced. One serving has around 300 calories, depending on the bread. Each ingredient adds its own nutrients. This makes chickpea avocado toast great for a snack or meal. This blog post covered the ingredients for chickpea avocado toast, how to prepare it, and tips for great flavor and texture. You learned about various toppings, ways to store leftovers, and how to adapt the recipe to meet dietary needs. Remember, chickpea avocado toast is fun to make and packed with nutrients. You can customize it for any meal. Try different flavors and toppings to keep things exciting. Enjoy experimenting and creating your own delicious versions!](https://goldendishy.com/wp-content/uploads/2025/07/d91d2ffa-6d2b-4892-832e-374b5d5b44d0-768x768.webp)
![- 4 medium zucchinis, sliced into 1/2-inch thick rounds - 4 tablespoons extra virgin olive oil - 2 tablespoons freshly squeezed lemon juice - 1 teaspoon freshly grated lemon zest - 2 teaspoons dried oregano - 1 teaspoon garlic powder - 1 teaspoon sea salt - 1/2 teaspoon freshly cracked black pepper - 2 tablespoons fresh parsley, finely chopped (for garnish) You can use other oils for grilling. Avocado oil or sesame oil works well. If you have fresh herbs, use them instead of dried ones. Fresh oregano or basil adds great flavor. Adjust the amount based on your taste. When selecting zucchinis, look for ones that are firm and shiny. Avoid any that feel soft or have blemishes. Choose smaller zucchinis for a sweeter taste. Check for seasonal zucchinis in late summer. They are often at their best during this time. To make the marinade, start with a large bowl. Add the olive oil, lemon juice, and lemon zest. Next, sprinkle in the dried oregano, garlic powder, sea salt, and black pepper. Whisk everything together until mixed well. This blend of flavors makes your zucchini taste great. Marinating time is key. Let the zucchini sit in the marinade for 10 to 15 minutes. This helps the zucchini soak up the zesty flavors. Skipping this step means missing out on rich taste. First, preheat your grill to medium-high heat, about 400°F (200°C). A hot grill gives your zucchini nice grill marks and a smoky flavor. When ready, carefully place the marinated zucchini rounds on the grill. Cook them for 3 to 4 minutes on each side. Watch for tender slices with grill marks. This means they are perfectly grilled. When done, transfer the zucchini to a serving platter. Arrange them in a fan shape for a pretty look. For garnish, sprinkle fresh parsley on top. This adds a pop of color and a burst of flavor. You can also drizzle extra olive oil and sprinkle sea salt for extra taste. Enjoy your Lemon Herb Grilled Zucchini! For the complete recipe, check the [Full Recipe]. To avoid sticking on the grill, start with a clean grill. Oil the grates well before adding zucchini. This creates a non-stick surface. Use a paper towel dipped in oil to wipe the grates. For even cooking, cut zucchini into uniform pieces. I recommend 1/2-inch thick rounds. This size cooks well without burning. Grill over medium-high heat for best results. You can boost flavor with fresh herbs like basil or thyme. They add a nice twist. For a bit of heat, try red pepper flakes or sliced jalapeños. Both pair well with the lemony taste. The best grill types for zucchini are gas or charcoal grills. Both give great flavor and heat. A grill basket can help keep slices from falling through the grates. Use tongs for safe flipping. For a great grilling experience, have a spatula and a timer handy. These tools help track cooking time and make flipping easy. For the complete process, check the Full Recipe. {{image_4}} You can change the flavors of your grilled zucchini by trying different herbs and spices. Instead of oregano, use thyme or basil for a fresh twist. You can also add a pinch of red pepper flakes for a little heat. Mixing in some smoked paprika can give your dish a nice depth. Incorporating other citrus flavors makes the marinade even more fun. Try lime or orange juice instead of lemon. Both options add a unique taste that pairs well with zucchini. You can also mix lemon with lime for a zesty combo. Grilled zucchini pairs well with many other vegetables. Bell peppers, eggplant, and asparagus are great choices. You can slice them into similar sizes for even cooking. Cooking times vary, so keep an eye on your veggies. Zucchini takes about 3-4 minutes per side. Bell peppers need about 5-7 minutes, while eggplant may take up to 8 minutes. This way, you can enjoy a colorful mix on your plate. Grilled zucchini makes a tasty side dish for many meals. It pairs well with proteins like grilled chicken, fish, or steak. You can also serve it alongside grains like quinoa or couscous for a filling meal. For fun side dish ideas, try serving grilled zucchini with a yogurt sauce. A sprinkle of feta cheese or a handful of nuts can also add a nice touch. For more flavor, drizzle balsamic glaze over the top. For a complete guide to making this dish, check out the Full Recipe. To store leftover grilled zucchini, let it cool first. Place it in an airtight container. This keeps it fresh and prevents odors from mixing. You can store it in the fridge. It usually lasts for about 3 to 5 days. Reheating grilled zucchini can be tricky. The best method is to use a skillet. Heat the skillet over medium-low heat. Add a small drizzle of olive oil. Place the zucchini in the skillet. Cook it for about 2 to 3 minutes on each side. This keeps the texture nice and firm. You can also add it to pasta or salads for a tasty twist. Yes, you can freeze grilled zucchini! To do this, let it cool completely first. Then, arrange the slices in a single layer on a baking sheet. Freeze them for about 1 to 2 hours. Once frozen, transfer the slices to a freezer bag. Remove as much air as possible. Grilled zucchini can last for up to 3 months in the freezer. When ready to use, thaw it in the fridge overnight. You can also toss it directly into soups or stews. For the full recipe, check out the Lemon Herb Grilled Zucchini recipe. To cut zucchini for grilling, slice it into 1/2-inch thick rounds. This thickness helps the zucchini cook evenly and stay firm. You can also cut them into long strips if you prefer a different shape. Just ensure your slices are uniform. This way, they will grill at the same rate. For added flavor, you can cut the zucchini lengthwise and brush the cut sides with olive oil. Yes, you can prepare Lemon Herb Grilled Zucchini ahead of time. To do this, marinate the zucchini slices a few hours before grilling. You can store them in the fridge for up to 24 hours in the marinade. This will enhance the flavor. Just remember to grill them right before serving for the best taste and texture. If grilling later, store the grilled zucchini in an airtight container. Grilled zucchini is very healthy. It is low in calories and high in vitamins. Zucchini is a great source of vitamin C, which boosts your immune system. It also contains potassium, which helps with heart health. Plus, grilling keeps the zucchini's nutrients intact while adding a nice smoky flavor. Enjoy it as a side dish or in salads. You can find the full recipe in the main article. In this article, we covered the key ingredients for Lemon Herb Grilled Zucchini and preparation steps. You learned how to marinate, grill, and enhance flavors. I shared tips for choosing fresh zucchini and creative variations. Remember, fresh ingredients lead to the best taste. Enjoy experimenting with different herbs or vegetables. Grilled zucchini is not just simple but also healthy and tasty. Now, you are ready to impress at your next meal!](https://goldendishy.com/wp-content/uploads/2025/06/34b028ee-fd33-4782-b46e-eaef12af4b53-768x768.webp)


![- 2 cups cooked chicken breast, shredded - 1 ripe avocado, mashed until smooth - 1/4 cup smooth Greek yogurt - 1 tablespoon freshly squeezed lemon juice - 1/4 cup red onion, finely chopped - 1/2 cup cherry tomatoes, halved - 1/4 cup celery, finely diced - 1/4 teaspoon garlic powder - Salt and freshly ground black pepper to taste - Fresh cilantro or parsley, chopped, for garnish The ingredients in creamy avocado chicken salad make it tasty and healthy. The chicken provides protein, while avocado adds healthy fats. Greek yogurt makes it creamy without extra calories. Fresh veggies like tomatoes and celery give a nice crunch. Using fresh ingredients is key. This brings out the best flavors. You can adjust the amounts based on what you like. For example, add more tomatoes if you love them. Don’t forget the seasoning! Salt and pepper enhance the taste. Fresh herbs like cilantro or parsley top it off perfectly. They add color and flavor. I recommend checking the full recipe for detailed steps. Enjoy making this delicious dish! - Combine mashed avocado, Greek yogurt, and lemon juice in a bowl. - Mix until smooth using a fork or whisk. To make the creamy dressing, start with a ripe avocado. Mash it in a bowl until it is smooth. Next, add 1/4 cup of Greek yogurt. This adds creaminess and protein. Then, squeeze in 1 tablespoon of lemon juice. This will brighten the flavor. Mix these three ingredients well with a fork or whisk. You want a creamy and smooth texture. This creamy dressing is the base of your salad and full of healthy fats. - Add shredded chicken to the avocado mixture. - Stir thoroughly to coat the chicken evenly. Now it’s time to add in the chicken. Use 2 cups of cooked chicken breast, shredded. You can use leftover chicken or rotisserie chicken for ease. Add the chicken to the creamy dressing. Stir well so every piece of chicken is coated. This adds protein and makes the salad filling. The creamy dressing brings all the flavors together. - Gently fold in red onion, cherry tomatoes, and celery. - Season with garlic powder, salt, and black pepper to taste. Next, let’s add some crunch and color. Gently fold in 1/4 cup of finely chopped red onion, 1/2 cup of halved cherry tomatoes, and 1/4 cup of diced celery. These veggies add freshness and texture. Now, season your salad. Add a pinch of garlic powder, salt, and freshly ground black pepper. Taste it and adjust the seasoning as needed. Mix gently so you don’t break the veggies. Now, your creamy avocado chicken salad is ready to serve! Check out the Full Recipe for more details. - Look for avocados that yield slightly to pressure. - Check the color; ripe avocados usually have a darker skin. Selecting the perfect avocado is key for your creamy avocado chicken salad. When you gently press the avocado, it should give a bit. This tells you it is ripe and ready to use. A darker skin tone often means ripeness, but don't rely on color alone. Always feel for that slight softness! - Use rotisserie chicken for convenience. - Ensure chicken is fully cooked; internal temperature should reach 165°F (75°C). Cooking the chicken can take time, but using rotisserie chicken saves you effort. It offers great flavor and saves cooking time. If you cook your own chicken, make sure to check the internal temperature. It needs to reach 165°F (75°C) to be safe to eat. - Serve in individual bowls, atop lettuce leaves, or in a wrap. - Consider a lemon wedge on the side for added flavor. Serving your salad can be fun! You can use individual bowls or place it on crisp lettuce leaves. If you want a wrap, that works too. A lemon wedge on the side brightens the meal and adds a zesty kick. For the full experience, try the [Full Recipe]. Enjoy your tasty and healthy choice! {{image_4}} You can make your creamy avocado chicken salad even better by adding fruits. Diced apples or grapes bring a nice sweetness. They also add a nice crunch. If you want a tropical twist, try adding mango. Its juicy flavor blends well with creamy avocado. Not in the mood for chicken? You can easily swap it out. Canned tuna or chickpeas work well for a vegetarian option. Both of these options add protein and flavor. If you love seafood, consider using grilled shrimp. It adds a fresh, light taste to the salad. Want to spice things up? Adding spices can really boost the flavor. Try cumin or smoked paprika for a warm kick. If you like heat, toss in some jalapeños. These will give your salad a spicy edge that keeps it exciting. Feel free to get creative with your mix-ins! Each variation gives you a new twist on this delicious dish. Check out the Full Recipe for more ideas. Store your creamy avocado chicken salad in an airtight container in the refrigerator. It will stay fresh for up to 2 days. I suggest enjoying it right after you make it. However, if you keep the ingredients separate, it can last a little longer. This way, you keep the textures nice. Do not freeze the salad. Avocado gets mushy when frozen. If you want to prepare ahead, consider freezing the chicken on its own. This will keep it fresh and ready for your salad. Prep your ingredients ahead of time. Store them separately to mix later. This salad is a great option for busy weeks. You can have a tasty meal ready in minutes! For the full recipe, check out the detailed instructions above. Typically lasts for about 2 days when stored properly. I recommend using an airtight container. This helps keep your salad fresh and tasty. After two days, the avocado may brown and lose its creamy texture. Yes, but it’s best to combine the ingredients just before serving to maintain freshness. If you prepare it early, store the salad components separately. This way, the avocado stays bright and creamy. Great with whole-grain bread, crackers, or a side of fruit. I love serving it on toast for a hearty lunch. Pairing it with fresh fruit offers a nice, sweet contrast. You can also use it as a filling in wraps for a tasty twist. For the full recipe, check out the detailed steps above. This creamy avocado chicken salad is easy to make and full of flavor. We covered the main ingredients, steps, and tips to perfect it. You learned how to mix chicken with creamy dressing and fresh veggies. Remember to store leftovers properly for the best taste. Enjoy this salad as a quick meal or snack. Feel free to customize with your favorite ingredients. With these simple tips, you can create a dish that is both healthy and delicious.](https://goldendishy.com/wp-content/uploads/2025/06/50306de2-9119-4a0c-8cb7-3da0c4c0a2a4-768x768.webp)