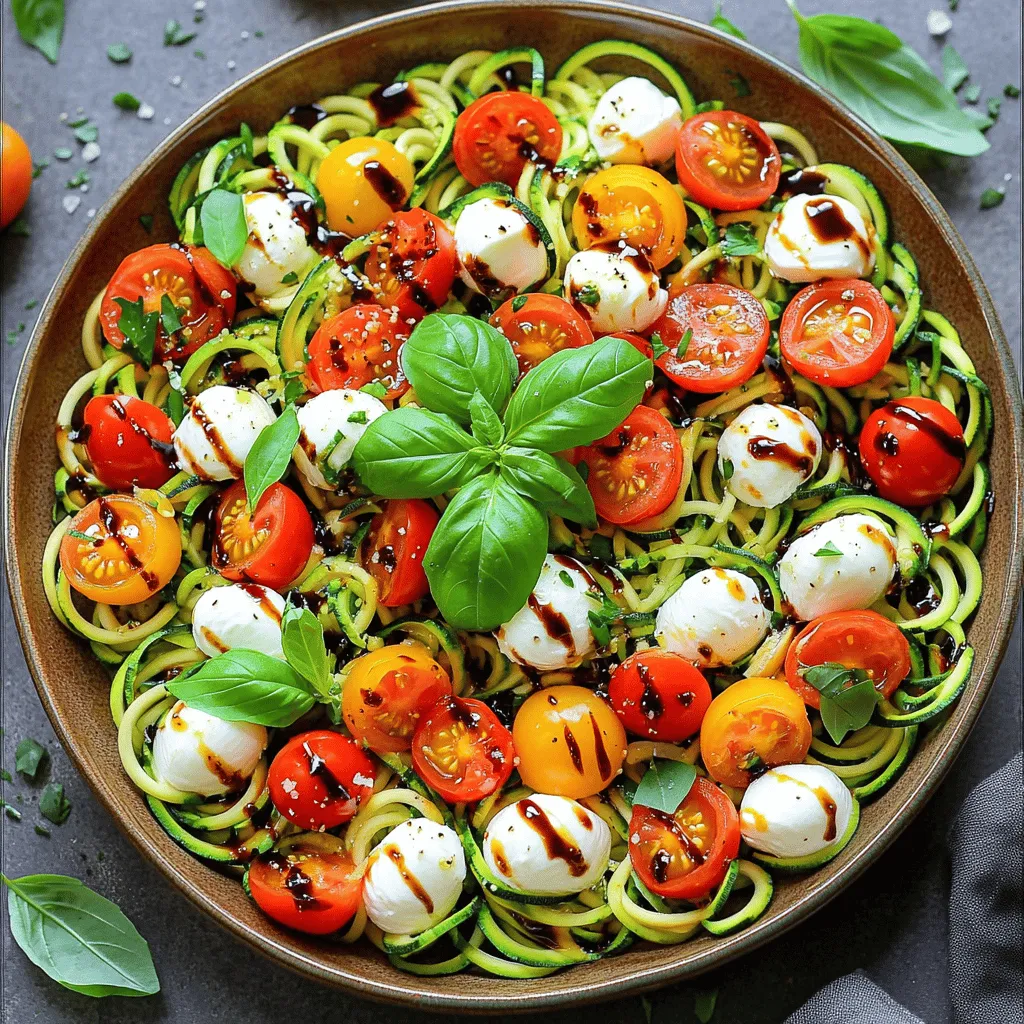
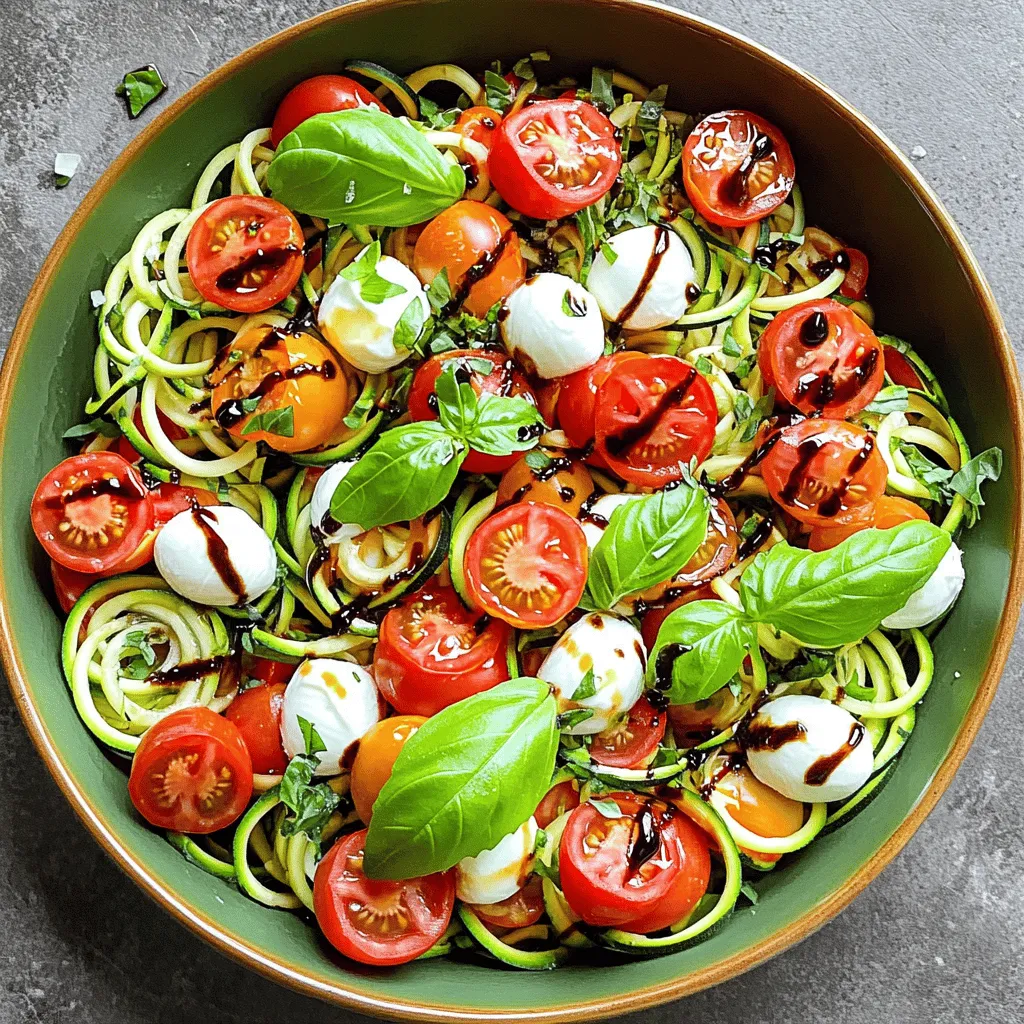
Looking for a fresh and tasty dish? Try my Caprese Zoodle Salad! This recipe blends vibrant zucchini noodles with juicy tomatoes and creamy mozzarella. It’s not just healthy; it’s easy to make and bursting with flavor. Whether you’re new to zoodles or a seasoned pro, you’ll find helpful tips and tricks here. Let’s dive into this simple, yet delightful, salad that’s perfect for any meal!
Ingredients
List of Required Ingredients
To make a delicious Caprese Zoodle Salad, you need the following ingredients:
– 2 medium zucchinis, spiralized to create zoodles
– 1 cup cherry tomatoes, halved for sweetness
– 1 cup fresh mozzarella balls (bocconcini), providing creamy texture
– 1/4 cup fresh basil leaves, torn to release fragrance
– 2 tablespoons balsamic vinegar, adding tangy depth
– 2 tablespoons extra virgin olive oil, offering richness
– Salt and freshly ground black pepper to taste
– 1/4 teaspoon garlic powder (optional for extra flavor)
Substitutions for Dietary Preferences
If you need to change the recipe, there are great swaps:
– Use yellow squash instead of zucchini for a different taste.
– Replace mozzarella with a vegan cheese option for dairy-free diets.
– Swap balsamic vinegar with lemon juice for a lighter flavor.
– If you avoid gluten, this salad is naturally gluten-free.
Nutritional Information Overview
This salad is not just tasty but also healthy. Here’s a quick look at its nutrition:
– Low in calories, making it perfect for light meals.
– High in vitamins from fresh veggies, especially vitamin C.
– Offers healthy fats from olive oil, which are good for your heart.
– Provides protein from mozzarella, which can help keep you full.
Step-by-Step Instructions
Preparing the Zoodles
To start, grab two medium zucchinis. Use a spiralizer to turn them into zoodles. If you don’t have a spiralizer, a simple vegetable peeler works too. Just peel long strips to mimic noodles. This gives your salad a fresh crunch. Zoodles are low in carbs and great for a healthy meal.
Combining Ingredients
Next, take a large mixing bowl. Add the zoodles, one cup of halved cherry tomatoes, and one cup of fresh mozzarella balls. The tomatoes add sweetness, while mozzarella adds creaminess. Toss these together gently. Then, tear a quarter cup of fresh basil leaves and add them to the bowl. This will bring a lovely aroma to your dish.
Making the Dressing
For the dressing, grab a small bowl. Whisk together two tablespoons of balsamic vinegar and two tablespoons of extra virgin olive oil. This mix gives a tangy and rich flavor. If you like, add garlic powder, salt, and black pepper to taste. Drizzle this dressing over your zoodle salad. Toss everything gently to coat well. Let the salad sit for about five minutes. This helps the flavors blend together nicely.
You can serve this salad right away for the best taste. If you prefer a cooler dish, refrigerate it for up to 30 minutes. Enjoy this vibrant Caprese Zoodle Salad as a fresh and flavorful delight!
Tips & Tricks
Best Practices for Spiralizing Zucchini
To spiralize zucchini perfectly, pick firm zucchinis. A fresh zucchini holds its shape well. Use a sharp spiralizer to create even zoodles. If you lack a spiralizer, try a vegetable peeler. Simply peel long strips for a similar effect. Keep the zucchini ends for better grip. Always spiralize in a steady motion for even strands.
Flavor Enhancements and Seasoning Suggestions
To boost flavor, consider adding fresh herbs. Oregano or thyme pairs well with the dish. You can also try a pinch of red pepper flakes for heat. If you love garlic, add a clove minced into the salad. A squeeze of fresh lemon juice can brighten flavors too. Experiment with different vinegars, like red wine vinegar, for a twist.
Serving and Presentation Tips
Serve the Caprese zoodle salad in a wide bowl. This makes the colors pop and looks inviting. Garnish with extra basil leaves for a fresh touch. A drizzle of balsamic glaze adds flair. For a party, consider individual servings in small cups. This makes it easy for guests to enjoy. Remember to serve it cool for the best taste.
Variations
Adding Protein Options
You can boost the nutrition of your Caprese zoodle salad by adding protein. Grilled chicken is a great choice. It adds a nice, savory flavor. Shrimp is another option. Just sauté them in olive oil for a quick cook. For a vegetarian twist, try chickpeas. They add heartiness and extra fiber. Cubes of tofu also work well. Make sure to season it for more taste.
Seasonal Ingredient Swaps
Seasonal ingredients can keep your salad fresh and exciting. In summer, add sweet corn for crunch. In fall, try roasted butternut squash. It adds a warm, nutty flavor. During winter, sliced radishes can provide a nice bite. In spring, include peas for a pop of color and sweetness. These swaps keep your salad vibrant all year round.
Alternative Dressings
While balsamic dressing is classic, you can try different ones too. A lemon vinaigrette adds brightness and zest. Mix lemon juice with olive oil and a pinch of salt. For a creamy option, use a yogurt-based dressing. It gives a rich texture without being heavy. A pesto dressing can also bring in bold flavors. Just toss it with your salad for a tasty twist.
Storage Info
How to Store Leftovers
To store leftovers, place the Caprese zoodle salad in an airtight container. Make sure to keep it in the fridge. This will help maintain its freshness. Avoid adding the dressing until you’re ready to eat. This keeps the zoodles crisp and vibrant.
Reheating Guidelines
You do not need to reheat this salad. It tastes best when cold. If you want to warm it up, do so gently in a pan. Heat it for just a minute or two. Be careful not to overcook the zoodles. They can become mushy.
Shelf Life of Ingredients
The salad stays good for about 2 days in the fridge. The cherry tomatoes and basil may lose their texture after that. Zucchini zoodles last up to 3 days if kept dry. Always check for signs of spoilage before eating.
FAQs
What is the best way to spiralize zucchini?
To spiralize zucchini, use a spiralizer. This tool makes long, thin noodles. If you don’t have one, a vegetable peeler works too. Just peel long strips from the zucchini. Keep turning the zucchini to get even strips. You want them to be thin and fun to eat!
Can I prepare this salad in advance?
Yes, you can prepare the salad ahead of time. Make the zoodles and mix the other ingredients. Just wait to add the dressing until you are ready to serve. This keeps everything fresh and crisp. If you want to store it, cover it and keep it in the fridge. It stays good for about 30 minutes.
How do I make the salad vegan-friendly?
To make the salad vegan, skip the mozzarella. You can use vegan cheese instead. Another option is to add avocado for creaminess. It adds a nice texture and taste. The dressing is already vegan, so you’re all set with that.
What other ingredients can I add?
You can add grilled chicken or shrimp for protein. If you want a crunch, toss in some nuts. Try pine nuts or walnuts. They add a nice bite. You can also add more veggies like bell peppers or cucumbers for extra flavors.
How do I store leftovers?
Store any leftovers in an airtight container. Keep it in the fridge for up to two days. The zoodles may get a bit soggy over time. If that happens, a quick toss with fresh seasoning can help.
Can I use other types of squash?
Yes, you can use other squash like yellow squash. It has a similar texture and flavor. The cooking time stays the same. Each type of squash gives a unique taste. Feel free to mix and match!
What makes this salad so healthy?
This salad is low in carbs and high in vitamins. Zucchini is rich in water, so it hydrates you. Tomatoes add antioxidants, and basil brings fresh flavor. The olive oil adds healthy fats, making this salad balanced and nutritious.
This blog post covered how to make a tasty zoodle salad. We looked at the needed ingredients, step-by-step instructions, and helpful tips. You now know how to choose the right ingredients and make the dressing. The variations allow you to add your favorite flavors, too. Lastly, the storage tips keep your leftovers fresh. Remember, cooking is fun and can be healthy. Enjoy making your zoodle salad your way!


