Buffalo Ranch Chickpea Wraps Flavorful and Easy Meal

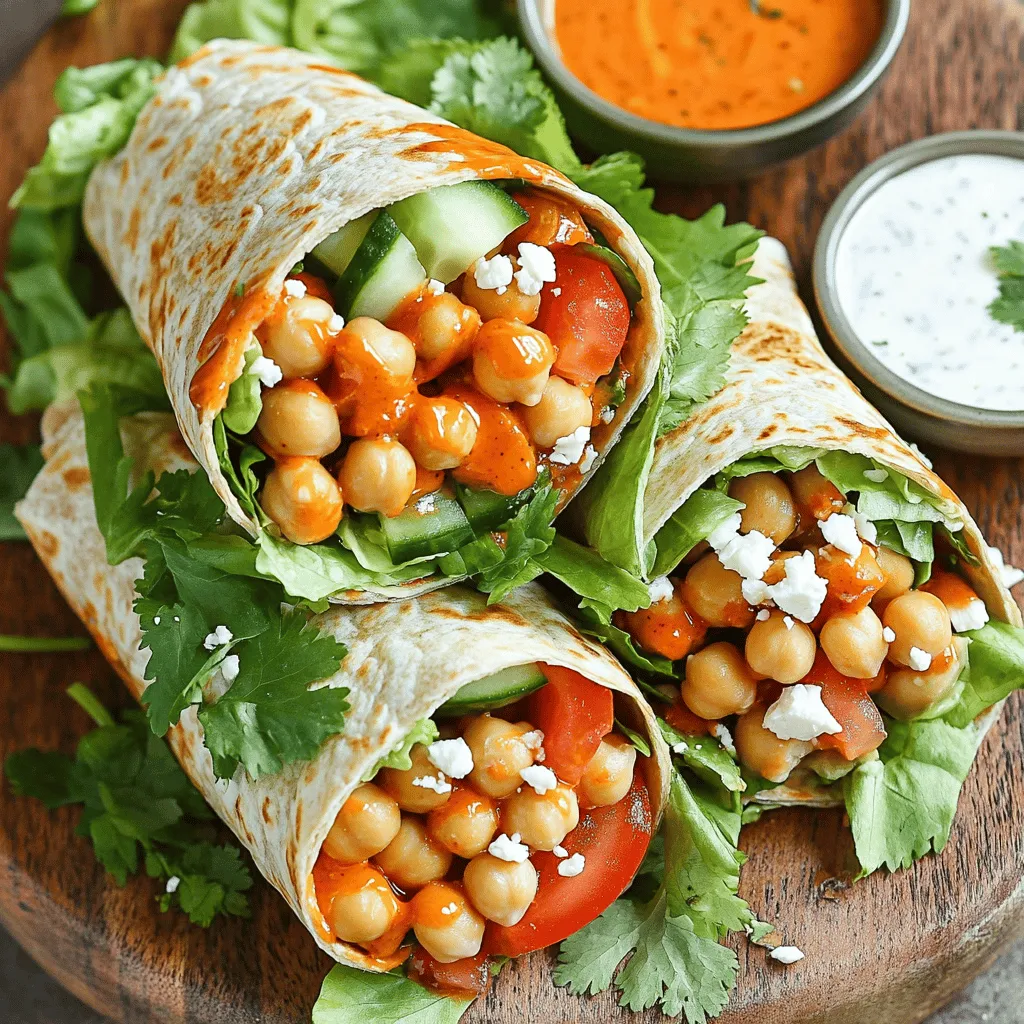
Looking for a quick, tasty meal? Buffalo Ranch Chickpea Wraps might just be your new favorite dish! Packed with flavor and easy to make, these wraps are perfect for busy weeknights or casual gatherings. With simple ingredients like chickpeas, buffalo sauce, and fresh veggies, you can whip up a satisfying meal in no time. Ready to dive into this flavorful adventure? Let’s get started!
Ingredients
Main Ingredients
– 1 can chickpeas (15 oz)
– 2 tablespoons buffalo sauce
– 2 tablespoons ranch dressing (vegan option available)
– Olive oil
– 1/2 teaspoon garlic powder
– 1/2 teaspoon onion powder
– Tortillas
– Lettuce
– Tomatoes
– Cucumbers
– Feta cheese
The main ingredients in Buffalo Ranch Chickpea Wraps come together to create a tasty meal. Chickpeas are the star here. They give the wraps protein and fiber. You might want to choose a good buffalo sauce. The spiciness of the sauce brings a fun kick. Ranch dressing adds creaminess to balance it out.
You can use any tortillas you like—whole wheat or spinach are great options. Fresh veggies like lettuce, tomatoes, and cucumbers add crunch and freshness. Feta cheese is optional but adds a nice salty flavor.
Optional Add-ins
– Fresh herbs for garnish (cilantro or parsley)
– Additional veggies for crunch
Feel free to get creative! Fresh herbs like cilantro or parsley can brighten your wraps. You can also add other veggies for more texture. Try bell peppers, carrots, or even shredded cabbage.
Equipment Needed
– Mixing bowls
– Fork or potato masher
– Skillet (optional for grilling)
You will need a few kitchen tools to make these wraps. Mixing bowls are essential for combining ingredients. A fork or potato masher helps you smash the chickpeas. If you want a crispy texture, a skillet is useful for grilling the wraps.
Step-by-Step Instructions
Preparing the Chickpeas
– Smash the drained chickpeas in a mixing bowl.
– Achieve a chunky texture for best results.
To start, open a can of chickpeas. Drain and rinse them under cold water. In a mixing bowl, use a fork or potato masher to gently smash the chickpeas. You want a mix of chunky bits and some whole chickpeas. This texture adds a nice bite to the wrap. Don’t over-mash. A little chunkiness keeps it fun!
Making the Buffalo Sauce Mixture
– Combine buffalo sauce, ranch dressing, and seasonings.
– Adjust to taste for desired spice level.
Now, let’s make the buffalo sauce blend. In a small bowl, mix two tablespoons of buffalo sauce with two tablespoons of ranch dressing. Add one tablespoon of olive oil, half a teaspoon of garlic powder, and half a teaspoon of onion powder. Season with salt and pepper. Whisk until smooth. Taste it, and if you want more heat, add more buffalo sauce. It’s all about finding your perfect spice level!
Assembling the Wraps
– Layer chickpea mixture on tortillas.
– Add fresh veggies and optional feta.
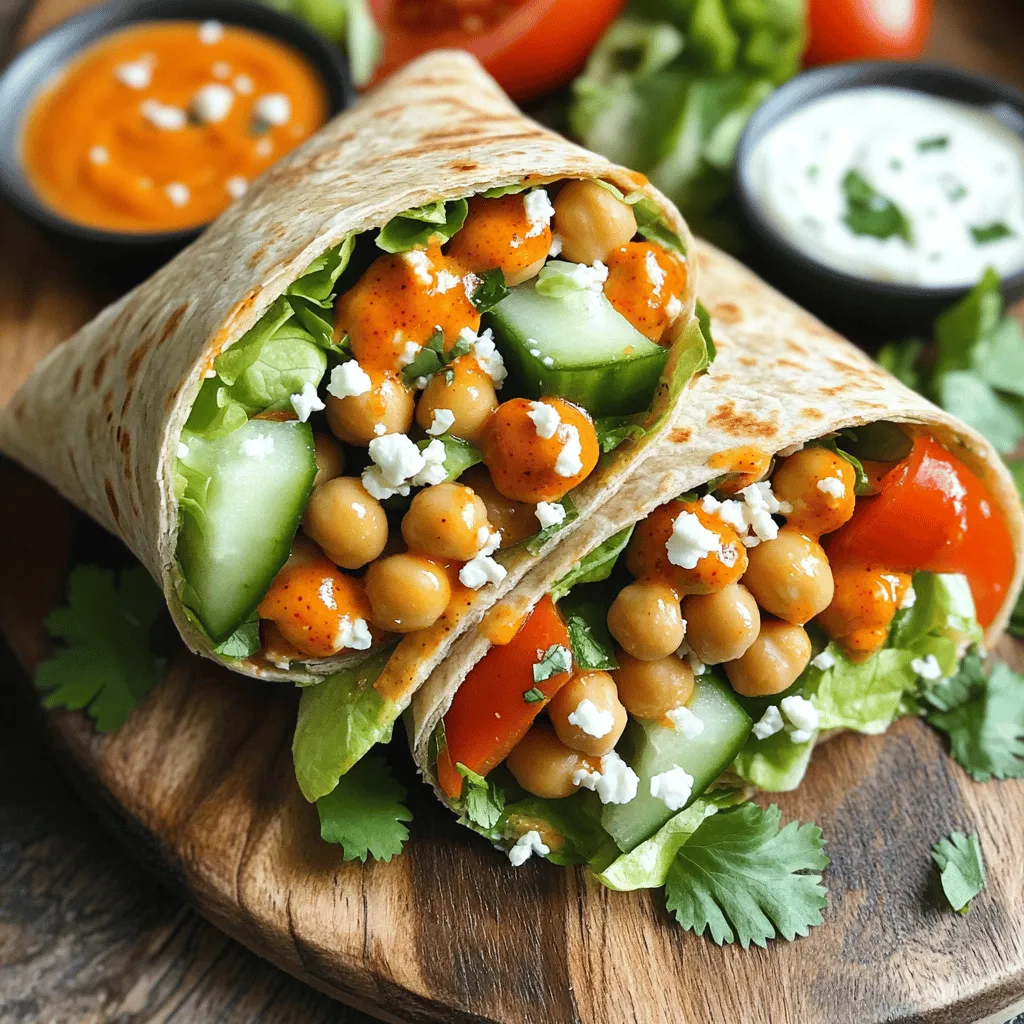
Next, it’s time to build the wraps. Take a tortilla and lay it flat. Spoon a generous amount of the buffalo chickpea mixture down the center. Top it with shredded lettuce, diced tomatoes, and sliced cucumbers. If you like, sprinkle some crumbled feta cheese on top for an extra kick. This mix of flavors will make your wrap shine!
Grilling the Wraps (Optional)
– Heat skillet over medium and grill wraps for crunch.
– Tips for achieving perfect grill marks and texture.
If you want a crispy wrap, heat a skillet over medium heat. Place the wraps seam-side down in the skillet. Grill each wrap for about 2-3 minutes on each side. Look for that golden color and nice grill marks. This step adds a lovely crunch and makes the wraps even more enjoyable. Enjoy the process, and your wraps will be amazing!
Tips & Tricks
How to Customize Your Wrap
You can easily change this recipe to fit your tastes. For a gluten-free option, use gluten-free tortillas. If you’re vegan, swap regular ranch for a vegan version. You can also try adding avocado for creaminess. Consider using different sauces to change the flavor. Try barbecue sauce for a sweet twist or a spicy sriracha for heat.
Best Pairings
These wraps are great with crunchy side dishes. Serve them with carrot sticks or celery for a fresh crunch. You can also pair them with a light salad. A simple green salad with lemon vinaigrette works well. For drinks, iced tea or lemonade makes a refreshing choice. You could even serve a light beer if you like.
Presentation Ideas
Make your wraps look great for gatherings. Cut each wrap in half to show off the colorful filling. Arrange them on a big platter for everyone to admire. For extra flair, add a sprinkle of fresh herbs on top. Fresh cilantro or parsley adds a nice touch. You can even serve them with small bowls of extra sauce for dipping. This adds fun and keeps everyone happy.

Variations
Vegan Adaptation
To make this wrap fully plant-based, choose the right dressings. Look for vegan ranch dressings at your local store. They often taste just as good as regular ranch. Brands like Kite Hill and Follow Your Heart are my favorites. Always check the label to make sure it is dairy-free.
Protein Boost Options
Want more protein? Add grilled tofu or tempeh to your wrap. These options are tasty and filling. You can also mix in beans or lentils for added texture. Black beans or chickpeas work well. They pack a protein punch and add flavor.
Spicy Alternatives
If you love heat, try adding jalapeños or chili flakes. They give your wrap a nice kick. You can also switch up your hot sauce. Sriracha or a chipotle sauce can add a smoky flavor. Adjust the spice to suit your taste!
Storage Info
Refrigeration Tips
To store your Buffalo Ranch Chickpea Wraps, wrap them tightly in foil or plastic wrap. This keeps them fresh and prevents drying. You can also place them in an airtight container. These wraps will stay good in the fridge for about 3 days. After that, the veggies may lose their crunch.
Freezing Instructions
Yes, you can freeze these wraps! To freeze, wrap each one in plastic wrap and place them in a freezer-safe bag. They will keep well for up to 2 months. When you’re ready to eat, thaw them in the fridge overnight. To reheat, place them in a skillet over medium heat. This method helps keep the wrap crisp and tasty.
Upcycling Leftovers
Got extra filling? Use it as a salad topping! Just add it to greens with your favorite dressing. You can also mix it into a grain bowl with quinoa or rice. If you have leftover veggies, toss them into a stir-fry or omelet. These ideas can help reduce waste and create new meals.
FAQs
Can I make Buffalo Ranch Chickpea Wraps ahead of time?
Yes, you can. These wraps are great for meal prep. You can make the chickpea filling a day in advance. Store it in an airtight container in the fridge. Just assemble the wraps when ready to eat. This keeps the tortillas fresh and prevents sogginess.
What can I substitute for ranch dressing?
If you want a different taste, try yogurt or vinaigrette. You can also make your own ranch dressing. Mix Greek yogurt, herbs, and a splash of lemon juice. This adds a fresh twist while keeping it creamy.
Are Buffalo Ranch Chickpea Wraps gluten-free?
Yes, they can be gluten-free! Look for gluten-free tortillas at your store. Many brands offer tasty options made from rice or corn. Just check the labels to be sure.
How can I elevate the flavor of this recipe?
To boost the flavor, add more spices like paprika or cayenne. You can also mix in fresh herbs like dill or chives. Another option is to add a splash of lime juice for brightness. Each addition brings a new layer of taste.
What other veggies work well in wraps?
Many veggies fit well in wraps! Try adding bell peppers, shredded carrots, or avocado. These add crunch and nutrition, making your wraps more colorful and fun. Don’t be afraid to mix and match your favorites!
Buffalo Ranch Chickpea Wraps are fun, tasty, and easy to make. You learned how to prepare chickpeas, mix a zesty sauce, and customize your wraps with fresh veggies. Remember, you can store leftovers or even freeze them for later. Try different proteins or sauces to fit your taste. With a few tweaks, your wraps can be a hit at any meal. Enjoy exploring these ideas and make the recipe your own!


![- 2 medium zucchinis - 1 cup cherry tomatoes - 1/4 cup fresh basil leaves The fresh produce makes this dish feel bright and lively. Zucchini adds a crunchy texture, while cherry tomatoes bring a sweet burst. Basil gives a fragrant touch that brightens every bite. When you use fresh ingredients, you elevate the salad. - 1 cup fresh mozzarella balls Fresh mozzarella balls, or bocconcini, are creamy and soft. They add richness to the salad that balances the fresh flavors. Their bite-sized shape makes them easy to enjoy. I recommend using high-quality mozzarella for the best taste. - 2 tablespoons balsamic glaze - 2 tablespoons extra-virgin olive oil - Salt and black pepper - 1 clove garlic (optional) The dressing ties all the ingredients together. Balsamic glaze provides sweetness and depth, while olive oil adds richness. Salt and pepper enhance the natural flavors. If you want an extra kick, add minced garlic. It brings a wonderful aroma and taste to the dish. For the full recipe, check out the detailed instructions on how to make this fresh and flavorful dish. To start, you need to spiralize the zucchinis. This will make long, noodle-like strands. A spiralizer works best for this task. If you do not have one, you can use a vegetable peeler. Just slice thin ribbons of zucchini instead. Next, combine all salad components in a large bowl. Add the spiralized zucchini, cherry tomatoes, and fresh mozzarella balls. This colorful mix creates a vibrant base for your salad. In a small bowl, whisk together balsamic glaze and olive oil. This will help blend the flavors nicely. If you want a bolder taste, add minced garlic to the dressing. The garlic gives it a nice kick. Now, pour the dressing over the zucchini noodle mixture. Sprinkle salt and black pepper to taste. These simple seasonings enhance the dish's flavors. Use your hands or tongs to toss the salad gently. Make sure all the ingredients are well coated. To finish, add the torn basil leaves on top of the salad. This adds a fresh aroma and flavor. Gently toss the salad again to mix the basil throughout. For serving, you can put it in a big bowl. A light drizzle of balsamic glaze on top makes it look even better. For the full details, check out the [Full Recipe]. If you want to switch things up, there are great options. For mozzarella, try using burrata. Burrata is creamier and adds a rich twist. You can also use vegan cheese if you prefer a plant-based option. For the dressing, consider a light vinaigrette. A mix of lemon juice, olive oil, and a dash of mustard works well. This gives a fresh flavor while cutting calories. To keep the salad fresh, store it properly. Use an airtight container to keep the salad from getting soggy. If you layer the ingredients, place the zucchini at the bottom. This helps keep moisture away from the tomatoes and cheese. On busy days, you can prep the salad in advance. Spiralize the zucchini and chop the tomatoes ahead of time. Just add the dressing and basil when you're ready to eat. This saves you time without losing flavor. To boost the taste, consider adding fresh herbs like oregano or parsley. They add depth and freshness. You can also sprinkle in some crushed red pepper for a bit of heat. For extra crunch, serve the salad with toasted pine nuts or sunflower seeds. These add a nice texture contrast and make the dish even more enjoyable. You can find the full recipe [here](#). {{image_4}} You can add protein to your Zucchini Noodle Caprese Salad for a fuller meal. Here are two great options: - Grilled chicken or shrimp: Both add a tasty twist and extra nutrients. Cook them simply with salt, pepper, and olive oil. Slice and mix them in. - Chickpeas for a vegetarian option: These add a nice crunch and plant-based protein. Just rinse and toss them in for a hearty touch. Mixing up flavors can keep this salad exciting. Here are some ideas: - Adding different dressing styles: Try pesto, ranch, or lemon vinaigrette for a fresh taste. Each will give your salad a unique flair. - Incorporating seasonal vegetables: Add bell peppers, corn, or avocado. These can enhance the texture and flavor while keeping it fresh and vibrant. How you serve this salad can change its vibe. Consider these styles: - Zucchini noodle bowls: Serve it in deep bowls for a casual gathering. It makes it easy for guests to dig in. - Plated salads for special occasions: For a fancy dinner, plate it neatly. This elevates the look and makes it feel more special. These variations can help you customize your Zucchini Noodle Caprese Salad. Choose your favorites to make it truly yours! For the full recipe, check out the details above. To store leftovers, place your Zucchini Noodle Caprese Salad in an airtight container. This keeps the salad fresh and prevents odors from mixing. Use a container that fits the salad snugly to minimize air exposure. Ideal storage containers: - Glass containers with tight lids - BPA-free plastic containers - Silicone food bags Zucchini noodles can stay fresh in the fridge for about 2 to 3 days. Cherry tomatoes and mozzarella also last up to this time frame. Always check for signs of spoilage. Signs of spoilage: - Slimy texture on zucchini - Mold growth on tomatoes - Sour smell from mozzarella Freezing zucchini noodles is a great way to keep them longer. However, fresh zucchini noodles can lose their texture when thawed. To freeze, spiralize the zucchini and place it in a freezer-safe bag. Remove as much air as possible before sealing. Best practices for freezing prepared salad: - Avoid freezing with the dressing; add it later. - Store without fresh basil, as it does not freeze well. - Use within 1 to 2 months for the best flavor. For the full recipe, refer back to the Zucchini Noodle Caprese Salad section. Zucchini noodles last about 3 to 5 days in the fridge. Store them in an airtight container. They will keep fresh and crisp during this time. If they start to look slimy, it’s best to toss them out. Yes, you can use other vegetables. Some great alternatives are carrots, cucumbers, and sweet potatoes. Each offers a unique taste and texture, making your salad fun and versatile. Yes, this salad is gluten-free. The main ingredients contain no gluten. Zucchini, tomatoes, and cheese all fit into a gluten-free diet. Enjoy this dish without worry! You can prep some parts ahead. Spiralize the zucchini and cut the tomatoes a day before. However, add the dressing just before serving. This keeps the salad fresh and crunchy. This salad pairs well with grilled chicken or shrimp. It also goes great with crusty bread or a light soup. For drinks, try a crisp white wine or sparkling water. Enjoy the mix of flavors! For the full recipe, check out the details above! This blog explored a delicious and fresh Zucchini Noodle Caprese Salad. You learned about key ingredients like zucchini, cherry tomatoes, and mozzarella. The instructions simplified making this dish with easy steps. Tips offered ways to customize and store your salad. Variations let you add protein or seasonal flavors. This salad is perfect for any meal. With its bright flavors, it suits busy days or special occasions. Enjoy your cooking adventure and make this salad often!](https://goldendishy.com/wp-content/uploads/2025/07/4c5bc4a7-43a5-40d0-aa85-49819cbbae48-768x768.webp)

![To make crispy air fryer chicken wings, you need the right ingredients. Here’s what you’ll need: - 2 pounds of chicken wings - 1 tablespoon baking powder - 1 teaspoon garlic powder - 1 teaspoon onion powder - 1 teaspoon smoked paprika - 1 teaspoon salt - ½ teaspoon black pepper - ½ teaspoon cayenne pepper (optional, for heat) - 2 tablespoons olive oil These ingredients help create a crunchy skin and juicy meat. The spice mix is key to adding flavor. The baking powder helps crisp the skin. Garlic and onion powders give a savory kick. Smoked paprika adds a touch of smokiness. The salt enhances all the flavors. Black pepper brings a mild heat, while cayenne adds more spice if you like it hot. You can add a few optional touches to enhance your dish. Fresh parsley, finely chopped, looks great as a garnish. It adds color and freshness to the wings. As for dipping sauces, ranch or blue cheese dressing pairs perfectly with these wings. You can also try hot sauce for an extra kick! For the full recipe, check out the main article. Start by preheating your air fryer to 400°F (200°C). This step is key for crispy wings. Make sure the fryer is empty and clean. Let it heat up while you prepare the chicken. Rinse 2 pounds of chicken wings under cold water. Pat them dry with paper towels. Dry wings help get that nice crunch. In a bowl, mix these spices: - 1 tablespoon baking powder - 1 teaspoon garlic powder - 1 teaspoon onion powder - 1 teaspoon smoked paprika - 1 teaspoon salt - ½ teaspoon black pepper - ½ teaspoon cayenne pepper (optional for heat) After mixing, add the wings to the bowl. Drizzle with 2 tablespoons of olive oil. Toss well so every wing gets coated. You want flavor in every bite! Carefully place the wings in the air fryer basket in a single layer. Avoid crowding them. This allows air to circulate and crisp them up. Cook for 25-30 minutes. Flip the wings halfway through for even cooking. Look for a golden-brown color and crispy texture. After cooking, let the wings rest for a few minutes. This keeps them juicy. Finally, garnish with fresh parsley and serve with ranch or blue cheese dressing. Enjoy your crispy air fryer chicken wings! You can find the full recipe above. To make your wings extra crispy, start with dry wings. Pat them well with paper towels. The baking powder helps create crunch. It pulls moisture away and makes the skin crisp. Air fry at 400°F (200°C) for the best results. Flip them halfway through to ensure even cooking. If you want more crunch, give them a quick broil after cooking. One mistake is overcrowding the air fryer basket. This stops air from flowing around the wings. Cook in batches if needed. Another error is not drying the wings enough. Wet wings lead to soggy skin. Lastly, avoid using too much oil. A little goes a long way. The oil helps the spices stick and adds flavor without making them greasy. Use a good air fryer that heats evenly. A basket-style air fryer works well. You’ll need mixing bowls for seasoning the wings. A set of measuring spoons is also handy for accuracy. Finally, have a good pair of tongs for flipping the wings safely. A meat thermometer can help check if they are cooked through. For the full recipe, be sure to check the linked instructions. {{image_4}} You can easily change the flavor of your wings. To make Buffalo wings, toss them in hot sauce before serving. For BBQ wings, add your favorite BBQ sauce after cooking. You can even mix flavors! Try garlic parmesan by adding garlic powder and parmesan cheese. Each variation brings a new taste to your plate. Wing sizes can change the cooking time. For small wings, cook for 20-25 minutes. Medium wings need about 25-30 minutes. Large wings may take 30-35 minutes. Always check for doneness. The internal temperature should reach 165°F (74°C). This ensures safe and tasty wings. If you don't have an air fryer, you can bake or fry wings. To bake, set your oven to 425°F (220°C) and cook wings for 40-45 minutes. Flip them halfway. For frying, heat oil to 350°F (175°C) and fry wings for 8-10 minutes. Each method offers its own delicious crunch. For the complete recipe, check out the [Full Recipe]. After enjoying your crispy air fryer chicken wings, you may have some left. To keep them fresh, place the wings in an airtight container. This helps keep moisture out. Store them in the fridge for up to three days. If you want to keep them longer, consider freezing them. To reheat your wings, the air fryer is best. Preheat it to 375°F (190°C). Place the wings in the basket in a single layer. Heat them for 5 to 10 minutes. This method helps keep the wings crispy. You can also use an oven, but the air fryer works wonders for crispiness. If you freeze your wings, they can last for up to three months. Place the cooled wings in a freezer-safe bag. Remove as much air as possible before sealing. When you want to eat them, thaw the wings overnight in the fridge. Then, reheat them in the air fryer for a crispy finish. This is a great way to enjoy your crispy air fryer chicken wings later. For the full recipe, check out the complete guide! To get crispy wings, start with dry wings. Use paper towels to remove excess moisture. Baking powder is your secret weapon! It helps make the skin crisp. Coat the wings evenly with the spice mix. Arrange them in a single layer in the air fryer. Don’t overcrowd them; air needs to flow. Flip the wings halfway through cooking for even crispiness. Keep an eye on them for a nice golden color. Yes, you can use frozen chicken wings! Just remember to thaw them first. You can leave them in the fridge overnight or run them under cold water. After thawing, pat them dry. Then, follow the same steps in the Full Recipe. Cooking time may be a bit longer, so check for doneness. When serving crispy wings, ranch and blue cheese dressings are classic choices. They add creaminess and balance the spice. You can also try honey mustard for sweetness or hot sauce for extra heat. Experiment with different sauces to find your favorite match! In this post, we explored how to make crispy air fryer chicken wings. We covered essential ingredients, step-by-step instructions, and helpful tips. You can experiment with flavors like buffalo and BBQ, too. Remember to store leftovers properly and reheat safely for the best taste. Enjoy your tasty wings and share them with friends or family. Now, you have all the tools to make crispy wings at home whenever you want. Happy cooking!](https://goldendishy.com/wp-content/uploads/2025/06/40ff0ca3-8982-419f-b213-91fbe0dabedd-768x768.webp)

![- 1 lb ground chicken - 1 tablespoon olive oil - 1 red bell pepper, diced - 1 carrot, grated - 3 green onions, finely chopped - 2 cloves garlic, minced - 1 tablespoon fresh ginger, grated - 3 tablespoons low-sodium soy sauce - 1 tablespoon rice vinegar - 1 tablespoon sesame oil - 1 tablespoon honey - Salt and pepper to taste - 1 head of butter lettuce or iceberg lettuce, leaves carefully separated - Optional toppings: chopped almonds, fresh cilantro, shredded coconut I love cooking with ground chicken. It cooks fast and takes on great flavors. Olive oil helps to keep the chicken moist. Fresh vegetables add color and crunch to the wraps. I use red bell pepper, carrot, and green onions for taste and texture. Aromatics like garlic and ginger bring warmth and depth to the dish. They make the kitchen smell amazing while cooking. For the sauce, I mix low-sodium soy sauce, rice vinegar, sesame oil, and honey. This gives the wraps a sweet and savory kick. I prefer using butter or iceberg lettuce for the wraps. They provide a nice, crisp bite. You can also add toppings like chopped almonds or fresh cilantro. These add extra flavor and crunch. For a touch of sweetness, consider shredded coconut. For the full recipe, check out the details I provided earlier. Enjoy making these tasty, healthy chicken lettuce wraps! 1. Heating the Oil: Start by adding olive oil to a large skillet. Heat it over medium until it shimmers. 2. Cooking the Chicken: Add ground chicken to the skillet. Cook it for about 5-7 minutes, stirring often, until it turns brown. Break up any large clumps with a spatula. 3. Adding Aromatics: Stir in minced garlic and grated ginger. Sauté for 1-2 minutes until the garlic turns a light gold and the smell fills the kitchen. 4. Incorporating Vegetables: Toss in diced red bell pepper and grated carrot. Sauté for 3-4 minutes, or until the veggies soften nicely. 1. Whisking the Sauce Ingredients Together: In a small bowl, whisk together the soy sauce, rice vinegar, sesame oil, and honey. Mix until it's smooth. 2. Combining Sauce with Chicken and Veggies: Pour the sauce over the chicken and veggie mixture in the skillet. Stir well to coat everything. Cook for another 2-3 minutes until heated through. 3. Finishing with Green Onions: Remove the skillet from heat. Gently fold in chopped green onions for a fresh kick. 1. Spoon Chicken Filling into Lettuce Leaves: Take a lettuce leaf and spoon in a generous amount of the chicken mix. 2. Adding Optional Toppings for Extra Flavor: For added flavor, sprinkle chopped almonds, fresh cilantro, or shredded coconut on top. This method creates a fun and tasty meal that’s easy to make. For the full recipe, check the earlier section. To prevent the chicken from becoming dry, cook it over medium heat. Stir often and break up clumps. This helps it brown evenly and stay juicy. For chopping vegetables, use a sharp knife. Dice the red bell pepper and grate the carrot into thin pieces. This makes them blend well in the wraps and adds great texture. For plating, arrange the filled lettuce wraps on a colorful platter. Add some lime wedges and extra cilantro around them. This creates a vibrant look that is sure to impress. Ideal sides for your wraps include brown rice or a light salad. You could also serve a soy dipping sauce for added flavor. To make ahead, cook the chicken filling and store it in an airtight container. You can keep it in the fridge for up to three days. When reheating, use a microwave or a skillet. Heat it slowly to keep the chicken moist. Always check the temperature; it should be hot all the way through. For the [Full Recipe], follow the detailed steps for a delicious meal. {{image_4}} You can switch up the protein in your wraps. Turkey works well instead of chicken. Ground turkey has a similar taste and texture. If you want a plant-based option, use lentils or mushrooms. They add a nice, hearty feel to your dish. Ground beef or shrimp can also shine in these wraps. Just adjust your cooking time for each protein. Adding different sauces can change the whole meal. For a spicy kick, try adding sriracha or chili paste. You can also mix in some hot sauce for extra heat. If you like sweet flavors, swap honey for maple syrup or agave. Different vinegars can change the taste too. Try apple cider vinegar for a fruity twist or balsamic vinegar for a rich flavor. You can explore new veggies in your wraps. Bell peppers, carrots, and green onions are great, but don’t stop there! Try zucchini, shredded cabbage, or even corn. They add color and crunch. Adding spices like cumin or coriander can boost flavor. Fresh herbs, like basil or mint, can add a bright taste. The more you mix and match, the more fun your wraps will be! For the full recipe, check here. To keep your chicken filling fresh, store it in an airtight container. This will lock in flavor and moisture. Place the chicken in the fridge right after it cools. It can stay good for about 3 to 4 days. For the lettuce, wrap the leaves in a damp paper towel. Then, place them in a plastic bag. This helps keep them crisp and fresh for about 2 to 3 days. Yes, you can freeze the chicken filling! It’s best to freeze it in a sturdy container or bag. Make sure to remove as much air as possible. The filling can last up to 3 months in the freezer. When you’re ready to eat, thaw the chicken in the fridge overnight. Reheat it in a skillet over medium heat until hot. This keeps the flavor and texture nice. Cooked chicken can be safely stored in the fridge for 3 to 4 days. Always check for signs of spoilage before eating. If the chicken smells off or has a slimy texture, it’s best to throw it away. Freshness is key to enjoying your Healthy Chicken Lettuce Wraps. For the best taste, eat them as soon as possible! Enjoy the full recipe for more guidance on this dish. You can add heat in several ways. Use crushed red pepper flakes for a kick. Sriracha or chili sauce also works well. If you like fresh heat, add sliced jalapeños. For a smoky flavor, try smoked paprika. Adjust the amount based on your spice level. Each option adds a unique twist to your wraps. Yes, you can use regular soy sauce. However, it has more salt than low-sodium options. This will change the flavor, making it saltier. If you're watching your sodium intake, low-sodium is better. You might need to cut back on other salty ingredients too. Always taste as you go to avoid over-salting. Chicken lettuce wraps have many health benefits. Ground chicken is lean and high in protein. The fresh vegetables add vitamins and minerals. Lettuce is low in calories and high in fiber, which aids digestion. Using low-sodium soy sauce helps keep sodium levels in check. This meal is light yet filling, making it a great choice. To make the wraps vegan, swap ground chicken for plant-based meat. You can use lentils, chickpeas, or tofu as great options. Replace honey with maple syrup or agave for sweetness. Use tamari instead of soy sauce for a gluten-free option. With these changes, you can enjoy a tasty vegan version of the dish. For the complete recipe, check out the Full Recipe. Healthy chicken lettuce wraps are simple and tasty. We covered key ingredients like ground chicken, fresh veggies, and flavorful sauces. The step-by-step guide helps you cook and assemble them perfectly. Tips on meal prep and variations let you get creative. In the end, you can enjoy a delicious dish tailored to your taste. These wraps are healthy, fun, and easy to make. Make them for a light dinner or a snack! Enjoy your cooking adventure!](https://goldendishy.com/wp-content/uploads/2025/06/f37706c1-09e0-4508-86ce-50d139ffc9b7-768x768.webp)
