Balsamic Glazed Caprese Skewers Tasty and Simple Bite

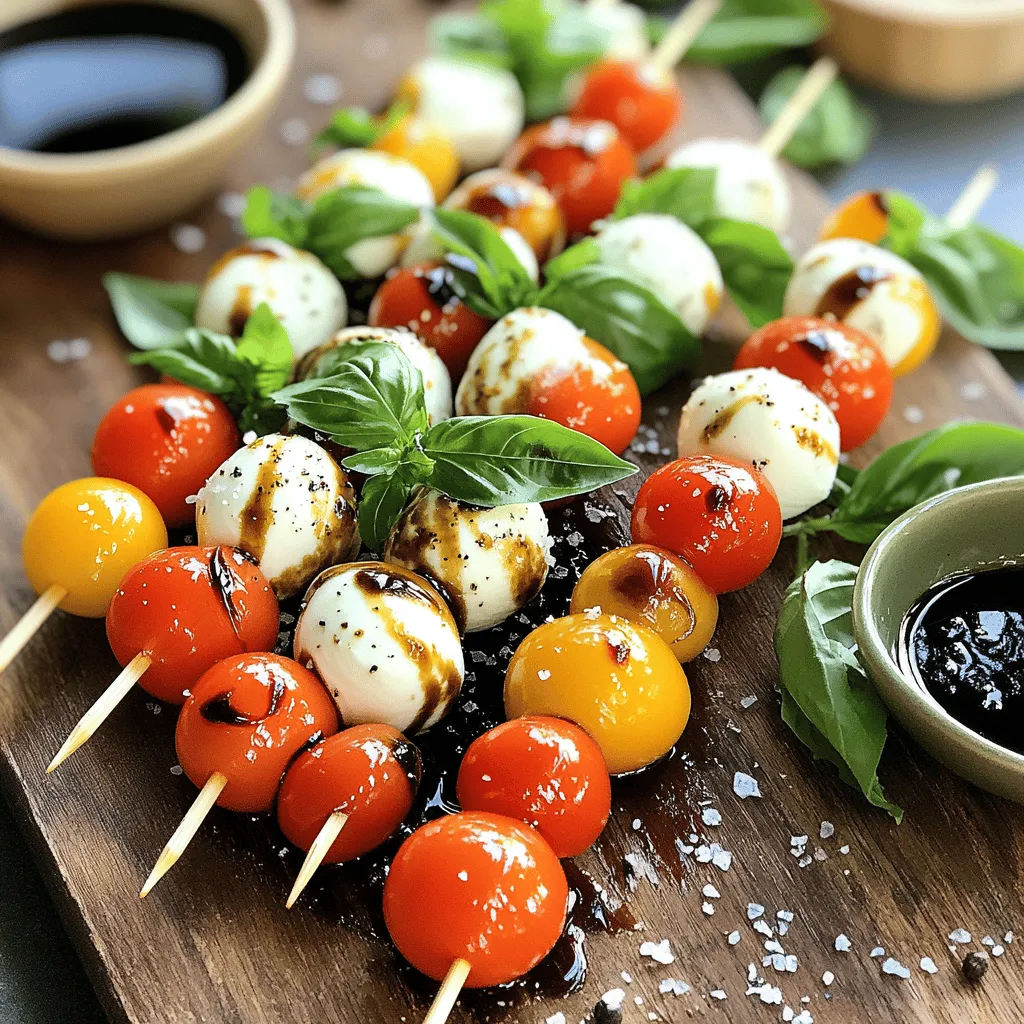
Welcome to a burst of flavor with Balsamic Glazed Caprese Skewers! If you love fresh ingredients and quick meals, you’ll enjoy this simple recipe. Combining juicy cherry tomatoes, creamy mozzarella, and aromatic basil, these skewers are drizzled with a sweet balsamic glaze that’s hard to resist. Whether you’re hosting friends or just want a tasty snack, these bite-sized delights will impress everyone. Let’s dive into how to make them!
Ingredients
Complete List of Ingredients
– Fresh cherry tomatoes
– Mini fresh mozzarella balls (bocconcini)
– Fresh basil leaves
– Balsamic vinegar
– Honey
– Extra-virgin olive oil
– Sea salt and freshly ground black pepper
– Skewers (wooden or metal)
Tips for Selecting Ingredients
When making Balsamic Glazed Caprese Skewers, choosing the right ingredients is key for taste. Here are some tips:
– Choosing ripe cherry tomatoes: Look for tomatoes that are deep red and firm. They should feel heavy for their size. If they smell sweet, they are ripe and ready.
– Opting for high-quality balsamic vinegar: A good balsamic vinegar should have a rich flavor. Check for labels that mention “tradizionale” or “aged.” This vinegar will give your skewers a great taste.
– Fresh basil storage considerations: Store basil in a glass of water, like a flower. Cover it with a bag and keep it at room temperature. This keeps the leaves fresh and vibrant.
These tips will help you pick the best ingredients for your skewers. Using high-quality items makes a big difference in flavor.
Step-by-Step Instructions
Preparing the Balsamic Glaze
To make the balsamic glaze, start by mixing balsamic vinegar and honey in a small saucepan. Place it on medium heat. Once it simmers, stir occasionally for about 5-7 minutes. You want the glaze to thicken slightly. It should coat the back of a spoon. When done, remove it from heat. Let it cool at room temperature. This step is key for a sweet and tangy flavor.
Assembling the Skewers
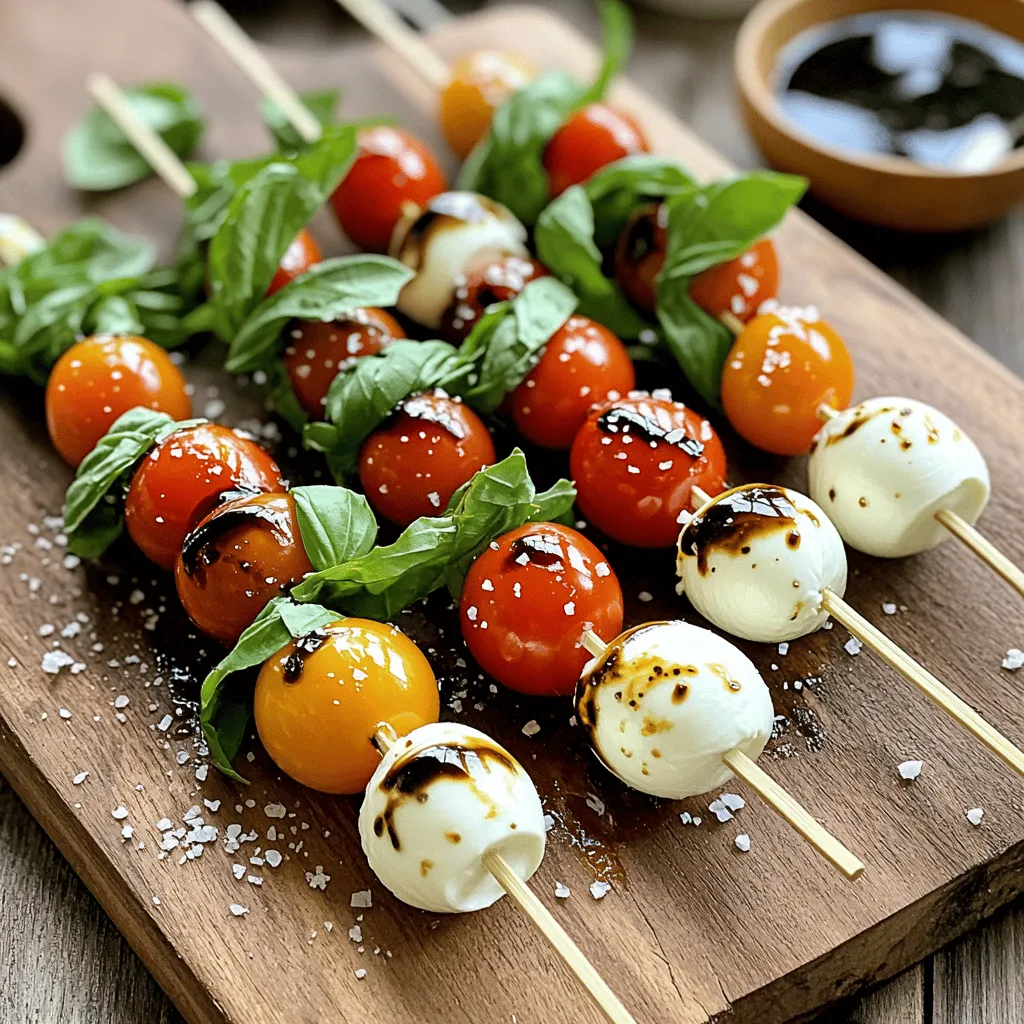
Now it’s time to assemble the skewers. Take a skewer and thread one cherry tomato onto it first. Next, add a fresh basil leaf. Follow this with a mozzarella ball. Repeat the pattern—tomato, basil, mozzarella—until your skewer is filled. Make sure to leave a little space at both ends. This helps with handling and looks great on a platter.
Final Touches
Once you have assembled all the skewers, place them on a serving platter. Drizzle extra-virgin olive oil over the skewers generously. Then, sprinkle with sea salt and freshly ground black pepper. These steps enhance the flavors. After that, take your cooled balsamic glaze and drizzle it over the skewers. This adds a delightful sweetness and tang. Serve them right away for the best taste. You can also let them rest for a few minutes if you wish. Enjoy these tasty bites!
Tips & Tricks
Presentation Ideas
– Arranging on a platter: Place your skewers on a large wooden board or a bright platter. This makes them easy to grab. Keep them close together for a fun look.
– Garnishing suggestions: Add extra basil leaves around the skewers for color. You can also drizzle some leftover balsamic glaze in a small bowl next to the skewers for dipping.
Serving Suggestions
– Best occasions to serve: These skewers shine at parties, picnics, or barbecues. They also work well as an appetizer for dinner guests.
– Pairing with beverages: Serve these with a light white wine or sparkling water. They also pair nicely with a refreshing lemonade.
Common Mistakes to Avoid
– Overcooking the glaze: Watch your glaze closely! If it cooks too long, it can become too thick and sticky. Aim for a syrupy texture.
– Skewering technique errors: Be gentle when threading the ingredients. If you push too hard, you might break the tomatoes or mozzarella. Keep a little space at the ends of the skewer for easy handling.

Variations
Ingredient Swaps
You can easily swap some ingredients in Balsamic Glazed Caprese Skewers. If you want an alternative for mozzarella, try using burrata cheese. Burrata has a creamy center that adds a rich texture. You could also use feta cheese for a tangy twist.
If basil isn’t your favorite, consider using arugula or fresh mint instead. Both herbs give a unique flavor. Arugula adds a peppery bite, while mint brings a refreshing taste. These swaps keep the essence of the dish while adding new flavors.
Additional Flavor Profiles
To enhance the taste of your skewers, you can add spices or herbs. A sprinkle of Italian seasoning or crushed red pepper flakes can add warmth. Fresh herbs like oregano or thyme can also elevate the flavor profile.
You can also incorporate other vegetables for extra crunch. Cherry bell peppers or zucchini slices work well. Grilled vegetables add a smoky taste. Try mixing and matching to create your perfect skewer. The combinations are endless, making each bite a new delight.
Storage Info
Storing Leftover Skewers
To keep your Balsamic Glazed Caprese Skewers fresh, store them in the fridge. Use an airtight container to prevent them from drying out. If you don’t have one, wrap them tightly in plastic wrap. This keeps flavors locked in and helps maintain texture.
Reheating is simple but be careful. I suggest eating them cold for the best taste. If you prefer warm skewers, heat them briefly in the microwave. Use a low setting and check often. You want to warm them without cooking the ingredients.
Duration of Freshness
These skewers taste best within three days. After that, they may lose their charm. In the fridge, they’ll stay fresh for about 2 to 3 days.
Look for signs of spoilage. If the tomatoes look mushy or the cheese becomes slimy, it’s time to toss them. Also, any off smell means they are no longer good to eat. Always trust your senses when it comes to food safety.
FAQs
What are Balsamic Glazed Caprese Skewers?
Balsamic glazed Caprese skewers are a fresh, tasty appetizer. They mix cherry tomatoes, mozzarella, and basil on skewers. The dish gets a sweet and tangy touch from balsamic glaze. This dish is simple, yet it impresses guests at any gathering. You can enjoy it at parties or as a light snack.
Can I prepare these skewers ahead of time?
Yes, you can prep these skewers in advance. Assemble them a few hours before serving. Just keep them in the fridge until you’re ready to serve. Drizzle the balsamic glaze just before serving for the best taste. This way, the flavors stay fresh and vibrant.
What can I serve with these skewers?
Balsamic glazed Caprese skewers pair well with many dishes. Consider serving them with bruschetta for a fun mix. You can also add a green salad or a charcuterie board. For drinks, try serving with white wine or sparkling water. These pairings enhance the flavors of the skewers.
How long does it take to make Balsamic Glazed Caprese Skewers?
Making Balsamic glazed Caprese skewers takes about 25 minutes. You will spend around 15 minutes prepping the ingredients. The cooking time for the glaze is about 5-7 minutes. After that, assembly is quick and easy. This makes it a fast and fun dish to prepare.
Are there vegan options for this recipe?
Yes, you can easily make this recipe vegan. Swap the mozzarella balls for vegan cheese or tofu. This keeps the dish flavorful and creamy. Ensure the balsamic vinegar and honey are vegan-friendly. You can use maple syrup instead of honey for sweetness.
In this blog post, I shared how to make tasty Balsamic Glazed Caprese Skewers. We covered the best ingredients, including ripe cherry tomatoes and fresh basil. I provided step-by-step instructions for making the glaze and assembling the skewers. Don’t forget the tips on storage and common mistakes to avoid.
Feel free to get creative with the ingredients or serve them at your next gathering. With these tips, you can impress your guests and enjoy a fresh, flavorful snack.


![- 8 oz (about 225g) rotini or penne pasta - 1 cup cherry tomatoes, halved - 1 cucumber, finely diced - 1/2 red onion, finely chopped - 1 bell pepper (any color), diced into small pieces - 1 cup Kalamata olives, pitted and sliced in half - 1 cup feta cheese, crumbled into bite-sized pieces - 1/4 cup fresh parsley, roughly chopped - 1/4 cup high-quality olive oil - 2 tablespoons red wine vinegar (optional for flavor) - 1 tablespoon freshly squeezed lemon juice - 1 teaspoon dried oregano - Sea salt and freshly cracked black pepper to taste You can make this salad your own. Try adding: - Grilled chicken or shrimp for protein - Artichoke hearts for extra flavor - Sun-dried tomatoes for a sweeter touch - Avocado for creaminess - Different herbs like mint or dill for freshness Fresh ingredients shine in this salad. Here’s how to pick the best: - Choose firm, bright cherry tomatoes. They should smell sweet. - Look for a cucumber with smooth skin. It should feel heavy for its size. - Pick bell peppers that are shiny and firm. Avoid any with soft spots. - For olives, select Kalamata that are dark and plump. - Get feta cheese that is crumbly and moist, not dry. Using fresh ingredients elevates the flavor and makes your Easy Greek Pasta Salad a true delight. For the full recipe, check out the Mediterranean Delight Pasta Salad 🥗! Start by boiling a large pot of salted water. This step is key to flavor. Add 8 oz of rotini or penne pasta. Cook it according to the package directions until it is al dente. This should take about 8-10 minutes. Once the pasta is cooked, drain it well. Rinse the pasta under cold water to stop the cooking and cool it down. This keeps the texture just right. In a large mixing bowl, add the cooled pasta. Next, toss in 1 cup of halved cherry tomatoes, 1 diced cucumber, and 1/2 finely chopped red onion. Don’t forget 1 diced bell pepper, which adds color and crunch. Add 1 cup of Kalamata olives that you’ve pitted and sliced. Finally, sprinkle in 1/4 cup of roughly chopped fresh parsley. Mix everything well to combine the flavors. In a small bowl, whisk together the dressing. Use 1/4 cup of high-quality olive oil. Add 2 tablespoons of red wine vinegar or fresh lemon juice if you prefer a brighter taste. Squeeze in 1 tablespoon of lemon juice for extra zest. Mix in 1 teaspoon of dried oregano. Season with sea salt and freshly cracked black pepper to taste. Whisk until the ingredients blend into a smooth dressing. Drizzle the dressing over the pasta and vegetable mix. Toss gently to coat all the ingredients well with the dressing. This step is crucial for flavor. Now, softly fold in the crumbled feta cheese. Be careful not to break the cheese too much; you want those nice chunks. For the best flavor, cover the salad with plastic wrap. Place it in the refrigerator for at least 20 minutes. This waiting period allows the flavors to blend beautifully. After chilling, taste the salad. Adjust the seasoning with more salt, pepper, or lemon juice if needed. Enjoy making this Easy Greek Pasta Salad! For the Full Recipe, check the link. To make the best Greek pasta salad, start with the right pasta. Use rotini or penne, as they hold the dressing well. Cook the pasta just right. It should be al dente, so it stays firm. Rinse it under cold water after cooking. This step cools the pasta and stops it from cooking more. Next, chop your veggies evenly. This way, each bite has a bit of everything. Fresh ingredients bring the best flavor. Use ripe cherry tomatoes and a crisp cucumber. Kalamata olives add a nice briny touch. Don’t forget the feta cheese! It should be crumbly but not too small. Many people overcook the pasta. This makes it mushy and not enjoyable. Also, don’t skip the rinsing step. It keeps the pasta from sticking together. Another mistake is not seasoning enough. Taste your salad after mixing. You might need more salt, pepper, or lemon juice. Always adjust to make it perfect for your palate. Lastly, let your salad chill before serving. This step allows the flavors to blend and deepen. A quick chill of at least 20 minutes works wonders. For more flavor, try adding fresh herbs. Basil or dill can brighten the dish. If you like heat, add a pinch of red pepper flakes. This gives your salad a nice kick. Experiment with your dressing too! Swap red wine vinegar for lemon juice for a brighter taste. A splash of balsamic vinegar can also add depth. Lastly, if you want a creamier salad, mix in some Greek yogurt. It adds richness without overpowering other flavors. For the full recipe, check out the Mediterranean Delight Pasta Salad. Enjoy making this simple and colorful dish! {{image_4}} You can easily add proteins to your Easy Greek Pasta Salad. Grilled chicken or canned tuna are great choices. They boost the dish's nutrition and make it more filling. For chicken, use cooked, diced pieces. For tuna, just drain and flake it. Mix your chosen protein right into the salad for a complete meal. Feel free to switch up the veggies in your pasta salad. Different colors and flavors keep it exciting. Try adding artichoke hearts, sun-dried tomatoes, or roasted red peppers. You can also use zucchini or spinach for a fresh twist. Just chop them into small pieces and mix them in. If you want a vegan version, swap feta cheese for a plant-based alternative. Nutritional yeast can also add a cheesy flavor without dairy. For gluten-free options, use gluten-free pasta. There are many types available now. This way, you can enjoy the salad without worry. Check labels to ensure all ingredients meet your dietary needs. Find the full recipe at [Full Recipe]. To keep your Easy Greek Pasta Salad fresh, store it in an airtight container. This helps prevent air and moisture from spoiling your salad. If you have leftovers, make sure to cool the salad before sealing it. This keeps the flavors intact and avoids sogginess. You can also separate the dressing if you want to keep the salad crisp for longer. This salad tastes best cold, so there’s no need to reheat it. If you find the pasta has absorbed the dressing, add a splash of olive oil or lemon juice. Toss it gently to revive the flavors. If you stored the salad in the fridge, let it sit at room temperature for about 10 minutes before serving. This will enhance the taste and texture. Your Easy Greek Pasta Salad can last about 3 to 5 days in the fridge. Always check for any signs of spoilage. Look for changes in color or texture. If you notice any off smells, discard it. Trust your senses; if something seems off, it’s better to be safe. Enjoy your salad while it's fresh for the best taste! You can store Easy Greek Pasta Salad in the fridge for about 3 to 5 days. Keep it in a sealed container to keep it fresh. If you see any signs of spoilage, like an off smell or discoloration, it's best to toss it out. Yes, you can make this salad ahead of time! In fact, it tastes better after sitting for a while. The flavors meld together nicely. I recommend making it a few hours in advance or even the night before. Just remember to add the feta cheese right before serving to keep it fresh. Greek Pasta Salad pairs well with various dishes. You can serve it alongside grilled chicken, lamb, or fish. It also works great as a side for burgers or sandwiches. If you're having a picnic, it's perfect with some crusty bread and hummus. Yes, you can substitute feta cheese if you prefer. Try using goat cheese or ricotta for a different flavor. For a dairy-free option, you can use a plant-based cheese. Just keep in mind that the taste will change slightly, but the salad will still be delicious! This blog post covers how to make Easy Greek Pasta Salad. We discussed essential ingredients and tips for freshness. You learned steps to prepare the salad, mix the ingredients, and make the dressing. We highlighted ways to enhance flavors and avoid common mistakes. Plus, you can try various protein and veggie options. Finally, you got storage tips to keep the salad fresh. Enjoy making this salad for your next meal or gathering! It’s simple, tasty, and fun to customize.](https://goldendishy.com/wp-content/uploads/2025/06/0fc22d26-3c6f-4a8e-aae2-92058968a948-768x768.webp)
