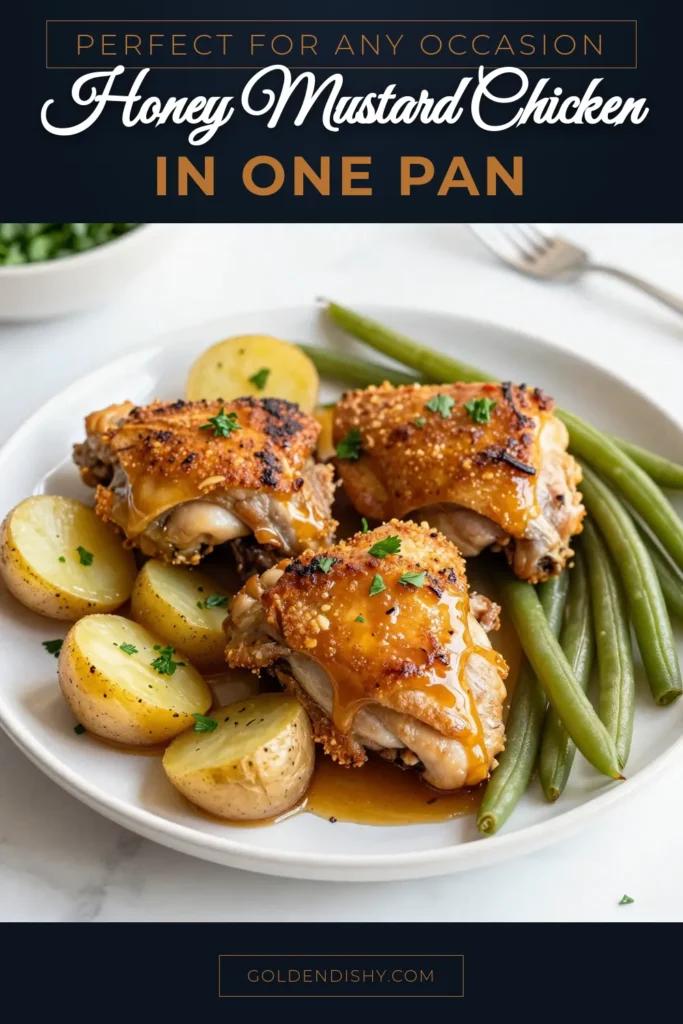
Honey Mustard Sheet Pan Chicken Easy and Flavorful Dish
If you’re after a dinner that’s both easy and delicious, honey mustard sheet pan chicken is your answer. With minimal prep and straightforward steps, you can create a meal that bursts with flavor. I’ll guide you through the key ingredients, cooking process, and tips to make your chicken juicy and flavorful. Whether you’re a kitchen pro or a novice, this dish will impress your family and friends. Let’s dive in!
Why I Love This Recipe
- Simple Preparation: This recipe requires minimal prep time, making it perfect for a busy weeknight dinner.
- One-Pan Wonder: Cooking everything on one sheet pan saves time on cleanup and allows flavors to meld beautifully.
- Deliciously Flavorful: The honey mustard marinade adds a delightful sweetness and tang to the chicken and veggies.
- Healthy and Wholesome: With chicken and fresh vegetables, this dish is nutritious and satisfying.
Ingredients
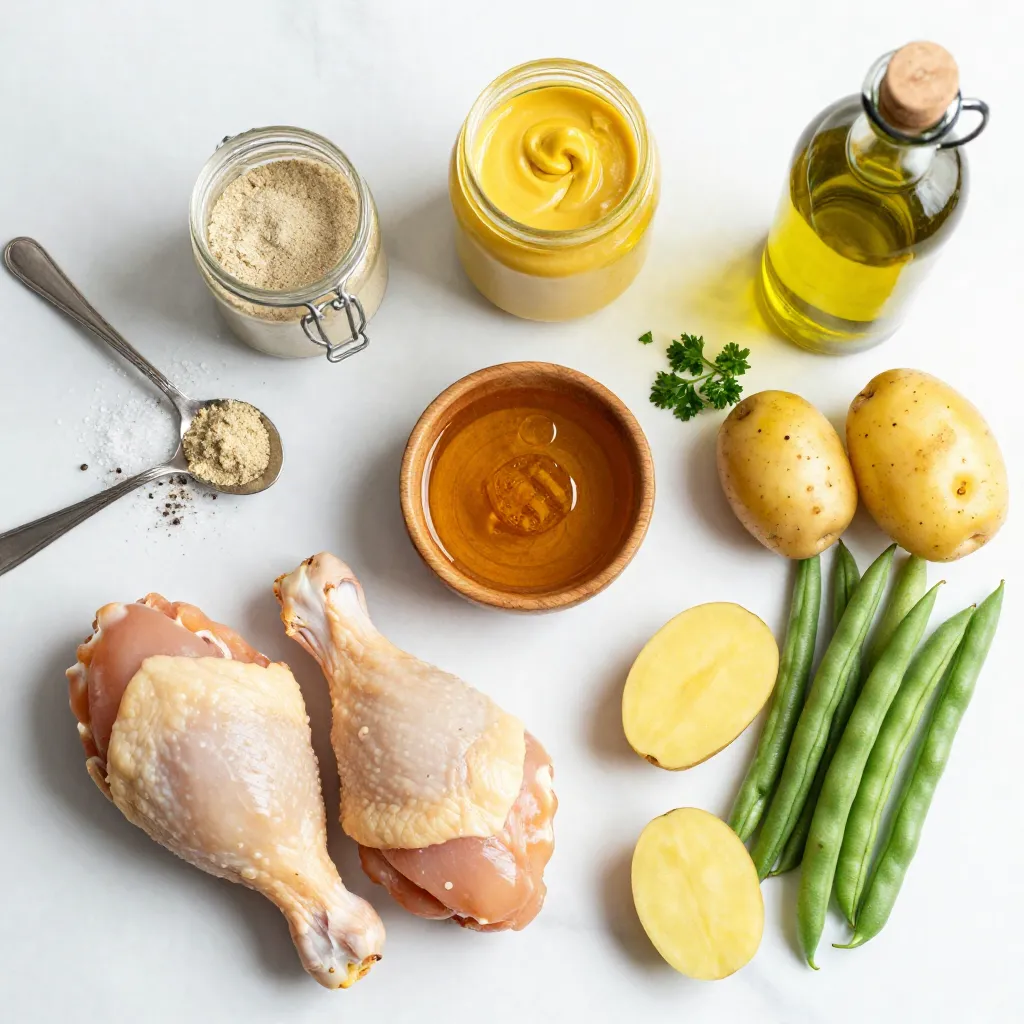
Main Ingredients for Honey Mustard Sheet Pan Chicken
– 4 chicken thighs, skin-on and bone-in
– 2 tablespoons of honey
– 2 tablespoons of Dijon mustard
– 2 tablespoons of olive oil
– 1 teaspoon of garlic powder
– 1 teaspoon of onion powder
– Salt and freshly ground black pepper, to taste
– 1 pound of baby potatoes, halved
– 1 cup of green beans, trimmed
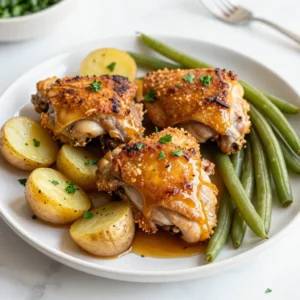
The chicken thighs are the star of this dish. Their skin adds rich flavor and crispiness. Honey and mustard create a sweet and tangy marinade. Olive oil keeps the chicken moist. Garlic and onion powders add depth to the taste. Baby potatoes and green beans cook alongside the chicken, soaking up the delicious flavors.
Optional Ingredients for Adding Flavor
– Lemon juice for brightness
– Paprika for a smoky touch
– Fresh herbs like thyme or rosemary
Adding lemon juice can brighten up the dish. Paprika gives a nice smoky flavor. Fresh herbs can enhance the overall taste and aroma. Feel free to mix and match these options to your liking.
Suggested Garnishes
– Fresh parsley, chopped
– Lemon wedges
Chopped parsley adds a pop of color and freshness. Lemon wedges can brighten the dish even more when served. These simple garnishes make your meal look and taste even better. Enjoy your Honey Mustard Sheet Pan Chicken!
Step-by-Step Instructions
Preparing the Marinade
Start by gathering your ingredients. You need honey, Dijon mustard, olive oil, garlic powder, onion powder, salt, and pepper. In a medium bowl, mix together:
– 2 tablespoons of honey
– 2 tablespoons of Dijon mustard
– 2 tablespoons of olive oil
– 1 teaspoon of garlic powder
– 1 teaspoon of onion powder
– Salt and freshly ground black pepper to taste
Whisk these until smooth. This marinade adds a sweet and tangy flavor to the chicken.
Marinating the Chicken
Take your chicken thighs and place them in a large resealable bag or a shallow dish. Pour half of your honey mustard marinade over the chicken. Make sure each piece is well-coated. Seal the bag or cover the dish with plastic wrap. Let the chicken marinate in the fridge for at least 30 minutes. If you have time, marinate for up to 2 hours. This helps deepen the flavors.
Cooking the Chicken and Vegetables
Preheat your oven to 425°F (220°C). While the chicken marinates, prepare the veggies. Take 1 pound of baby potatoes and halve them. Trim 1 cup of green beans. In a separate bowl, add the veggies and pour the remaining marinade over them. Toss until coated evenly.
Line a large sheet pan with parchment paper to help with clean-up. Place the marinated chicken thighs skin-side up on one side of the pan. Spread the marinated potatoes and green beans on the other side. Make sure everything is in a single layer for even cooking.
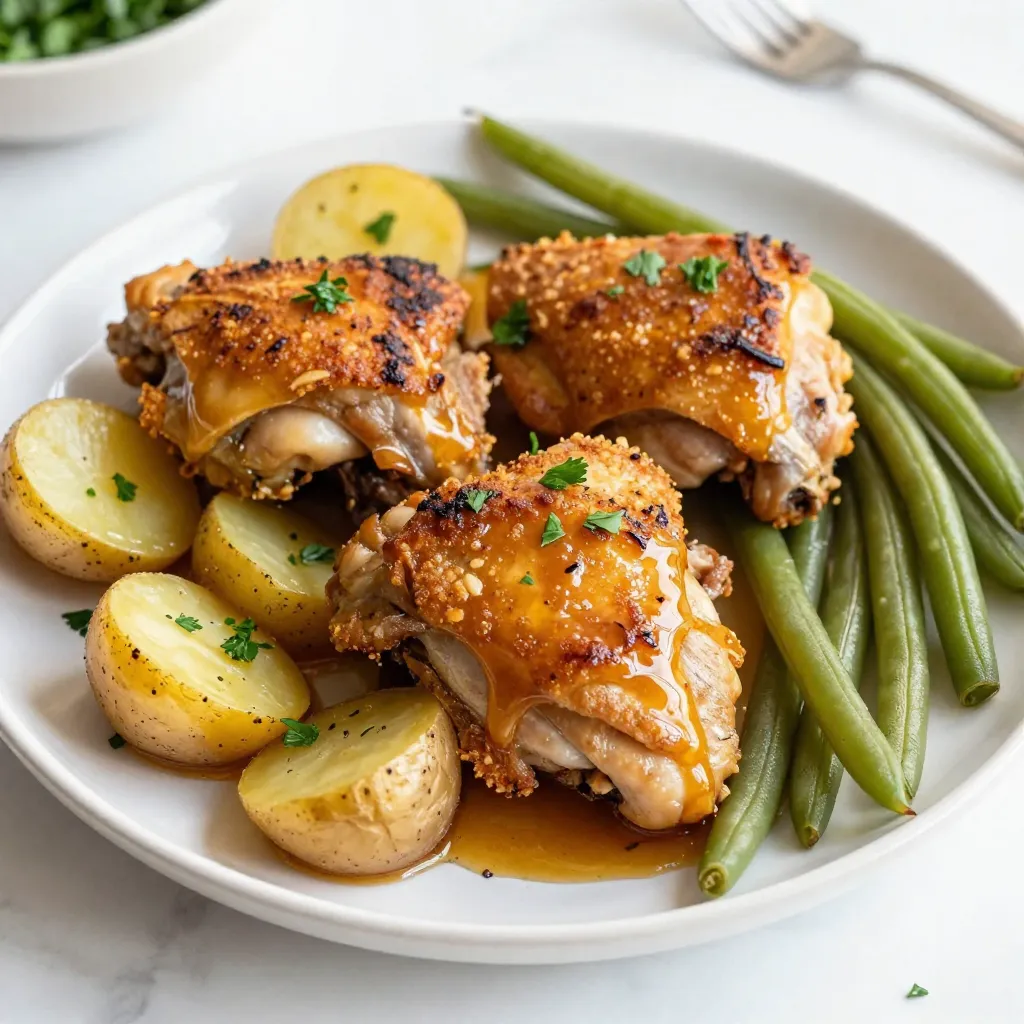
Bake the pan in the preheated oven for 30-35 minutes. The chicken should reach an internal temperature of 165°F (75°C) and have crispy skin. The vegetables will be tender and slightly caramelized. After baking, let the dish rest for a few minutes. Garnish with fresh chopped parsley before serving for a pop of color. Enjoy!
Tips & Tricks
How to Achieve Perfectly Cooked Chicken
To make sure your chicken cooks just right, follow a few steps. First, always start with chicken thighs that have skin and bones. They stay juicy and flavorful. Next, marinate the chicken for at least 30 minutes. If you have time, let it sit for up to 2 hours. This brings out the best taste. When cooking, ensure the oven is preheated to 425°F. This high heat helps the skin get crispy. Use a meat thermometer to check that the chicken reaches 165°F. This way, you know it’s safe to eat.
Ensuring Even Vegetable Cooking
For great veggies, keep these tips in mind. Cut the baby potatoes in half to help them cook evenly. Make sure the green beans are trimmed well. Toss the veggies with the leftover marinade. This adds flavor and helps them cook nicely. When placing the food on the sheet pan, arrange the veggies in a single layer. This allows hot air to circulate and cook them evenly. If you crowd the pan, some veggies may cook slower than others.
Recommended Cooking Equipment
Using the right tools makes cooking easier. Here’s what I recommend. Get a large sheet pan, preferably rimmed, to keep everything in place. Lining it with parchment paper helps with cleanup. A good meat thermometer is key for checking chicken doneness. A mixing bowl is useful for combining your marinade and tossing the veggies. Lastly, have a pair of tongs handy. They help with flipping chicken and serving the dish. With these tools, you’ll set yourself up for success!
Pro Tips
- Marinate Longer for Flavor: For the best flavor, marinate the chicken thighs for up to 2 hours instead of 30 minutes. This allows the marinade to penetrate deeper into the meat.
- Use Fresh Herbs: Fresh parsley is a great garnish, but consider adding other fresh herbs like thyme or rosemary to enhance the flavor profile of your dish.
- Check Vegetable Doneness: The cooking time may vary based on the size of the potato halves. Make sure to check the potatoes for doneness by piercing them with a fork; they should be tender.
- Rest Before Serving: Allow the chicken to rest for a few minutes after baking. This helps the juices redistribute, resulting in juicier chicken when served.
Variations
Alternative Proteins to Use
You can switch up the chicken in this recipe. Try using pork chops or turkey thighs. Both work well with the honey mustard flavor. If you prefer seafood, salmon fillets are a great choice too. They cook quickly and soak up the marinade nicely. Just remember to adjust the cooking time based on the protein you choose.
Seasonal Vegetable Substitutions
Vegetables can change with the seasons. In spring, add asparagus or baby carrots. In summer, zucchini and bell peppers shine. Fall brings squash and Brussels sprouts. Winter is perfect for root veggies like parsnips and turnips. Each vegetable adds a unique taste and texture to your dish. Feel free to mix and match based on what’s fresh at the market.
Different Marinade Flavor Ideas
While honey mustard is delicious, other flavors can be fun too. Try BBQ sauce for a smoky flavor. Or use teriyaki sauce for an Asian twist. If you love spice, add sriracha to your marinade. You can even try a simple lemon herb mix with olive oil, lemon juice, and your favorite herbs. Each variation keeps the dish exciting and new.
Storage Info
How to Properly Store Leftovers
After enjoying your Honey Mustard Sheet Pan Chicken, store any leftovers right away. Place the chicken, potatoes, and green beans in an airtight container. This keeps them fresh and safe to eat. Make sure to let the food cool to room temperature before sealing. Store them in the fridge for up to three days.
Reheating Instructions
When you’re ready to enjoy the leftovers, preheat your oven to 350°F (175°C). Place the chicken and veggies on a baking sheet. Cover them with foil to keep moisture in. Heat for about 15-20 minutes or until warmed through. You can also use a microwave if you’re short on time. Heat in short bursts, stirring in between to ensure even warming.
Freezing Guidelines
If you want to save your Honey Mustard Sheet Pan Chicken for later, freezing is a great option. First, let the dish cool completely. Then, wrap each portion tightly in plastic wrap and place it in a freezer-safe bag. Make sure to label it with the date. Frozen leftovers can last up to three months. When you’re ready to eat, thaw them in the fridge overnight before reheating.
FAQs
Can I use boneless chicken for this recipe?
Yes, you can use boneless chicken. Boneless chicken will cook faster. Adjust the cooking time to about 20-25 minutes. Check the internal temperature. It should reach 165°F (75°C) for safety. Boneless chicken thighs stay juicy and tender. They work well with this sweet and tangy marinade.
What can I serve with Honey Mustard Sheet Pan Chicken?
I love serving this dish with a fresh salad. A light green salad pairs well. You can also add rice or quinoa for a filling side. Roasted veggies make a great addition too. Feel free to use your favorite sides to complete the meal.
How can I make this dish healthier?
To make this dish healthier, use skinless chicken thighs. You can reduce the amount of honey in the marinade as well. Swap baby potatoes for sweet potatoes or cauliflower. Add more green beans or other veggies to increase fiber. This keeps the dish tasty while lowering calories.
This blog post outlined a simple recipe for Honey Mustard Sheet Pan Chicken. We covered the key ingredients, tips for cooking, and storage methods. You learned how to prepare a tasty marinade and keep your chicken and veggies perfectly cooked. I shared variations to try different proteins and vegetables. Remember, this dish is easy and fun to make. It’s a great way to enjoy healthy meals with minimal cleanup. Use these tips to enhance your meal prep and impress your friends and family. Happy cookin
Honey Mustard Sheet Pan Chicken
Ingredients
- 4 pieces chicken thighs, skin-on and bone-in
- 2 tablespoons honey
- 2 tablespoons Dijon mustard
- 2 tablespoons olive oil
- 1 teaspoon garlic powder
- 1 teaspoon onion powder
- to taste salt and freshly ground black pepper
- 1 pound baby potatoes, halved
- 1 cup green beans, trimmed
- for garnish fresh parsley, chopped
Instructions
- Begin by preheating your oven to 425°F (220°C), ensuring it's fully heated for optimal cooking.
- In a medium-sized mixing bowl, combine the honey, Dijon mustard, olive oil, garlic powder, onion powder, and a generous pinch of salt and pepper. Whisk these ingredients together until you achieve a smooth marinade.
- Place the chicken thighs into a large resealable ziplock bag or a shallow dish. Pour half of the honey mustard marinade over the chicken, ensuring each piece is well-coated. Seal the bag tight or cover the dish with plastic wrap, and let the chicken marinate in the refrigerator for at least 30 minutes. For more intense flavor, allow it to marinate for up to 2 hours.
- While the chicken is marinating, wash and prepare your vegetables. In a separate mixing bowl, add the halved baby potatoes and trimmed green beans. Pour the remaining marinade over these veggies and toss until they are fully coated.
- Line a large sheet pan with parchment paper for easier cleanup after cooking. Place the marinated chicken thighs skin-side up on one side of the pan. Spread the marinated potatoes and green beans on the opposite side, arranging them in a single layer for even cooking.
- Slide the sheet pan into the preheated oven and bake for 30-35 minutes. You’ll know the dish is ready when the chicken reaches an internal temperature of 165°F (75°C) and the skin is nicely crispy. The vegetables should be tender and show a hint of caramelization.
- After baking, carefully remove the sheet pan from the oven. Allow the dish to rest for a few minutes to let the juices settle. Just before serving, garnish with a sprinkle of fresh chopped parsley for a burst of color and flavor.
![To make a tasty Chicken Zoodle Soup, gather these fresh ingredients: - 2 medium zucchinis, spiralized into noodles (zoodles) - 1 pound boneless, skinless chicken breast, diced into bite-sized pieces - 4 cups low-sodium chicken broth - 1 medium onion, finely chopped - 2 cloves garlic, minced - 2 medium carrots, peeled and sliced into thin rounds - 1 celery stalk, diced into small pieces - 1 teaspoon dried thyme - 1 teaspoon dried oregano - 1 tablespoon extra virgin olive oil - Salt and freshly ground black pepper to taste - Fresh parsley, finely chopped (for garnish) You can also add optional toppings like grated cheese or a squeeze of lemon for extra flavor. Using fresh herbs adds a bright touch to your bowl. Each ingredient plays a role, from the chicken's protein to the zoodles' crunch. For the full recipe, check out the detailed steps to create this comforting dish. To make Chicken Zoodle Soup, start by preparing your zoodles. You can use a spiralizer to turn the zucchinis into long, thin noodles. If you don’t have a spiralizer, a vegetable peeler works too. Just slice the zucchini into thin strips. Next, chop your vegetables. Finely chop the onion and mince the garlic. Peel the carrots and slice them into thin rounds. Finally, dice the celery into small pieces. This will help the veggies cook evenly. Now, it’s time to cook the chicken and vegetables. In a large pot, heat one tablespoon of extra virgin olive oil over medium heat. When hot, add the chopped onion and minced garlic. Stir for about 2 minutes until they smell great. Then, add the sliced carrots and diced celery. Cook for 5 to 7 minutes until they soften. After the veggies soften, add the diced chicken to the pot. Sprinkle in one teaspoon each of dried thyme and oregano, along with salt and pepper to taste. Cook for another 5 to 7 minutes until the chicken is no longer pink. Then, pour in the low-sodium chicken broth. Turn the heat up to bring it to a boil. Once it boils, lower the heat and let it simmer for about 10 minutes. This allows all the flavors to blend well. Now comes the fun part! When your soup has simmered, it’s time to add the zoodles. Stir them into the broth and cook for an additional 3 to 5 minutes. You want them tender but still a bit firm, so check them often. After cooking, taste the soup. If it needs more flavor, add more salt or pepper to your liking. Finally, ladle the hot soup into bowls. Use fresh parsley to garnish each bowl for a pop of color. This step adds a fresh touch to your comforting meal. For the full recipe, make sure to check out the complete instructions. Enjoy your delicious Chicken Zoodle Soup! - How to make the best zoodles Start with firm zucchinis. Use a spiralizer to cut them into thin noodles. This gives the best texture. Avoid wet zucchinis; they can turn soggy. If needed, salt the zoodles and let them sit for 15 minutes to draw out moisture. Rinse and pat them dry before cooking. - Perfecting the soup flavor Use low-sodium chicken broth for a balanced taste. Fresh herbs like thyme and oregano add depth. Sauté your onions and garlic well to build a strong base flavor. Taste the soup as it cooks, adjusting salt and pepper for the perfect bite. - Avoiding mushy zucchini noodles Add zoodles towards the end of cooking. They only need 3 to 5 minutes to soften. Overcooking makes them mushy and less appealing. Keep them slightly firm for the best texture in your soup. - Ideal serving dishes Use warm, deep bowls to enhance the cozy feel of your soup. The depth keeps the soup hot longer. If you like, serve with a side of crusty bread or a light salad. - Accompaniments like bread or salad Crusty bread pairs well with this soup. It’s perfect for dipping. A fresh side salad can add crunch and flavor to your meal. Choose greens like spinach or arugula for a nice contrast. - Garnishing techniques for presentation Finish your soup with a sprinkle of fresh parsley. This adds color and freshness. A slice of lemon on the side can brighten the flavors, too. For a fun twist, add a few chili flakes for heat. For the complete method, check out the Full Recipe. {{image_4}} You can switch up the chicken for many options. Try turkey, tofu, or chickpeas for a plant-based meal. Each brings its own taste and texture to the soup. For those who want low-carb or dairy-free options, use vegetable broth instead of chicken broth. You can also replace the chicken with cauliflower or mushrooms. These choices keep the soup hearty and tasty. Want to add more veggies? Toss in spinach, bell peppers, or green beans. They add color and crunch to your bowl. To add spice and kick, consider cayenne pepper or red pepper flakes. Just a pinch can warm up your soup without being too hot. Herbs can change the flavor based on the season. In winter, use rosemary or sage. In summer, fresh basil and cilantro brighten the dish. You can also incorporate noodles or pasta for a different twist. Whole wheat pasta or rice noodles work well. They make the soup even more filling. For the full recipe, check out the details above. Enjoy experimenting with your Chicken Zoodle Soup! To keep your Chicken Zoodle Soup fresh, store it in the fridge. Use an airtight container. Make sure the soup cools first. This helps prevent condensation. You can freeze the soup if you want to store it longer. Use freezer-safe bags or containers. Leave some space at the top for expansion. To reheat, warm it on the stove over low heat. Stir often to avoid burning. You can also use the microwave. Heat in short bursts, stirring in between. In the fridge, your soup lasts about three to four days. If you freeze it, it can last up to three months. Just remember to label the containers with the date. Look for signs of spoilage. If the soup smells sour or has mold, it’s time to toss it. Always trust your senses; they guide you well. What are zoodles and how can they be made? Zoodles are zucchini noodles. You can make them by spiralizing zucchinis. Use a spiralizer or a peeler for thin strips. They are a great, low-carb alternative to pasta. Can I make Chicken Zoodle Soup ahead of time? Yes, you can make the soup ahead. Store it in the fridge for up to three days. Just add the zoodles when you're ready to eat. This keeps them fresh and firm. How do I prevent zoodles from becoming soggy? To keep zoodles from getting soggy, add them at the end of cooking. Only cook them for a few minutes. This way, they stay crisp and tasty. Can I use rotisserie chicken for this recipe? Absolutely! Rotisserie chicken saves time. Just shred or cube the chicken and add it to the soup. It adds a nice flavor boost, too. Is it possible to make this in a slow cooker? Yes, you can use a slow cooker. Cook the chicken and veggies on low for 4-6 hours. Add zoodles in the last 15 minutes to keep them tender. How do I make the soup gluten-free? To make the soup gluten-free, use gluten-free chicken broth. Ensure all added spices are also gluten-free. This way, everyone can enjoy your delicious Chicken Zoodle Soup. For a full recipe, check out the [Full Recipe]. You now have a clear guide to making Chicken Zoodle Soup. We covered the key ingredients, preparation steps, and cooking instructions. I shared useful tips to keep your zoodles from turning mushy and ways to enhance the flavor. Remember, you can customize your soup with ingredient swaps to fit your needs. Store leftovers properly to enjoy later. Cooking doesn’t have to be complicated. Experiment and have fun with this recipe. Your kitchen can be a place of creativity and health. Enjoy your tasty, homemade soup!](https://goldendishy.com/wp-content/uploads/2025/06/e4db2e18-4a3d-4a81-8032-e96fb997d624-768x768.webp)
![- Bell peppers: Choose bright colors like red, yellow, or orange. These colors not only look great but also add natural sweetness. Each pepper holds the filling nicely and provides a tasty bite. - Quinoa: Rinse the quinoa well under cold water. This step removes the bitter coating called saponin. Rinsing ensures your quinoa has a clean, nutty flavor that shines in the dish. - Vegetable broth: Use low-sodium broth for better control of the flavor. It enhances the taste of quinoa and adds depth to the dish. You can also try homemade broth for a fresher taste. - Ground spices: Cumin, smoked paprika, and chili powder are key. Cumin gives an earthy flavor, while paprika adds a hint of smokiness. Chili powder can amp up the heat level, making your dish exciting. - Beans and corn: Black beans add protein and fiber, making the meal hearty. Corn brings sweetness and crunch, creating a balanced texture. Both ingredients make the filling more nutritious and filling. - Cheese alternatives: Depending on your diet, choose cheddar for a classic taste or opt for a dairy-free cheese. Both melt well and enhance the flavors, giving a creamy finish to each stuffed pepper. For the full list of ingredients, check the Full Recipe. Start by preheating your oven to 375°F (190°C). This step matters because the right heat cooks the peppers evenly and makes them tender. While the oven warms up, you can prepare the bell peppers. Cut the tops off and scoop out the seeds and membranes inside. Stand the peppers upright in a baking dish. This helps them stay stable while they bake. Next, it’s time to cook the quinoa. In a medium saucepan, add 1 cup of rinsed quinoa and 2 cups of vegetable broth. Bring it to a boil, then lower the heat. Cover and let it simmer for about 15 minutes. You want the quinoa to be fluffy and all the liquid should be gone. While the quinoa cooks, you can mix the filling. In a large bowl, combine the fluffy quinoa, black beans, corn, diced tomatoes, cumin, smoked paprika, and chili powder. Add salt and pepper to taste. Make sure everything is mixed well to ensure a consistent flavor in every bite. Now comes the fun part—stuffing the peppers! Use a spoon to fill each bell pepper with your quinoa mixture. Pack it down gently to fit as much filling as possible. Once filled, sprinkle a good amount of cheese on top of each pepper. Cover the baking dish with aluminum foil and place it in the oven. Bake for 25 minutes. After that, remove the foil and bake for another 10 minutes. This helps the cheese melt and become bubbly. The peppers should be tender but still hold their shape. Once done, take the dish out and let it cool for a few minutes. Right before serving, add fresh cilantro or parsley on top for a nice touch. For the full recipe, check out the details provided earlier. To achieve fluffy quinoa, rinse it well before cooking. Rinsing removes the bitter coating called saponin. Use a fine mesh strainer for this step. Then, cook the quinoa in the right ratio of water to quinoa. I recommend 2 cups of vegetable broth for every 1 cup of quinoa. Bring it to a boil, then simmer for 15 minutes. This way, the quinoa will be light and fluffy. When baking your stuffed peppers, timing is key. Start by covering the dish with foil for the first 25 minutes. This keeps the moisture in, helping the peppers cook evenly. After that, remove the foil and bake for an extra 10 minutes. This will make the cheese melt perfectly and the peppers tender but not mushy. For presentation, serve your stuffed peppers on a large platter. Sprinkle extra herbs like cilantro or parsley around for a fresh look. A drizzle of olive oil or a squeeze of lime juice adds brightness and flavor. As for side dishes, consider a simple green salad or some roasted vegetables. These pair well with the peppers and add color to your meal. A light white wine or sparkling water complements the dish nicely, enhancing your dining experience. For the full recipe, check out [Full Recipe]. {{image_4}} What can I use instead of black beans? You can swap in other legumes like chickpeas or kidney beans. Each offers unique flavors and textures. Chickpeas add a nutty taste, while kidney beans bring a soft bite. Both boost protein and fiber, making your meal heartier. Can I add meat to my stuffed peppers? Yes! Chicken or turkey works great. Use cooked ground meat for easy mixing. This adds a savory depth to your dish. Just remember to season the meat well for the best flavor. How can I change the spices? Explore with different spices to create new flavors. Try adding oregano for a Mediterranean twist or curry powder for a bold kick. Each spice changes the overall taste, making your stuffed peppers exciting. Can I use different veggies? Absolutely! Seasonal vegetables like zucchini, spinach, or mushrooms can enhance your filling. They add more nutrients and variety. Just chop them finely and mix them in with your quinoa and beans. For the full recipe, check out the details above. After enjoying your quinoa stuffed bell peppers, store leftovers in the fridge. Place them in an airtight container. This keeps them fresh for up to four days. If you plan to eat them later, consider freezing them. To freeze, wrap each pepper in plastic wrap. Then place them in a freezer-safe bag or container. Make sure to remove as much air as possible. Properly stored, they can last for up to three months in the freezer. When it’s time to enjoy your stuffed peppers again, you can reheat them in several ways. The oven is my favorite method. Preheat it to 350°F (175°C). Place the peppers in a baking dish and cover with foil. Bake for about 20 minutes, or until heated through. You can also use the microwave for quick reheating. Simply place a pepper on a microwave-safe plate. Cover it with a paper towel to keep moisture in. Heat it for about 2-3 minutes, checking to avoid overheating. If you prefer the stovetop, heat a skillet over medium heat and add a little water. Place the peppers in the skillet and cover. Heat for about 5-7 minutes, turning occasionally. To keep the texture nice, avoid sogginess. When reheating, do not add extra moisture or cover too tightly. This will help maintain that delightful crunch of the peppers. For the full recipe, visit the [Full Recipe]. How long do quinoa stuffed peppers last in the fridge? Quinoa stuffed peppers can last about 3 to 5 days in the fridge. Store them in an airtight container to keep them fresh. If you want to enjoy them later, just heat them up in the oven or microwave. Can I make quinoa stuffed peppers ahead of time? Yes, you can prepare quinoa stuffed peppers ahead of time. Stuff the bell peppers and store them in the fridge. Bake them when you’re ready to eat. This makes meal prep easy and convenient. What can I substitute for quinoa in this recipe? If you want to swap out quinoa, try using brown rice or couscous. Both options provide a nice texture. Just remember to adjust cooking times as needed for these ingredients. Are quinoa stuffed peppers healthy? Yes, quinoa stuffed peppers are healthy. They’re packed with protein, fiber, and vitamins. Quinoa is a complete protein, making this dish a great choice for a balanced meal. Gluten-free options: Ensuring a safe meal for all Quinoa is naturally gluten-free, so this dish is safe for gluten-sensitive people. Just check your labels for any added ingredients that might contain gluten. Vegetarian vs. vegan: Key differences in ingredients Vegetarian quinoa stuffed peppers include cheese, while vegan ones use dairy-free cheese. Both versions are delicious. Choose based on your dietary needs. Quinoa stuffed bell peppers use fresh ingredients and bold flavors for a tasty meal. First, choose colorful bell peppers and rinse the quinoa for the best taste. Use ground spices and beans to boost nutrition. Follow the steps closely for perfect results, and don’t forget to try different flavors and proteins. Store leftovers well to enjoy later. Healthy and easy, this dish fits any dinner. You can impress friends and family while eating well! So, get cooking and enjoy every bite of your delicious creation.](https://goldendishy.com/wp-content/uploads/2025/06/de4f4195-310c-4430-9b68-8374d14e079c-768x768.webp)
![For this soup, fresh broccoli is key. Use about 4 cups of broccoli florets, roughly chopped. This gives the soup its vibrant green color and healthy crunch. You also need 1 medium onion, finely chopped, and 2 cloves of garlic, minced. These aromatics build a rich flavor base. Dairy makes this soup creamy and rich. You will need 1 cup of heavy cream. If you prefer a lighter option, substitute with coconut cream. For the broth, use 3 cups of low-sodium vegetable broth. This adds depth without overpowering the other flavors. Seasonings elevate the taste of your soup. Use 1 teaspoon of garlic powder and 1/2 teaspoon of onion powder. Don’t forget to add salt and freshly ground black pepper to taste. If you want a crunchy finish, top your soup with toasted croutons. They add a delightful texture and flavor contrast. This combination of ingredients creates a comforting, flavorful Broccoli Cheddar Soup. For a complete guide, check the Full Recipe. Start by melting the butter in a large pot over medium heat. Add the finely chopped onion. Sauté for about five minutes. You want the onion to be soft and clear. Next, add the minced garlic and cook for one to two minutes. This will make your kitchen smell amazing! Be careful not to burn the garlic. Now it’s time for the broccoli. Add the roughly chopped florets to the pot. Sauté them for about three to four minutes. This helps them soften a bit before the next step. Pour in the vegetable broth and raise the heat to bring it to a boil. Once boiling, reduce the heat to a simmer. Let it cook for about ten to twelve minutes until the broccoli is tender. After the broccoli is tender, it’s blending time! Use an immersion blender right in the pot. If you have a regular blender, transfer the soup in batches. Just be careful with the hot liquid. Blend until smooth. Return the soup to the pot and stir in the heavy cream, keeping the heat low. Slowly add the shredded sharp cheddar cheese. Stir until it melts and mixes well. Finally, add garlic powder and onion powder, and season with salt and pepper. Let it warm for a few more minutes. Serve your soup hot, and add toasted croutons if you like. Enjoy this cheesy broccoli bliss! You can find the full recipe above. To get that creamy feel, blend the soup well. Use an immersion blender for ease. If you want a chunkier soup, blend only half. This keeps some broccoli bits for a nice bite. Make sure to blend until smooth. This step makes all the difference in your final dish. Add more depth to your soup by using fresh herbs. Parsley or thyme brings bright notes. You can also toss in a dash of nutmeg for warmth. Adjust the salt and pepper to your taste. A squeeze of lemon juice can brighten flavors, too. Experiment with these extras until you find your favorite mix. Store leftover soup in an airtight container. It will keep well in the fridge for up to three days. Reheat gently on the stove to avoid curdling the cream. If you freeze it, leave out the cheese. Add it back when you reheat for the best flavor. Store in portions to make it easy to enjoy later. {{image_4}} You can make a vegan version of this soup. Replace the heavy cream with coconut cream. Use nutritional yeast instead of cheddar cheese. This option keeps the cheesy flavor while being dairy-free. Blend the soup until smooth, just like the original. You can still enjoy that creamy texture without any animal products. For a low-carb soup, swap the heavy cream for cauliflower. Cook the cauliflower with the broccoli, then blend it all together. This change cuts carbs while keeping the soup rich and hearty. You can also use a low-carb cheese to enhance the flavor without adding too many carbs. Want to boost the protein? Add cooked chicken or beans. They pair well with the flavors of broccoli and cheese. You can also toss in other veggies like carrots or spinach. This adds color and nutrients to your soup. Just make sure to cook them until tender before blending. For the full recipe, check out the main article. A serving of broccoli cheddar soup contains about 350 calories. The calorie count may vary based on the ingredients you use. For instance, using heavy cream adds more calories than coconut cream. If you add croutons, that will increase the total calories too. This soup packs a punch of nutrients. Here are some key nutrients you get in each serving: - Protein: About 12 grams, mostly from cheese and cream. - Fat: Approximately 25 grams, primarily from cheddar and cream. - Carbohydrates: Around 20 grams, mainly from broccoli and onion. - Fiber: Offers about 4 grams, thanks to the broccoli. Broccoli is more than just tasty. It is a superfood! Here are some reasons to love it: - Rich in Vitamins: It's high in vitamins C and K. - Antioxidants: Broccoli has powerful antioxidants. They help fight free radicals in your body. - Supports Digestion: The fiber helps keep your digestive system healthy. - Boosts Immunity: Eating broccoli may help strengthen your immune system. This nutritional information shows why broccoli cheddar soup is a great choice for a meal. It is not just delicious; it also nourishes your body. To store leftover broccoli cheddar soup, let it cool first. Then, pour it into an airtight container. It keeps well in the fridge for about three to four days. When you want to eat it, just reheat it on the stove or in the microwave. Stir well to mix the flavors again before serving. Yes, you can freeze broccoli cheddar soup. First, let it cool down completely. Then, place it in a freezer-safe container. Make sure to leave some space at the top, as the soup will expand when frozen. It can last for about three months in the freezer. To use, thaw it overnight in the fridge and reheat gently. To make broccoli cheddar soup gluten-free, use gluten-free broth. Most vegetable broths are gluten-free, but always check the label. Also, use cornstarch instead of flour if you want to thicken it. Just mix cornstarch with a little water before adding it to the soup. This way, you will enjoy a creamy soup without gluten. For the full recipe, check out [Full Recipe]. This blog covered how to make a tasty broccoli cheddar soup. We discussed key ingredients, including fresh broccoli and flavor-packed aromatics. I outlined helpful steps for cooking and blending the soup. You learned tips for great texture and flavor as well as how to store leftovers. Try variations like vegan options or low-carb versions to fit your needs. Broccoli brings healthy nutrients, making this soup a smart choice. Enjoy this dish, knowing you can customize it just the way you like!](https://goldendishy.com/wp-content/uploads/2025/06/c21049f2-ac49-4cf8-bdd7-9e479da09cd5-768x768.webp)