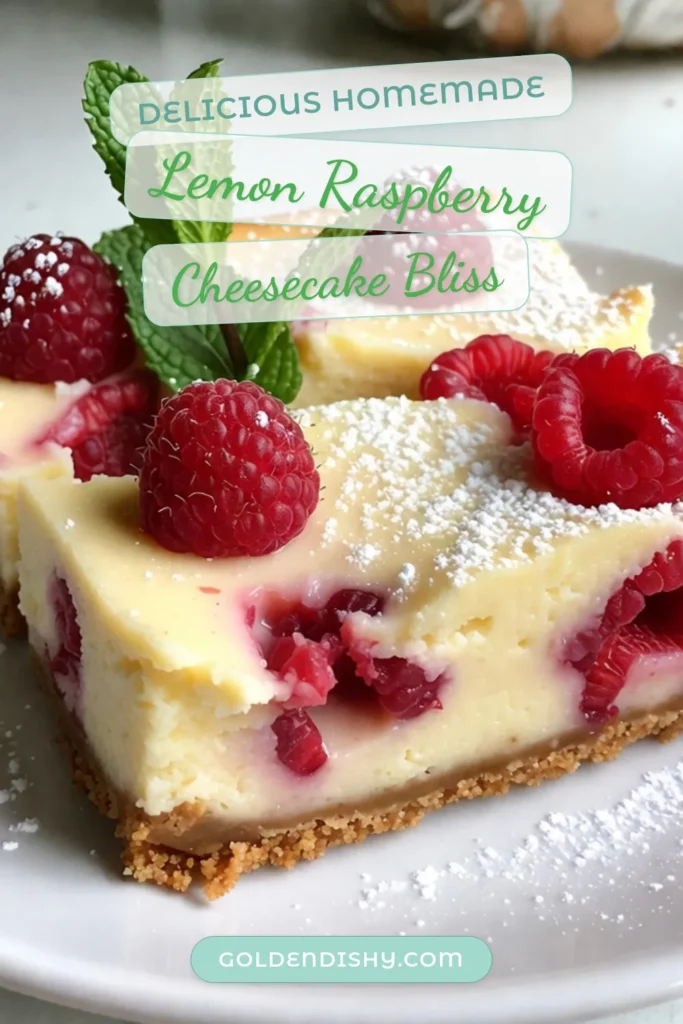
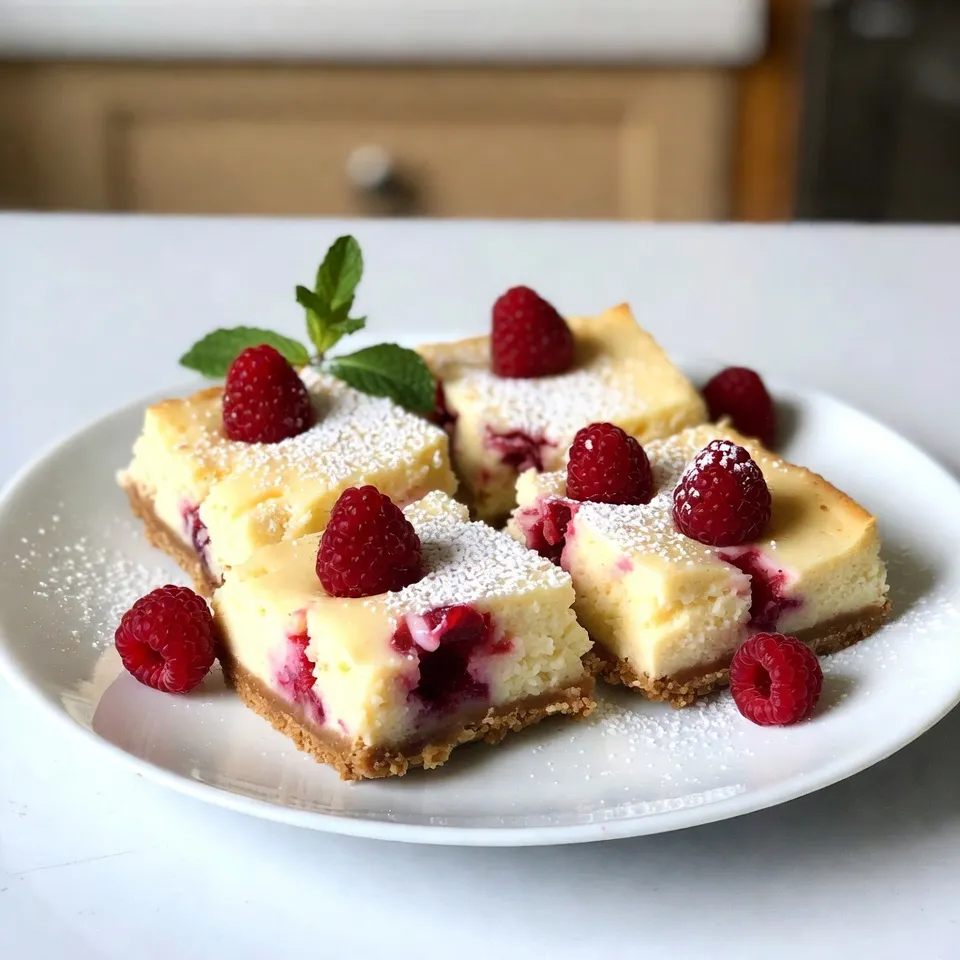
Lemon Raspberry Cheesecake Bars Simple and Delicious
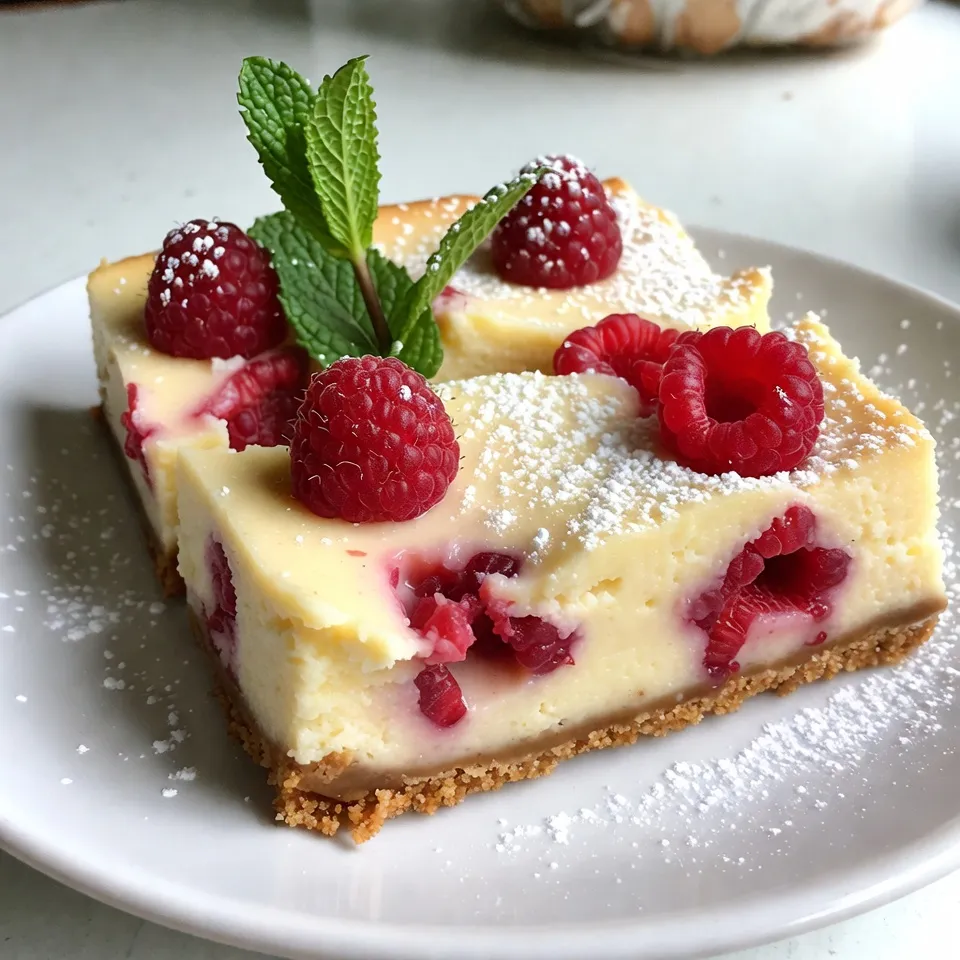
Get ready to impress your friends and family with these Lemon Raspberry Cheesecake Bars! They are simple to make, yet oh-so-delicious. Picture a light and creamy cheesecake topped with bright lemon and sweet raspberries. This treat is perfect for any occasion. In this post, I’ll walk you through each step, share tips for success, and offer fun variations to try. Let’s dive into baking these tasty bars together!
Why I Love This Recipe
- Fresh and Fruity Flavor: The combination of zesty lemon and tart raspberries creates a refreshing taste that is perfect for any occasion.
- Easy to Make: With straightforward steps and minimal ingredients, these cheesecake bars are simple enough for bakers of all levels to enjoy.
- Perfect for Sharing: Cut into squares, these bars are ideal for parties, potlucks, or as a delightful treat to share with friends and family.
- Beautiful Presentation: The vibrant colors of the raspberries and the dusting of powdered sugar make these bars not only delicious but also visually stunning.
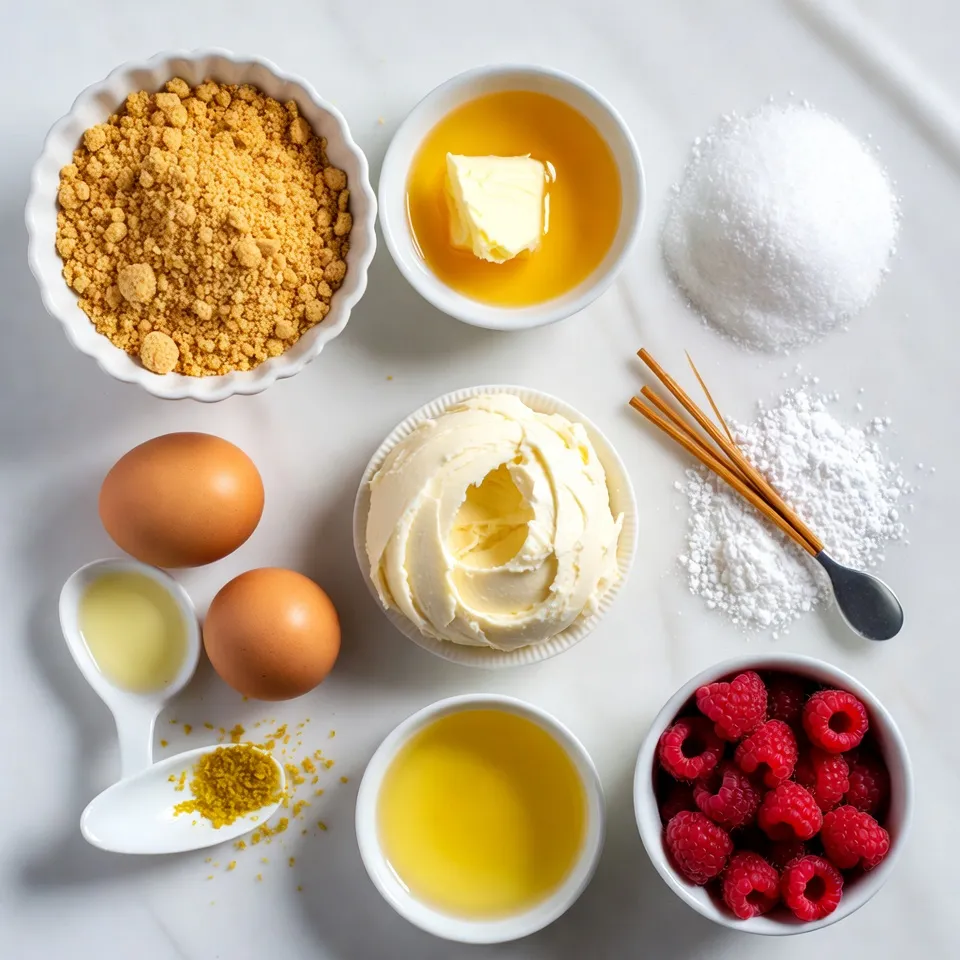
Ingredients
Main Ingredients for Lemon Raspberry Cheesecake Bars
To make these bars, you need simple yet tasty ingredients. Here’s what you will need:
– 1 ½ cups graham cracker crumbs
– ½ cup unsalted butter, melted
– 2 tablespoons granulated sugar (for crust)
– 16 oz cream cheese, softened
– 1 cup granulated sugar (for filling)
– 2 large eggs, at room temperature
– 1 teaspoon pure vanilla extract
– Zest of 1 medium lemon
– ½ cup freshly squeezed lemon juice
– 1 cup fresh raspberries, plus extra for garnish
– 2 tablespoons powdered sugar (for dusting and garnish)
Each ingredient plays a role. The graham cracker crumbs form a crunchy base. Cream cheese gives the bars their rich, creamy texture. Lemon juice and zest add bright flavor. Raspberries provide a burst of sweetness.
Optional Garnishes and Toppings
While the bars are delicious on their own, you can add some fun touches. Consider these options:
– Additional fresh raspberries for garnish
– A sprinkle of powdered sugar on top
– A sprig of fresh mint for color
These garnishes make your bars look fancy and inviting.
Equipment Needed
You don’t need many tools, but a few essentials help. Gather the following:
– 8×8-inch square baking pan
– Parchment paper for lining
– Mixing bowls (medium and large)
– Electric mixer for a smooth filling
– Spatula for folding in the raspberries
Having the right equipment makes your baking easier. It helps you create perfectly layered cheesecake bars.
Step-by-Step Instructions
Preparation of the Crust
To start, preheat your oven to 350°F (175°C). Grab an 8×8-inch baking pan. Line it with parchment paper. Make sure some paper hangs over the edges. This helps you lift the bars out later.
In a medium bowl, mix 1 ½ cups of graham cracker crumbs, ½ cup of melted unsalted butter, and 2 tablespoons of granulated sugar. Stir until it looks like wet sand.
Now, press this crumb mixture into the bottom of the pan. Make it even. Bake it for 10 minutes. After baking, let it cool a bit while you make the filling.
Making the Cheesecake Filling
In a large bowl, take 16 oz of softened cream cheese. Add 1 cup of granulated sugar. Beat them together with an electric mixer until smooth. This should take about 2-3 minutes.
Next, add 2 large eggs, one at a time. Mix well after each egg. This keeps the filling lump-free. Then, stir in 1 teaspoon of vanilla extract, the zest of 1 medium lemon, and ½ cup of freshly squeezed lemon juice. Mix until it’s all blended together.
Now, gently fold in 1 cup of fresh raspberries. Be careful not to squish them. You want the raspberries whole for bursts of flavor in each bite.
Baking and Cooling Process
Pour the cheesecake filling over your cooled crust. Spread it evenly. Tap the pan gently on the counter to release any air bubbles.
Bake the mixture for 25-30 minutes. The center should be set but still jiggle a little when you move the pan. Once done, take it out and let it cool at room temperature for about 1 hour. Then, put it in the fridge to chill for at least 3 hours, or overnight if you can wait.
When it’s set, lift the bars out of the pan using the parchment paper. Cut them into 16 equal squares. Dust each bar with powdered sugar and add fresh raspberries on top for a pretty touch.
Tips & Tricks
Key Techniques for Perfect Cheesecake Bars
To make the best lemon raspberry cheesecake bars, start with room-temperature cream cheese. This helps create a smooth filling. Use a hand mixer to blend the filling well. Mix until it gets creamy and fluffy. When adding eggs, beat them in one at a time. This helps prevent lumps in your batter.
When folding in the raspberries, be gentle. You want them to stay whole for pops of flavor. Pour the filling over the crust and tap the pan on the counter. This removes air bubbles and helps the filling settle evenly.
Common Mistakes to Avoid
One common mistake is overmixing the batter. This can make the cheesecake dense. Always mix just until combined. Another mistake is baking too long. The center should jiggle slightly when done. If you overbake, it can crack and dry out.
Make sure to chill the bars properly. If you cut them too soon, they won’t hold their shape. Use parchment paper for easy removal. This way, you won’t lose any bars to the pan.
How to Achieve the Best Flavor
For the best flavor, use fresh lemons and raspberries. The zest and juice bring a bright taste. You can also add a pinch of salt to the filling. This enhances the sweet and tart balance.
Dusting with powdered sugar adds a nice touch. It makes the bars look pretty and taste sweet. To serve, add fresh raspberries and mint leaves. This makes a beautiful presentation and adds freshness.
Pro Tips
- Use Room Temperature Ingredients: Make sure your cream cheese and eggs are at room temperature before mixing. This helps achieve a smoother filling without lumps.
- Don’t Overmix: When incorporating the eggs and raspberries, mix just until combined. Overmixing can lead to a denser cheesecake.
- Chill for Best Texture: Allow the cheesecake bars to chill in the refrigerator for at least 3 hours, or overnight if possible. This enhances both the flavor and the texture.
- Garnish Right Before Serving: Dust the bars with powdered sugar and add fresh raspberries just before serving to maintain their freshness and visual appeal.
Variations
Alternative Crust Options
You can switch up the crust for your Lemon Raspberry Cheesecake Bars. Instead of graham crackers, try these options:
– Oreo Crust: Crush Oreo cookies and mix them with butter. This adds a rich, chocolatey flavor.
– Almond Flour Crust: Combine almond flour with melted butter and a bit of sugar. This option is gluten-free and adds a nutty taste.
– Shortbread Crust: Use crushed shortbread cookies for a buttery and sweet base.
Each crust adds a unique flavor to the bars. Experiment and find your favorite!
Flavor Additions and Swaps
You can play around with flavors in the filling too. Here are some ideas:
– Berry Mix: Swap raspberries for strawberries, blueberries, or blackberries. A mix gives a colorful twist.
– Citrus Zest: Add lime or orange zest for a different citrus kick. This will brighten the flavor.
– Chocolate Swirls: Melt some dark chocolate and swirl it into the filling before baking. This adds a rich layer to the bars.
Feel free to get creative with these flavor swaps. Each adds a personal touch!
Serving Suggestions
How you serve these bars can make a big difference. Here are a few fun ideas:
– Fresh Garnish: Top each bar with a few fresh raspberries and a mint leaf. This makes them look fancy.
– Drizzle: Drizzle with melted white chocolate or a berry sauce for extra sweetness.
– Cheesecake Parfaits: Layer crumbled bars with whipped cream and fresh berries in a glass. This is a fun way to serve them at parties.
These serving ideas will wow your guests and make your dessert even more enjoyable!
Storage Info
Best Practices for Storing Cheesecake Bars
To keep your lemon raspberry cheesecake bars fresh, store them in the fridge. Use an airtight container to avoid any odors. If you don’t have one, wrap them tightly in plastic wrap. This way, they stay moist and tasty.
How Long Do They Last in the Fridge?
These cheesecake bars last about five days in the fridge. After that, they may lose some flavor and texture. Make sure to check for any signs of spoilage before enjoying them again.
Can You Freeze Lemon Raspberry Cheesecake Bars?
Yes, you can freeze these bars! They freeze well and can last for up to three months. Wrap each bar in plastic wrap, then place them in a freezer bag. When you’re ready to eat, thaw them in the fridge overnight.
FAQs
Can I use frozen raspberries instead of fresh?
Yes, you can use frozen raspberries. Just thaw them first and drain any extra juice. This helps keep your bars from getting too soggy. Frozen raspberries may break apart more easily while mixing, so be gentle. The flavor will still be great, and your cheesecake bars will still taste fresh and delicious.
What can I substitute for cream cheese?
If you need a cream cheese substitute, try using Greek yogurt or cottage cheese. Both options will give you a creamy texture. You can also use vegan cream cheese if you want a dairy-free option. Just keep in mind that the taste may change slightly, but your bars will still be tasty.
How do I know when the cheesecake is done baking?
Check for doneness by looking for the center of the cheesecake. It should be set but still jiggle slightly when you move the pan. The edges may look firm while the center appears a bit soft. This is normal. Let the cheesecake cool, and it will firm up as it chills in the fridge.
This blog post covered how to make delicious lemon raspberry cheesecake bars. We explored the main ingredients, optional toppings, and equipment you need. I shared clear steps for preparing the crust and filling, plus tips to avoid mistakes. I also suggested variations and storage tips to keep them fresh.
Remember, making cheesecake bars is easy and fun. You can try many flavors and toppings. Enjoy your bakin

Lemon Raspberry Cheesecake Bars
Ingredients
- 1.5 cups graham cracker crumbs
- 0.5 cups unsalted butter, melted
- 2 tablespoons granulated sugar (for crust)
- 16 oz cream cheese, softened to room temperature
- 1 cups granulated sugar (for filling)
- 2 large eggs, at room temperature
- 1 teaspoon pure vanilla extract
- 1 medium zest of lemon
- 0.5 cups freshly squeezed lemon juice
- 1 cups fresh raspberries, plus extra for garnish
- 2 tablespoons powdered sugar (for dusting and garnish)
Instructions
- Preheat your oven to 350°F (175°C). Prepare an 8x8-inch square baking pan by lining it with parchment paper, allowing some overhang to facilitate easy removal later.
- In a medium mixing bowl, combine the graham cracker crumbs, melted butter, and 2 tablespoons of granulated sugar. Mix the ingredients together until the mixture is evenly combined and resembles wet sand.
- Press the crumb mixture firmly into the bottom of the lined baking pan to form a uniform crust. Bake in the preheated oven for 10 minutes, then remove and let cool slightly while you prepare the filling.
- In a large mixing bowl, use an electric mixer to beat the softened cream cheese and 1 cup of granulated sugar together until the mixture is completely smooth and creamy, approximately 2-3 minutes.
- Add the eggs to the cream cheese mixture one at a time, ensuring you mix well after each addition to avoid lumps. Once combined, stir in the vanilla extract, lemon zest, and freshly squeezed lemon juice, mixing until thoroughly blended.
- Gently fold in the fresh raspberries with a spatula, taking care not to squish them. You want the raspberries to remain whole for delightful bursts of flavor in the finished bars.
- Pour the cheesecake filling over the slightly cooled crust, spreading it evenly to cover the crust completely. Tap the pan gently on the counter to remove any air bubbles.
- Bake in the oven for 25-30 minutes, or until the center of the cheesecake is set but still slightly jiggles when you move the pan. Remove from the oven and let cool at room temperature for about 1 hour, then transfer to the refrigerator to chill for at least 3 hours, or preferably overnight for best results.
- Once chilled and set, carefully lift the cheesecake bars out of the pan using the parchment paper overhang. Cut into 16 equal squares.
- Just before serving, dust each bar with powdered sugar for a touch of sweetness and visual appeal. Garnish with additional fresh raspberries and a sprig of fresh mint for a beautiful presentation.
![- 1 ripe avocado, peeled and pitted - 1/2 cup unsweetened cocoa powder - 1/2 cup maple syrup or honey - 1/4 cup almond butter or peanut butter - 1/2 cup whole wheat flour - 1/2 teaspoon baking soda - 1/4 teaspoon salt - 1 teaspoon pure vanilla extract - 1/2 cup dark chocolate chips The key ingredient here is the avocado. Why choose avocado for brownies? It adds creaminess and healthy fats. This makes the brownies moist without extra oil. Next, we have cocoa powder. It gives the brownies a rich chocolate taste. The maple syrup or honey acts as a natural sweetener. I prefer maple syrup for its unique flavor. Almond butter or peanut butter brings a nutty taste. Whole wheat flour adds fiber, making these brownies healthier. Baking soda helps the brownies rise. Salt enhances all the flavors. Finally, dark chocolate chips are a must for that gooey chocolate burst. Using avocado offers many perks. It is rich in vitamins and healthy fats. These fats can help lower bad cholesterol. The fiber in avocado also aids digestion. Cocoa powder is full of antioxidants. It can improve heart health while making brownies delicious. Maple syrup is a lower glycemic option. It can provide a steady energy boost without a sugar crash. Switching to whole wheat flour adds more nutrients. It has more fiber than white flour. This helps keep you full longer. If you need gluten-free options, use almond flour instead of whole wheat. It works well and keeps the taste rich. For a vegan-friendly version, replace honey with maple syrup. Use a nut butter that fits your diet. You can also find dairy-free chocolate chips easily. These easy swaps ensure everyone can enjoy these healthy chocolate avocado brownies! - Preheat your oven to 350°F (175°C). - Line an 8x8 inch baking pan with parchment paper. Leave some paper hanging over the edges. This helps with easy removal later. - Take your ripe avocado and mash it in a bowl. You want it smooth and creamy. You can also use a food processor for this step. - In the same bowl, add maple syrup (or honey), almond butter, and vanilla extract. Mix until everything is blended well. - In a different bowl, whisk together cocoa powder, whole wheat flour, baking soda, and salt. Make sure these dry ingredients are mixed well. - Gradually add the dry mix to the wet mix. Stir gently until just combined. It’s okay to have a few lumps; this helps keep the brownies soft. - Fold in dark chocolate chips so they are evenly spread in the batter. - Pour the batter into your prepared pan. Use a spatula to smooth it out evenly. - Place the pan in your oven. Bake for 20-25 minutes. - To check if they are done, insert a toothpick into the center. It should come out with a few moist crumbs but not wet batter. - Once baked, let the brownies cool in the pan on a wire rack for 15 minutes. Use the parchment paper to lift them out. Let them cool further before cutting into squares. Enjoy making these Healthy Chocolate Avocado Brownies with the [Full Recipe]. To make your brownies just right, avoid overmixing. When you combine wet and dry ingredients, mix gently. A few lumps are okay. This keeps your brownies soft and fudgy. Even baking is also key. Make sure to spread the batter evenly in the pan. This helps them bake at the same time. For a lovely presentation, dust the brownies with cocoa powder or powdered sugar. You can also serve them with fresh berries. A dollop of yogurt adds creaminess and balances the rich chocolate. These simple touches make your brownies look great on any plate. You can boost the taste of your brownies easily. Try adding spices like cinnamon or a pinch of sea salt. A splash of almond or peppermint extract gives a fun twist. Using flavored chocolate chips adds another layer of taste. Think about using orange or hazelnut chips for a unique flavor profile. Check out the Full Recipe for more ideas! {{image_4}} To make these brownies gluten-free, swap whole wheat flour for almond flour or coconut flour. These options keep the texture rich and moist while avoiding gluten. Just remember to adjust the amount, as almond flour is more absorbent. For a vegan twist, replace honey with maple syrup. You can also use a plant-based nut butter, like almond or sunflower seed butter, instead of peanut butter. This keeps the flavor intact without any animal products. You can add a fresh twist to these brownies by mixing in mint extract. Use about 1 teaspoon of pure mint extract for a refreshing flavor. This makes mint chocolate avocado brownies that are perfect for any mint lover! Another fun option is to create a peanut butter swirl. Drop spoonfuls of peanut butter into the brownie batter before baking. Use a knife to swirl it around for a beautiful marbled look. This adds a delicious peanut flavor that pairs well with chocolate. If you want to change the serving size, you can easily convert the recipe. For a smaller batch, halve the ingredients. Use a smaller pan, like 6x6 inches, and keep an eye on the baking time. Smaller brownies will bake faster. You can also bake these brownies in a larger pan for thinner squares. A 9x13 inch pan works well, but adjust the baking time to about 15-20 minutes. Check for doneness with a toothpick, just like before. For the full recipe, check out the details above! To keep your brownies fresh, store them in an airtight container. This prevents air from making them dry. You can also place a slice of bread in the container. The bread helps maintain moisture. Always let brownies cool before storing. This avoids steam build-up, which can make them soggy. If you want to freeze brownies, first cut them into squares. Wrap each piece tightly in plastic wrap. Then, place them in a freezer-safe bag or container. This helps avoid freezer burn. When you're ready to eat them, just take out a piece and let it thaw at room temperature. You can also warm them in the microwave for a few seconds. Brownies last about 3-4 days at room temperature. If you see any mold, throw them away. To keep them fresh longer, refrigerate or freeze them. Refrigeration can extend their life to about a week. For best taste, enjoy them within a few days. For the full recipe, check out the provided details. Can I use ripe bananas instead of avocado? Yes, you can use ripe bananas. They add sweetness and moisture. However, the flavor changes slightly. Bananas may make the brownies taste fruitier. If you love banana, give it a try! How can I make these brownies less sweet? To reduce sweetness, cut back on the maple syrup or honey. You can also swap some sweetener for unsweetened applesauce. This keeps the texture but lowers the sugar. What is the best way to test brownies for doneness? The best way is to use a toothpick. Insert it in the center. If it comes out with a few moist crumbs, the brownies are done. If it has wet batter, bake a bit longer. Can these brownies be made without flour? Yes, you can make them without flour. Use a blend of nut flour or almond flour instead. This gives a nutty flavor and keeps the brownies moist. How many calories are in a serving? Each brownie has about 100 calories. This can change based on the ingredients you use. For example, using less sweetener or different nut butter may alter the calorie count. What are good dairy-free alternatives for chocolate chips? Look for dairy-free dark chocolate chips. Many brands make these with coconut or almond milk. You can also chop up a dairy-free chocolate bar for chunks. In this article, I covered a delicious brownie recipe that uses healthy ingredients. You learned about the key components, their nutritional benefits, and how to adapt the recipe for dietary needs. I shared step-by-step instructions for baking these brownies to perfection. With tips on flavor and texture, you can create the best version. Remember to store your leftovers properly to keep them fresh. Enjoy baking these brownies, knowing they are a tasty treat that can fit your diet!](https://goldendishy.com/wp-content/uploads/2025/06/19347e51-2d6e-4328-baa5-83086a8293f2-768x768.webp)