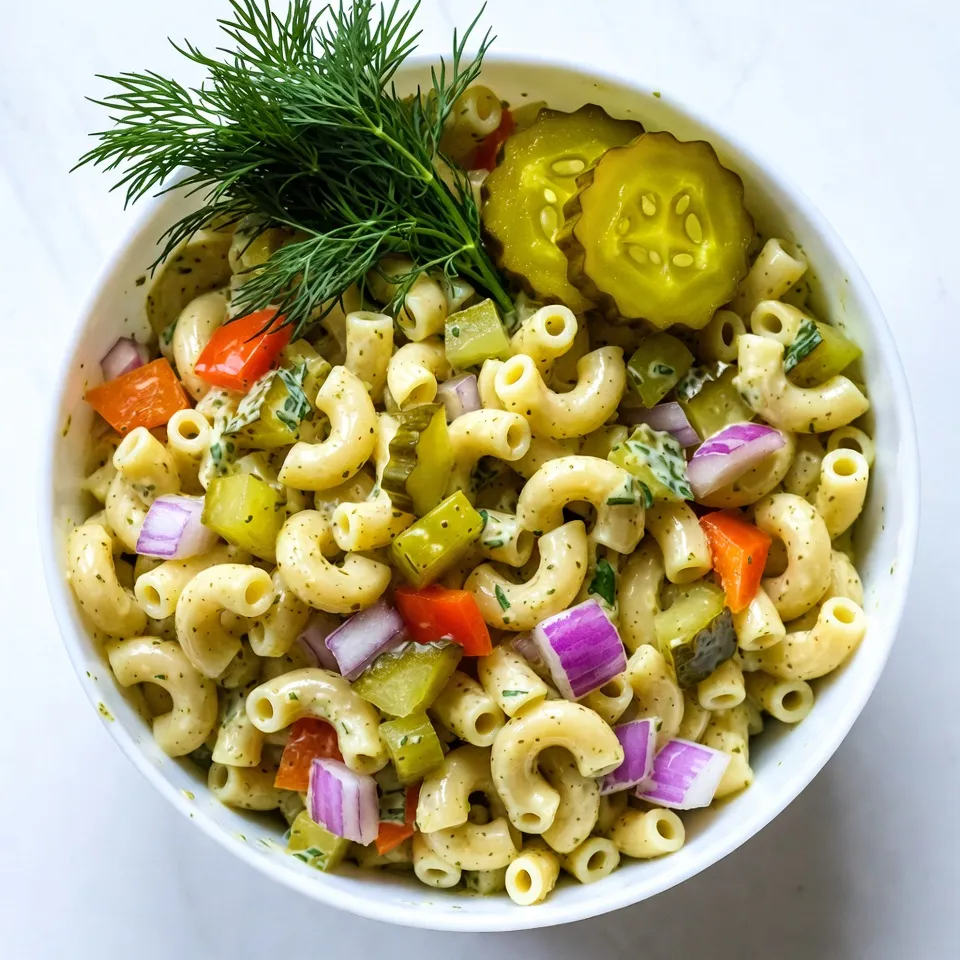
Dill Pickle Pasta Salad Quick and Tasty Recipe
Are you ready for a fun twist on pasta salad? My Dill Pickle Pasta Salad combines creamy dressing with the crunch of dill pickles and fresh veggies. It’s quick to make and perfect for summer barbecues or potlucks. This recipe is easy to follow, and you can adjust it to your taste. Let’s get started and create a dish that everyone will love!
Why I Love This Recipe
- Unique Flavor Combination: This pasta salad beautifully combines the tangy crunch of dill pickles with creamy dressing, creating a delightful bite that’s hard to resist.
- Quick and Easy: With minimal prep time and straightforward steps, this recipe is perfect for busy weeknights or last-minute gatherings.
- Versatile: You can easily customize this salad by adding your favorite vegetables or proteins, making it a flexible dish for any occasion.
- Chill and Serve: This dish gets even better after chilling, allowing the flavors to meld and intensify, making it ideal for meal prep or potlucks.
Ingredients
Main Ingredients
– 8 oz elbow macaroni or rotini pasta
– 1 cup diced dill pickles
– ½ cup finely diced red onion
– ½ cup diced bell pepper
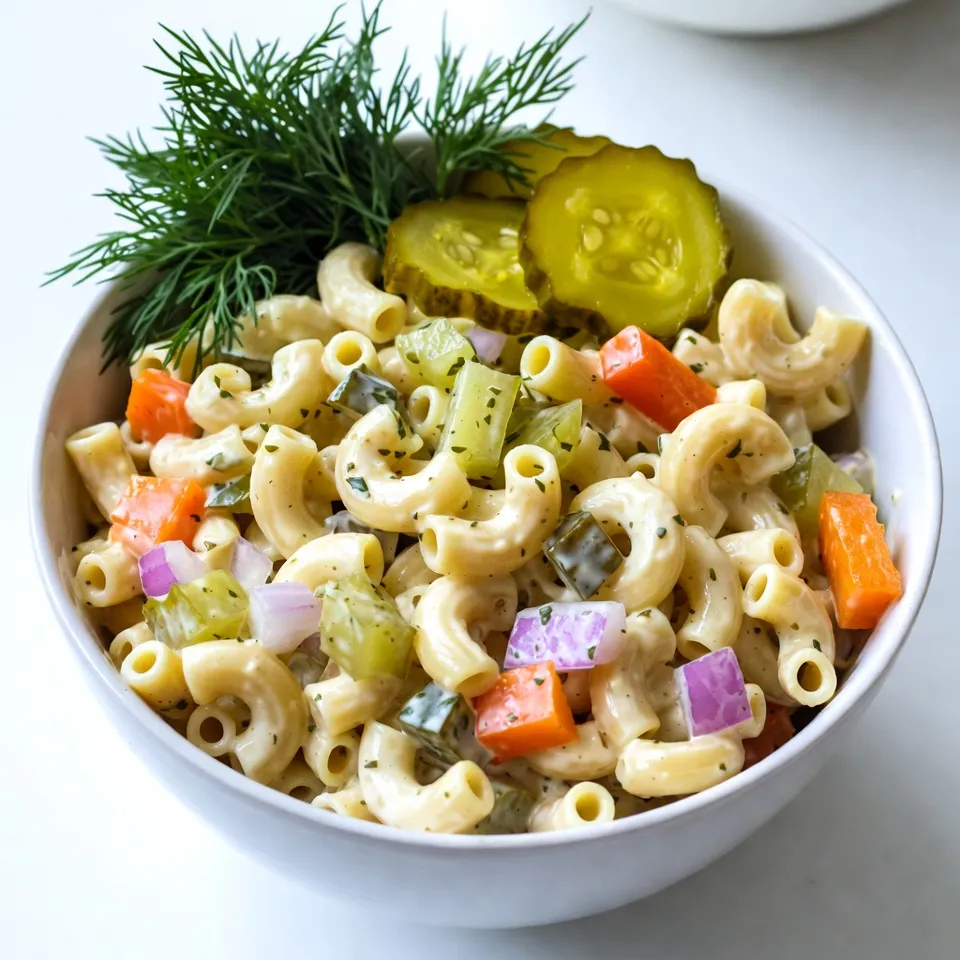
The stars of this salad are the pasta and pickles. You can use either elbow macaroni or rotini pasta. Both work well with the creamy dressing. The diced dill pickles add a tangy crunch that makes this dish special. You should also add finely diced red onion and bell pepper for a nice flavor contrast. The red onion gives a bit of sharpness, while the bell pepper adds sweetness.
Dressing Ingredients
– ¼ cup mayonnaise or Greek yogurt
– 2 tablespoons dill pickle juice
– 1 teaspoon Dijon mustard
– 1 teaspoon dried dill
For the dressing, you can choose between mayonnaise or Greek yogurt. Greek yogurt gives a lighter feel, while mayonnaise adds creaminess. Then, add dill pickle juice for extra tang. Dijon mustard adds a touch of spice, and dried dill enhances the pickle flavor. Mix these together for a creamy dressing that coats the pasta well.
Seasoning
– Salt and black pepper to taste
– Fresh dill sprigs for garnish
Don’t forget to season your dish! Add salt and black pepper to taste. This step is key to bringing out all the flavors. Finally, use fresh dill sprigs as a garnish. They not only look great but also add a fresh aroma that makes the salad even better.

Step-by-Step Instructions
Cooking the Pasta
First, bring a large pot of salted water to a boil. Add 8 oz of elbow macaroni or rotini. Cook until the pasta is al dente, or firm to the bite. This usually takes about 8-10 minutes. Once done, drain the pasta in a colander. Rinse it under cold water. This helps stop the cooking and cools the pasta quickly.
Preparing Vegetables
While your pasta cooks, chop the veggies. Take 1 cup of dill pickles, ½ cup of finely diced red onion, and ½ cup of diced bell pepper. You can use green or yellow bell pepper for a sweet touch. Make sure all pieces are small and even. This helps the flavors mix well.
Making the Dressing
In a medium bowl, mix the dressing. Combine ¼ cup of mayonnaise or Greek yogurt, 2 tablespoons of dill pickle juice, and 1 teaspoon of Dijon mustard. Add 1 teaspoon of dried dill. Season with salt and black pepper to taste. Stir until creamy and well mixed.
Combining Ingredients
In a large bowl, add the cooled pasta. Then, add the diced dill pickles, red onion, and bell pepper. Pour the dressing over the pasta and veggies. This is where the magic happens!
Toss and Chill
Use a spatula or large spoon to gently toss everything together. Make sure every piece is coated in dressing. Cover the bowl with plastic wrap or a lid. Refrigerate for at least 30 minutes to let the flavors meld.
Serving Suggestions
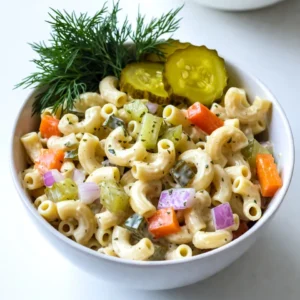
Before serving, stir the salad well. Taste it to see if you need more salt, pepper, or pickle juice. For a lovely touch, garnish with fresh dill sprigs and some reserved pickle slices. Enjoy this bright and tangy pasta salad!
Tips & Tricks
Enhancing Flavor
Adjust the seasoning and dressing to your taste. Start with the basics. Add salt and pepper as you mix. If you want more zing, add more dill pickle juice. You can also tweak the dressing by adding a bit more mustard or dill. This helps to bring out all the flavors. Taste as you go to find your perfect mix.
Serving Suggestions
This pasta salad is best served chilled. It tastes great on a hot day. Use colorful dishes to make it pop. A bright bowl can make your meal more fun. You can serve it as a side dish or the main course. Either way, it’s sure to please.
Presentation Tips
Make your salad look extra special. Use fresh garnishes like dill sprigs. Place them on top just before serving. You can also add a few pickle slices for a nice touch. This adds color and makes it look inviting. A well-presented dish makes the meal even better!
Pro Tips
- Perfect Pasta Texture: Make sure to cook the pasta just until al dente. This will ensure that the pasta retains a slight bite and doesn’t become mushy when mixed with the dressing and vegetables.
- Customize Your Veggies: Feel free to mix in other vegetables like cucumbers or cherry tomatoes for added color and texture. Just make sure they are finely chopped to match the size of the pasta.
- Flavor Boost: For an extra kick, consider adding a pinch of cayenne pepper or a splash of hot sauce to the dressing. This will add a subtle heat that complements the tanginess of the pickles.
- Make-Ahead Magic: This pasta salad is perfect for meal prep! You can make it a day in advance, and the flavors will only get better as it sits in the fridge.
Variations
Healthier Options
You can make this salad lighter. Substitute Greek yogurt for mayonnaise. Greek yogurt still adds creaminess. It also boosts protein and cuts fat. This swap keeps the same great taste. You get a fresher feel with every bite.
Adding Proteins
Want to make it heartier? Consider adding cooked chicken or chickpeas. Cooked chicken gives a nice protein boost. Chickpeas add a plant-based option. Both options mix well with the pasta. They make the salad fill you up more.
Vegetable Alternatives
Feel free to experiment with different veggies. Try adding crunchy celery or sweet carrots. Both add texture and flavor. You can even toss in peas or corn. Each veggie brings its own unique taste. This keeps the salad fun and fresh.
Storage Info
Refrigeration
Store leftover Dill Pickle Pasta Salad in an airtight container. This keeps it fresh and tasty. Make sure to cool the salad to room temperature before sealing. It will last well in the fridge for about 3 to 5 days. If you notice any changes in color or smell, it’s best to throw it away.
Shelf Life
For the best taste, enjoy your pasta salad within 3 days. After that, it may lose its crunch and flavor. The pickles can get too soft, and the dressing may separate. If you plan to keep it longer, consider other storage options.
Freezing
You can freeze pasta salad, but I don’t recommend it. Freezing can change the texture of the pasta and veggies. If you want to try, place the salad in a freezer-safe container. Leave some room for expansion. To thaw, move it to the fridge overnight before serving. Enjoy it fresh for the best flavor!
FAQs
How do I make Dill Pickle Pasta Salad vegetarian?
To make this salad vegetarian, you don’t need to change much. The main ingredients are already plant-based. Just ensure any mayo you use is vegetarian-friendly. You can swap regular mayo for vegan mayo if you want. If you want more crunch, add chopped celery or shredded carrots. Both add great flavor and texture.
Can I use other types of pasta?
Yes, you can use other pasta types. Penne or fusilli works well too. Just remember to cook your pasta until it is al dente. For elbow macaroni or rotini, usually, it takes about 7-10 minutes. Check the package for exact cooking times.
Is this pasta salad gluten-free?
You can make this pasta salad gluten-free. Choose gluten-free pasta made from rice or corn. Most grocery stores have good options. Just follow the cooking times on the package, as they can vary a bit from regular pasta.
How long can I store Dill Pickle Pasta Salad?
You can store this salad in the fridge for up to 3 days. Just keep it in an airtight container. If you notice any changes in smell or color, it’s best to throw it away. Always check for freshness before eating leftovers.
Can I make this salad in advance?
Yes, this salad is great to make ahead. I recommend making it a day before you plan to serve it. This allows the flavors to mix well. Just remember to cover it tightly and store it in the fridge. Before serving, give it a good stir to refresh the flavors.
In this blog post, we gathered everything you need for a delicious Dill Pickle Pasta Salad. You learned about the key ingredients, from pasta and veggies to the creamy dressing. We also shared step-by-step instructions to make it easy. Lastly, we covered storage tips and variations to suit your taste.
Enjoy this refreshing dish for any occasion. Experiment with flavors and make it your own. Happy cookin
Dill Pickle Delight Pasta Salad
Ingredients
- 8 oz elbow macaroni or rotini pasta
- 1 cup diced dill pickles
- 0.5 cup finely diced red onion
- 0.5 cup diced bell pepper
- 0.25 cup mayonnaise or Greek yogurt
- 2 tablespoons dill pickle juice
- 1 teaspoon Dijon mustard
- 1 teaspoon dried dill weed
- to taste Salt and black pepper
- for garnish Fresh dill sprigs
Instructions
- Cook the Pasta: Start by bringing a large pot of salted water to a rolling boil. Add the elbow macaroni or rotini and cook according to the package instructions until al dente. Once done, drain the pasta and immediately rinse it under cold water to stop the cooking process and cool it down.
- Prepare the Vegetables: While the pasta cooks, take the time to finely chop the dill pickles, red onion, and bell pepper into small, bite-sized pieces, ensuring they blend well into the salad.
- Make the Dressing: In a medium-sized bowl, mix together the mayonnaise (or Greek yogurt), dill pickle juice, Dijon mustard, dried dill, and season with salt and pepper. Stir until all the ingredients are well incorporated and creamy.
- Combine Ingredients: In a large mixing bowl, add the cooled pasta along with the diced dill pickles, red onion, and bell pepper. Pour the dressing over the top of the pasta mixture.
- Toss Well: Gently toss all the ingredients together using a spatula or large spoon, ensuring each piece of pasta and vegetable is fully coated with the dressing for the best flavor.
- Chill: Cover the mixing bowl with plastic wrap or a lid and refrigerate the pasta salad for at least 30 minutes. This chilling time allows the flavors to meld beautifully.
- Serve: Before serving, give the salad a good stir to redistribute the dressing. Taste to check for seasoning and adjust with additional salt, pepper, or dill pickle juice as needed. Garnish with fresh dill sprigs and the reserved pickle slices for an extra pop of flavor and color.
. To start, you need to preheat your grill or oven. If you choose to grill, set it to medium-high heat. This will help create a nice char on the corn. If baking sounds better, preheat your oven to 400°F (200°C). Both methods work well, giving you tasty corn. Next, prepare the garlic butter mixture. In a mixing bowl, combine melted unsalted butter, minced garlic, smoked paprika, sea salt, and black pepper. Whisk this mix together until all the ingredients blend well. The aroma will fill your kitchen, making it hard to wait for the corn! Now, it’s time to coat the corn. Take each ear of corn and brush it with your garlic butter mix. Make sure to cover every kernel. This ensures each bite bursts with flavor. For grilling, place the corn on the grill grates. Rotate it every 2-3 minutes until charred and tender, about 10-12 minutes total. If baking, wrap the corn in aluminum foil and bake for 20-25 minutes, turning halfway. After cooking, sprinkle grated Parmesan cheese on top while it’s still hot. Optionally, drizzle with fresh lemon juice for added flavor. Finally, garnish your corn with chopped parsley for a bright finish. Enjoy your Garlic Parmesan Corn on the Cob! For a complete guide, check out the Full Recipe. Grilling corn on the cob can be fun and easy. First, soak the husked corn in water for 15 minutes before grilling. This helps keep the corn moist. When you're ready, heat your grill to medium-high. Place the corn directly on the grates. Rotate the corn every 2-3 minutes. This gives it even cooking and a nice char. In about 10-12 minutes, the corn will be bright and tender. For the best garlic flavor, use fresh garlic. Mince the cloves finely to release the oils. Mix it well with the melted butter before brushing it on the corn. If you want a stronger taste, let the garlic sit in the butter for a bit. This helps the flavors blend. You can also add a touch of garlic powder if you like more depth. If you prefer a bit of heat, add a pinch of cayenne pepper to your garlic butter. For those who enjoy a milder taste, skip the pepper entirely. You can also adjust the smoked paprika amount. Start with less, then taste as you go. Everyone has different spice levels, so make it your own. Remember, you can always add more spice, but you can’t take it out! For the full recipe, check out the Garlic Parmesan Corn on the Cob section. {{image_4}} To change up the flavor, you can add more spices. Try adding chili powder for heat. You can also mix in some Italian herbs, like oregano or basil. They give a fresh lift. If you love herbs, fresh cilantro is a great choice. Just chop it fine and add it to your garlic butter mix. This will make your corn taste even better! Parmesan is great, but other cheeses can work too. For a creamier taste, use feta cheese. It adds a nice tang. If you want something sharper, try aged cheddar. It gives a bold kick. You can even use vegan cheese if you prefer. Just make sure it melts well. Each cheese choice will give your corn a unique twist. Serving corn on the cob can be fun and playful. Try cutting the corn into smaller pieces for easy sharing. You can also serve it on skewers for a fun touch. Drizzle it with a spicy sauce for extra flavor. If you want a fancy look, sprinkle some microgreens on top. They add color and freshness. For the full recipe, check out the detailed steps to make this dish shine! After enjoying your Garlic Parmesan Corn on the Cob, you may have some left. It’s best to store it in an airtight container. Let the corn cool to room temperature first. Wrap each ear in plastic wrap or foil for extra protection. This keeps it fresh and tasty for later. Store the container in the fridge. It can last about 3 to 4 days. When you’re ready to enjoy the leftover corn, reheating it is simple. You can use the microwave, grill, or oven. For the microwave, place the corn on a plate and cover it with a damp paper towel. Heat in short bursts of 30 seconds. Check to see if it’s warm. If using the grill, wrap the corn in foil to avoid drying out. Heat for about 5 to 7 minutes. For the oven, preheat to 350°F (175°C) and bake wrapped corn for 10 to 15 minutes. Freezing is a great option if you want to save the corn for a long time. Husk the corn and cut the kernels off the cob if you prefer. Place the kernels in a freezer bag, removing as much air as possible. Label the bag with the date. You can also freeze whole cobs. Wrap each cob in plastic wrap and place it in a freezer bag. The corn can last up to 6 months in the freezer. When you’re ready to use it, thaw in the fridge overnight before reheating. You can pair Garlic Parmesan Corn on the Cob with many easy side dishes. Some great options include: - Grilled chicken or fish - Fresh salad with vinaigrette - Coleslaw for crunch - Roasted potatoes for heartiness - Tomato and mozzarella salad for freshness These sides complement the sweet, buttery flavor of the corn. They also create a colorful plate. Yes, you can make Garlic Parmesan Corn on the Cob in the oven. Preheat your oven to 400°F (200°C). Wrap the corn tightly in aluminum foil to keep it moist. Bake for 20-25 minutes. Turn the foil halfway through cooking. This method gives you tender corn, full of flavor. To prevent the corn from sticking to the grill, follow these tips: - Preheat the grill to medium-high heat. - Brush the grill grates with oil before placing the corn. - Make sure to coat the corn with the garlic butter mixture. This keeps it moist and adds flavor. - Rotate the corn every few minutes to avoid sticking. These steps help you achieve perfectly grilled corn every time. Enjoy your cooking! Making Garlic Parmesan Corn on the Cob is simple and fun. We covered the best ingredients, tools, and methods. Preheating is key, and the garlic butter really adds flavor. You learned grilling tips and how to customize with herbs or spices. Don't forget about storage and reheating for later. Enjoy your delicious corn, and share it with friends. Each bite can bring smiles, making it worth the effort. Now, get cooking!](https://goldendishy.com/wp-content/uploads/2025/07/bd43f489-c25e-441e-8123-0082a4d55c21-768x768.webp)