Teriyaki Chicken Pineapple Skewers Tasty and Easy Meal
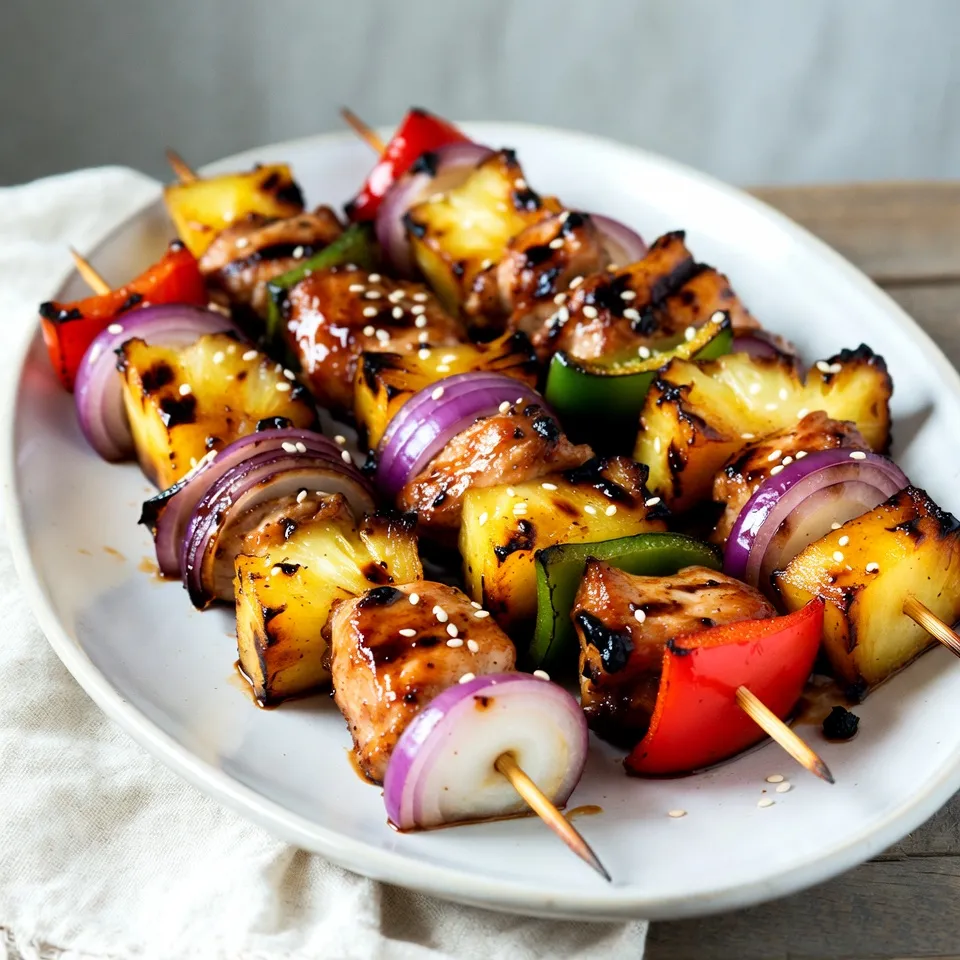

Looking for a quick and tasty meal? Try my Teriyaki Chicken Pineapple Skewers! They bring together juicy chicken, sweet pineapple, and colorful veggies for a meal that pleases everyone. In just a few simple steps, you can grill these flavorful skewers for dinner or a fun get-together. Let’s dive into the ingredients and discover how easy it is to make this delicious dish!
Why I Love This Recipe
- Bold Flavors: The combination of sweet pineapple and savory teriyaki chicken creates a delicious explosion of flavors that elevate any meal.
- Easy to Prepare: With simple ingredients and straightforward steps, these skewers are perfect for both beginners and seasoned cooks alike.
- Perfect for Grilling: These skewers are ideal for outdoor gatherings, making them a great choice for summer barbecues and family cookouts.
- Customizable: You can easily swap out vegetables or proteins to suit your taste, making this recipe versatile and adaptable.
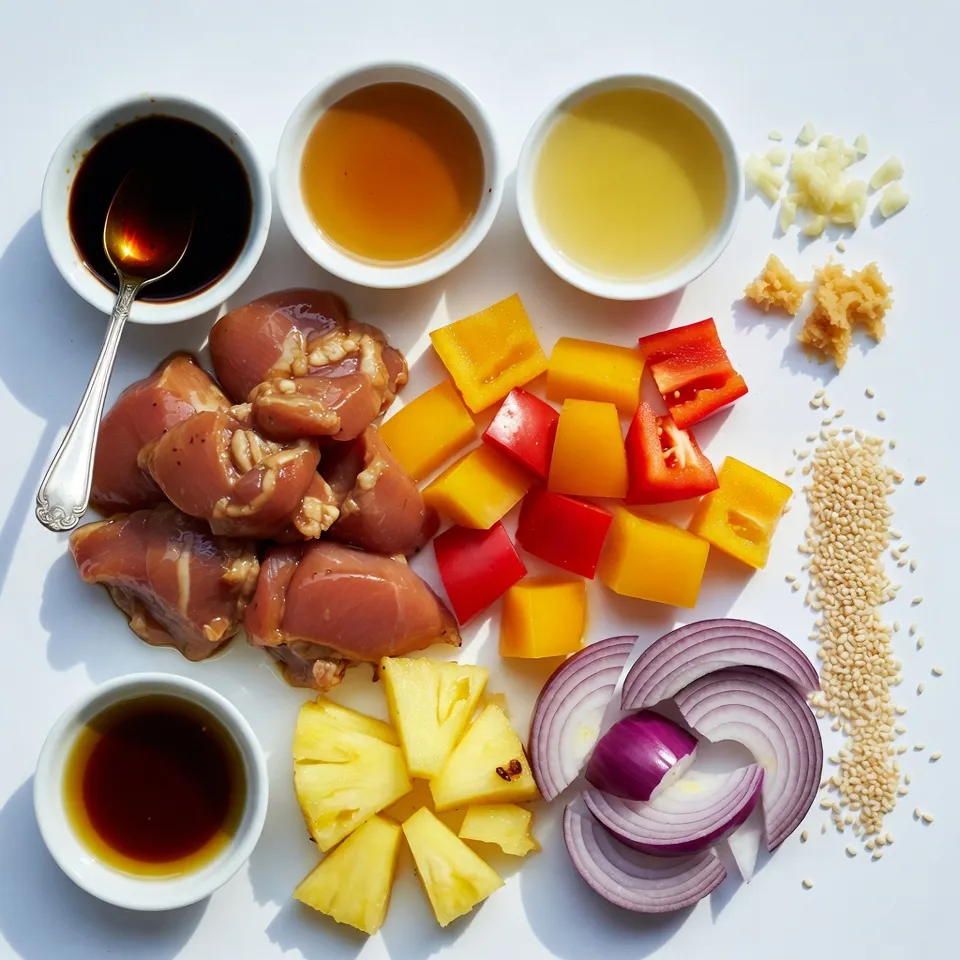
Ingredients
Main Ingredients
– 1 lb boneless chicken thighs, cut into 1-inch pieces
– 1 cup pineapple chunks, fresh or canned
– 1 bell pepper, red or yellow, cut into 1-inch squares
– 1 small red onion, cut into wedges
Marinade Ingredients
– 1/4 cup low-sodium soy sauce
– 2 tablespoons honey or maple syrup
– 2 tablespoons rice vinegar
– 1 tablespoon sesame oil
– 2 cloves garlic, minced
– 1 teaspoon fresh ginger, grated
Additional Ingredients
– Sesame seeds, toasted, for garnish
– Skewers (wooden or metal; soak wooden ones for 30 minutes)
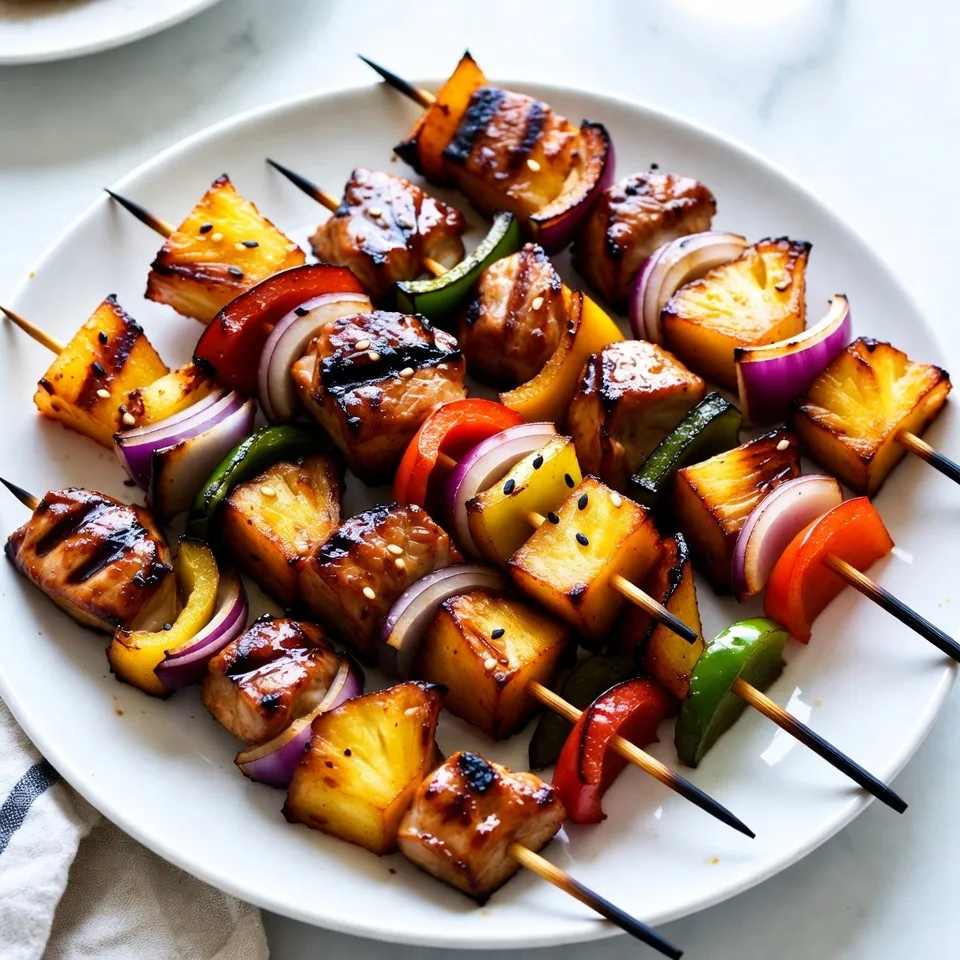
Step-by-Step Instructions
Preparing the Skewers
To start, soak your wooden skewers in water for at least 30 minutes. This step helps prevent them from burning on the grill. If you’re using metal skewers, you can skip this. Next, it’s time to assemble the skewers. Alternate threading the chicken, pineapple chunks, bell pepper squares, and red onion wedges. Aim for 3-4 pieces of chicken per skewer. This not only looks good but also adds flavor.
Marination Process
Mix the marinade in a medium bowl. Whisk together the low-sodium soy sauce, honey or maple syrup, rice vinegar, sesame oil, minced garlic, and grated ginger. Once mixed, add the chicken pieces. Stir until the chicken is well-coated. Cover the bowl and let it marinate for at least 30 minutes at room temperature. For even better taste, refrigerate for up to 2 hours.
Grilling Instructions
Now, preheat your grill or grill pan over medium-high heat. Lightly oil the grill grates to stop the skewers from sticking. Place the skewers on the hot grill and cook for about 5-7 minutes on each side. The chicken should reach an internal temperature of 165°F (75°C). Brush with any leftover marinade to add flavor and moisture. Keep an eye on them to avoid burning.
Tips & Tricks
Grilling Tips
To enjoy perfect Teriyaki Chicken Pineapple Skewers, keep these tips in mind:
– How to prevent sticking: Lightly oil your grill grates before cooking. This helps keep the skewers from sticking. You can use a paper towel dipped in oil, held with tongs, to coat the grates.
– Monitoring for doneness: Cook the skewers for about 5-7 minutes on each side. Check the chicken’s internal temperature. It should reach 165°F (75°C). This ensures it’s safe to eat and perfectly juicy.
Serving Suggestions
Make your Teriyaki Chicken Pineapple Skewers look as good as they taste:
– Presentation ideas: Place skewers on a large platter with chopped cilantro or parsley. The green adds a nice pop of color. You can also arrange them in a circle or stack them for a fun look.
– Complementary side dishes: Serve these skewers with fluffy steamed rice or a fresh salad. You can also add a side of grilled vegetables for an extra flavor boost.
Enhancing Flavor
Spice up your skewers with these ideas:
– Adjusting sweetness and tang: If you like it sweeter, add more honey or maple syrup. For more tang, increase the rice vinegar. Taste your marinade before adding the chicken to get it just right.
– Adding extra spices: Want a kick? Sprinkle some red pepper flakes or add a pinch of smoked paprika to the marinade. This will give your skewers an extra layer of flavor that will impress everyone.
Pro Tips
- Choose Fresh Ingredients: Opt for fresh pineapple and vibrant bell peppers for the best flavor and presentation. Fresh produce elevates the dish significantly.
- Marinate for Maximum Flavor: Allow the chicken to marinate for at least 30 minutes, but for deeper flavor, marinating for up to 2 hours in the refrigerator is ideal.
- Watch Your Cooking Time: Keep an eye on the skewers while grilling as cooking times can vary. Aim for a perfect internal temperature of 165°F (75°C) for juicy chicken.
- Add a Spicy Kick: If you enjoy heat, consider adding a splash of sriracha or red pepper flakes to the marinade for a spicy twist to your teriyaki skewers.
Variations
Different Protein Options
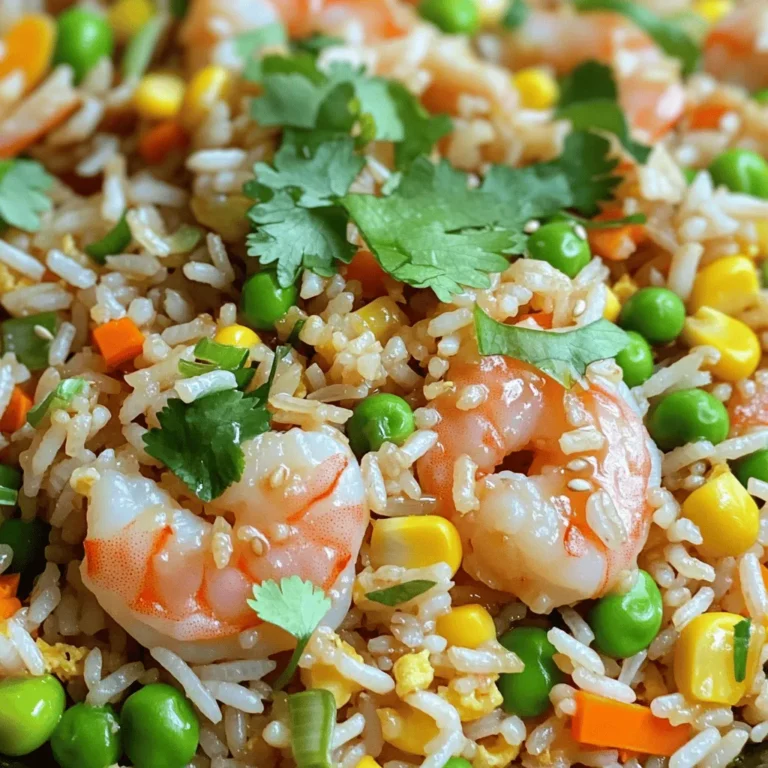
You can easily swap the chicken for shrimp or tofu. Shrimp cooks quickly and absorbs flavors well. Tofu is a great plant-based choice. If you use shrimp, look for large ones. They will stay juicy on the grill. For tofu, choose firm or extra-firm varieties. Marinate both shrimp and tofu just like the chicken. This step makes sure they are tasty.
Seasonal Ingredient Swaps
Feel free to mix in seasonal veggies. Zucchini or cherry tomatoes work great. You can slice zucchini into rounds or half the tomatoes. These add color and flavor to your skewers. Try bell peppers in different colors for a vibrant look. You can also use mushrooms for an earthy taste. The key is to pick fresh, in-season veggies for the best flavor.
Sauce Variations
You can change up the sauce for a new twist. Try teriyaki sauce with a spicy kick by adding chili paste. You can also use a sweet and sour sauce for a different flavor. If you want a smoky taste, add some barbecue sauce. Each sauce gives your skewers a unique taste. Experiment and find your favorite!
Storage Info
Storing Leftovers
To keep your Teriyaki Chicken Pineapple Skewers fresh, store them in an airtight container. Place the skewers in the fridge as soon as you finish eating. This helps prevent spoilage. Aim to eat leftovers within 3 days. After that, the chicken may lose flavor and texture.
Reheating Instructions
When reheating, I recommend using the oven or a skillet. These methods help keep the skewers juicy. Preheat your oven to 350°F (175°C) and bake for about 10-15 minutes. If using a skillet, heat it over medium. Add a splash of water to keep moisture. Cook for about 5-7 minutes, turning gently.
Freezing Tips
You can freeze these skewers if you want to save some for later. However, it’s best to freeze them uncooked. This keeps the chicken and vegetables fresh. Wrap them tightly in plastic wrap and place them in a freezer bag. For cooked skewers, freeze them in a similar way but use them within 2 months for best taste.
FAQs
How long should I marinate the chicken?
You should marinate the chicken for at least 30 minutes. This gives the chicken time to soak up the flavors. For even better taste, you can marinate it in the fridge for up to 2 hours. The longer you marinate, the richer the flavor.
Can I use canned pineapple chunks?
Yes, you can use canned pineapple chunks. However, fresh pineapple gives a better taste and texture. Canned pineapple may be softer and sweeter. If you choose canned, look for those packed in juice, not syrup. This keeps the flavor bright without adding extra sugar.
What’s the ideal internal temperature for chicken?
The ideal internal temperature for chicken is 165°F (75°C). This ensures the chicken is safe to eat. Use a meat thermometer to check. Cook the chicken until it reaches this temperature, and you will have juicy, safe, and tasty skewers.
This blog post outlined a tasty way to make skewers using chicken, pineapple, and veggies. You can enhance flavors with a simple marinade for delicious results. Remember to soak wooden skewers and monitor grill doneness for the best texture. Feel free to get creative with proteins and seasonal veggies. Proper storage can keep your leftovers fresh for later meals. Enjoy your grilling and share these tips with friends for a fun cookou

Teriyaki Chicken Pineapple Skewers
Ingredients
- 1 lb boneless chicken thighs, cut into 1-inch bite-sized pieces
- 1 cup pineapple chunks
- 1 whole bell pepper, cut into 1-inch squares
- 1 small red onion, cut into wedges
- 1/4 cup low-sodium soy sauce
- 2 tablespoons honey or maple syrup
- 2 tablespoons rice vinegar
- 1 tablespoon sesame oil
- 2 cloves garlic, finely minced
- 1 teaspoon fresh ginger, grated
- to taste none toasted sesame seeds, for garnish
- as needed none skewers (wooden or metal)
Instructions
- Prep the Skewers: If using wooden skewers, soak them in water for at least 30 minutes.
- Marinate the Chicken: In a medium mixing bowl, whisk together the soy sauce, honey or maple syrup, rice vinegar, sesame oil, minced garlic, and grated ginger. Add the chicken pieces and stir until thoroughly coated. Cover the bowl and allow the chicken to marinate for at least 30 minutes at room temperature, or refrigerate for up to 2 hours.
- Assemble the Skewers: Once marinated, alternate threading the chicken pieces, pineapple chunks, bell pepper squares, and red onion wedges onto the skewers.
- Grill the Skewers: Preheat your grill or grill pan over medium-high heat. Lightly oil the grill grates. Place the skewers on the hot grill and cook for about 5-7 minutes on each side. The chicken should be cooked through and have beautiful grill marks.
- Serve and Garnish: Once cooked, remove the skewers from the grill and let them rest for a few minutes. Before serving, sprinkle toasted sesame seeds generously over the skewers.

![- Bell peppers and their colors: You can use four large bell peppers. Choose any color you like: red, yellow, green, or orange. Each adds its own taste and look to the dish. - Protein options: For the filling, you can select either ground turkey or beef. Both options will give you a hearty and satisfying meal. - Base ingredients: You will need one cup of cooked rice. You can use either white or brown rice. Additionally, add one cup of black beans, rinsed and drained, and one cup of corn. You can choose fresh, frozen, or canned corn. - Flavor enhancers: To boost the flavor, use one cup of salsa. You can pick your favorite brand or make it homemade. Also, add one tablespoon of taco seasoning. You can use store-bought or make your own. - Toppings: For the top of the peppers, use one cup of shredded cheddar cheese. This cheese gives a nice gooey texture. You can add extra cheese for a more decadent touch. Fresh cilantro is a great garnish, adding color and a bit of fresh flavor. You can find the full recipe in the earlier sections of this article. Happy cooking! Preheat the oven to 375°F (190°C). This helps cook the peppers evenly. While it heats, grab a baking dish. Set it aside for the stuffed peppers. Prepare the bell peppers by slicing the tops off. Remove the seeds and membranes, which can taste bitter. Brush each pepper with olive oil. This adds flavor and helps them roast nicely. Place the peppers upright in the baking dish. Cook the meat in a large skillet over medium heat. Add 1 pound of ground turkey or beef. Break it apart with a spatula as it cooks. Make sure it browns well. Once cooked, drain any excess fat. This keeps the filling lean and tasty. Next, add rice, black beans, corn, salsa, and seasoning to the skillet. Use 1 cup of cooked rice, 1 cup of rinsed black beans, and 1 cup of corn. Pour in 1 cup of salsa and 1 tablespoon of taco seasoning. Sprinkle some salt and pepper too. Mix everything well. Simmer the mixture for about 5 minutes. This lets the flavors meld together, making the filling more delicious. Stir it occasionally to avoid sticking. Now, mix in half of the shredded cheddar cheese. This makes the filling creamy and rich. Remove the skillet from heat. Stuff the peppers by spooning the mixture into each one. Press down gently to pack it in well. This ensures every bite is full of flavor. Top with more cheese by sprinkling the remaining cheddar over each filled pepper. It will melt and brown nicely while baking. Bake the peppers by covering the baking dish with aluminum foil. Place it in the oven for 25-30 minutes. In the last 10 minutes, remove the foil. This helps the cheese bubble and turn golden. Once done, cool the peppers for a few minutes before serving. The filling will be very hot. If you like, garnish with fresh cilantro for extra flavor. Enjoy your taco stuffed bell peppers! Remember, you can find the full recipe above for all the details. How to choose fresh bell peppers: Pick bell peppers that are firm and shiny. Look for smooth skin with no blemishes. A good pepper feels heavy for its size. Colors like red, yellow, and orange are sweeter. Green peppers are a bit more bitter. All colors work well in this dish. Ensuring optimal cooking temperature and timing: Set your oven to 375°F (190°C) before you start cooking. This temperature helps the peppers cook evenly. Bake them for 25-30 minutes. In the last 10 minutes, uncover the dish to let the cheese brown. Suggestions for additional spices or ingredients: Add cumin or chili powder for an extra kick. You can also mix in diced tomatoes or jalapeños for more flavor. If you love heat, try adding some hot sauce to the filling. Offering a vegetarian option: For a vegetarian version, swap the meat for lentils or extra beans. You can use quinoa instead of rice for a healthy twist. This way, everyone can enjoy taco stuffed bell peppers! Plating ideas for presentation: Serve the peppers on a colorful platter. You can place them upright for a fun look. Add a dollop of sour cream on the side. Fresh cilantro on top adds a pop of green. Recommended side dishes for a complete meal: Pair your stuffed peppers with a fresh salad or tortilla chips. A side of guacamole or salsa also works great. These sides make the meal more fun and filling. For the full details, check out the Full Recipe! {{image_4}} You can mix up the protein in taco stuffed bell peppers. If you want a meatless option, try using black beans or lentils. They add great flavor and protein. For a twist, you can also use ground chicken or pork. When it comes to cheese, feel free to get creative. While cheddar is classic, you might try Monterey Jack or pepper jack for extra spice. You can also use cream cheese for a creamier filling. For salsa, any kind works! Chunky salsa adds texture, while smooth salsa blends in. You can even make your own with fresh tomatoes, onions, and peppers. Grilling adds a smoky flavor. Wrap the stuffed peppers in foil and place them on the grill. Cook for about 15 to 20 minutes until tender. You can also use a slow cooker. Place the stuffed peppers in the slow cooker with a bit of sauce. Cook on low for 4 to 6 hours for a hands-off approach. If you need a quick meal, the microwave is your friend. Just place the stuffed peppers in a microwave-safe dish. Cover with a lid or plastic wrap. Heat for about 5 to 7 minutes, checking for doneness. Using seasonal veggies makes your dish brighter. In summer, add fresh zucchini or corn. In fall, consider adding diced sweet potatoes or pumpkin. These add flavor and nutrition. For holidays, you can theme your peppers. For Halloween, use orange peppers and stuff them with spicy fillings. For Christmas, use red and green peppers and add festive spices. It’s a fun way to celebrate! For the full recipe, check out [Full Recipe]. To store leftovers, place the stuffed peppers in an airtight container. This keeps them fresh and tasty. You can keep them in the fridge for up to three days. Make sure they cool down first to avoid steam build-up. If you want to save some for later, freezing is a great option. Wrap each stuffed pepper tightly in plastic wrap. Then, place them in a freezer-safe bag. They can last for up to three months in the freezer. When you’re ready to eat, thaw them overnight in the fridge. To reheat, bake at 350°F (175°C) for about 25 minutes, or until heated through. For easy meal prep, you can cook a big batch in advance. Make the filling and stuff the peppers ahead of time. Store them in the fridge for two days before baking. This way, you can have a quick meal ready on busy nights. You can also use different colors of bell peppers for fun and variety. What can I substitute for rice in the recipe? You can use quinoa or cauliflower rice instead of regular rice. Quinoa adds protein and fiber. Cauliflower rice keeps it low-carb. Both options work well and keep the dish tasty. How do I know when the peppers are fully cooked? The peppers should be tender but not mushy. You can poke them with a fork. If they give easily but hold their shape, they are ready. The cheese should be melted and bubbly on top too! Caloric content and portion sizes Each stuffed pepper is about 300 calories. This includes the filling and toppings. If you use ground turkey, it may be lower in calories. Adjust the portion size based on your hunger. Health benefits of ingredients used Bell peppers are rich in vitamins A and C. They help boost your immune system. Black beans provide protein and fiber, promoting good digestion. Corn adds vitamins and a sweet crunch. What drinks pair well with taco stuffed bell peppers? A refreshing drink like lemonade or iced tea works great. For adults, a light beer or margarita adds fun. Choose drinks that balance the spice of the peppers. Can taco stuffed bell peppers be made in advance for gatherings? Yes! You can prepare the stuffed peppers ahead of time. Just store them in the fridge. Bake them when your guests arrive. They will taste fresh and hot from the oven! For the full recipe, check the earlier section. Taco stuffed bell peppers are fun and easy to make. We covered the key ingredients, steps, and helpful tips for a great dish. You learned how to mix flavors and pack ingredients for maximum yum. With ideas for storage and meal prep, you’re ready to enjoy these peppers anytime. Get creative with variations to keep things fresh. Whether for a family dinner or a gathering, these peppers can impress. Happy cooking!](https://goldendishy.com/wp-content/uploads/2025/06/e36cd186-0c48-4bd5-9184-2d07a9c06671-768x768.webp)