Spicy Sesame Peanut Noodles Delicious and Simple Meal

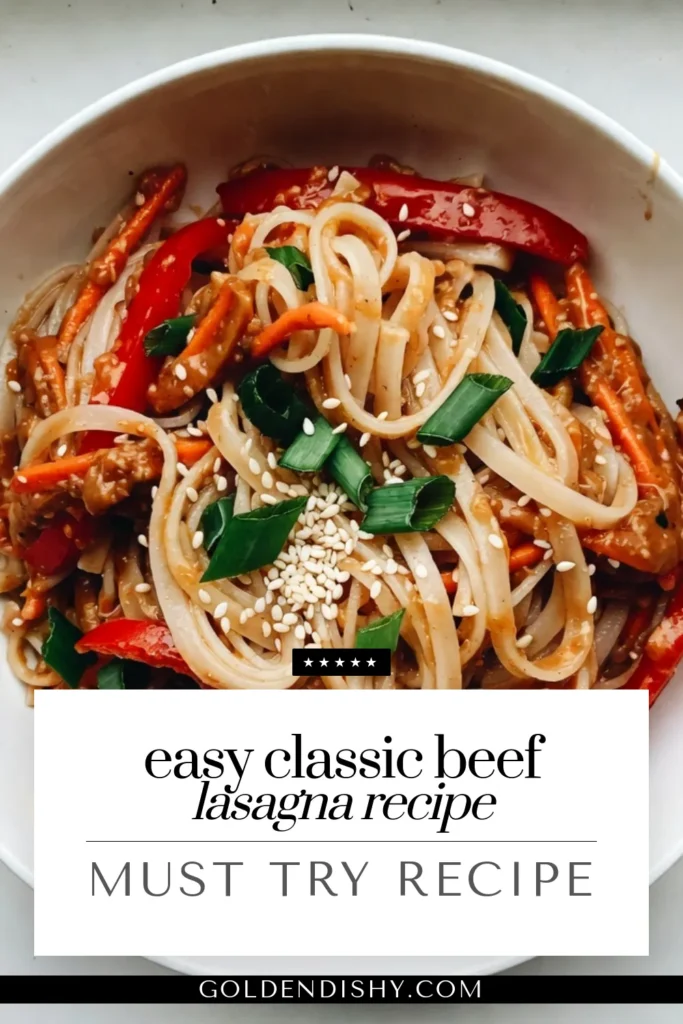
Craving a quick, tasty meal? Look no further than Spicy Sesame Peanut Noodles! This dish blends chewy rice noodles with a rich peanut sauce and fresh veggies for a burst of flavor. I’ll share simple steps, helpful tips, and tasty variations. Join me to whip up a tasty meal that’s both easy to make and hard to resist. You won’t want to miss this delicious recipe!
Why I Love This Recipe
- Deliciously Flavorful: The combination of creamy peanut butter, spicy sriracha, and aromatic sesame oil creates a rich and satisfying sauce that elevates the noodles to a whole new level.
- Quick and Easy: This recipe is perfect for a weeknight dinner, taking only about 25 minutes from start to finish, making it a go-to for busy schedules.
- Customizable: Feel free to add your favorite vegetables or protein to the dish, making it versatile and adaptable to your taste preferences.
- Healthy Ingredients: Packed with fresh veggies and wholesome ingredients, this dish offers a nutritious meal without sacrificing flavor.
Ingredients
Main Ingredients
– 8 oz rice noodles
– 1/4 cup creamy peanut butter
– 2 tablespoons sesame oil
– 2 tablespoons soy sauce (or tamari for gluten-free)
– 1 tablespoon sriracha (adjust to taste)
– 1 tablespoon honey or maple syrup
– 1 tablespoon rice vinegar
– 2 cloves garlic, minced
– 1 inch piece of ginger, grated
– 1/2 cup scallions, thinly sliced (reserve green parts for garnish)
– 1/2 red bell pepper, julienned
– 1/2 cup shredded carrots
– 1/4 cup fresh cilantro, chopped (for garnish)
– Sesame seeds for garnish
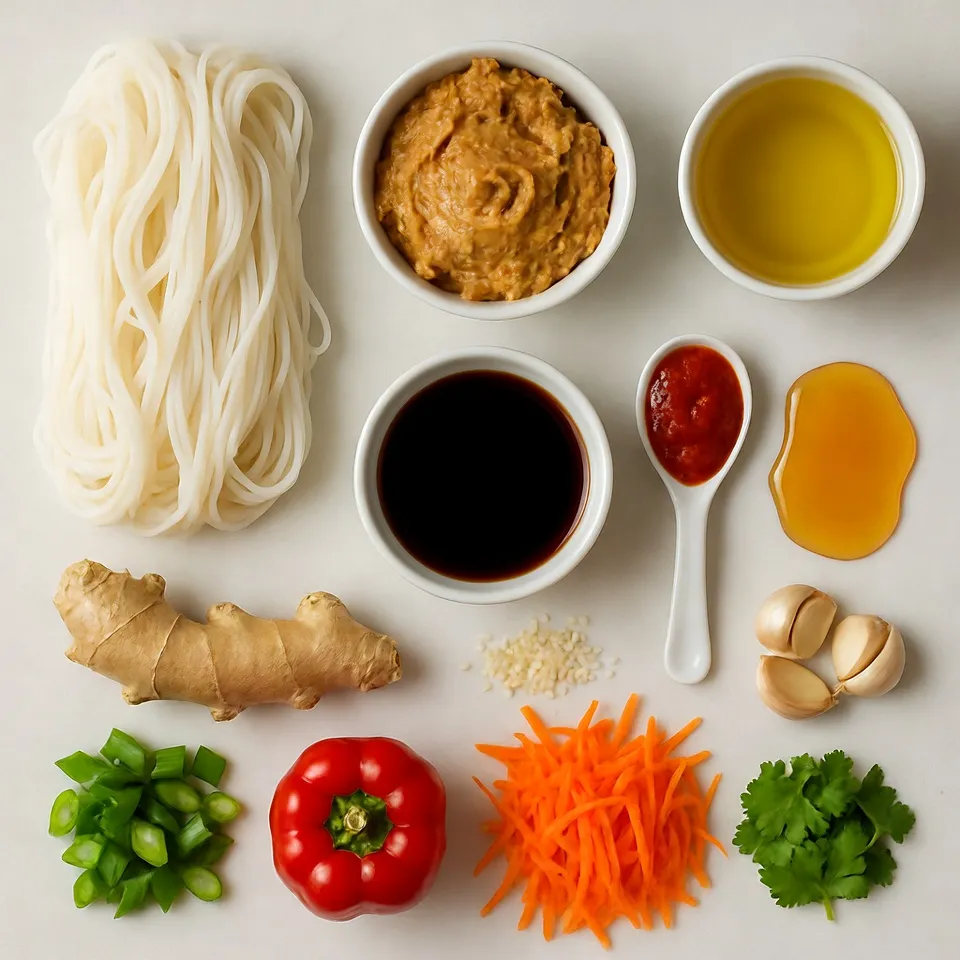
When making spicy sesame peanut noodles, the right ingredients are key. Start with rice noodles. They provide a great base for the dish. They cook quickly and soak up flavors well.
Next, we have the peanut sauce components. Creamy peanut butter gives a rich, nutty flavor. Sesame oil adds a nice aroma and depth. Soy sauce or tamari brings saltiness, while sriracha adds heat. Honey or maple syrup balances the spice with sweetness. Rice vinegar brightens the sauce and gives it a fresh taste. Garlic and ginger round out the flavor profile.
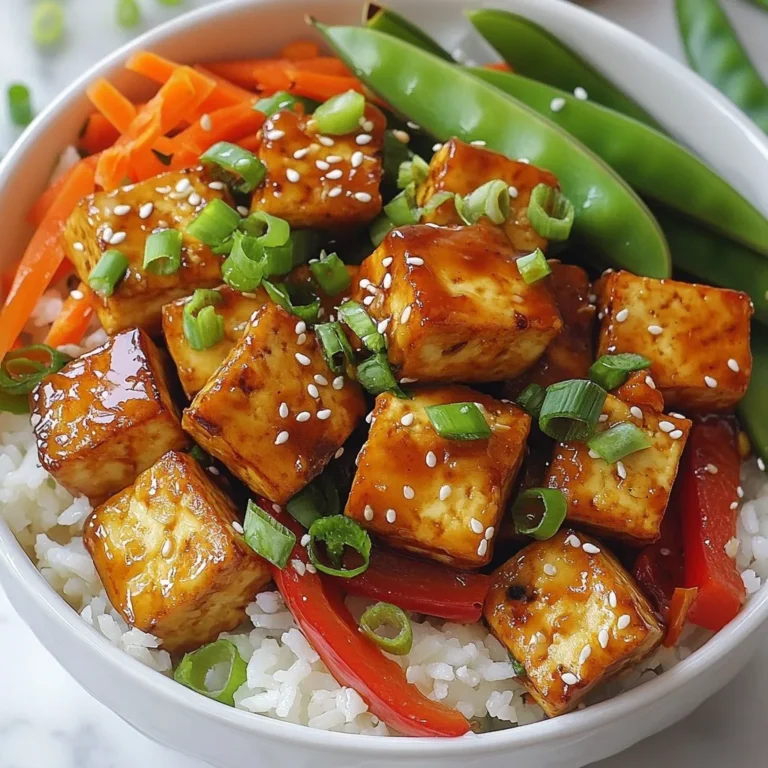
Don’t forget the fresh vegetables! Scallions, red bell pepper, and carrots give the dish color and crunch. They also add vitamins and nutrients, making this meal not just tasty but healthy, too.
Optional Garnishes
– Sesame seeds
– Scallions
– Fresh cilantro
Garnishes can take your noodles to the next level. Sesame seeds provide a nutty crunch. They also look great on top. Scallions add freshness and a mild onion flavor. Save some green parts for garnish. Fresh cilantro gives a pop of color and flavor, bringing everything together.
Feel free to get creative with garnishes! You can add what you like to make it your own.
Step-by-Step Instructions
Cooking the Rice Noodles
Boiling Water and Cooking Time
Start by boiling water in a large pot. You want a rolling boil. Once the water boils, add the rice noodles. Cook them for 4 to 6 minutes. Check the package for exact time.
Draining and Rinsing
After cooking, drain the noodles in a colander. Rinse them under cold water. This stops cooking and helps keep them firm. Set them aside to cool.
Preparing the Peanut Sauce
Mixing the Ingredients
Grab a medium mixing bowl. Add creamy peanut butter, sesame oil, soy sauce, sriracha, honey, rice vinegar, garlic, and ginger. Whisk these well until everything is smooth and mixed.
Adjusting Consistency
If your sauce feels thick, add warm water. Start with one tablespoon at a time. Mix until you find your desired thickness.
Combining Noodles and Sauce
Tossing Techniques
Place the cooled noodles in a large mixing bowl. Pour the peanut sauce over them. Use tongs or a spatula to toss gently. Make sure every noodle is coated in the sauce.
Ensuring Even Coating
Take your time while tossing. You want a nice, even layer of sauce on all the noodles. This step makes each bite tasty.
Adding Fresh Vegetables
Incorporating Bell Pepper and Carrots
Now, add the sliced red bell pepper and shredded carrots to the noodles. These add crunch and color to your dish.
Mixing Tips
Gently stir the mixture. You want the veggies evenly spread throughout the noodles. This makes every bite a delight.
Serving Suggestions
Temperature Preferences
You can serve these noodles warm or at room temperature. Both options taste great!
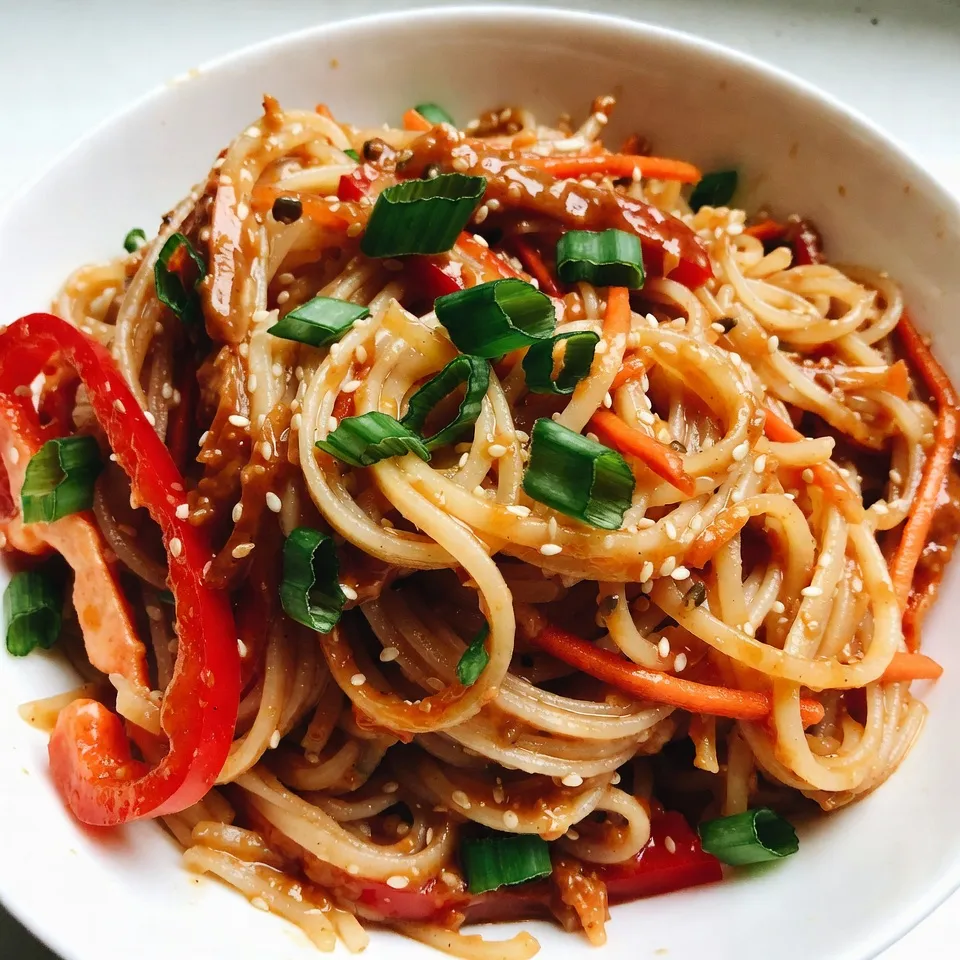
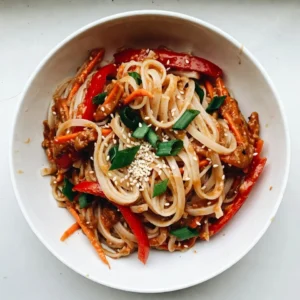
Presentation Ideas
Divide the noodles into bowls. Top with green scallions, cilantro, and sesame seeds. This adds a pop of color and texture. Enjoy your spicy sesame peanut noodles!
Tips & Tricks
Tips for Perfect Noodles
– Avoiding Sticky Noodles: Rinse the cooked noodles under cold water. This stops cooking and removes extra starch. Use a bit of oil to keep them from sticking together.
– Timing for the Best Texture: Follow the package instructions for cooking time. Aim for al dente noodles, which means they should be firm but not hard.
Enhancing the Sauce Flavor
– Ingredient Substitutions: Swap soy sauce for tamari if you need a gluten-free option. Try almond butter instead of peanut butter for a nut-free choice.
– Spice Level Adjustments: Want more heat? Add extra sriracha. To lower the spice, use less sriracha or add a bit of sugar to balance it out.
Serving and Pairing Suggestions
– Best Side Dishes: Serve with a simple cucumber salad or steamed broccoli. These sides add freshness and color to your meal.
– Beverage Pairings: A chilled ginger ale or iced green tea pairs nicely. Both drinks complement the spicy flavors of the noodles.
Pro Tips
- Adjust the Spice Level: If you prefer milder flavors, start with less sriracha and gradually add to your taste. It’s easier to add spice than to take it away!
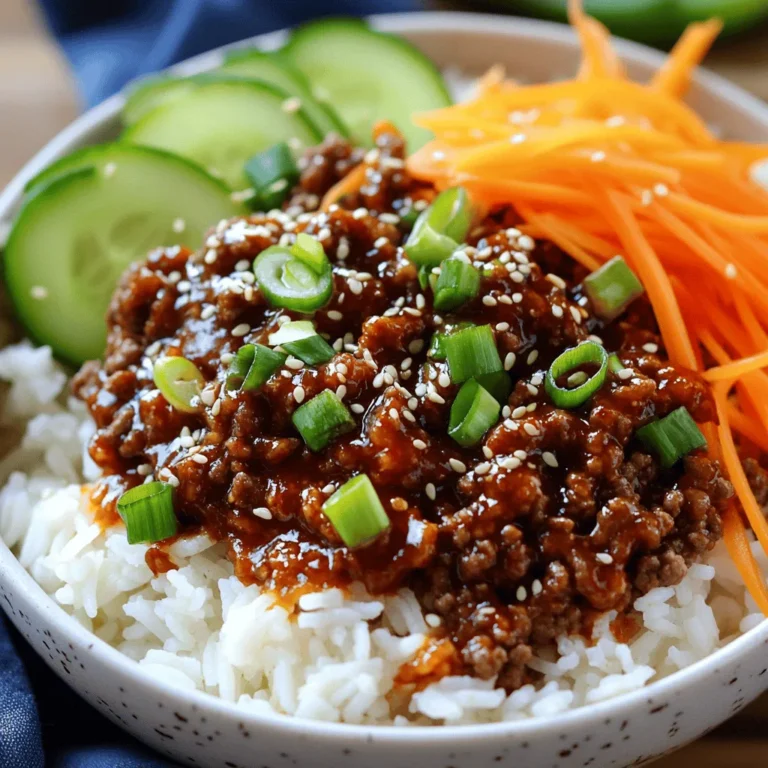
- Make it a Meal: Add protein such as grilled chicken, tofu, or shrimp to the noodles for a heartier dish that’s perfect as a main course.
- Prep Ahead: You can prepare the peanut sauce in advance and store it in the fridge for up to a week. This saves time on busy days!
- Fresh Herbs Matter: Don’t skip the cilantro and scallions; they add a burst of freshness that elevates the dish significantly!
Variations
Dietary Preferences
Gluten-Free Versions
You can easily make gluten-free spicy sesame peanut noodles. Just swap regular soy sauce for tamari. This small change keeps the dish tasty while accommodating gluten-free diets. Always check labels to ensure your ingredients are gluten-free.
Vegan Options
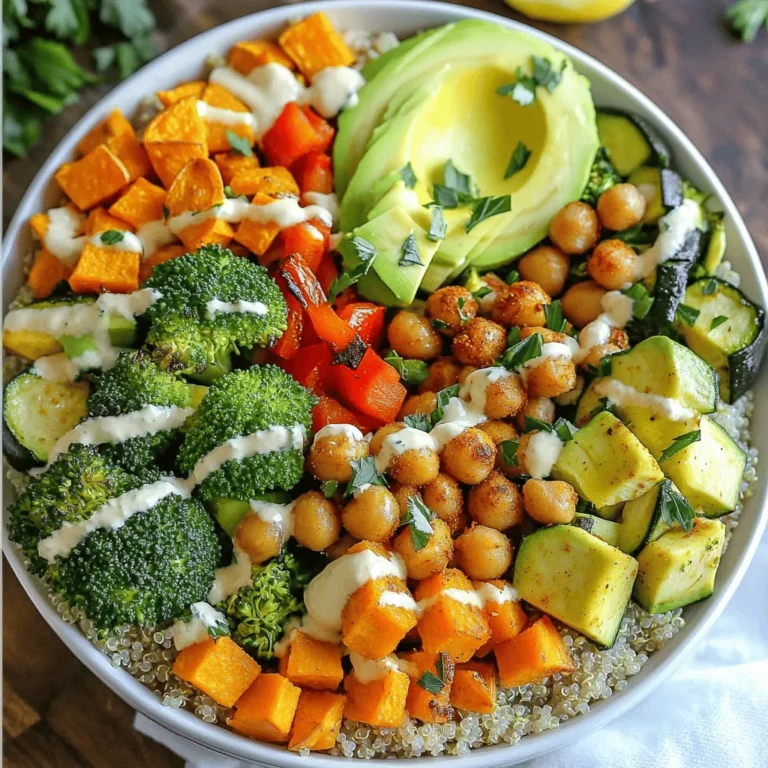
For a vegan version, use maple syrup instead of honey. The rest of the ingredients are already plant-based. You can also choose vegan protein, like tofu or chickpeas, to make the meal heartier.
Flavor Variations
Adding Protein
You can enhance the nutrition by adding protein. Grilled chicken or shrimp works well. For a plant-based option, try marinated tofu. Just cube it and toss it in the pan before adding to the noodles.
Alternative Sauces and Seasonings
Feel free to mix up the sauce. Instead of peanut butter, try almond or cashew butter for a new flavor. You can also add hoisin sauce for a sweet twist.
Seasonal Ingredient Swaps
Using Seasonal Vegetables
Seasonal vegetables add freshness. In spring, try snap peas or asparagus. In summer, add zucchini or cherry tomatoes. These swaps keep the dish vibrant and full of flavor.
Incorporating Local Flavors
Use local produce to make the dish unique. For example, if you find fresh herbs or veggies at a local market, throw them in. This adds a personal touch and supports local farms.
Storage Info
Short-Term Storage
– Refrigeration Tips: Allow the spicy sesame peanut noodles to cool completely. Place them in an airtight container. Store them in the fridge for up to three days.
– Best Storage Containers: Use glass or BPA-free plastic containers. These keep the noodles fresh and prevent spills.
Long-Term Storage
– Freezing Guidelines: You can freeze the noodles for up to three months. Store them in freezer-safe bags or containers. Make sure to remove as much air as possible.
– Reheating Instructions: To reheat, thaw the noodles in the fridge overnight. Then, warm them in a pan over medium heat. You can add a splash of water to loosen the sauce if needed.
Shelf Life
– Signs of Spoilage: Check for off smells or mold. If the noodles feel sticky or slimy, it’s time to toss them.
– Recommended Timeframes: In the fridge, eat within three days. In the freezer, use within three months for best taste and quality.
FAQs
How to Make Spicy Sesame Peanut Noodles?
To make Spicy Sesame Peanut Noodles, start by cooking 8 oz of rice noodles. Boil water, add the noodles, and cook for 4-6 minutes. Drain and rinse with cold water.
Next, mix the peanut sauce. Combine 1/4 cup creamy peanut butter, 2 tablespoons sesame oil, 2 tablespoons soy sauce, 1 tablespoon sriracha, 1 tablespoon honey, 1 tablespoon rice vinegar, 2 minced garlic cloves, and 1 inch of grated ginger in a bowl. Whisk until smooth.
Combine the noodles and sauce in a large bowl. Toss until all noodles are coated. Add 1/2 julienned red bell pepper and 1/2 cup shredded carrots. Mix gently.
Serve at room temperature or warm. Garnish with scallions, cilantro, and sesame seeds.
Key Cooking Tips
– Rinse noodles well to stop cooking.
– Adjust sauce thickness with warm water if needed.
– Toss gently to keep the noodles intact.
Can I use different noodles?
Yes, you can use other noodles. Options include udon, soba, or even spaghetti.
Suitable Noodle Alternatives
– Udon noodles: Chewy and thick.
– Soba noodles: Nutty flavor and great texture.
– Spaghetti: Easy to find in most kitchens.
Texture considerations
Rice noodles are light and soft. Udon adds chewiness. Soba offers a unique bite. Choose based on your preference.
How to adjust the spiciness?
You can easily adjust the heat level in your dish. Start with less sriracha and add more if needed.
Methods for Reducing Heat
– Use less sriracha in the sauce.
– Add more peanut butter to mellow the flavor.
– Mix in coconut milk for creaminess.
Adding Heat Gradually
Taste your dish as you add sriracha. This way, you control the spice level. A little goes a long way!
What can I serve with Spicy Sesame Peanut Noodles?
Spicy Sesame Peanut Noodles pair well with many sides. Think fresh salads or grilled meats.
Suggested Side Dishes and Pairings
– Cucumber salad: Refreshing and light.
– Grilled chicken: Adds protein and flavor.
– Steamed broccoli: A simple vegetable option.
Complete Meal Ideas
Make it a full meal with a side of edamame. Or serve with spring rolls for a fun twist.
In this article, we covered how to make Spicy Sesame Peanut Noodles. You learned about key ingredients like rice noodles and fresh veggies. We discussed step-by-step instructions for cooking and blending the sauce. Tips on perfecting texture and flavor were shared. We also explored tasty variations and storage methods.
Now, you can enjoy this dish your way. It’s simple and fun to make. With practice, you’ll impress everyone! Grab your ingredients and start cooking. Enjoy your mea
Spicy Sesame Peanut Noodles
Ingredients
- 8 oz rice noodles
- 0.25 cup creamy peanut butter
- 2 tablespoons sesame oil
- 2 tablespoons soy sauce
- 1 tablespoon sriracha
- 1 tablespoon honey
- 1 tablespoon rice vinegar
- 2 cloves garlic, minced
- 1 inch ginger, grated
- 0.5 cup scallions, thinly sliced
- 0.5 cup red bell pepper, julienned
- 0.5 cup shredded carrots
- 0.25 cup fresh cilantro, chopped
- none sesame seeds for garnish
Instructions
- Cook the rice noodles by boiling water in a large pot. Add the rice noodles and prepare according to package instructions, usually about 4-6 minutes. Drain and rinse under cold water. Set aside to cool.
- In a medium mixing bowl, combine the creamy peanut butter, sesame oil, soy sauce, sriracha, honey, rice vinegar, minced garlic, and grated ginger. Whisk until smooth and creamy, adding warm water if needed.
- In a large mixing bowl, add the cooled rice noodles and pour the peanut sauce over them. Toss gently until the noodles are evenly coated.
- Incorporate the sliced red bell pepper and shredded carrots into the noodle mixture, stirring gently to combine.
- Serve at room temperature or slightly warm, garnished with reserved scallion greens, chopped cilantro, and sesame seeds. Adjust heat with additional sriracha if desired.
![To make your delicious crispy zucchini tacos, you'll need a few fresh ingredients. Here’s what you should gather: - 2 medium zucchinis, sliced into thin rounds - 1 cup cornmeal and seasonings: chili powder, garlic powder, onion powder, ground cumin - Fresh toppings: shredded lettuce, diced tomatoes, avocado slices, sour cream or Greek yogurt - Tortilla options: soft corn or flour These ingredients work together to create a tasty and fun meal. The zucchini brings a nice crunch, while the cornmeal adds flavor. Don’t forget the toppings! They add freshness and creaminess. If you want the full recipe, check out the Full Recipe for all the details. Set your oven to 425°F (220°C). This high heat will help make the zucchini crispy. Line a large baking sheet with parchment paper. This step prevents the zucchini from sticking and makes cleanup easy. In a medium mixing bowl, combine 1 cup of cornmeal with spices. Add 1 tablespoon of chili powder, 1 teaspoon of garlic powder, 1 teaspoon of onion powder, and 1/2 teaspoon of ground cumin. Season this mix with salt and freshly cracked black pepper. Mix well until everything is blended. This coating gives the zucchini great flavor and crunch. Take your zucchini rounds and dip them into the cornmeal mixture. Make sure both sides are coated evenly. Arrange the coated zucchini on the baking sheet in a single layer. Avoid overlapping the rounds to ensure they cook evenly. Place the baking sheet in the preheated oven and bake for 20-25 minutes. Halfway through, flip the zucchini rounds for an even golden brown color. Enjoy the crispy goodness as you prepare your tacos! For the complete recipe, see the [Full Recipe]. To get the best crispy texture, the coating needs to be even. Make sure you coat each zucchini round well. This way, every bite has flavor. Use a good amount of cornmeal mix on both sides. When you bake, flip the zucchini halfway. This helps them brown nicely and stay crisp. Warm tortillas before you fill them. You can heat them in a skillet over medium heat. Just a minute on each side makes them soft. You can also wrap them in foil and pop them in the oven. Give them a few minutes so they get warm and pliable. For a colorful dish, use a bright platter. Layer your crispy zucchini tacos with fresh toppings. Add shredded lettuce, diced tomatoes, and avocado slices. Finish with a dollop of sour cream or Greek yogurt. Serve with lime wedges for extra zest. A sprinkle of fresh cilantro adds a lovely touch. Use these tips to make your tacos not just tasty, but also beautiful! {{image_4}} You can easily make your crispy zucchini tacos vegan. For a creamy topping, replace sour cream with cashew cream or dairy-free yogurt. Both options give a rich flavor. You can also use mashed avocado as a spread. It adds creaminess and healthy fats. For toppings, use fresh veggies like radishes or sliced jalapeños for a spicy kick. These swaps keep your meal tasty and plant-based. To boost the flavor of your zucchini coating, try adding more spices. Smoked paprika can add a nice depth. You might also enjoy a pinch of cayenne for heat. Fresh herbs like cilantro or parsley can brighten the dish. Mix them into your cornmeal for an extra layer of flavor. Don't hesitate to experiment! The right spices can take your tacos to the next level. Zucchini is great, but many other veggies work well too. You can use sliced eggplant or summer squash for a similar texture. Carrots add a sweet crunch, while bell peppers bring color and flavor. For a different twist, try sweet potatoes. Just cut them into thin slices and bake. Each veggie offers a unique taste, so have fun mixing it up! You’ll find your favorite combinations. For the complete experience, check out the [Full Recipe]. To keep your crispy zucchini tacos fresh, use an airtight container. Place any leftover tacos in the container. You can store them in the fridge for up to three days. This method helps keep them from getting soggy. If you have extra zucchini rounds, store them separately. This way, they stay crispy longer. When you're ready to enjoy your leftovers, reheating correctly is key. The best way to revive that crunch is in the oven. Preheat your oven to 375°F (190°C). Place the tacos on a baking sheet. Heat them for about 10-15 minutes. This method ensures your tacos stay crispy. You can also use an air fryer for faster results. Just heat them for 5-7 minutes at 350°F (175°C). You can freeze crispy zucchini tacos, but it's best to freeze the zucchini rounds separately. After baking, let them cool completely. Then, place them in a single layer on a baking sheet and freeze for a few hours. Once frozen, transfer them to a freezer bag. This prevents sticking. You can store them in the freezer for up to three months. When ready to eat, bake them straight from the freezer. This keeps them crunchy and delicious. For the full recipe, check the detailed instructions above. To make crispy zucchini tacos, follow these steps: 1. Preheat your oven to 425°F (220°C). 2. Prepare a baking sheet with parchment paper. 3. Mix cornmeal and spices in a bowl. 4. Dip zucchini rounds in the cornmeal mix. 5. Arrange the coated zucchini on the baking sheet. 6. Bake for 20-25 minutes, flipping halfway. 7. Warm your tortillas in a skillet or oven. 8. Assemble tacos with zucchini, lettuce, tomatoes, avocado, and sour cream. This simple process makes crispy zucchini tacos that are full of flavor. The baking gives the zucchini a nice crunch while keeping the inside tender. You can find the full recipe above. You can use either corn or flour tortillas for zucchini tacos. - Corn Tortillas: - They are gluten-free. - They have a distinct flavor that pairs well with the zucchini. - Flour Tortillas: - They are soft and chewy. - They hold up well with toppings and fillings. Both options are great, so choose based on your taste! I often prefer corn tortillas for their authentic flavor. Yes, you can prepare some parts ahead of time. - Zucchini Rounds: You can coat and bake the zucchini earlier in the day. Store them in an airtight container. - Tortillas: Warm them just before serving to keep them soft. - Toppings: Dice your tomatoes and slice your avocado in advance, but keep them in the fridge. This way, you can quickly assemble the tacos when you're ready to eat. Enjoy your meal without the rush! This blog post covered how to make crispy zucchini tacos. You learned about the ingredients, instructions, and tips for perfecting texture. I also shared variations for dietary needs and options to store leftovers. Crispy zucchini tacos are fun, easy to make, and delicious. You can enjoy them during any meal. Experiment with the toppings to make each taco special. Enjoy your cooking!](https://goldendishy.com/wp-content/uploads/2025/06/dad710f9-4001-4f00-9608-4b60580076cc-768x768.webp)