Lemon Poppy Seed Pound Cake Delightful and Easy Recipe
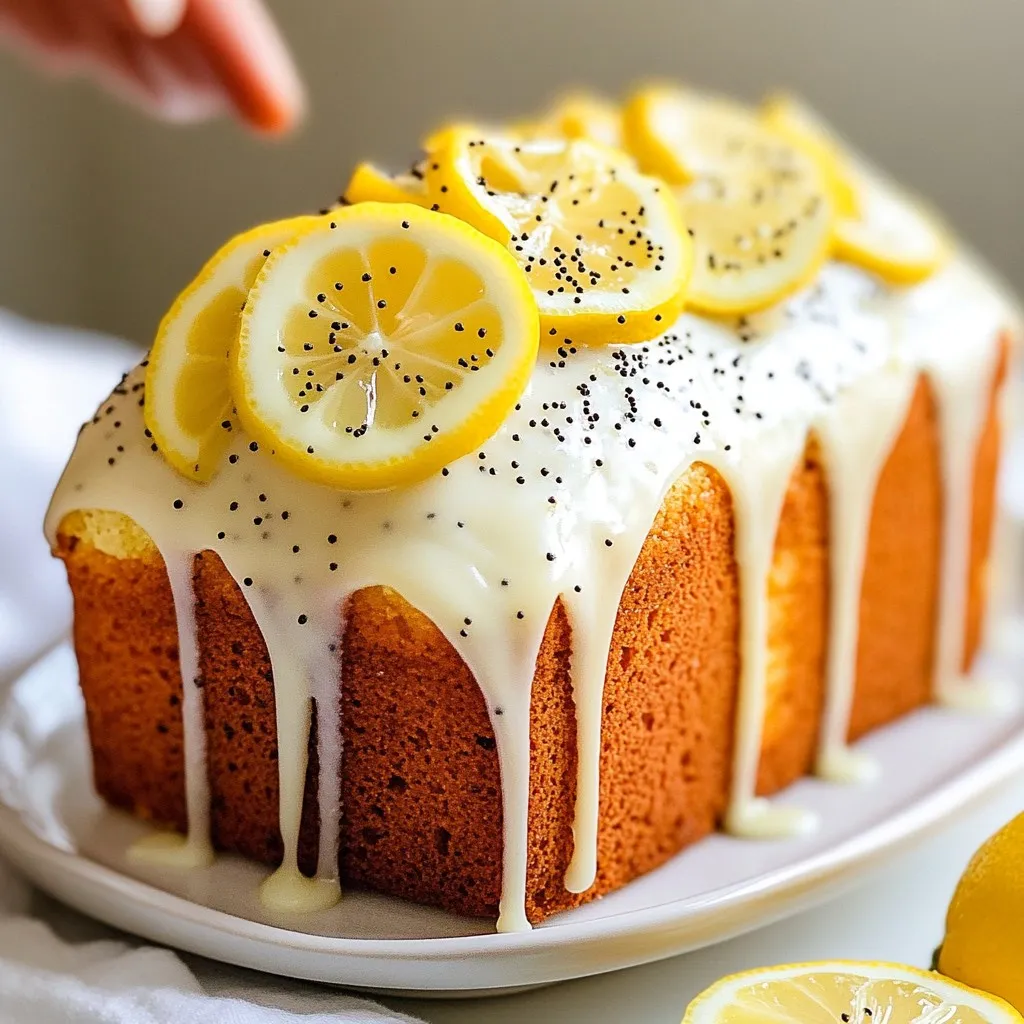

Get ready to delight your taste buds with my Lemon Poppy Seed Pound Cake! This easy recipe combines zesty lemons and crunchy poppy seeds for a delicious treat. Whether you want to impress guests or simply satisfy your sweet tooth, this pound cake fits the bill. I’ll guide you through every step, from gathering ingredients to achieving that perfect glaze. Let’s dive in and bake something amazing together!
Why I Love This Recipe
- Bright and Zesty Flavor: This cake is bursting with fresh lemon flavor, making every bite a delightful experience.
- Perfectly Moist Texture: The combination of butter and buttermilk ensures a moist and tender crumb that everyone will love.
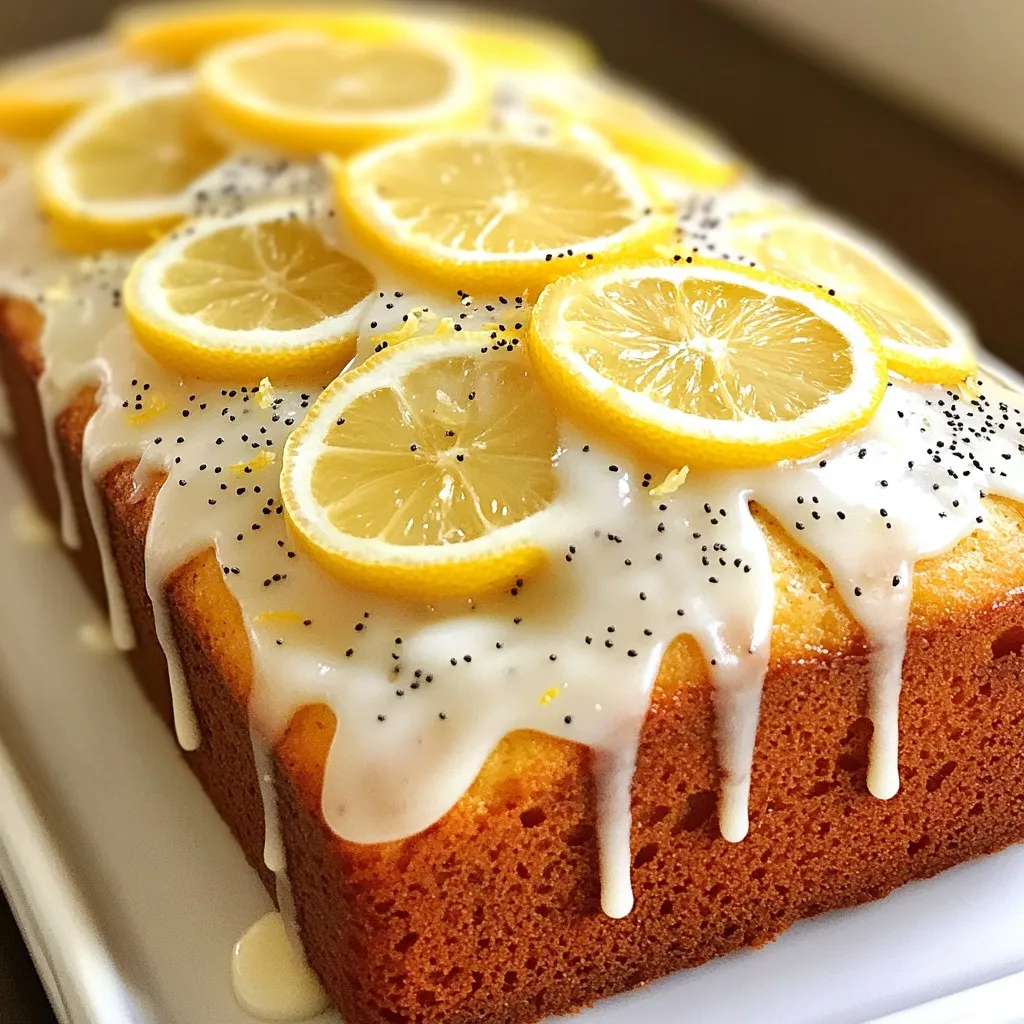
- Elegant Presentation: With its glaze and poppy seed finish, this cake looks as good as it tastes, perfect for any occasion.
- Easy to Make: The straightforward steps make this recipe accessible for bakers of all skill levels, ensuring success every time.
Ingredients
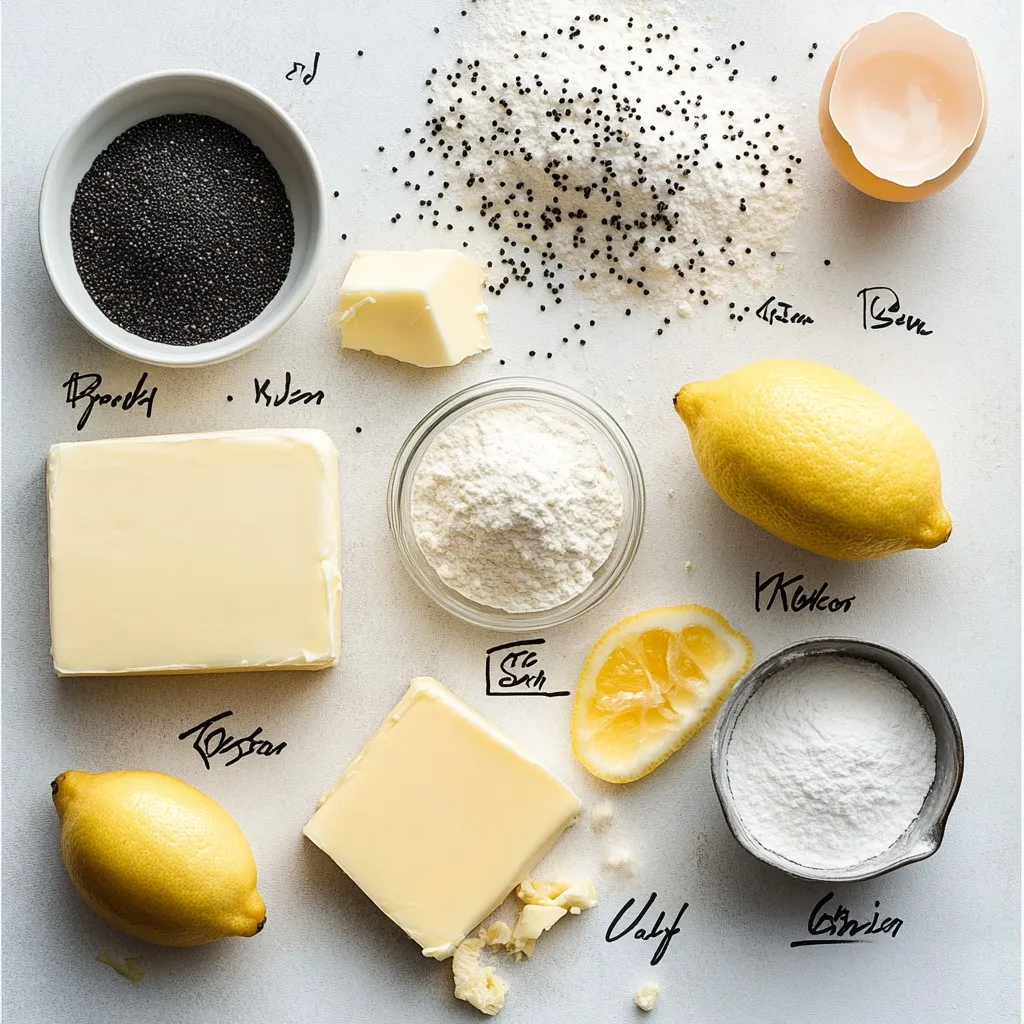
List of Ingredients
– 1 cup unsalted butter, softened to room temperature
– 2 cups granulated sugar
– 4 large eggs, at room temperature
– 1 teaspoon pure vanilla extract
– 3 cups all-purpose flour
– 1 tablespoon baking powder
– ½ teaspoon salt
– 1 cup buttermilk, at room temperature
– Zest of 2 large lemons (about 2 tablespoons)
– ¼ cup poppy seeds
– 1 cup powdered sugar (for glaze)
– 3 tablespoons fresh lemon juice (for glaze)
Using fresh ingredients makes a big difference. I recommend fresh lemons for zest. The zest gives a bright flavor. For the best cake, use soft butter. It helps whip air into the batter. Room temperature eggs mix in better, too.
Optional Ingredients for Variation
You can add more fun to your cake! Try mixing in nuts, like chopped walnuts. You could also add blueberries for a fruity twist. If you want a different taste, try orange zest instead of lemon.
Notes on Ingredient Quality
Always choose high-quality ingredients. Use real vanilla extract, not imitation. It adds depth to your cake. Check your baking powder for freshness. Old baking powder can make your cake dense. Fresh buttermilk is key to a soft, rich texture. These small details can make your cake truly special!
Step-by-Step Instructions
Preparation
1. Preheating the Oven and Preparing Bakeware
First, preheat your oven to 350°F (175°C). This helps the cake bake evenly. Next, grease a 10-inch loaf pan or two 8-inch round cake pans. Dust the pans with flour to keep the cake from sticking.
2. Creaming Butter and Sugar
In a large bowl, add 1 cup of softened unsalted butter and 2 cups of granulated sugar. Use an electric mixer on medium speed. Mix until the mixture is light and fluffy. This usually takes about 3 to 4 minutes.
3. Incorporating Eggs and Extracts
Crack 4 large eggs into a separate bowl. Check for shell pieces. Add the eggs one at a time to the butter-sugar mixture. Mix well after each egg. Stir in 1 teaspoon of pure vanilla extract and the zest of 2 large lemons until everything is blended.
Mixing Dry Ingredients
1. Sifting and Combining Dry Components
In another bowl, sift together 3 cups of all-purpose flour, 1 tablespoon of baking powder, and ½ teaspoon of salt. Sifting helps combine these ingredients and makes the cake lighter.
2. Tips for Avoiding Clumps in the Mixture
When sifting, be sure to break up any clumps. This way, the dry mix will blend nicely into the wet batter without lumps.
Combining Wet and Dry Ingredients
1. Alternate Mixing Process Explained
Gradually add the dry mixture to the wet batter. Alternate adding the dry mix with 1 cup of buttermilk. Start and end with the flour mixture. Mix just until combined to avoid overworking the batter.
2. Folding in Poppy Seeds
Gently fold in ¼ cup of poppy seeds using a spatula. Be careful not to over-mix. This keeps the batter light and airy.
Baking
1. Pouring the Batter into Pans
Pour the cake batter into your prepared pan(s). Use a spatula to smooth the top. This ensures even baking.
2. Baking Duration and Temperature
Bake the cake in the preheated oven. If you’re using a loaf pan, bake for 60 to 70 minutes. If using round pans, bake for 30 to 35 minutes.
3. Checking for Doneness
To check if the cake is done, insert a toothpick into the center. It should come out clean or with a few crumbs attached.
Cooling and Glazing
1. Cooling Process Details
Once baked, remove the cake from the oven. Let it cool in the pan for 10 minutes. Then, transfer it to a wire rack to cool completely.
2. Preparing the Lemon Glaze
While the cake cools, whisk together 1 cup of powdered sugar and 3 tablespoons of fresh lemon juice in a bowl. Mix until smooth.
3. Drizzling Techniques for Presentation
Once the cake is cool, drizzle the lemon glaze over the top. Let it cascade down the sides for a beautiful look.
Tips & Tricks
Baking Techniques
To keep your lemon poppy seed pound cake moist, follow a few simple steps:
– Use room temperature ingredients: Make sure your butter and eggs are at room temperature. This helps them mix well and create a light texture.
– Add buttermilk: The buttermilk not only adds flavor but also keeps the cake moist. It’s key for a tender crumb.
– Watch the baking time: Overbaking can dry out your cake. Use a toothpick to check for doneness. It should come out clean or have a few crumbs.
To avoid overmixing, mix your batter gently. Here are some tips:
– Mix until just combined: When you add the flour, mix until you no longer see dry flour. This helps keep the cake soft.
– Fold in poppy seeds carefully: Use a spatula to gently fold them in. This keeps your batter light.
Common mistakes to avoid include:
– Not greasing the pan: Make sure to grease and flour your pan well. This prevents the cake from sticking.
– Skipping the zest: Lemon zest is vital for the best flavor. Do not leave it out!
Presentation Tips
For serving your lemon poppy seed pound cake, consider these ideas:
– Slice and plate it nicely: Use a decorative platter for a pretty presentation. Each slice should look inviting.
– Garnish well: Add fresh lemon slices on top. A sprinkle of additional poppy seeds adds a nice touch.
For extra flair, try these garnishing ideas:
– Add mint leaves: A sprig of mint gives a pop of color and freshness.
– Drizzle extra glaze: Drizzle more lemon glaze over the slices for added sweetness and shine.
With these tips, your cake will not only taste great but also look stunning!
Pro Tips
- Room Temperature Ingredients: Make sure your eggs and buttermilk are at room temperature. This helps create a smoother batter and ensures even mixing.
- Don’t Overmix: When combining the wet and dry ingredients, mix until just combined. Overmixing can lead to a dense cake, so be gentle!
- Check for Doneness: Use a toothpick to check the center of the cake. It should come out clean or with a few crumbs attached. Avoid opening the oven door too early to prevent the cake from sinking.
- Glaze Variations: Feel free to experiment with the glaze by adding a touch of lemon zest or even a splash of vanilla extract for extra flavor.
Variations
Gluten-Free Lemon Poppy Seed Pound Cake
To make a gluten-free version, swap all-purpose flour for a gluten-free blend. Look for a blend that includes xanthan gum. This helps mimic the texture of regular flour.
Adjust the baking time, too. Gluten-free cakes often bake faster, so check for doneness around 50-60 minutes. Use the toothpick method to test.
Dairy-Free Options
For a dairy-free cake, replace the butter with coconut oil or dairy-free margarine. Instead of buttermilk, use almond milk mixed with a tablespoon of lemon juice. This gives a similar tang.
You may need to add more lemon zest for flavor. The coconut oil also adds a light taste that pairs well with lemon.
Flavor Variations
Want to switch up the taste? Adding other citrus zests can enhance the cake. Try orange or lime zest for a fresh twist.
You can also mix in nuts like walnuts or pecans for crunch. Blueberries add sweetness and moisture, making a delightful pairing. Just fold them in gently to keep the cake light.
Storage Info
Short-term Storage
To keep your Lemon Poppy Seed Pound Cake fresh, store it at room temperature. Wrap the cake in plastic wrap or foil. This helps to keep moisture in and prevents it from drying out. Place it in a cool, dry area away from sunlight. If you have cut pieces, you can use a cake dome for added protection. The cake stays tasty for about three days this way.
Long-term Storage
If you want to save your cake for later, freezing it is a great option. First, let the cake cool completely. Then, wrap it tightly in plastic wrap. For extra protection, wrap it again in aluminum foil. This helps prevent freezer burn. You can freeze the cake for up to three months.
When you are ready to enjoy it, take the cake out of the freezer. Leave it in the fridge overnight to thaw slowly. If you want to speed up the process, you can thaw it at room temperature for a few hours. Once thawed, you can refresh the cake. Just pop it in a warm oven for about 10 minutes. This brings back some of the moisture and flavor. Enjoy your delicious cake once more!
FAQs
How do I know when my Lemon Poppy Seed Pound Cake is done?
You can check if your cake is done using a toothpick. Simply insert it into the center of the cake. If the toothpick comes out clean or with a few crumbs, the cake is ready. This method is quick and easy. I always use it to avoid cutting the cake too soon. Remember, overbaking can dry out the cake. Keep an eye on it near the end of the baking time.
Can I make this cake ahead of time?
Yes, you can make this cake ahead of time. It stays fresh for a few days. To do this, bake the cake and let it cool completely. Then, wrap it tightly in plastic wrap. This keeps it moist. You can store it at room temperature if you plan to eat it soon. If you want to keep it longer, freeze it. Just make sure to use an airtight container. It will last for up to three months in the freezer.
What can I substitute if I don’t have poppy seeds?
If you don’t have poppy seeds, you can skip them. The cake will still taste great. Another option is to use chia seeds. They give a similar texture. You can also add nuts for crunch or even dried fruit for a twist. Just remember to adjust the amount. This way, your cake will stay balanced in flavor.
How can I enhance the lemon flavor?
To boost the lemon flavor, use fresh lemon juice and zest. The zest adds a strong citrus taste. You can also add more lemon juice to the glaze. Another tip is to let the cake sit after glazing. This allows the flavors to meld. For an extra kick, try adding lemon extract to the batter. Just a little goes a long way.
Can I use other flours besides all-purpose?
Yes, you can use other flours if needed. Almond flour or coconut flour are good options. They give a different texture and flavor. However, you may need to adjust the liquid in the recipe. For a gluten-free option, use a gluten-free baking mix. This will keep the cake light and moist. Just remember that the baking time may vary. Keep an eye on it as it bakes.
You now know how to make a delicious Lemon Poppy Seed Pound Cake. We covered the ingredients, mixing techniques, and baking instructions. You learned tips for perfecting the texture and presentation. Plus, we explored variations like gluten-free and dairy-free options.
Remember, baking is a fun way to express yourself. Don’t be afraid to try new flavors or techniques. With practice, you’ll create a cake everyone loves. Enjoy your baking journe

Lemon Poppy Seed Delight Cake
Ingredients
- 1 cup unsalted butter, softened to room temperature
- 2 cups granulated sugar
- 4 large eggs, at room temperature
- 1 teaspoon pure vanilla extract
- 3 cups all-purpose flour
- 1 tablespoon baking powder
- 0.5 teaspoon salt
- 1 cup buttermilk, at room temperature
- 2 large lemons, zest (about 2 tablespoons)
- 0.25 cup poppy seeds
- 1 cup powdered sugar (for glaze)
- 3 tablespoons fresh lemon juice (for glaze)
Instructions
- Preheat your oven to 350°F (175°C). Prepare a 10-inch loaf pan or two 8-inch round cake pans by greasing them with butter and dusting with flour to prevent sticking.
- In a large mixing bowl, use an electric mixer to cream the softened butter and granulated sugar together on medium speed until light and fluffy, which should take about 3-4 minutes.
- Crack the eggs into a separate bowl to check for shell pieces, then add them one at a time to the butter-sugar mixture, mixing well after each addition to ensure a smooth batter. Stir in the vanilla extract and lemon zest until evenly distributed.
- In another bowl, sift together the all-purpose flour, baking powder, and salt to combine them well.
- Gradually add the dry ingredient mixture to the wet batter, alternating with the buttermilk. Start and end with the flour mixture (flour, buttermilk, flour, buttermilk, flour), mixing until just combined to avoid overworking the batter.
- Gently fold in the poppy seeds using a spatula, being careful to combine them evenly without over-mixing the batter.
- Pour the cake batter into the prepared pan(s) and use a spatula to smooth the top to ensure even baking.
- Bake in the preheated oven. If using a loaf pan, bake for 60-70 minutes, or if using round cake pans, bake for 30-35 minutes. The cake is done when a toothpick inserted into the center comes out clean or with a few crumbs attached.
- Once baked, carefully remove the cake from the oven. Allow it to cool in the pan for 10 minutes, then transfer it to a wire rack to cool completely.
- While the cake cools, prepare the glaze by whisking together the powdered sugar and fresh lemon juice in a bowl until you achieve a smooth consistency.
- Once the cake is completely cool, drizzle the lemon glaze over the top, allowing it to cascade down the sides for an elegant finish.
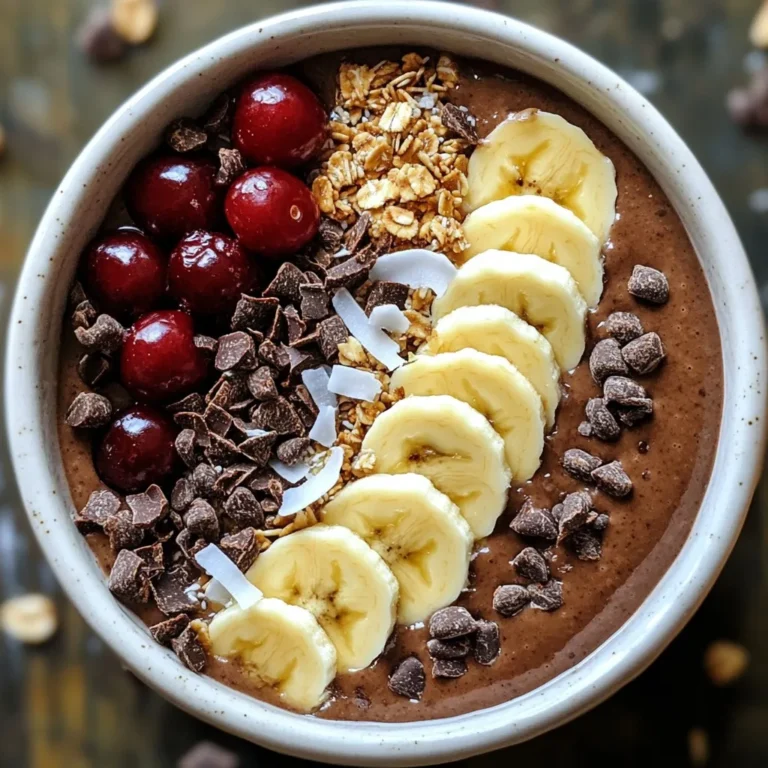
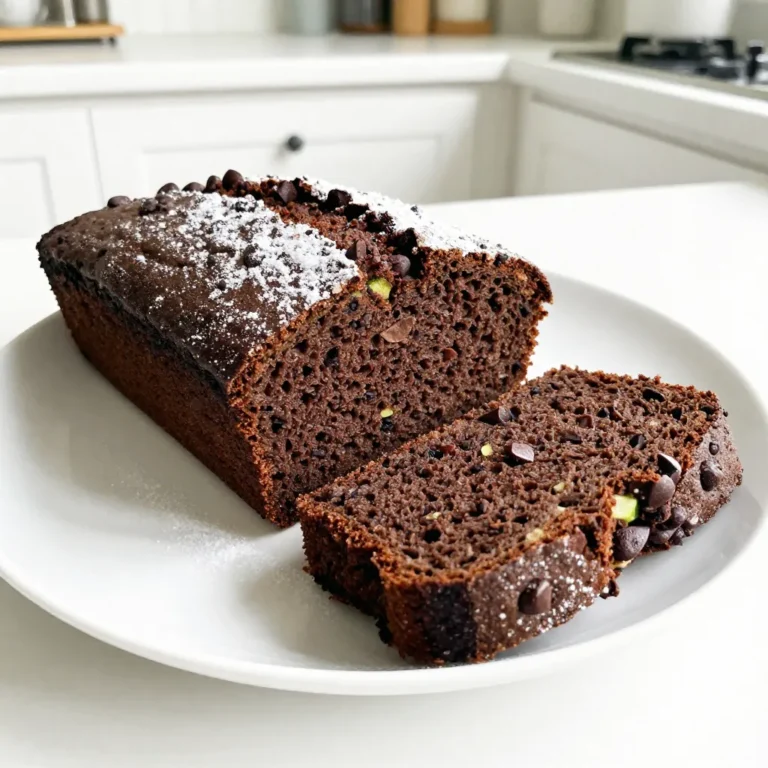
![- 1 ripe avocado, peeled and pitted - 1/2 cup unsweetened cocoa powder - 1/2 cup maple syrup or honey - 1/4 cup almond butter or peanut butter - 1/2 cup whole wheat flour - 1/2 teaspoon baking soda - 1/4 teaspoon salt - 1 teaspoon pure vanilla extract - 1/2 cup dark chocolate chips The key ingredient here is the avocado. Why choose avocado for brownies? It adds creaminess and healthy fats. This makes the brownies moist without extra oil. Next, we have cocoa powder. It gives the brownies a rich chocolate taste. The maple syrup or honey acts as a natural sweetener. I prefer maple syrup for its unique flavor. Almond butter or peanut butter brings a nutty taste. Whole wheat flour adds fiber, making these brownies healthier. Baking soda helps the brownies rise. Salt enhances all the flavors. Finally, dark chocolate chips are a must for that gooey chocolate burst. Using avocado offers many perks. It is rich in vitamins and healthy fats. These fats can help lower bad cholesterol. The fiber in avocado also aids digestion. Cocoa powder is full of antioxidants. It can improve heart health while making brownies delicious. Maple syrup is a lower glycemic option. It can provide a steady energy boost without a sugar crash. Switching to whole wheat flour adds more nutrients. It has more fiber than white flour. This helps keep you full longer. If you need gluten-free options, use almond flour instead of whole wheat. It works well and keeps the taste rich. For a vegan-friendly version, replace honey with maple syrup. Use a nut butter that fits your diet. You can also find dairy-free chocolate chips easily. These easy swaps ensure everyone can enjoy these healthy chocolate avocado brownies! - Preheat your oven to 350°F (175°C). - Line an 8x8 inch baking pan with parchment paper. Leave some paper hanging over the edges. This helps with easy removal later. - Take your ripe avocado and mash it in a bowl. You want it smooth and creamy. You can also use a food processor for this step. - In the same bowl, add maple syrup (or honey), almond butter, and vanilla extract. Mix until everything is blended well. - In a different bowl, whisk together cocoa powder, whole wheat flour, baking soda, and salt. Make sure these dry ingredients are mixed well. - Gradually add the dry mix to the wet mix. Stir gently until just combined. It’s okay to have a few lumps; this helps keep the brownies soft. - Fold in dark chocolate chips so they are evenly spread in the batter. - Pour the batter into your prepared pan. Use a spatula to smooth it out evenly. - Place the pan in your oven. Bake for 20-25 minutes. - To check if they are done, insert a toothpick into the center. It should come out with a few moist crumbs but not wet batter. - Once baked, let the brownies cool in the pan on a wire rack for 15 minutes. Use the parchment paper to lift them out. Let them cool further before cutting into squares. Enjoy making these Healthy Chocolate Avocado Brownies with the [Full Recipe]. To make your brownies just right, avoid overmixing. When you combine wet and dry ingredients, mix gently. A few lumps are okay. This keeps your brownies soft and fudgy. Even baking is also key. Make sure to spread the batter evenly in the pan. This helps them bake at the same time. For a lovely presentation, dust the brownies with cocoa powder or powdered sugar. You can also serve them with fresh berries. A dollop of yogurt adds creaminess and balances the rich chocolate. These simple touches make your brownies look great on any plate. You can boost the taste of your brownies easily. Try adding spices like cinnamon or a pinch of sea salt. A splash of almond or peppermint extract gives a fun twist. Using flavored chocolate chips adds another layer of taste. Think about using orange or hazelnut chips for a unique flavor profile. Check out the Full Recipe for more ideas! {{image_4}} To make these brownies gluten-free, swap whole wheat flour for almond flour or coconut flour. These options keep the texture rich and moist while avoiding gluten. Just remember to adjust the amount, as almond flour is more absorbent. For a vegan twist, replace honey with maple syrup. You can also use a plant-based nut butter, like almond or sunflower seed butter, instead of peanut butter. This keeps the flavor intact without any animal products. You can add a fresh twist to these brownies by mixing in mint extract. Use about 1 teaspoon of pure mint extract for a refreshing flavor. This makes mint chocolate avocado brownies that are perfect for any mint lover! Another fun option is to create a peanut butter swirl. Drop spoonfuls of peanut butter into the brownie batter before baking. Use a knife to swirl it around for a beautiful marbled look. This adds a delicious peanut flavor that pairs well with chocolate. If you want to change the serving size, you can easily convert the recipe. For a smaller batch, halve the ingredients. Use a smaller pan, like 6x6 inches, and keep an eye on the baking time. Smaller brownies will bake faster. You can also bake these brownies in a larger pan for thinner squares. A 9x13 inch pan works well, but adjust the baking time to about 15-20 minutes. Check for doneness with a toothpick, just like before. For the full recipe, check out the details above! To keep your brownies fresh, store them in an airtight container. This prevents air from making them dry. You can also place a slice of bread in the container. The bread helps maintain moisture. Always let brownies cool before storing. This avoids steam build-up, which can make them soggy. If you want to freeze brownies, first cut them into squares. Wrap each piece tightly in plastic wrap. Then, place them in a freezer-safe bag or container. This helps avoid freezer burn. When you're ready to eat them, just take out a piece and let it thaw at room temperature. You can also warm them in the microwave for a few seconds. Brownies last about 3-4 days at room temperature. If you see any mold, throw them away. To keep them fresh longer, refrigerate or freeze them. Refrigeration can extend their life to about a week. For best taste, enjoy them within a few days. For the full recipe, check out the provided details. Can I use ripe bananas instead of avocado? Yes, you can use ripe bananas. They add sweetness and moisture. However, the flavor changes slightly. Bananas may make the brownies taste fruitier. If you love banana, give it a try! How can I make these brownies less sweet? To reduce sweetness, cut back on the maple syrup or honey. You can also swap some sweetener for unsweetened applesauce. This keeps the texture but lowers the sugar. What is the best way to test brownies for doneness? The best way is to use a toothpick. Insert it in the center. If it comes out with a few moist crumbs, the brownies are done. If it has wet batter, bake a bit longer. Can these brownies be made without flour? Yes, you can make them without flour. Use a blend of nut flour or almond flour instead. This gives a nutty flavor and keeps the brownies moist. How many calories are in a serving? Each brownie has about 100 calories. This can change based on the ingredients you use. For example, using less sweetener or different nut butter may alter the calorie count. What are good dairy-free alternatives for chocolate chips? Look for dairy-free dark chocolate chips. Many brands make these with coconut or almond milk. You can also chop up a dairy-free chocolate bar for chunks. In this article, I covered a delicious brownie recipe that uses healthy ingredients. You learned about the key components, their nutritional benefits, and how to adapt the recipe for dietary needs. I shared step-by-step instructions for baking these brownies to perfection. With tips on flavor and texture, you can create the best version. Remember to store your leftovers properly to keep them fresh. Enjoy baking these brownies, knowing they are a tasty treat that can fit your diet!](https://goldendishy.com/wp-content/uploads/2025/06/19347e51-2d6e-4328-baa5-83086a8293f2-768x768.webp)