
Grilled Peach Burrata Salad Flavorful Summer Delight

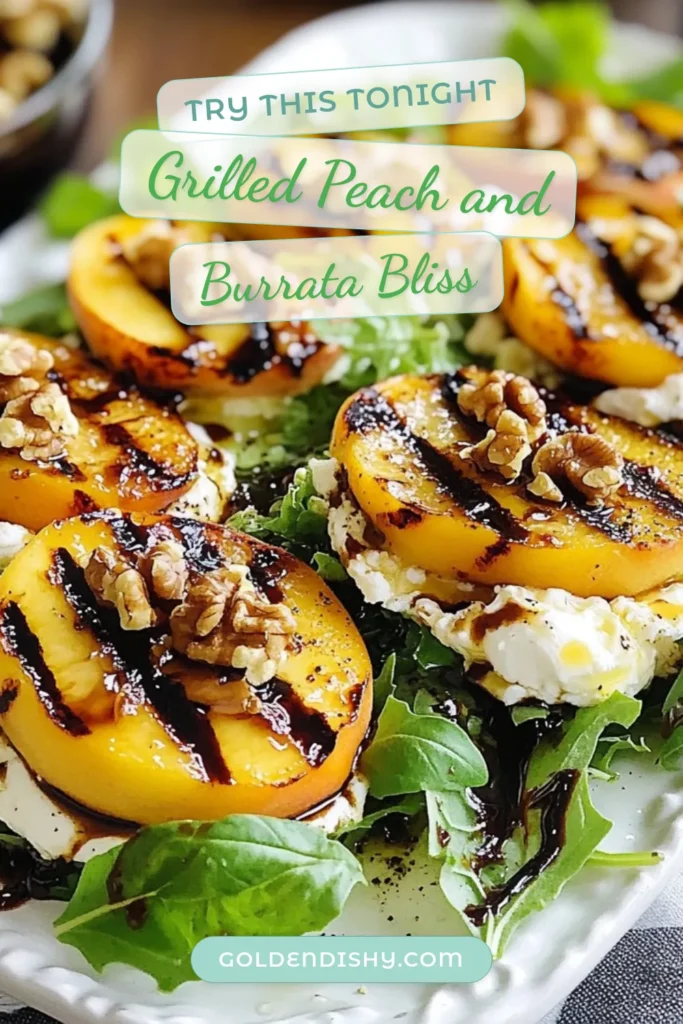
Summer is here, and it’s time to savor fresh flavors! My Grilled Peach Burrata Salad combines sweet, juicy peaches with creamy burrata. Mixed greens and toasted walnuts bring in crunch and freshness. This simple dish is perfect for any gathering or a light dinner. Follow my easy guide to create this tasty summer delight that will impress your friends and family. Ready to get grilling? Let’s dive in!
Why I Love This Recipe
- Fresh and Seasonal: This salad celebrates the flavors of summer with juicy, ripe peaches that are at their peak.
- Creamy and Crunchy: The combination of creamy burrata and crunchy walnuts adds delightful texture to each bite.
- Simple and Quick: With a prep time of just 15 minutes, this recipe is perfect for a quick, elegant meal.
- Beautiful Presentation: The vibrant colors of the greens and peaches make this dish visually appealing for any occasion.
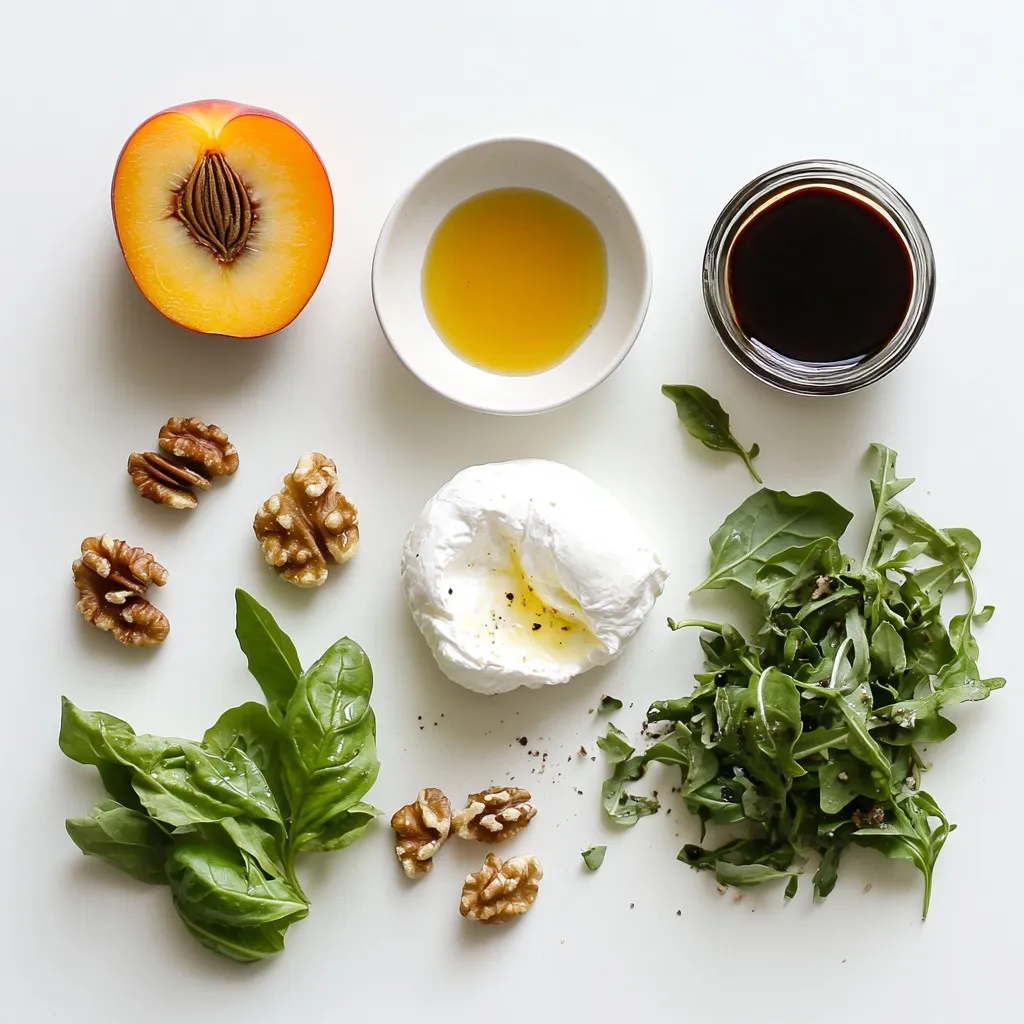
Ingredients
Fresh Produce
– 3 ripe peaches, halved and pitted
– 4 cups mixed greens: arugula, spinach, kale
Fresh peaches are the star of this salad. Look for peaches that feel slightly soft when you press them. Their sweetness shines when grilled. The mixed greens add a nice crunch and balance.
Cheese and Nuts
– 8 ounces creamy burrata cheese
– 1/4 cup toasted walnuts, roughly chopped
Burrata is rich and creamy. It pairs perfectly with the sweet peaches. Toasted walnuts add a nutty crunch that enhances the salad’s texture.
Seasoning and Dressings
– 1/4 cup balsamic glaze
– 2 tablespoons extra virgin olive oil
– Sea salt and freshly cracked black pepper to taste
The balsamic glaze brings a sweet and tart flavor. Olive oil adds richness. A pinch of sea salt and black pepper makes all the flavors pop. Using these simple ingredients makes the salad both tasty and fresh.
Step-by-Step Instructions
Preparing the Grill
First, preheat your grill or grill pan to medium heat. This step is key for getting nice grill marks on the peaches. A well-heated grill gives your fruit that sweet, smoky flavor.
Grilling Peaches
Next, take your ripe peaches and cut them in half. Remove the pits. Brush the cut sides with olive oil. This helps prevent sticking and adds flavor. Sprinkle lightly with sea salt and freshly cracked black pepper. Place the peaches cut-side down on the hot grill. Grill for about 3-4 minutes until you see lovely grill marks. Then, flip them carefully and grill for another 2 minutes. This cooking method softens the peaches while keeping their shape.
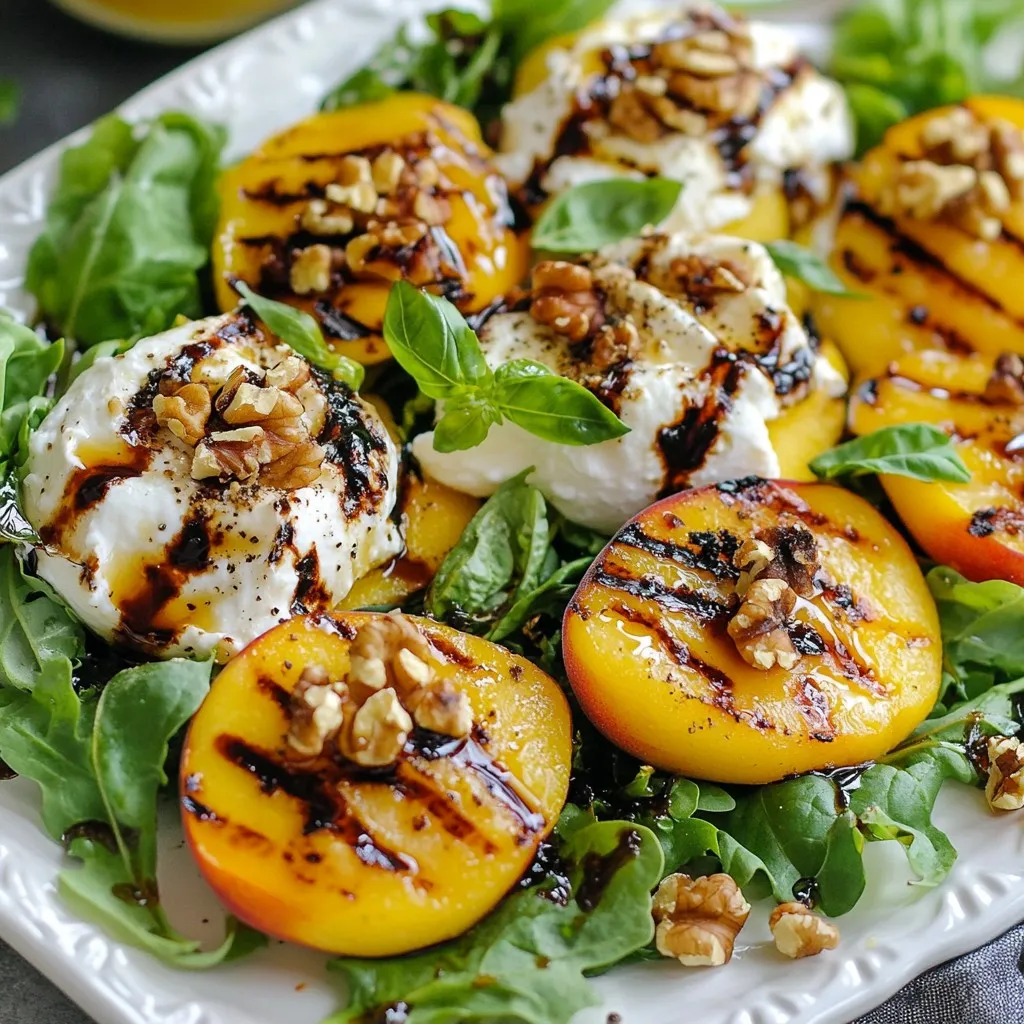
Assembling the Salad
While the peaches cool, grab a large mixing bowl and add the mixed greens. Drizzle with the remaining olive oil. Season with a pinch of salt and black pepper. Toss gently to coat all the greens. Now, arrange the greens on a serving platter or on individual plates. Tear the creamy burrata cheese into rustic pieces and scatter them over the greens. This cheese adds a rich, creamy texture.
Slice the grilled peaches into quarters. Arrange them around the burrata for a beautiful presentation. Drizzle balsamic glaze over the top for sweetness. Lastly, sprinkle the toasted walnuts and torn basil leaves for extra crunch and flavor. Serve this salad right away to enjoy its fresh taste and delightful mix of flavors!
Tips & Tricks
Grilling Peaches Perfectly
To get the best grill marks, start with ripe peaches. Choose peaches that yield slightly to gentle pressure. This means they are ready for grilling. Brush the cut sides with olive oil. Sprinkle with sea salt and black pepper. This adds flavor and helps caramelize the fruit.
Grill the peaches cut-side down for 3-4 minutes. Keep an eye on them. You want to see nice grill marks. Then, flip the peaches and grill for another 2 minutes. This timing keeps them soft yet firm. Remove them from heat and let them cool slightly before slicing.
Enhancing Flavor
To boost flavor, try different oils or glazes. Instead of olive oil, you can use avocado oil for a rich taste. Balsamic glaze adds sweetness. You can also try honey or maple syrup for a twist. Adding fresh herbs like mint or thyme gives a fresh kick.
To add crunch, mix in different nuts. Almonds or pecans work well. Toasting the nuts before adding them brings out their flavor.
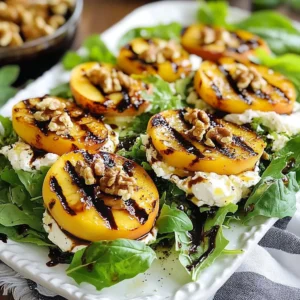
Presentation Tips
For a stunning salad, arrange it artfully. Use a large white platter to show off the colors. Start with the mixed greens as a base. Scatter the burrata pieces over the greens. Place the grilled peach slices around the cheese. This creates a beautiful look.
Finish with a drizzle of balsamic glaze. Sprinkle the toasted walnuts and torn basil leaves on top. This adds texture and makes the salad inviting. Use a nice serving dish to elevate the whole experience.
Pro Tips
- Choose the Right Peaches: Look for peaches that are ripe but still firm to the touch. They should yield slightly when pressed, indicating they are juicy and sweet.
- Perfect Grilling Temperature: Make sure your grill is at medium heat before adding the peaches. This helps achieve those beautiful grill marks without overcooking them.
- Enhance the Balsamic Glaze: For an extra layer of flavor, consider reducing balsamic vinegar on the stove until it thickens slightly before drizzling over the salad.
- Serve Fresh: This salad is best served immediately after preparation to maintain the freshness of the greens and the creaminess of the burrata cheese.
Variations
Ingredient Swaps
You can change up the fruits in your salad. Plums and nectarines work well too. They offer a similar sweet and juicy taste. You may also try berries for a different twist.
If you want to swap nuts, try pecans or almonds. Both add a crunchy texture and nutty flavor. Pecans bring a sweet note, while almonds add a mild taste.
Dressings
Balsamic glaze is common, but you can use other options. A honey vinaigrette adds sweetness. A lemon dressing gives a fresh zing. You can even try a yogurt-based dressing for creaminess.
Making your own dressing is easy. Combine olive oil, vinegar, and some herbs. This way, you can tailor it to your taste.
Dietary Adjustments
To make this salad vegan, skip the burrata. You can use avocado for creaminess. This keeps the salad rich without dairy.
For gluten-free options, check your nuts and dressings. Most ingredients are naturally gluten-free, but always read labels. This ensures a safe, tasty meal for everyone.
Storage Info
Leftover Storage
To keep the grilled peach burrata salad fresh, store it in an airtight container. Place it in the fridge right after serving. This helps maintain flavor and texture. For best results, eat leftovers within two days. Grilled peaches can lose their charm when reheated. If you need to warm them, use a microwave for just a few seconds.
Meal Prep Options
You can prep components ahead of time. Grill the peaches and store them in the fridge for up to two days. Wash and dry the mixed greens, then keep them in a separate container. This way, you can assemble the salad quickly when you’re ready to eat. A good shortcut is to buy pre-grilled peaches if you’re short on time.
Shelf Life
The salad’s components can last a few days in the fridge. The mixed greens usually stay fresh for about three to five days. Grilled peaches are best eaten within two days for optimal taste. Always check for signs of spoilage, like a sour smell or slimy texture. If you notice these, it’s best to toss them out to stay safe.
FAQs
How do you choose ripe peaches for grilling?
To pick ripe peaches, look for a few key signs. First, choose peaches that feel slightly soft when you gently squeeze them. They should have a sweet scent. The skin should be smooth and have a rich color, like yellow or golden orange. Avoid peaches with green spots. Those are not ripe yet.
When you grill peaches, ripe ones caramelize well. This adds a sweet flavor and a lovely texture. If your peaches are hard, let them sit at room temperature for a couple of days to ripen before grilling.
Can you make this salad ahead of time?
Yes, you can prepare parts of this salad ahead of time. You can grill the peaches a few hours before serving. Let them cool and store them in an airtight container in the fridge. They will stay fresh for up to two days.
You can also prep the mixed greens and keep them in a separate bowl. Just add the olive oil, salt, and pepper right before serving. The burrata cheese should be added last to keep it creamy. This way, you can enjoy a quick assembly when it’s time to eat.
What to serve with Grilled Peach Burrata Salad?
This salad pairs well with many dishes. You can serve it with grilled chicken or fish. These proteins add heartiness to the meal. A light soup, like tomato basil, works well as a starter.
If you’re hosting a gathering, serve this salad with crusty bread or garlic bread. It makes a great side for any summer meal. For a refreshing drink, try iced tea or a light white wine. These drinks complement the fresh flavors of the salad.
This blog post covers how to create a tasty Grilled Peach Burrata Salad. We started with fresh ingredients like ripe peaches and mixed greens. Then, I explained how to grill peaches and assemble the salad. I also shared helpful tips for perfect grilling and ways to boost flavors. You can even customize the salad with different ingredients or dressings.
Try this salad to impress at your next meal. It’s easy to make and delicious to eat! Remember, the right prep and fresh ingredients make all the differenc
Grilled Peach Burrata Salad
Ingredients
- 3 whole ripe peaches, halved and pitted
- 8 ounces creamy burrata cheese
- 4 cups mixed greens (a blend of arugula, spinach, and kale)
- 1/4 cup balsamic glaze
- 1/4 cup toasted walnuts, roughly chopped
- 1/4 cup fresh basil leaves, torn into pieces
- 2 tablespoons extra virgin olive oil
- to taste sea salt and freshly cracked black pepper
Instructions
- Start by preheating your grill or grill pan to medium heat. This ensures nice grill marks and caramelization on the peaches.
- Gently brush the cut sides of the peach halves with some olive oil, then sprinkle lightly with sea salt and freshly cracked black pepper for flavor.
- Place the peach halves cut-side down on the hot grill. Grill for about 3-4 minutes, or until you see beautiful grill marks and the peaches begin to soften. Carefully flip them and grill for another 2 minutes. Once done, remove them from the heat and allow them to cool slightly.
- While the peaches cool, take a large mixing bowl and combine the mixed greens. Drizzle with the remaining olive oil, and season with a pinch of salt and pepper. Toss gently until the greens are evenly coated.
- Arrange the lightly dressed greens artfully on a serving platter or divide them among individual plates for a more personal touch.
- Tear the burrata cheese into rustic pieces and scatter them atop the greens, allowing its creamy texture to meld beautifully with the salad.
- Slice the grilled peaches into quarters and artistically arrange them around the burrata, ensuring each serving receives a lovely portion.
- Finish the salad by drizzling balsamic glaze over the top, and generously sprinkle the toasted walnuts and torn basil leaves for added crunch and aroma.
- Serve the salad immediately and enjoy the delightful medley of flavors and textures!
![- 1 can (15 oz) chickpeas, thoroughly drained and rinsed - 1 large cucumber, diced into bite-sized pieces - 1 cup cherry tomatoes, halved for a burst of flavor - 1 red bell pepper, diced for sweetness and crunch - 1 small red onion, finely chopped for subtle sharpness - 1/4 cup fresh parsley, roughly chopped for a fresh aroma - 1/4 cup feta cheese, crumbled (optional; adds creaminess) - Juice of 2 fresh lemons, providing that zesty kick - 3 tablespoons extra-virgin olive oil for richness - 1 teaspoon Dijon mustard for a hint of tang - 1 teaspoon honey (or maple syrup for a vegan option) to balance flavors - Salt and freshly ground black pepper to taste This salad is packed with nutrients. It has about 200 calories per serving. You get protein from chickpeas, fiber from veggies, and healthy fats from olive oil. Plus, it provides vitamins A and C. This makes it not just tasty, but also good for you. Start by gathering a large mixing bowl. Add the chickpeas, diced cucumber, halved cherry tomatoes, red bell pepper, red onion, and parsley. Mix these fresh ingredients well. You want each piece to shine in your salad. If you enjoy cheese, sprinkle in the crumbled feta for a creamy touch. This adds a nice contrast to the crunch of the veggies. For the dressing, take a smaller bowl. Whisk together the lemon juice and olive oil. This forms the base of your zesty dressing. Next, add the Dijon mustard and honey. These ingredients give a perfect balance of flavor. Season with salt and black pepper. Whisk until the mixture looks smooth and well combined. Now it’s time to bring everything together. Drizzle the dressing over your salad mix. Use a spatula or wooden spoon to toss gently. You want all the ingredients to be evenly coated without mashing them. If you added feta, do a light toss to keep the cheese intact. Taste your salad and adjust the seasoning if needed. Cover it and let it chill in the fridge for at least 30 minutes. This helps the flavors meld beautifully. For the full recipe, you can refer back to the recipe card. To make your Zesty Lemon Chickpea Salad shine, focus on seasoning. Start with salt and pepper. Taste as you go. You may want more lemon juice for tang. If you like a sweeter flavor, drizzle more honey. For different dressings, try balsamic vinegar or apple cider vinegar. You can also mix in tahini for creaminess. Each option gives a new twist to the salad. Serving your salad well makes it more enticing. Use a large, colorful bowl for a rustic look. Add fresh parsley on top for a pop of green. You can even place lemon wedges around the bowl for a bright touch. If you want individual servings, use clear cups. This way, the layers show off the bright colors. A light drizzle of olive oil on each cup adds elegance. Prepping this salad in advance is easy. Make it a few hours before serving. The flavors develop more when they sit. For best results, chill the salad for at least 30 minutes. This helps the flavors mix well. You can store leftovers in the fridge for up to three days. Just keep the dressing separate if you want it fresh. For the full experience, check out the Full Recipe. {{image_4}} You can make this salad even better by adding veggies. Try adding avocados. They bring creaminess and healthy fats. Carrots can add a nice crunch. You can also toss in diced mango or apple. These fruits add sweetness and a fun twist. Want to make this salad heartier? Add some protein! Grilled chicken works great for meat lovers. Shrimp is a tasty option too. For a plant-based choice, use tofu. It soaks up flavors well and adds nutrition. Switch up the dressing for a new taste! Try using different vinegars, like balsamic or apple cider. You can also squeeze in more citrus juice for extra zing. For a creamier touch, mix in yogurt or tahini. Both add richness and make the salad more filling. Check out the [Full Recipe] to see how these variations can fit into your meal! Store your Zesty Lemon Chickpea Salad in a sealed container. This keeps it fresh and tasty. It lasts about 3 to 5 days in the fridge. Make sure to check for any signs of spoilage before eating. Freezing this salad is not ideal. The vegetables may lose their crunch. If you want to freeze it, consider freezing just the chickpeas. Place them in an airtight bag. When you want to use them, thaw overnight in the fridge. Leftover salad is great for new meals! You can add it to wraps for a quick lunch. Toss it in grain bowls for added flavor. Or, layer it in sandwiches for a fresh twist. You can even mix it into soups for a hearty touch. Enjoy creating new dishes with your leftover salad! For the full recipe, refer to the [Full Recipe]. Yes, you can make this salad ahead of time. In fact, it often tastes better after chilling. The flavors mix well when you let it sit. I suggest making it a few hours before serving. Just cover it with plastic wrap and place it in the fridge. This way, the lemon juice and olive oil soak into the chickpeas and veggies. You will enjoy a zesty and bright flavor profile! Yes, this salad is gluten-free. Chickpeas, fresh veggies, and the dressing contain no gluten. If you want to check other ingredients, always read the labels. Most items are safe, but it’s best to confirm. This makes the salad a great option for those with gluten sensitivities. You can serve it to everyone without worry! If you can’t eat chickpeas, no problem! You can use other beans like black beans or kidney beans. These will add protein and texture. Another option is to use cooked quinoa or lentils. These alternatives keep the salad hearty and filling. Each will bring a unique taste, so feel free to explore. Get creative based on what you have! This blog post provided a clear guide to making a Zesty Lemon Chickpea Salad. We covered the key ingredients, from fresh veggies to the zesty dressing. You learned how to prepare, dress, and assemble the salad for the best flavor. I shared tips for meal prep, variations to try, and how to store leftovers. Remember, this salad is not just easy to make; it’s also packed with nutrients. Enjoy your creation, explore the variations, and make it your own!](https://goldendishy.com/wp-content/uploads/2025/07/e89bc11c-d040-4055-8bd2-d62839faab5f-768x768.webp)
![- 2 cans (15 oz each) chickpeas, thoroughly drained and rinsed - 2 tablespoons extra virgin olive oil - 1 tablespoon smoked paprika - 1 teaspoon cayenne pepper - 1 teaspoon garlic powder - 1 teaspoon onion powder - 1 teaspoon ground cumin - Salt, to taste - Fresh cilantro for garnish (optional) Chickpeas are the star of this recipe. They are high in protein and fiber, making them a healthy choice. Each can of chickpeas gives you a great base for a crispy snack. Now, let's break down the other ingredients. Extra virgin olive oil adds healthy fats, helping the spices stick. Smoked paprika gives a deep flavor, while cayenne pepper adds heat. Garlic and onion powders give a nice aroma and a touch of sweetness. Ground cumin brings an earthy taste that balances the spices. You can adjust the salt to your liking. Fresh cilantro is optional but adds a fresh touch. Chickpeas are packed with nutrients. One serving has about 120 calories. They provide around 6 grams of protein and 2 grams of fat. You also get about 20 grams of carbs and 5 grams of fiber. Chickpeas support heart health, help with digestion, and can aid in weight management. They are a smart choice for a snack or a meal. They fit well into many diets, too! For the full recipe, check out [Full Recipe]. Start by preheating your oven to 400°F (200°C). This step is key for making the chickpeas crispy. Use a baking sheet lined with parchment paper. This helps with easy cleanup and ensures the chickpeas do not stick. Next, rinse the chickpeas under cold water. Drain them well, then pat them dry with a clean paper towel. This step is very important. Removing moisture makes the chickpeas crispier when roasting. In a large bowl, mix the drained chickpeas with olive oil and spices. Use smoked paprika, cayenne pepper, garlic powder, onion powder, ground cumin, and a pinch of salt. Toss gently so every chickpea gets coated in the spice mix. Even coverage is vital for that great flavor. Spread the seasoned chickpeas on the baking sheet in a single layer. This helps them roast evenly. Place the sheet in the oven and roast for about 25-30 minutes. Shake the pan halfway through to promote even cooking. Watch them closely near the end to avoid burning. Once they are golden and crispy, take the chickpeas out. Let them cool on the baking sheet for a few minutes. They will continue to crisp up as they cool. For a fresh touch, sprinkle chopped cilantro on top before serving. Enjoy them as a snack or use them as a topping on salads. For the full recipe, check the ingredient list above. To make your spicy roasted chickpeas super crispy, dry them well. After draining, rinse them under cold water. Then, pat them dry with a paper towel. This step is vital! Any leftover moisture will make them soggy. Spread the chickpeas in a single layer on your baking sheet. This helps them cook evenly. If they overlap, they won’t get as crisp. Adjusting the spice levels is easy. If you want more heat, add more cayenne pepper. For less spice, reduce the amount or skip it. You can also experiment with other spices! Try adding chili powder or even a dash of curry powder for a fun twist. Taste the mix before roasting to find your perfect balance. Store any leftover roasted chickpeas in an airtight container. Keep them at room temperature for up to three days. If they get soft, re-crisp them in the oven for a few minutes. This restores their crunch. Enjoy them as a snack or toss them on salads. For the full recipe, check out the original source. {{image_4}} You can change the flavor of spicy roasted chickpeas easily. Try adding different spices or herbs. Here are some great ideas: - Cumin: Boost the earthy flavor. - Chili powder: Add more heat. - Turmeric: For a warm, golden color. - Herbs: Experiment with thyme or rosemary for fresh notes. For a sweet twist, mix in a little cinnamon and honey. Toss your roasted chickpeas with a bit of honey after cooking. The sweetness pairs well with spice. It creates a tasty snack that balances flavors. Spicy roasted chickpeas work well with many dishes. They are great as a snack on their own. You can also add them to salads or grain bowls for extra crunch. - Salads: Sprinkle them over leafy greens. They add texture and flavor. - Bowls: Use them in grain bowls for a hearty meal. - Snacking: Serve them in a bowl at parties for a fun treat. Feel free to mix them into soups for added richness. The crispy texture enhances warm dishes too. Get creative and enjoy these versatile little gems! For the full recipe, check the earlier section. To keep your spicy roasted chickpeas fresh, place them in an airtight container. This helps lock in their crunch. You can store them on the counter for up to three days. For longer storage, try the fridge, where they can last up to a week. However, they might lose some crispness in the fridge. If you want to save them for later, consider freezing them. In the freezer, they can last for about three months. Just remember to let them cool completely before storing. When you’re ready to enjoy leftovers, the best way to reheat them is in the oven. Preheat your oven to 375°F (190°C). Spread the chickpeas on a baking sheet in a single layer. Heat them for about 10 minutes. This method helps restore their crunch and flavor. You can also use an air fryer for quick reheating. Set it to 350°F (175°C) and heat for five to seven minutes. Both methods keep your chickpeas crispy and tasty! If you can't use chickpeas, try these options: - Canned white beans: They are creamy and mild in taste. - Edamame: These young soybeans add a nice crunch. - Lentils: Cooked lentils can work, but they won’t be as crunchy. - Roasted pumpkin seeds: They give a great crunch and are nutty. These alternatives are great for those with dietary restrictions or different tastes. Yes, you can easily adapt this recipe for an air fryer. Here’s how: - Preheat your air fryer to 400°F (200°C). - Follow the same steps to season your chickpeas. - Place them in the air fryer basket in a single layer. - Cook for about 15 to 20 minutes, shaking the basket halfway. This method gives you extra crispiness while saving time. The spice level of spicy roasted chickpeas is adjustable. The cayenne pepper in the recipe gives a kick, but you can change it. - For mild: Use less or skip the cayenne. - For extra spicy: Add more cayenne or include chili powder. Taste as you go to find your perfect heat! Yes, spicy roasted chickpeas are naturally gluten-free. Chickpeas do not contain gluten, making them a safe choice for those with gluten sensitivities. Always check your spice labels to ensure no gluten-containing ingredients are added. Enjoy these snacks worry-free! For the full recipe, visit the Spicy Roasted Chickpeas section. This blog post covered how to make spicy roasted chickpeas. We went through the ingredients, detailed the steps, and shared tips for perfecting your snack. Chickpeas are healthy, tasty, and easy to customize. You can adjust spices or enjoy them sweet. Whether you serve them in salads or as a snack, there are many ways to enjoy them. With proper storage, your leftovers will stay fresh. Get ready to impress with this simple recipe!](https://goldendishy.com/wp-content/uploads/2025/07/52a5824a-88a4-4b76-bbe8-61087731f54f-768x768.webp)


![- 2 ripe peaches, halved and pitted - 1 tablespoon extra virgin olive oil - Kosher salt and freshly cracked black pepper, to taste - 4 cups fresh arugula or a mix of leafy greens - 8 oz creamy burrata cheese - ¼ cup toasted almonds, roughly chopped - ¼ cup balsamic glaze - Fresh basil leaves, for garnish When you make this Grilled Peach Burrata Salad, you need just a few key ingredients. Each one plays a big role in the flavor and texture. The peaches bring sweetness, while the burrata adds creaminess. The arugula gives a nice peppery bite. The toasted almonds add crunch, and the balsamic glaze ties everything together with a sweet tang. You can even add fresh basil leaves for a pop of color and taste. I love how simple ingredients can create such a beautiful dish. - Calories: Approximately 300 per serving - Fats: 22g - Protein: 8g - Carbohydrates: 20g This salad is not just tasty; it also offers health benefits. Peaches are low in calories and high in vitamins A and C. They support eye health and boost your immune system. Arugula is rich in vitamins and minerals. It helps with digestion and adds fiber. Burrata is creamy and delicious, providing protein and healthy fats. Almonds are good for your heart and give you energy. Overall, this dish is a great choice for a healthy meal or snack. You can enjoy this salad while knowing it’s good for you! For the complete recipe, check out the [Full Recipe]. - Preheat grill or grill pan to medium-high heat. - Brush peach halves with olive oil, salt, and pepper. To start, I heat my grill or grill pan to medium-high heat. This helps the peaches caramelize nicely. While my grill heats up, I prepare the peaches. I cut them in half and remove the pit. Then, I brush the cut sides with olive oil. A sprinkle of salt and pepper adds a touch of flavor and enhances the natural sweetness of the peaches. - Grill peaches cut side down for 4-5 minutes. - Remove and set aside to cool. Next, I place the peaches cut side down on the grill. I let them cook for 4 to 5 minutes. I look for those beautiful grill marks, which mean they are ready. Once grilled, I carefully remove them and set them aside to cool. The grilling process brings out the peaches' natural sugars, making them even sweeter. - Create a base of arugula in the serving bowl. - Tear and place burrata on greens. - Slice and arrange peaches around burrata. - Add almonds and drizzle with balsamic glaze. - Garnish with basil leaves. Now for the fun part—assembly! I take a large serving bowl and create a bright base of arugula. The fresh greens add a peppery bite. I then gently tear the burrata cheese into pieces, placing them on top of the greens. The creamy texture of burrata pairs perfectly with the grilled peaches. Next, I slice the peaches into wedges and artfully arrange them around the burrata. I love the contrast of the warm peaches and the cool cheese. I then scatter toasted almonds over the salad. They add a nice crunch to each bite. Finally, I drizzle balsamic glaze all over the salad. This adds a sweet and tangy touch that ties all the flavors together. I finish with fresh basil leaves for color and aroma. This salad is a true delight, and you can find the Full Recipe for all the details above! To achieve perfect grill marks on your peaches, start with a clean grill. Preheat it to medium-high heat. Brush your peach halves with olive oil. This helps them avoid sticking and gives them a nice sear. Place the peaches cut side down. Let them cook for about 4-5 minutes without moving them. This ensures nice grill lines and caramelization. If you don’t have a grill, you can use a griddle or stovetop pan. Heat it well and follow the same oiling and cooking steps. You can still get great flavor without a grill! To boost the flavor of your grilled peaches, try adding some spices. A pinch of cinnamon can add warmth. Fresh thyme or rosemary adds a nice herbal touch. You can sprinkle these on before grilling. If you need an alternative to balsamic glaze, try honey or maple syrup. Drizzle these over the salad for a sweet touch. A splash of lemon juice can also add brightness to the dish. For a beautiful display, serve the salad on a large, shallow platter. This lets the colors pop. You can also use individual bowls for a personal touch. Drizzle extra balsamic glaze on the plate for added flair. Garnishing is key! Use fresh basil leaves to add color and aroma. Consider adding edible flowers for an extra visual boost. These small touches make your salad stand out and look professional. {{image_4}} You can change the salad by adding protein. Grilled chicken adds a nice, savory touch. Shrimp also works well, bringing a sweet flavor. If you want a plant-based option, try tofu. For cheese, you can swap burrata for feta. Feta gives a nice salty kick. Goat cheese is another great choice. It brings creaminess and a tangy flavor. You can also switch up the dressing. A honey vinaigrette adds sweetness and pairs well with peaches. A citrus dressing, made with lemon or lime, brightens the dish and adds zest. If you want to make this salad vegan, skip the cheese. You can use a vegan cheese option or leave it out. A simple olive oil and vinegar mix works well too. In the summer, use fresh peaches. But when peaches are out of season, try nectarines. They have a similar taste and texture. Plums are another great choice, adding a sweet and juicy bite. As the seasons change, adapt your salad to use what’s fresh. In fall, add roasted squash for warmth. In winter, try pomegranate seeds for a burst of color and flavor. Each season offers new ways to enjoy this salad. To keep your grilled peach burrata salad fresh, store leftovers in a sealed container. This helps prevent drying and keeps flavors strong. You can store it in the fridge for up to three days. The peaches will soften, but they still taste great. The burrata may lose some creaminess but remains delicious. I do not recommend freezing the salad. The texture of peaches and burrata changes when frozen. If you must freeze, store only the grilled peaches. Wrap them in plastic and place in an airtight bag. When ready to use, thaw them in the fridge overnight. To refresh your salad, take it out of the fridge and let it sit for a few minutes. This helps bring back the flavors. If the greens look wilted, consider adding fresh arugula. You can also drizzle a bit more balsamic glaze for added flavor. Gently mix the salad to combine the ingredients, then serve. This will make it look and taste great again. You can prep the salad in parts. Grill the peaches and store them in the fridge. You can also wash and dry the greens. Keep the burrata cheese wrapped until you're ready to serve. Assemble everything just before you eat. This keeps the salad fresh and tasty. If you do not have burrata, try using fresh mozzarella. It has a similar creamy texture. Goat cheese is another good choice. It adds a tangy flavor that pairs well with peaches. Yes, this salad is naturally gluten-free. All the ingredients listed are free from gluten. Just make sure any balsamic glaze you use is gluten-free. Some brands may add gluten, so check the label. Fresh basil is a great choice for this salad. It adds a sweet and aromatic touch. Mint is another option that gives a refreshing flavor. You can also try arugula for a spicy kick. Use these herbs to boost the taste of your dish. This blog post detailed a delicious grilled peach and burrata salad. We covered the ingredients, from juicy peaches to creamy burrata and flavorful arugula. You learned how to prepare, grill, and assemble this fresh dish easily. We also shared tips for grilling and creative variations. Remember, you can adapt this salad for every season, and it stores well for later use. Enjoy experimenting with flavors and presentations to make it your own. This salad is sure to impress at any meal!](https://goldendishy.com/wp-content/uploads/2025/06/bc92e29d-8312-48fc-8428-fe4367025cca-768x768.webp)