Cheesy Chicken Enchilada Skillet Flavorful Family Meal
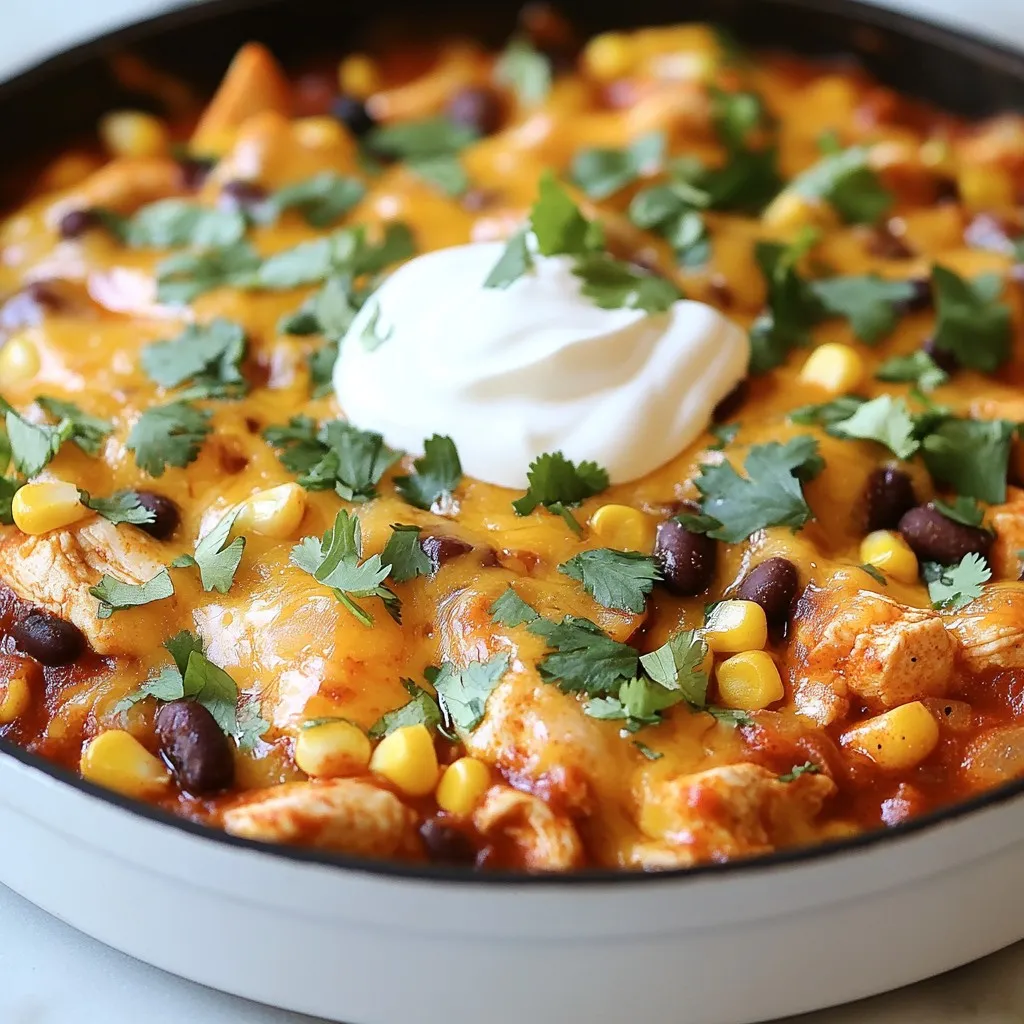
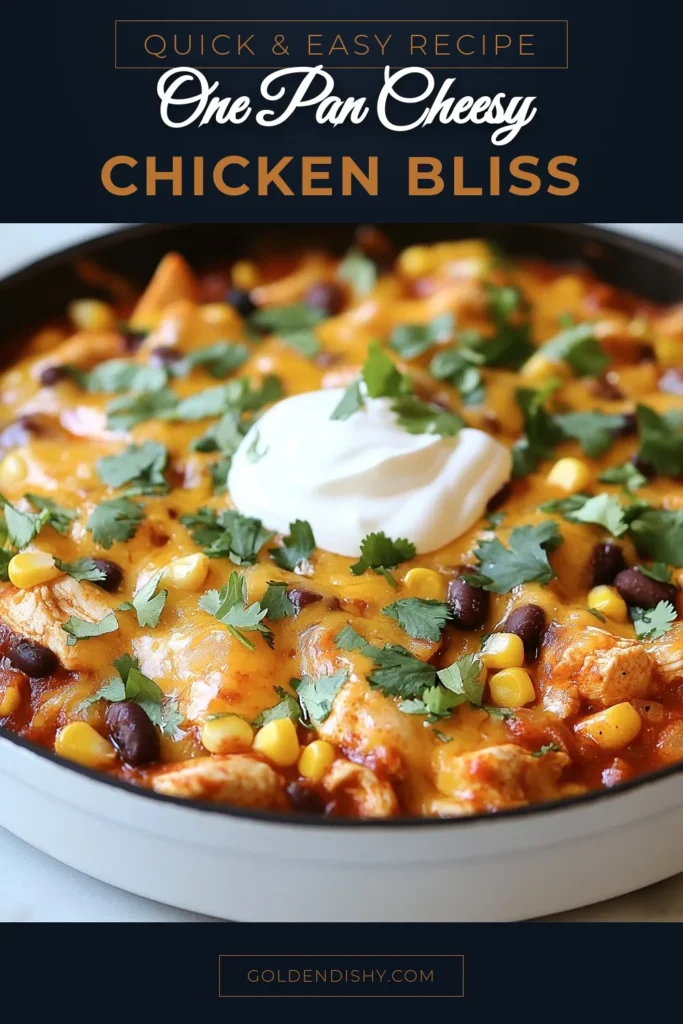
Looking for a quick, tasty meal the whole family will love? My Cheesy Chicken Enchilada Skillet is it! With simple ingredients and bold flavors, this one-pan dish takes less than 30 minutes to make. It’s perfect for busy weeknights and can be customized to suit everyone’s tastes. Let’s dive into the ingredients and get cooking a meal that will bring everyone to the table!
Why I Love This Recipe
- Quick and Easy: This cheesy chicken enchilada skillet comes together in just 25 minutes, making it perfect for busy weeknights.
- All-in-One Meal: With protein, beans, corn, and cheese, this dish offers a complete meal in one skillet, which means less cleanup!
- Flavorful and Satisfying: The combination of spices and melted cheese creates a rich, savory flavor that everyone will love.
- Customizable: Easily adapt this recipe by adding your favorite veggies, swapping the protein, or using different types of cheese.
Cheesy Chicken Enchilada Skillet Ingredients
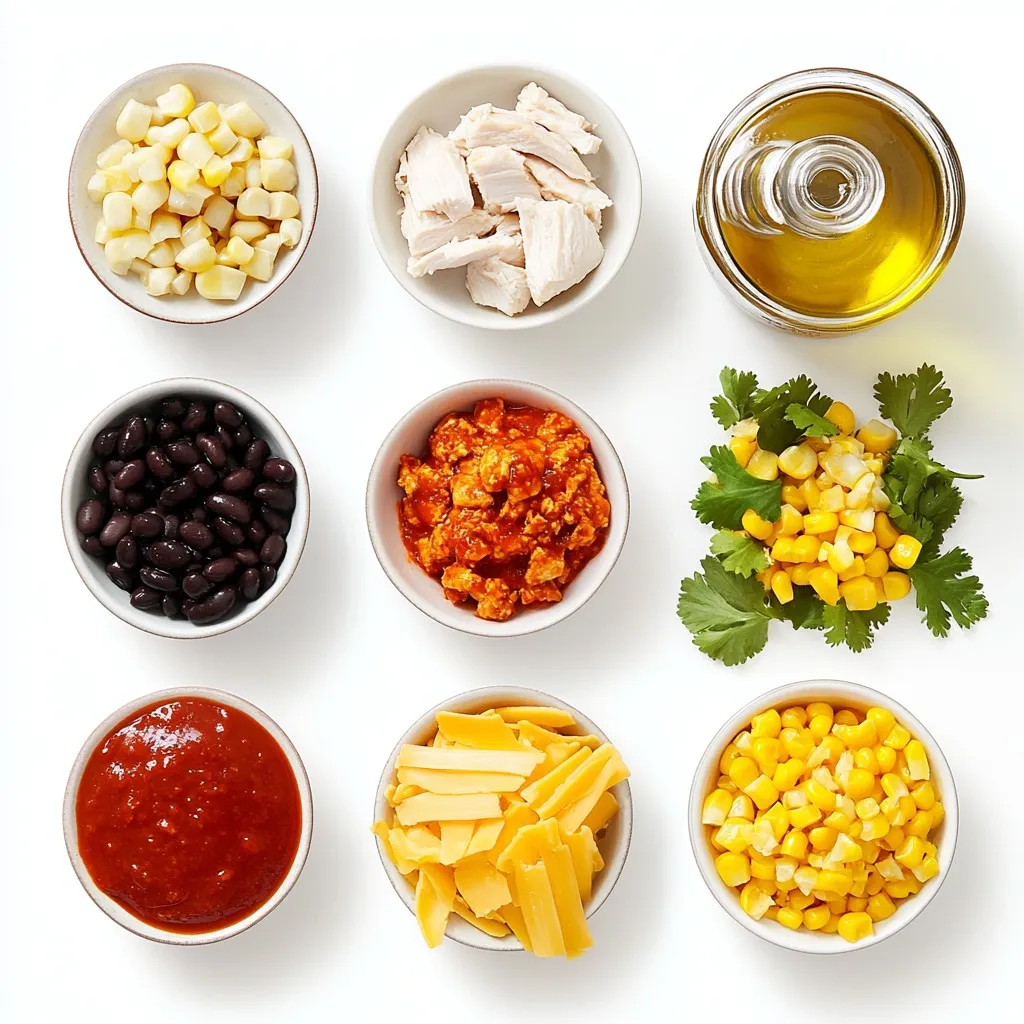
Main Ingredients
For this tasty dish, you need:
– 1 lb boneless, skinless chicken breasts, diced
– 1 tablespoon olive oil
– 1 small onion, finely chopped
– 2 cloves garlic, minced
– 1 can (15 oz) black beans, drained and rinsed
– 1 can (15 oz) sweet corn, drained
These main ingredients form the base of the dish. The chicken adds protein, while the black beans and corn bring fiber and sweetness. The onion and garlic add depth and aroma to the meal.
Spices and Sauces
Next, gather these flavorful spices and sauces:
– 1 can (10 oz) red enchilada sauce
– 1 teaspoon chili powder
– 1 teaspoon ground cumin
– Salt and pepper to taste
The enchilada sauce gives the dish its signature taste. Chili powder and cumin add warmth and a hint of spice. Salt and pepper tie all the flavors together, making each bite delicious.
Cheese and Garnishes
Finally, for that cheesy goodness, you will need:
– 1 cup shredded sharp cheddar cheese
– 1 cup shredded Monterey Jack cheese
– Fresh cilantro, chopped, for garnish
– Sour cream, for serving
The combination of cheddar and Monterey Jack melts beautifully, creating a gooey topping. Fresh cilantro adds a pop of color and flavor, while sour cream offers a creamy finish. Enjoy every bite of this delightful family meal!
Step-by-Step Instructions
Initial Cooking Steps
1. Heat a large skillet over medium heat. Add one tablespoon of olive oil.
2. Once the oil shimmers, add one pound of diced chicken. Season it with salt and pepper.
3. Cook for about 6-8 minutes. Stir occasionally until the chicken turns golden brown.
4. Next, add one small chopped onion and two minced garlic cloves. Sauté for 2-3 minutes. The onion should become soft and translucent.
Mixing in Other Ingredients
1. Now, mix in one can of drained black beans and one can of drained sweet corn.
2. Pour in one can of red enchilada sauce. Add one teaspoon of chili powder and one teaspoon of ground cumin.
3. Stir everything together until it combines well. Let it simmer for about 5 minutes. This helps the flavors meld together.
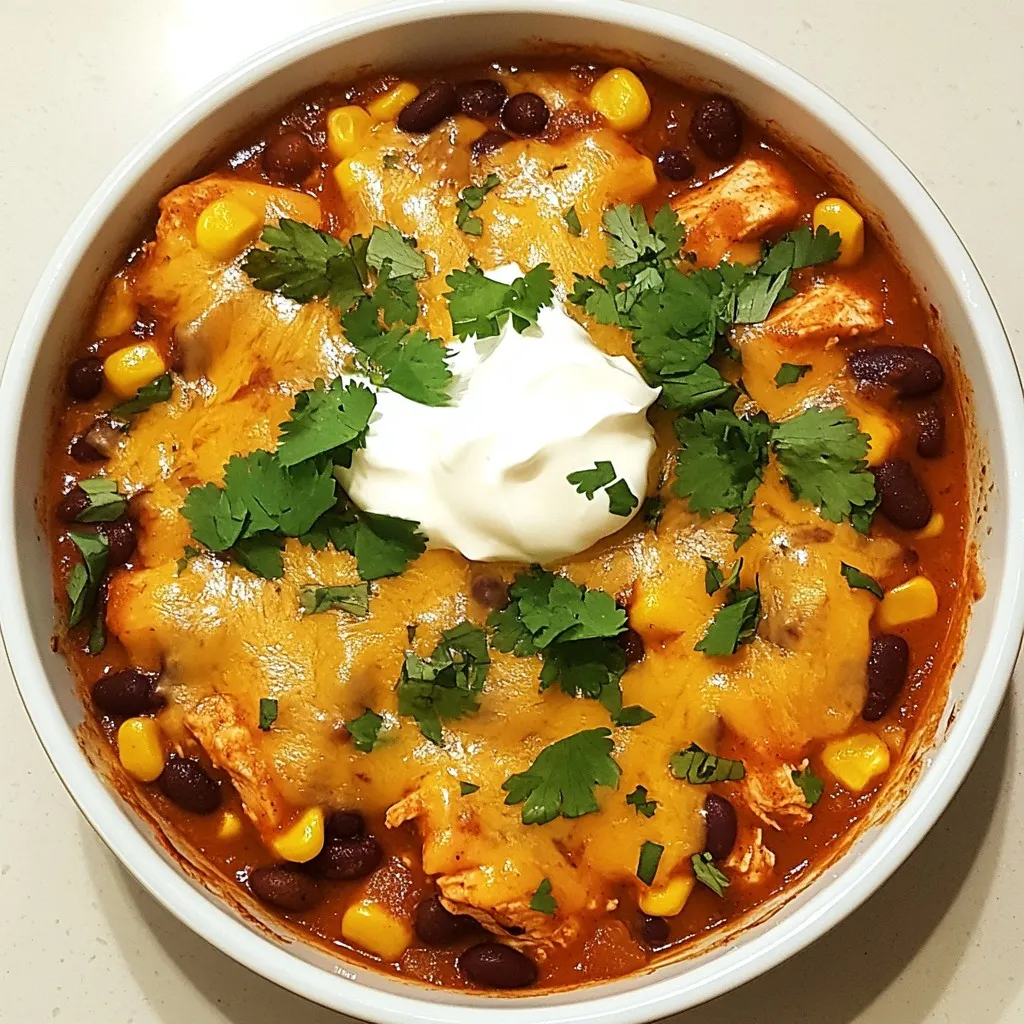
Final Cooking Steps
1. Reduce the heat to low. Sprinkle one cup of shredded cheddar and one cup of Monterey Jack cheese on top.
2. Cover the skillet and cook for another 5 minutes. The cheese should melt and bubble.
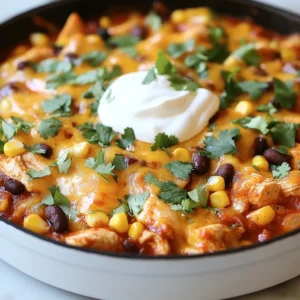
3. Remove from heat. Garnish with fresh chopped cilantro. Serve right away with a dollop of sour cream.
Tips & Tricks for Perfecting Your Skillet Enchiladas
Chicken Cooking Tips
To make sure your chicken cooks evenly, cut it into small pieces. This helps it cook faster and more evenly. I always use boneless, skinless chicken breasts for this dish. They stay moist and have great flavor. If you prefer, you can use thighs for more richness.
Enhancing Flavor
To boost flavor, try adding spices like smoked paprika or onion powder. These can add depth and warmth. Another key tip is to let your skillet simmer. This step lets the flavors blend. Simmer for a good five minutes, and you’ll notice a big difference.
Cheese Melting Techniques
For the best melt, use sharp cheddar and Monterey Jack cheese. They melt beautifully and create that gooey texture we all love. To achieve perfect gooeyness, cover the skillet while the cheese melts. This traps the heat and helps it melt evenly.
Pro Tips
- Use Cooked Chicken: For a quicker meal, use pre-cooked rotisserie chicken instead of raw chicken breasts. Just add it during the last few minutes of cooking to heat through.
- Customize the Heat: Adjust the spice level by adding diced jalapeños or using spicy enchilada sauce if you prefer a kick in your dish.
- Cheese Variations: Feel free to experiment with different types of cheese, such as pepper jack for additional spice or mozzarella for a milder flavor.
- Make it Vegetarian: Substitute the chicken with additional beans or sautéed vegetables like bell peppers and zucchini for a delicious vegetarian version.
Variations of Cheesy Chicken Enchilada Skillet
Substituting Proteins
You can switch up the protein in this dish. Ground turkey or beef works well. Cook the meat until it’s browned, just like the chicken. For a vegetarian option, try using black beans or lentils. Both add great flavor and protein.
Adding Vegetables
Adding veggies boosts nutrition and taste. Bell peppers add crunch and color. Dice them and toss them in with the onion. Zucchini is another good choice. You can also use seasonal vegetables like spinach or squash. They bring freshness and variety to your skillet.
Altering Texture and Flavor
Want to change the texture? Add more beans or grains like quinoa or rice. This gives you a heartier meal. If you like heat, mix in some jalapeños. They will spice things up nicely. Just chop them and stir them in.
Storage Information
How to Store Leftovers
To keep your Cheesy Chicken Enchilada Skillet fresh, let it cool first. Then, place it in an airtight container. This helps avoid moisture loss. Store it in the fridge for up to three days. Use clear containers to see what’s inside. This makes it easier to grab meals quickly.
Reheating Instructions
For the best reheating, use the stove. Place the skillet on low heat and stir occasionally. This helps the dish heat evenly. You can also use the microwave. Put the dish in a microwave-safe bowl. Cover it with a lid or microwave-safe wrap. Heat in short bursts, stirring in between. This keeps it from getting soggy.
Freezing Options
You can freeze the skillet before or after cooking. If freezing before cooking, assemble everything in a freezer-safe container. Make sure to label it with the date. To freeze after cooking, let it cool completely first. Then, transfer it to a freezer-safe container. Thaw it overnight in the fridge before reheating. Cook it on the stove or microwave until hot.
FAQs about Cheesy Chicken Enchilada Skillet
Can I make this dish in advance?
Yes, you can make this dish ahead of time. Prepare the Cheesy Chicken Enchilada Skillet as directed. Let it cool down a bit. Then, store it in an airtight container in the fridge. It will stay fresh for up to three days. When you’re ready to eat, reheat it on the stove or in the oven. If you want to save time, chop the chicken, onion, and garlic a day before. This way, you can cook it faster.
What can I serve with Cheesy Chicken Enchilada Skillet?
This dish pairs well with many sides. Here are some great options:
– Rice: White or brown rice works well.
– Tortillas: Soft flour or corn tortillas can complement the dish.
– Salad: A fresh green salad adds a nice crunch.
– Guacamole: Creamy guacamole enhances the flavors.
– Pico de Gallo: This fresh salsa brings a burst of flavor.
Each side dish can add more enjoyment to your meal.
Is this recipe customizable for dietary restrictions?
Yes, this recipe can fit different diets. Here are some options:
– Gluten-free: Use gluten-free enchilada sauce and check other ingredients.
– Dairy-free: Substitute cheese with dairy-free cheese and skip sour cream.
– Vegetarian: Replace chicken with extra beans or vegetables.
You can easily adapt this dish to fit your needs.
This Cheesy Chicken Enchilada Skillet offers tasty ingredients, easy steps, and simple tips. You learned how to cook chicken, mix in spices, and melt cheese to perfection. I shared variations and storage ideas for your leftovers. Remember, you can adjust spices and protein based on your taste. Enjoy this versatile dish when you crave comfort and flavor. It’s quick, satisfying, and perfect for busy nights. Now, it’s time to gather your ingredients and get cookin
Cheesy Chicken Enchilada Skillet
Ingredients
- 1 lb boneless, skinless chicken breasts, diced into bite-sized pieces
- 1 tablespoon olive oil
- 1 small onion, finely chopped
- 2 cloves garlic, minced
- 1 can black beans, drained and rinsed thoroughly
- 1 can sweet corn, drained
- 1 can red enchilada sauce
- 1 teaspoon chili powder
- 1 teaspoon ground cumin
- 1 cup shredded sharp cheddar cheese
- 1 cup shredded Monterey Jack cheese
- to taste Salt and freshly ground black pepper
- for garnish Fresh cilantro, chopped
- for serving Sour cream
Instructions
- In a large skillet, heat the olive oil over medium heat. Once the oil is shimmering, add the diced chicken. Season generously with salt and pepper, and sauté for about 6-8 minutes or until the chicken is golden brown and fully cooked, stirring occasionally to ensure even cooking.
- Add the finely chopped onion and minced garlic to the skillet. Sauté this mixture for 2-3 minutes, stirring frequently until the onion becomes soft and translucent.
- Incorporate the drained black beans, sweet corn, enchilada sauce, chili powder, and cumin into the skillet. Stir everything together until well combined. Allow the mixture to simmer for about 5 minutes, so the flavors can meld harmoniously.
- Reduce the heat to low and evenly sprinkle the shredded cheddar and Monterey Jack cheeses over the top of the chicken and bean mixture. Cover the skillet with a lid and let it cook for another 5 minutes, or until the cheese is melted, bubbling, and deliciously gooey.
- Remove the skillet from heat. Garnish with fresh chopped cilantro for a burst of color and flavor. Serve right away, accompanied by a dollop of sour cream for a creamy touch.
![- 2 large eggplants - 1 cup ricotta cheese - 1 cup grated mozzarella cheese, plus extra for topping - 1/2 cup grated Parmesan cheese - 1 large egg - 2 cups marinara sauce - 1 teaspoon dried oregano - 1 teaspoon garlic powder - Salt and pepper - Fresh basil leaves - 2 tablespoons olive oil For this dish, you need two large eggplants. Slice them lengthwise into 1/4-inch thick pieces. This thickness helps them cook well and roll easily. For the cheese filling, combine 1 cup of ricotta, 1 cup of grated mozzarella, and 1/2 cup of grated Parmesan. Add one large egg to bind the filling. The egg helps to keep the filling together when you roll it. When selecting eggplants, look for ones that feel heavy for their size. They should have smooth, shiny skin. Avoid any with blemishes or wrinkles. Fresh cheese gives the best taste, so choose high-quality ricotta and mozzarella. Use 2 cups of marinara sauce for a rich flavor. You can use store-bought or homemade. It adds moisture and taste to the dish. Dried oregano and garlic powder enhance the flavor; adjust them to suit your taste. This recipe serves four, making it perfect for a family dinner or a small gathering. Enjoy the process and feel free to add your unique twist! For the full recipe, check out the detailed instructions. To start, slice the eggplants. Cut them lengthwise into 1/4-inch thick slices. This helps them cook evenly. Next, arrange the slices on a baking sheet in a single layer. Brush both sides with olive oil. Sprinkle salt and pepper on top. Bake them in a preheated oven at 375°F (190°C) for about 20 minutes. Remember to flip the slices halfway through. They should be tender and lightly caramelized. While the eggplant bakes, prepare the cheese filling. In a large bowl, mix together the ricotta cheese, grated mozzarella, and grated Parmesan. Add the egg, dried oregano, garlic powder, and a pinch of salt and pepper. Stir until the mixture is smooth and creamy. This blend gives a rich flavor and a great texture. Once your eggplant slices cool, it’s time to roll them. Spread a thin layer of marinara sauce at the bottom of a 9x13-inch baking dish. Take one eggplant slice and place about 2 tablespoons of the cheese filling at one end. Carefully roll it up tightly and place it seam-side down in the dish. Repeat this for all the slices. After placing all the rollatini in the dish, pour the remaining marinara sauce on top. Finish with extra grated mozzarella cheese for a gooey finish. Cover with foil and bake for 25 minutes. Then, remove the foil and bake for an additional 10 minutes until the cheese is bubbly and golden. For more details, check the Full Recipe. To keep your eggplant from becoming soggy, salt it first. Here’s how: - Slice the eggplants and lay them flat. - Sprinkle salt on both sides of the slices. - Let them sit for about 30 minutes. - Rinse off the salt and pat them dry. This draws out excess moisture, making them firmer when cooked. For flavor enhancement, try adding herbs. Fresh basil and oregano pair well. You can also mix in some red pepper flakes for a hint of spice. Another tip is to use high-quality olive oil. It adds depth to the dish and a rich taste. When serving, you have options. Serve the rollatini straight from the baking dish for a rustic feel. For a fancier touch, place them on individual plates. Drizzle some extra marinara sauce around the plate for color. Garnishing makes a big difference. Add fresh basil leaves on top for a pop of green. Consider a sprinkle of extra grated cheese as well. It makes the dish look appealing and inviting. This recipe not only tastes great but also looks beautiful. Enjoy making your Eggplant Rollatini with these simple tips! For the full recipe, check out the instructions above. {{image_4}} You can swap out cheeses in this dish. If you want a lighter option, try cottage cheese instead of ricotta. For a plant-based twist, use cashew cheese or tofu. Both choices work well in the filling. You can also add more veggies to your rollatini. Spinach, zucchini, or mushrooms can mix nicely with the cheese. This not only adds flavor but also boosts nutrition. Feel free to get creative with your fillings! Making this dish gluten-free is easy. Just ensure your marinara sauce is gluten-free. Most are, but check the label to be sure. You can also use gluten-free breadcrumbs if you want a crunch on top. For a vegetarian option, stick with the original recipe. If you want a vegan version, replace the egg and cheese. You can use a flax egg and a vegan cheese blend instead. Both will give you that creamy texture without dairy! [Full Recipe] has all you need to create this delightful dish. To keep your eggplant rollatini fresh, store leftovers in an airtight container. Refrigerate them if you plan to eat them in a few days. They will stay good for about 3 to 5 days in the fridge. If you want to keep them longer, freezing is a great option. Wrap each rollatini in foil or plastic wrap and place them in a freezer-safe bag. They can last up to 3 months in the freezer. When you’re ready to enjoy your leftovers, reheat them gently. The best way is to use the oven. Preheat it to 350°F (175°C). Place the rollatini in a baking dish, cover with foil, and heat for about 20 minutes. This helps keep the cheese soft and the eggplant moist. Avoid reheating in the microwave if you can. It can dry out the rollatini. If you must use the microwave, cover them with a damp paper towel. This adds moisture and helps prevent dryness. Enjoy your meal just as tasty as the first time! What can I use instead of ricotta cheese? You can use cottage cheese or vegan cream cheese. Both give a creamy texture. For a dairy-free option, try tofu blended with a bit of lemon juice. This will mimic the flavor and texture of ricotta. How do I know when eggplant is cooked properly? Eggplant is done when it feels soft and tender. Use a fork to check; it should pierce easily. The edges may brown slightly, which adds flavor. Keep an eye on it to avoid overcooking. Can this recipe be made low-carb? Yes! You can swap eggplant for zucchini or use a low-carb cheese mix. Using fewer eggplant slices per roll can also help keep the carbs low. Adjust the sauce to fit your diet. What is the nutritional value of Eggplant Rollatini? Eggplant Rollatini is low in calories and rich in fiber. It provides protein from cheese and essential vitamins from eggplant. Each serving typically has around 250 calories, depending on ingredients used. What to serve with Eggplant Rollatini? Pair it with a fresh salad or garlic bread for a full meal. A side of steamed veggies also complements the dish well. You can drizzle extra marinara sauce on the plate for added flavor. Can it be made ahead of time? Absolutely! You can prepare the rollatini and store them in the fridge. Just cover it well. When you’re ready to eat, bake it straight from the fridge, adding a few extra minutes to the cooking time. For the full recipe, check the section above. In this post, we explored how to make a delicious eggplant rollatini. We covered key ingredients, helpful preparation tips, and specific cooking techniques. You learned how to assemble and present your dish beautifully. We also discussed alternatives to fit different diets and storage methods for leftovers. Eggplant rollatini is both tasty and flexible. With these steps, you can customize it to your taste. Enjoy making this dish for friends or family!](https://goldendishy.com/wp-content/uploads/2025/07/27d7144c-a390-4303-99e3-b84864a0b33f-768x768.webp)
![- 2 packs of instant ramen noodles (discard the flavor packets) - 2 tablespoons vegetable oil - 1 small onion, thinly sliced - 3 cloves garlic, minced - 1 cup bell peppers (a mix of red, green, and yellow), julienned - 1 cup broccoli florets (washed and trimmed) - 1 medium carrot, peeled and julienned - 1 cup snap peas (trimmed) - 2 tablespoons soy sauce - 1 tablespoon sriracha (adjust to your spice preference) - 1 tablespoon sesame oil - 1 teaspoon ginger, freshly grated - Salt and pepper to taste - 2 green onions, finely chopped (for garnish) - Sesame seeds (for garnish) - Large pot for boiling noodles - Frying pan or wok - Colander for draining Using fresh ingredients makes a big difference in flavor. I love using colorful veggies. They not only taste great but also look amazing in the bowl. You can customize the vegetables based on what you have. If you want to use leftover veggies, go for it! For the equipment, a large pot is a must for cooking the noodles. A frying pan or a wok works well for stir-frying. They heat evenly, which helps cook everything fast. A colander is handy for draining the noodles after cooking. This recipe is all about speed and flavor. You can find the full recipe to follow the steps easily. Just gather your ingredients and equipment, and let’s get cooking! 1. First, fill a large pot with water and bring it to a boil. Make sure to use enough water to cover the noodles. 2. Once boiling, add the ramen noodles. Cook them according to the package instructions, usually around 3-4 minutes. 3. After cooking, drain the noodles in a colander. Shake off any extra water and set them aside for later. 1. In a large frying pan or wok, heat 2 tablespoons of vegetable oil over medium-high heat. Wait until the oil shimmers. 2. Add the thinly sliced onion. Sauté for about 2 minutes until the onion becomes soft and fragrant. 3. Next, stir in 3 cloves of minced garlic, 1 cup of julienned bell peppers, and 1 teaspoon of freshly grated ginger. Cook for 2-3 minutes until the peppers soften. 4. Now, add 1 cup of broccoli florets, 1 medium julienned carrot, and 1 cup of snap peas. Stir-fry for 3-4 minutes. The veggies should stay bright and slightly crisp. 1. Lower the heat to medium. Gently add the cooked ramen noodles to the pan. Toss everything together carefully. 2. Drizzle 2 tablespoons of soy sauce, 1 tablespoon of sriracha, and 1 tablespoon of sesame oil over the mixture. Toss again for about 2 minutes. Ensure everything gets heated through and coated well. 3. Season with salt and pepper to taste. Toss once more to mix the seasoning evenly. 4. Turn off the heat and serve your stir-fry. Garnish with finely chopped green onions and a sprinkle of sesame seeds. For the full recipe, have a look at the detailed instructions above. Enjoy your cooking! You can change the spice level to match your taste. Start with one tablespoon of sriracha. If you like more heat, add more sriracha gradually. You can also try other spicy options. Chili flakes or hot sauce work great too. For a crunchy veggie texture, add them at the right time. Start with onions and garlic, then add bell peppers. Next, include broccoli, carrots, and snap peas. This order keeps them crisp. Stir-fry each batch for about three minutes. Do not overcook them. Serving is key to making your dish pop. Use deep bowls to showcase the vibrant colors. A sprinkle of sesame seeds adds flair. You might also offer extra sriracha on the side. This lets guests spice it up as they like. {{image_4}} You can add protein to your spicy ramen noodle stir fry for extra flavor and nutrition. If you enjoy meat, try using: - Chicken: Cut into thin strips and cook until golden. - Shrimp: Toss in fresh or frozen shrimp that cooks quickly. For a vegetarian or vegan option, consider these protein sources: - Tofu: Press and cube it, then sauté until crispy. - Tempeh: Slice it thin and stir-fry for a nutty taste. If you want to switch things up, you have other noodle options. Try these: - Udon: Thick and chewy, they add a hearty touch. - Rice noodles: They cook quickly and have a nice texture. If you need a gluten-free choice, look for rice noodles or gluten-free ramen. Many brands offer tasty options that fit your diet. To make your dish even better, think about adding more spices and sauces. Here are some ideas: - Chili paste: If you want more heat, add a spoonful. - Garlic powder: A pinch can enhance the garlic flavor. You can also use homemade sauces for a unique twist. Try mixing soy sauce with lime juice or sesame oil with chili flakes for exciting new flavors. This is a great way to personalize your meal and impress your guests! For the full recipe, check out the [Full Recipe]. To keep your ramen stir fry fresh, store leftovers in an airtight container. Make sure the dish cools to room temperature before sealing. This practice helps prevent moisture and keeps it tasty. You can store it in the fridge for up to three days. When ready to enjoy your leftovers, you have two great options. You can use a microwave or a skillet. - Microwave: Place the stir fry in a microwave-safe bowl. Add a splash of water to keep it moist. Heat it for 1-2 minutes, stirring halfway through. - Skillet: Heat a small amount of oil in a skillet over medium heat. Add your stir fry and cook for about 3-5 minutes. Keep stirring to ensure even heating. Both methods work well, but the skillet can help revive the stir fry's original texture better. Enjoy your meal again without losing any flavor! For more delicious ideas, check out the Full Recipe. Yes, you can. Instant ramen noodles are great, but you can try others too. Here are some options: - Udon noodles: These are thick and chewy. They hold sauce well. - Rice noodles: They are light and gluten-free. Just soak them in hot water. - Soba noodles: These are made from buckwheat. They add a nutty taste. When using different noodles, adjust cooking times as needed. You can easily ramp up the heat in this dish. Here are some ideas: - Add more sriracha: Increase the amount to suit your taste. - Include red pepper flakes: Sprinkle these in while cooking for extra kick. - Use fresh chilies: Slice them thin and toss them in with the veggies. - Try spicy sesame oil: This adds flavor and heat in one step. Experiment with these options until you find your perfect spice level! Absolutely! This recipe is perfect for meal prep. Here are some tips: - Cook the noodles and veggies in advance. Store them separately. - Mix everything together just before eating for the best taste. - Store in airtight containers in the fridge for up to three days. Reheat in a skillet for great flavor. You can also add fresh toppings when serving. For the full recipe, check out the details. You can create a tasty spicy ramen noodle stir fry with simple steps and fresh ingredients. We covered the main ingredients and useful equipment needed for success. I shared tips for adjusting spice levels and achieving that perfect crunch in your stir-fry. Explore variations to customize your dish with proteins or alternative noodles. Remember to store leftovers properly and reheat them well. Enjoy your cooking adventures while making this vibrant and flavorful meal!](https://goldendishy.com/wp-content/uploads/2025/07/9da77702-1484-4444-86e3-cca5584db0f1-768x768.webp)
![To make a tasty Chicken Zoodle Soup, gather these fresh ingredients: - 2 medium zucchinis, spiralized into noodles (zoodles) - 1 pound boneless, skinless chicken breast, diced into bite-sized pieces - 4 cups low-sodium chicken broth - 1 medium onion, finely chopped - 2 cloves garlic, minced - 2 medium carrots, peeled and sliced into thin rounds - 1 celery stalk, diced into small pieces - 1 teaspoon dried thyme - 1 teaspoon dried oregano - 1 tablespoon extra virgin olive oil - Salt and freshly ground black pepper to taste - Fresh parsley, finely chopped (for garnish) You can also add optional toppings like grated cheese or a squeeze of lemon for extra flavor. Using fresh herbs adds a bright touch to your bowl. Each ingredient plays a role, from the chicken's protein to the zoodles' crunch. For the full recipe, check out the detailed steps to create this comforting dish. To make Chicken Zoodle Soup, start by preparing your zoodles. You can use a spiralizer to turn the zucchinis into long, thin noodles. If you don’t have a spiralizer, a vegetable peeler works too. Just slice the zucchini into thin strips. Next, chop your vegetables. Finely chop the onion and mince the garlic. Peel the carrots and slice them into thin rounds. Finally, dice the celery into small pieces. This will help the veggies cook evenly. Now, it’s time to cook the chicken and vegetables. In a large pot, heat one tablespoon of extra virgin olive oil over medium heat. When hot, add the chopped onion and minced garlic. Stir for about 2 minutes until they smell great. Then, add the sliced carrots and diced celery. Cook for 5 to 7 minutes until they soften. After the veggies soften, add the diced chicken to the pot. Sprinkle in one teaspoon each of dried thyme and oregano, along with salt and pepper to taste. Cook for another 5 to 7 minutes until the chicken is no longer pink. Then, pour in the low-sodium chicken broth. Turn the heat up to bring it to a boil. Once it boils, lower the heat and let it simmer for about 10 minutes. This allows all the flavors to blend well. Now comes the fun part! When your soup has simmered, it’s time to add the zoodles. Stir them into the broth and cook for an additional 3 to 5 minutes. You want them tender but still a bit firm, so check them often. After cooking, taste the soup. If it needs more flavor, add more salt or pepper to your liking. Finally, ladle the hot soup into bowls. Use fresh parsley to garnish each bowl for a pop of color. This step adds a fresh touch to your comforting meal. For the full recipe, make sure to check out the complete instructions. Enjoy your delicious Chicken Zoodle Soup! - How to make the best zoodles Start with firm zucchinis. Use a spiralizer to cut them into thin noodles. This gives the best texture. Avoid wet zucchinis; they can turn soggy. If needed, salt the zoodles and let them sit for 15 minutes to draw out moisture. Rinse and pat them dry before cooking. - Perfecting the soup flavor Use low-sodium chicken broth for a balanced taste. Fresh herbs like thyme and oregano add depth. Sauté your onions and garlic well to build a strong base flavor. Taste the soup as it cooks, adjusting salt and pepper for the perfect bite. - Avoiding mushy zucchini noodles Add zoodles towards the end of cooking. They only need 3 to 5 minutes to soften. Overcooking makes them mushy and less appealing. Keep them slightly firm for the best texture in your soup. - Ideal serving dishes Use warm, deep bowls to enhance the cozy feel of your soup. The depth keeps the soup hot longer. If you like, serve with a side of crusty bread or a light salad. - Accompaniments like bread or salad Crusty bread pairs well with this soup. It’s perfect for dipping. A fresh side salad can add crunch and flavor to your meal. Choose greens like spinach or arugula for a nice contrast. - Garnishing techniques for presentation Finish your soup with a sprinkle of fresh parsley. This adds color and freshness. A slice of lemon on the side can brighten the flavors, too. For a fun twist, add a few chili flakes for heat. For the complete method, check out the Full Recipe. {{image_4}} You can switch up the chicken for many options. Try turkey, tofu, or chickpeas for a plant-based meal. Each brings its own taste and texture to the soup. For those who want low-carb or dairy-free options, use vegetable broth instead of chicken broth. You can also replace the chicken with cauliflower or mushrooms. These choices keep the soup hearty and tasty. Want to add more veggies? Toss in spinach, bell peppers, or green beans. They add color and crunch to your bowl. To add spice and kick, consider cayenne pepper or red pepper flakes. Just a pinch can warm up your soup without being too hot. Herbs can change the flavor based on the season. In winter, use rosemary or sage. In summer, fresh basil and cilantro brighten the dish. You can also incorporate noodles or pasta for a different twist. Whole wheat pasta or rice noodles work well. They make the soup even more filling. For the full recipe, check out the details above. Enjoy experimenting with your Chicken Zoodle Soup! To keep your Chicken Zoodle Soup fresh, store it in the fridge. Use an airtight container. Make sure the soup cools first. This helps prevent condensation. You can freeze the soup if you want to store it longer. Use freezer-safe bags or containers. Leave some space at the top for expansion. To reheat, warm it on the stove over low heat. Stir often to avoid burning. You can also use the microwave. Heat in short bursts, stirring in between. In the fridge, your soup lasts about three to four days. If you freeze it, it can last up to three months. Just remember to label the containers with the date. Look for signs of spoilage. If the soup smells sour or has mold, it’s time to toss it. Always trust your senses; they guide you well. What are zoodles and how can they be made? Zoodles are zucchini noodles. You can make them by spiralizing zucchinis. Use a spiralizer or a peeler for thin strips. They are a great, low-carb alternative to pasta. Can I make Chicken Zoodle Soup ahead of time? Yes, you can make the soup ahead. Store it in the fridge for up to three days. Just add the zoodles when you're ready to eat. This keeps them fresh and firm. How do I prevent zoodles from becoming soggy? To keep zoodles from getting soggy, add them at the end of cooking. Only cook them for a few minutes. This way, they stay crisp and tasty. Can I use rotisserie chicken for this recipe? Absolutely! Rotisserie chicken saves time. Just shred or cube the chicken and add it to the soup. It adds a nice flavor boost, too. Is it possible to make this in a slow cooker? Yes, you can use a slow cooker. Cook the chicken and veggies on low for 4-6 hours. Add zoodles in the last 15 minutes to keep them tender. How do I make the soup gluten-free? To make the soup gluten-free, use gluten-free chicken broth. Ensure all added spices are also gluten-free. This way, everyone can enjoy your delicious Chicken Zoodle Soup. For a full recipe, check out the [Full Recipe]. You now have a clear guide to making Chicken Zoodle Soup. We covered the key ingredients, preparation steps, and cooking instructions. I shared useful tips to keep your zoodles from turning mushy and ways to enhance the flavor. Remember, you can customize your soup with ingredient swaps to fit your needs. Store leftovers properly to enjoy later. Cooking doesn’t have to be complicated. Experiment and have fun with this recipe. Your kitchen can be a place of creativity and health. Enjoy your tasty, homemade soup!](https://goldendishy.com/wp-content/uploads/2025/06/e4db2e18-4a3d-4a81-8032-e96fb997d624-768x768.webp)