
Blueberry Lemonade Popsicles Refreshing Summer Treat

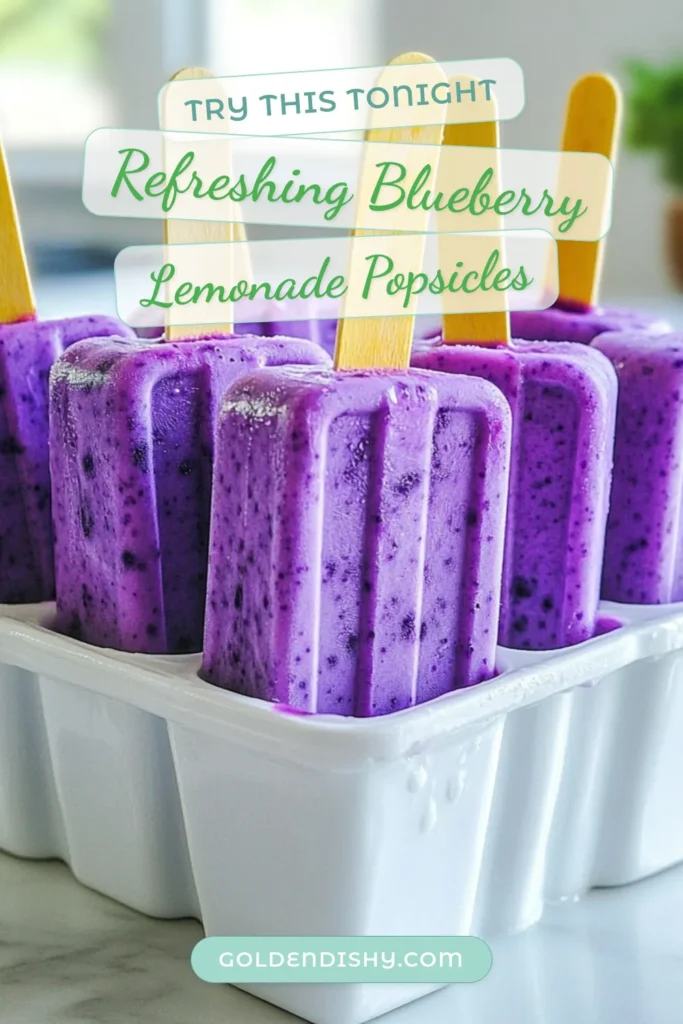
Get ready to cool off this summer with my easy Blueberry Lemonade Popsicles! These delicious treats combine the tang of lemons with the sweetness of blueberries. In this post, I’ll share fresh ingredients, step-by-step instructions, and fun tips to make these popsicles a hit. Whether you’re hosting a sunny picnic or just want a refreshing snack, these delights will satisfy your cravings. Let’s make summer unforgettable!
Why I Love This Recipe
- Fresh and Fruity Flavor: The combination of blueberries and lemon creates a refreshing and delightful taste that is perfect for hot days.
- Healthy Ingredients: These popsicles are made with natural ingredients, making them a healthier alternative to store-bought treats.
- Customizable Sweetness: You can adjust the sweetness level to your preference, making it easy to cater to different tastes.
- Fun to Make: Making these popsicles is a fun activity for kids and adults alike, perfect for summer gatherings!
Ingredients
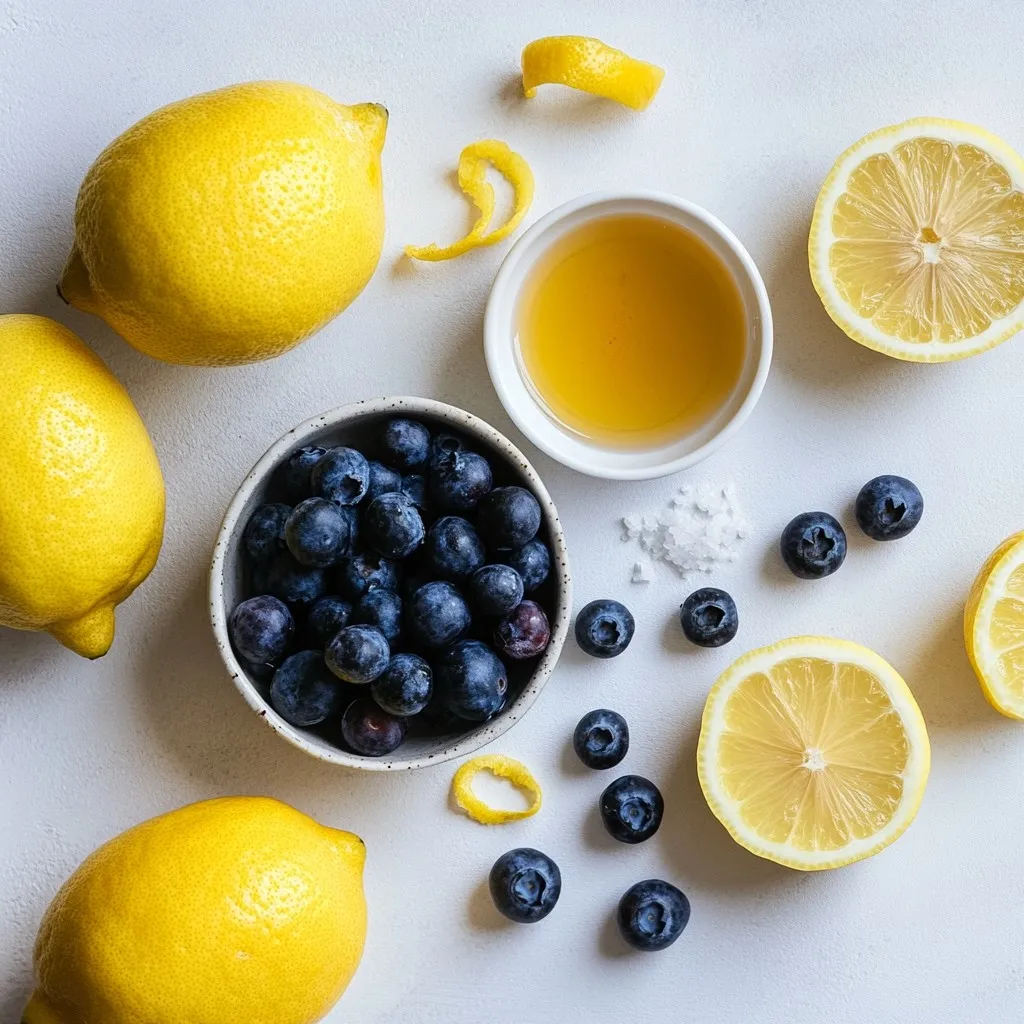
Fresh Ingredients for Blueberry Lemonade Popsicles
To make the best blueberry lemonade popsicles, you need fresh, simple ingredients:
– 2 cups fresh blueberries
– 1 cup freshly squeezed lemon juice (about 4-6 medium lemons)
– 1 cup purified water
– 1/2 cup honey or agave syrup (adjust for sweetness)
– Zest of 1 medium lemon
– A pinch of fine sea salt
These ingredients work together to create a sweet and tangy treat. I love using fresh blueberries for their rich flavor and vibrant color. Fresh lemon juice adds a bright kick, while honey or agave gives just the right amount of sweetness.
Sweetener Options: Honey vs. Agave
You can use either honey or agave syrup in this recipe. Honey gives a warm, floral taste. It also adds a nice depth to the popsicles. Agave syrup is a great choice if you want a milder sweetness. It’s also a vegan option. I recommend starting with 1/2 cup of your chosen sweetener. You can always taste and adjust to make it just right.
Recommended Tools and Equipment
Here are the tools you will need to create these popsicles:
– Medium-sized saucepan
– Immersion blender or countertop blender
– Fine-mesh sieve (optional for smooth texture)
– Mixing bowl
– Popsicle molds
– Popsicle sticks (if needed)
Using these tools will make the process smooth and easy. An immersion blender is handy for pureeing the blueberries right in the pot. If you don’t have one, a regular blender works just fine. Enjoy making these tasty popsicles!
Step-by-Step Instructions
Preparing the Blueberries
To start, gather 2 cups of fresh blueberries. Place them in a medium saucepan with 1 cup of water. Heat the mixture over medium flame. Bring it to a gentle simmer. Cook for about 5-7 minutes. You want the blueberries to burst and soften. This step is key for a tasty popsicle. If you cook them long enough, they release their sweet juices.
For optimal softness, make sure to stir gently. This helps the blueberries break down. Keep an eye on the heat. Too high can burn the mixture.
Blending and Straining the Mixture
Once the blueberries are soft, remove the pan from the heat. Let it cool for a few minutes. Now, I recommend using an immersion blender for this step. It makes blending easy. If you don’t have one, use a countertop blender. Just be careful when transferring the hot mixture.
Blend until you have a smooth consistency. If you want a creamier texture, you can strain the puree. Use a fine-mesh sieve over a bowl. This removes any bits you might not want in your popsicle.
Combining Ingredients and Filling Molds
In a large mixing bowl, combine the smooth blueberry puree with other ingredients. Add 1 cup of freshly squeezed lemon juice, 1/2 cup of honey or agave syrup, and the zest of one lemon. Don’t forget a pinch of fine sea salt. This helps balance the sweetness. Stir everything together until the honey is dissolved.
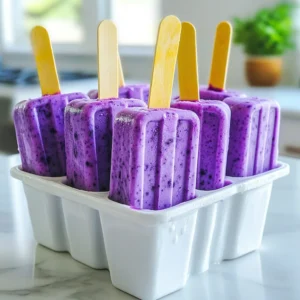
Now, it’s time to fill the popsicle molds. Carefully pour the mixture into the molds. Leave a small gap at the top. This allows for expansion during freezing. Gently tap the molds on the counter. This step helps release any trapped air bubbles.
If your molds take sticks, insert them now. Make sure they are secure before freezing. Place the filled molds in the freezer for at least 4-6 hours. They need to freeze solid. When they are ready, run warm water over the outside of the molds. This helps release the popsicles easily. Enjoy your refreshing summer treat!
Tips & Tricks
How to Adjust Sweetness Levels
To change the sweetness of your blueberry lemonade popsicles, start with honey or agave syrup. Use half a cup as a base. Taste the mixture after blending. If it needs more sweetness, add a bit more honey or agave. Mix well before pouring into molds. Remember, the sweetness can seem less strong once frozen.
Ensuring Smooth Popsicles
A smooth popsicle texture comes from proper blending. After cooking the blueberries, let the mixture cool. Use an immersion blender for the best results. If you don’t have one, a countertop blender works too. For an extra smooth popsicle, strain the mixture through a fine-mesh sieve. This step removes any fruit solids, giving you a silky finish.
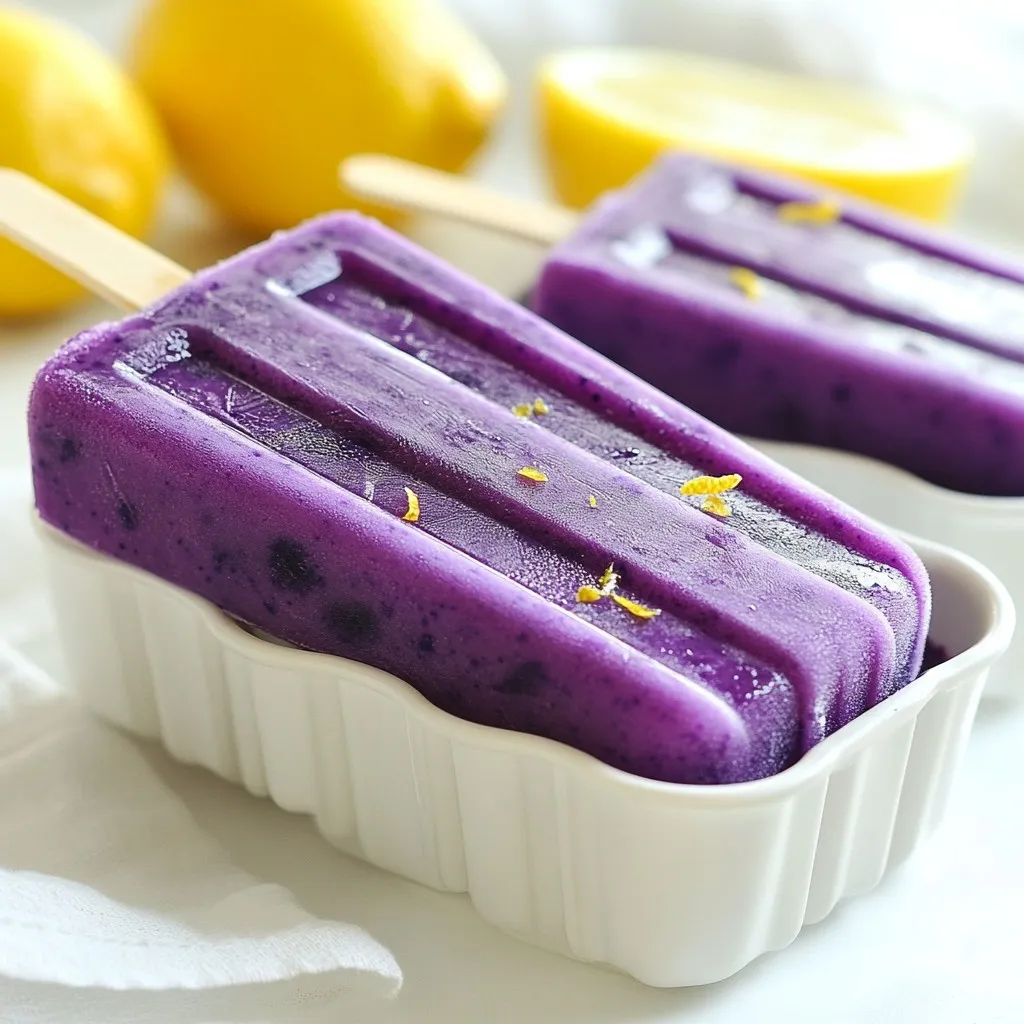
Presentation Tips for Serving
To serve your popsicles, choose a colorful platter or tall glass. Fill the glass with ice to keep pops cool. This adds a nice touch to your presentation. For flair, garnish with whole blueberries or lemon slices. Not only does this look nice, but it also adds a hint of extra flavor. Enjoy making your popsicles look as good as they taste!
Pro Tips
- Use Frozen Blueberries: If fresh blueberries aren’t available, frozen blueberries work just as well and save time on preparation.
- Adjust Sweetness: Taste the mixture before pouring it into molds and adjust the sweetness with honey or agave syrup according to your preference.
- Experiment with Flavors: Try adding a few sprigs of fresh mint or a splash of lime juice for a refreshing twist on the classic flavor.
- Perfect Popsicle Release: If you’re struggling to remove the popsicles from the molds, briefly submerge them in warm water to help loosen them.
Variations
Using Other Berries (e.g., Strawberries, Raspberries)
You can switch out blueberries for other berries. Strawberries and raspberries work well. These berries bring their own sweet and tart flavors. Use the same amount as the recipe calls for blueberries. The process stays the same, just blend and freeze! Mixing different berries can create fun flavor combos. Try strawberries with lemon for a classic taste, or mix raspberries for a tangy twist.
Adding Herbal Flavors (e.g., Mint, Basil)
Adding herbs can change the game for your popsicles. Fresh mint gives a bright, cooling flavor. Just chop a few leaves and mix them in with the puree. Basil also adds a unique taste. Use it sparingly, as its flavor can be strong. This twist adds depth to the sweet and tart mix. You can try different herbs until you find your favorite blend!
Infusing with Citrus Zest (e.g., Lime, Orange)
Want to amp up the citrus kick? Lime and orange zest can be a great addition. The zest adds a bright, zesty note. Just like with lemon, use the zest of one lime or orange. Mix it into your blueberry and lemon blend. This adds a fresh aroma and a burst of citrus flavor. You can even mix zests for a more complex taste. Get creative and enjoy the fruity fiesta!
Storage Info
Best Practices for Freezing Popsicles
To keep your blueberry lemonade popsicles fresh, follow these tips:
– Use fresh molds: Clean and dry your popsicle molds before filling.
– Leave space: When filling molds, leave a small gap at the top. This allows for expansion during freezing.
– Avoid air bubbles: Tap the molds gently on the counter to release trapped air.
How to Store Leftover Popsicles
Once your popsicles are frozen, store them properly:
– Wrap individually: Use plastic wrap or parchment paper to wrap each popsicle. This keeps them from sticking together.
– Use a freezer bag: Place wrapped popsicles in a sealed freezer bag. Label it with the date.
– Keep in the back: Store popsicles in the back of the freezer for the best temperature.
Shelf Life and Signs of Spoilage
Blueberry lemonade popsicles can last a long time. However, check for spoilage:
– Shelf life: They can stay fresh for up to 2 months in the freezer.
– Look for ice crystals: If you see large ice crystals, they may not taste fresh.
– Check for off smells: Any strange odors mean it’s time to toss them.
Enjoy your delightful treats all summer long!
FAQs
Can I use frozen blueberries instead of fresh?
Yes, you can use frozen blueberries. They work well in the recipe. Just thaw them slightly before cooking. Frozen berries may not burst as much but will still give great flavor.
How long do the popsicles take to freeze?
The popsicles need about 4 to 6 hours to freeze completely. For best results, let them freeze overnight. This ensures they harden well and are easy to remove from the molds.
What are some health benefits of blueberries and lemon?
Blueberries are rich in vitamins and antioxidants. They can help improve heart health and boost brain function. Lemons provide vitamin C and support digestion. Together, they make a refreshing and healthy treat.
Can I make these popsicles vegan?
Yes! To make them vegan, simply replace honey with agave syrup or maple syrup. Both options provide sweetness without animal products. This way, everyone can enjoy these tasty popsicles.
What equipment do I need to make popsicles?
You will need popsicle molds and a blender. An immersion blender works great for mixing. If you don’t have that, a countertop blender is fine too. You might also want a fine-mesh sieve for smoother popsicles.
Blueberry lemonades popsicles are refreshing and easy to make. You learned about fresh ingredients, sweetener choices like honey and agave, and the tools needed. We went through step-by-step instructions from cooking blueberries to filling molds. Remember to adjust sweetness to fit your taste and try different berries for fun. Store your popsicles well for the best flavor and enjoy them all summer long. With these tips, you can create delicious and healthy treats everyone will love. Get ready to enjoy your homemade popsicle
Blueberry Lemonade Popsicles
Ingredients
- 2 cups fresh blueberries
- 1 cup freshly squeezed lemon juice
- 1 cup purified water
- 1/2 cup honey or agave syrup
- 1 medium lemon zest
- a pinch fine sea salt
Instructions
- In a medium-sized saucepan, combine the fresh blueberries with 1 cup of water. Heat over medium flame, bringing the mixture to a gentle simmer. Allow it to cook for about 5-7 minutes, or until the blueberries have softened and burst.
- Once the blueberries are softened, remove the saucepan from the heat and let it cool for a few minutes. Using an immersion blender, puree the mixture until it reaches a smooth consistency.
- If you prefer a smoother popsicle texture, pass the blueberry puree through a fine-mesh sieve over a bowl, discarding any solids left behind.
- In a spacious mixing bowl, combine the smooth blueberry puree, freshly squeezed lemon juice, honey (or agave syrup), lemon zest, and a pinch of sea salt. Stir thoroughly until the honey is fully dissolved.
- Carefully pour the mixture into popsicle molds, ensuring to leave a small gap at the top to accommodate expansion during freezing.
- If your popsicle molds require sticks, insert them at this stage.
- Transfer the filled molds to the freezer and allow them to freeze for a minimum of 4-6 hours, or until they are completely solid.
- To release the popsicles, run warm water over the outside of the molds for a few seconds. Gently tug on the sticks to ease the popsicles out without breaking.
![To make healthy peanut butter oat bars, you need a few key items: - 2 cups rolled oats - 1/2 cup natural peanut butter - 1/4 cup honey or maple syrup - 1/4 cup unsweetened applesauce - 1/2 cup mixed nuts (almonds, walnuts, cashews), roughly chopped - 1/4 cup dark chocolate chips (optional) - 1/2 teaspoon ground cinnamon - 1/4 teaspoon sea salt These ingredients work together to create a tasty and nutritious snack. The oats provide fiber, while the peanut butter adds protein and healthy fats. Honey or maple syrup gives sweetness, and applesauce keeps the bars moist. You can easily change your bars by adding extra flavors or textures. Here are some fun options: - Dried fruits (like cranberries or raisins) - Seeds (like chia or flaxseed) - Protein powder for an extra boost - Coconut flakes for added flavor Feel free to mix and match these add-ins to suit your taste. These oat bars pack a nutritious punch. Here’s a quick look at what you’ll get: - Calories: About 150 per bar - Protein: Around 5g, thanks to the peanut butter and nuts - Fiber: Approximately 3g from the oats and nuts - Healthy Fats: Includes unsaturated fats from the peanut butter and nuts These bars not only taste great but also fuel your body. With their balanced nutrition, they make a perfect snack or breakfast option. For the complete recipe, check the Full Recipe link. Start by preheating your oven to 350°F (175°C). This step ensures even baking. Next, grab an 8x8-inch baking pan. Line it with parchment paper, letting some paper hang over the edges. This makes it easy to lift the bars out later. In a large mixing bowl, combine 2 cups of rolled oats, 1/2 teaspoon of ground cinnamon, and 1/4 teaspoon of sea salt. Stir well until the dry ingredients are mixed evenly. This mix creates a solid base for your bars. In a separate bowl, blend together 1/2 cup of natural peanut butter, 1/4 cup of honey or maple syrup, and 1/4 cup of unsweetened applesauce. Mix vigorously until the mixture is smooth. Pour this wet mixture into the bowl with the dry ingredients. Stir thoroughly, ensuring all the oats are coated. Now, it’s time for the fun part! Fold in 1/2 cup of roughly chopped mixed nuts and 1/4 cup of dark chocolate chips, if you want a sweet touch. Make sure to distribute these extras evenly throughout the batter. Spoon the mixture into your prepared baking pan. Use a spatula or your hands to press the mixture down firmly. This ensures the bars hold their shape while baking. Bake in the preheated oven for 20-25 minutes. Look for a lovely golden brown color on the edges. Once done, remove the pan from the oven. Let it cool for about 10 minutes. Use the parchment paper to lift the bars from the pan and place them on a wire rack. Allow them to cool completely before cutting into your desired size. You can store any leftovers in an airtight container to keep them fresh. Enjoy these tasty treats as a snack or a quick breakfast! For the complete recipe, see the Full Recipe section. To get the best texture for your peanut butter oat bars, use rolled oats. They stay chewy and hold together well. If you want a softer bar, add a bit more applesauce. For crunch, add more nuts. Press the mixture firmly into the pan. This helps the bars hold their shape when baked. Store your bars in an airtight container. This keeps them fresh and moist. You can also layer parchment paper between bars to prevent sticking. If you want to keep them longer, freeze them. They freeze well for up to three months. Just wrap them tightly in plastic wrap before placing them in a freezer bag. These bars make a great snack or breakfast. Cut them into small squares for easy grabbing. Pair them with yogurt or fruit for a balanced meal. You can also drizzle some honey on top for added sweetness. Feel free to explore the [Full Recipe] for more ideas on how to enjoy these delicious treats! {{image_4}} You can change up the nuts in your oat bars. Use almonds, walnuts, or cashews. If you like seeds, try adding pumpkin seeds or sunflower seeds. These options add crunch and healthy fats. Mix and match to find your favorite combination. If you want a different sweet taste, try maple syrup instead of honey. You can also use agave nectar for a milder flavor. For a low-calorie option, consider stevia or monk fruit sweetener. Each sweetener changes the taste just a little. Adding fruits and spices can make your bars pop with flavor. Try mashed bananas or dried fruits like cranberries or apricots. For spices, add a pinch of nutmeg or ginger for warmth. You can even fold in some cocoa powder for a chocolatey twist. These small changes can make your bars exciting and unique. To keep your healthy peanut butter oat bars fresh, store them in an airtight container. This helps to lock in moisture and flavor. You can keep them at room temperature for up to a week. If you want them to last longer, consider refrigerating them. The cool air helps maintain their taste and texture. Freezing is a great way to extend the life of your oat bars. Wrap each bar tightly in plastic wrap. Then place them in a freezer-safe bag or container. You can freeze the bars for up to three months. When you're ready to enjoy them, just take out a bar and let it thaw on the counter. If you prefer warm bars, you can reheat them. Simply place a bar in the microwave for about 15-20 seconds. This warms them up nicely and brings back their fresh-baked taste. If you stored them in the fridge, let them sit at room temperature for a few minutes before warming to avoid cold centers. For more details, check out the Full Recipe. Yes, you can swap peanut butter for almond, cashew, or sunbutter. Each nut butter brings its own flavor. Almond butter gives a creamy texture, while cashew butter is milder. Sunbutter is a great option for nut allergies. Just make sure to choose a natural nut butter without added sugars or oils. These oat bars last about one week at room temperature. Keep them in an airtight container. For longer storage, they can stay fresh in the fridge for about two weeks. If you want to enjoy them later, freeze the bars. They can last up to three months in the freezer. Just thaw them when you are ready to eat. Yes, this recipe is gluten-free if you use certified gluten-free oats. Most rolled oats are naturally gluten-free. However, some brands may process oats with gluten-containing grains. Always check the label before buying. This way, you can enjoy your oat bars without worry. Yes, you can skip added sugars. Use ripe bananas instead of honey or maple syrup. Applesauce also adds natural sweetness. You can add a bit more applesauce if you want a sweeter taste. This keeps the oat bars healthy and tasty without extra sugar. You now have a complete guide to making healthy peanut butter oat bars. We covered essential ingredients and fun add-ins to suit your taste. Step-by-step instructions ensure your bars come out perfectly every time. I shared tips for the best texture and storage methods to keep them fresh. You can also explore different variations for added flavor. These oat bars are easy to make, fun to customize, and nutritious. Enjoy your delicious, homemade snacks!](https://goldendishy.com/wp-content/uploads/2025/07/83a658d4-f414-4ba0-9f79-92aafa211a05-768x768.webp)
![- Fresh strawberries - Vanilla sponge cake - Heavy whipping cream - Granulated sugar - Powdered sugar - Lemon juice - Fresh mint leaves - Alternative decoration options The main ingredients in this trifle are fresh strawberries, vanilla sponge cake, and heavy whipping cream. You will want ripe strawberries for the best taste. They add a sweet and juicy flavor. The vanilla sponge cake gives the trifle its light and fluffy base. You can use store-bought or homemade cake—whichever you prefer! For the cream, we use heavy whipping cream. It whips up nicely to form soft peaks. This cream adds richness and makes the trifle feel special. Next, we have some additional ingredients. Granulated sugar helps sweeten the strawberries. It helps bring out their natural juice. Powdered sugar sweetens the whipped cream while keeping it smooth. Lemon juice adds a nice touch of tartness and brightens the flavors. For garnishes, fresh mint leaves add a pop of color and freshness. You can also use extra strawberry slices for decoration. If you want to get creative, consider adding chocolate shavings or crushed cookies on top. These small touches can enhance the trifle's look and taste. For the full recipe, check out the details above! To start, we need to macerate the strawberries. This means we will make them sweeter and juicier. - Ingredients: - 4 cups fresh strawberries, hulled and sliced - 1/4 cup granulated sugar - 1 tablespoon lemon juice In a medium bowl, combine the sliced strawberries, sugar, and lemon juice. Toss them gently to coat. This step helps the strawberries release their juices. Let this sit for 15 to 20 minutes. You will see them get juicy and sweet. Next, let's prepare the whipped cream. This will add a light and fluffy layer to our trifle. - Ingredients: - 2 cups heavy whipping cream - 1/4 cup powdered sugar - 1 teaspoon vanilla extract In a large bowl, mix the heavy whipping cream, powdered sugar, and vanilla extract. Using an electric mixer, beat this mixture on medium-high speed. Keep mixing until soft peaks form, which takes about 3 to 5 minutes. Be careful not to over-whip. We want it to stay light and fluffy. Now comes the fun part: assembling the trifle! This is where our layers come together. 1. Start by placing a layer of sponge cake cubes at the bottom of your trifle bowl. Spread them evenly. 2. Next, add a generous layer of macerated strawberries on top of the sponge cake. Make sure to include those sweet juices. 3. Follow with a layer of the freshly whipped cream. Repeat the layering process with sponge cake, strawberries, and whipped cream until you reach the desired height. Usually, two to three layers work well. For the top layer, add a smooth layer of whipped cream. Decorate with fresh strawberry slices and a sprig of mint. Cover with plastic wrap and chill in the fridge for at least 2 hours. This chilling time makes the flavors blend well. And there you have it! Your Strawberry Shortcake Trifle is ready to impress. For the complete recipe, check out the Full Recipe. To make your trifle shine, pay close attention to the whipped cream. Avoid over-whipping it. Ideal whipped cream is light and fluffy. If you whip it too long, it can become grainy. Watch it closely as you mix. Next, ensure your sponge cake absorbs flavors. Let the cake soak up the strawberry juice. This step is key for a moist and tasty dessert. Layer each ingredient gently, so the flavors meld well together. Choose clear glass bowls or cups for serving. This choice highlights the beautiful layers. You can see the juicy strawberries and fluffy cream through the glass. It adds a nice touch to your table. For garnish, use fresh mint leaves. A sprig on top creates a pop of color. You can also add extra strawberry slices to the top. This makes your trifle look even more appealing. Chill your trifle for at least 2 hours. This time allows the flavors to mix well. The cake absorbs the strawberry juices, enriching the taste. When ready to serve, take it out of the fridge. Use a large spoon to scoop out servings. This method keeps the layers intact and makes each bite delightful. {{image_4}} You can mix things up with different fruits. Other berries like blueberries or raspberries work great. Their tartness adds a nice twist. You can also add complementary fruits like bananas. Bananas bring a creamy texture that pairs well with the other layers. Do you want to try something new with the cake? You can use flavored cakes. Chocolate or lemon cakes add a fun taste. If you need gluten-free options, there are many gluten-free cakes available. You can use sponge cake made from almond flour or coconut flour. These options keep the dessert light and fluffy. Not a fan of whipped cream? You can substitute it with yogurt. Greek yogurt gives a nice tang and is a bit healthier. If you're looking for dairy-free options, try coconut cream. It’s rich and creamy, making it a great choice for this trifle. Feel free to explore these variations to make the Strawberry Shortcake Trifle your own. For a full recipe, check out the [Full Recipe]. After making your strawberry shortcake trifle, store it in the fridge. Cover it with plastic wrap or a lid. This keeps it fresh and prevents it from absorbing other smells. It stays fresh for up to three days. The flavors will meld and deepen over time, making it even tastier. You can freeze your trifle for later enjoyment. However, it’s best to freeze layers separately. Wrap the sponge cake and strawberries tightly in plastic wrap. Place the whipped cream in an airtight container. This helps keep the taste and texture. When ready to serve, move the layers to the fridge to thaw overnight. Once thawed, layer them again for a fresh look. You can get creative with leftover trifle. Try blending the leftover cake and cream into a milkshake. You can also make parfaits with yogurt and fruit. If you have sponge cake left, warm it in the oven. This brings back some of its soft texture, making it perfect for new desserts. Use these ideas to enjoy your trifle in new and fun ways! The trifle needs to chill for at least 2 hours. This allows the flavors to mix well. Chilling also helps the sponge cake soak up the strawberry juices. For the best taste, I recommend leaving it in the fridge longer if you can. The longer it chills, the better it gets. Yes, you can make this dessert a day in advance. Just assemble the trifle and chill it. This way, you save time on the day of serving. If you prepare it early, the flavors will deepen and blend even more. Just make sure to cover it well to keep it fresh. If you want a lighter version, you can use whipped topping. You can also try Greek yogurt for a creamy texture. Another option is coconut cream for a dairy-free choice. These substitutes may change the flavor, but they can work well in a pinch. This dessert recipe shines through simple, fresh ingredients and easy steps. We explored how to prepare fresh strawberries, make light whipped cream, and assemble a delicious trifle. With tips on texture, presentation, and storage, you can create impressive layers in no time. Remember, variations are endless—try different fruits or cakes. Enjoy your trifle today and impress your friends with your skills. Happy layering!](https://goldendishy.com/wp-content/uploads/2025/07/6bc930bf-8069-41ce-85f7-a06b19a5b93e-768x768.webp)