
Grilled Peach Burrata Salad Fresh and Flavorful Recipe
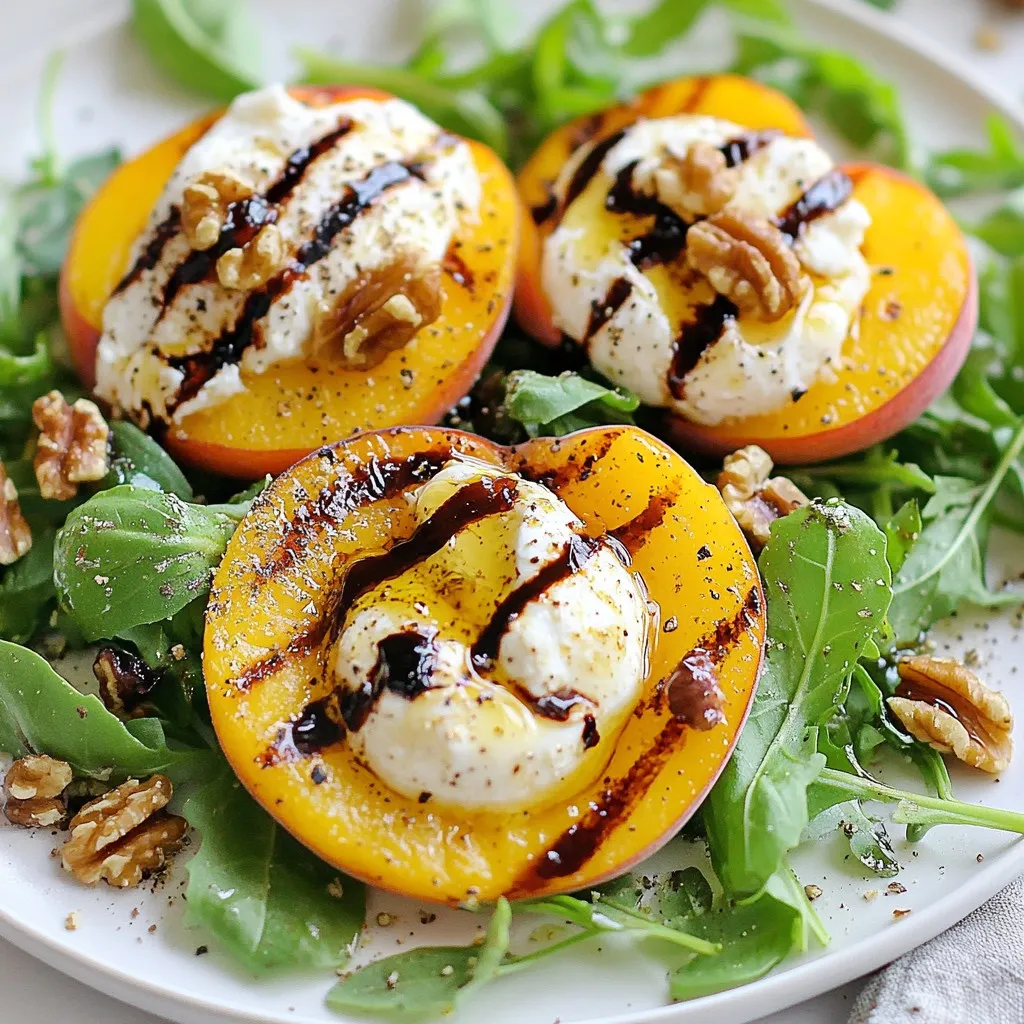
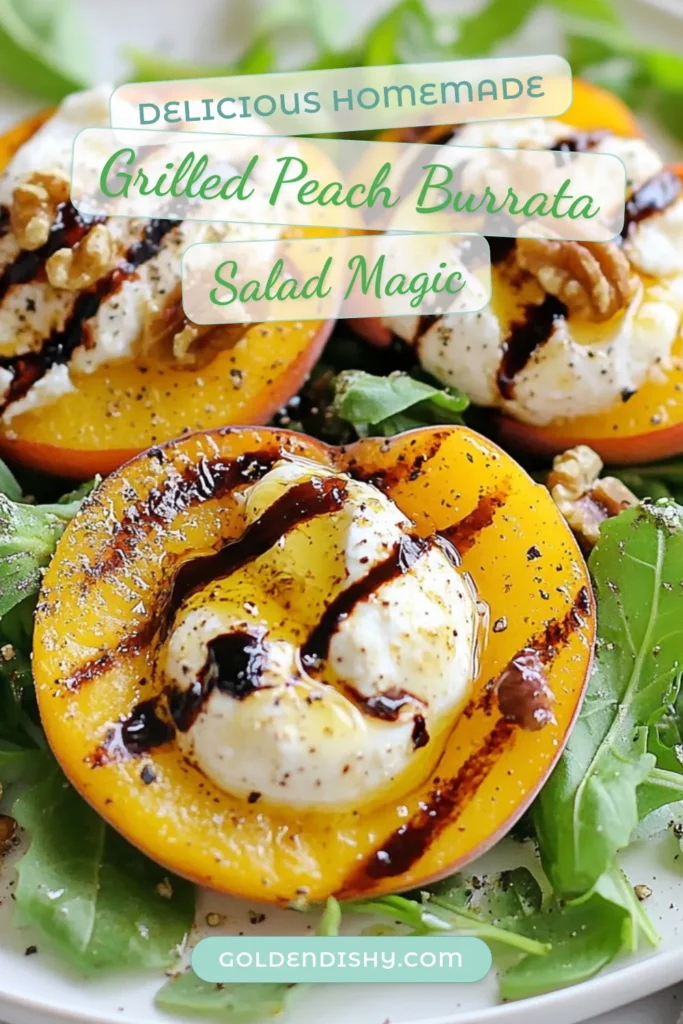
Welcome to my kitchen! Today, I’m excited to share a fresh and vibrant Grilled Peach Burrata Salad recipe. This dish combines the sweetness of grilled peaches with creamy burrata for a salad that bursts with flavor. Perfect for summer picnics or light dinners, it’s easy to make and packed with nutrients. Join me as we explore simple steps, tips, and twists to make your dish stand out! Let’s get grilling!
Why I Love This Recipe
- Seasonal Delight: This salad showcases the best of summer with juicy grilled peaches, making it a refreshing choice for warm weather.
- Creamy Contrast: The creamy burrata adds a luxurious texture that perfectly complements the sweetness of the peaches and the peppery arugula.
- Nutty Crunch: Toasted walnuts provide a satisfying crunch, enhancing the overall flavor profile of the dish.
- Easy to Assemble: This salad is quick to prepare, making it an ideal option for gatherings or a simple weeknight dinner.
Ingredients
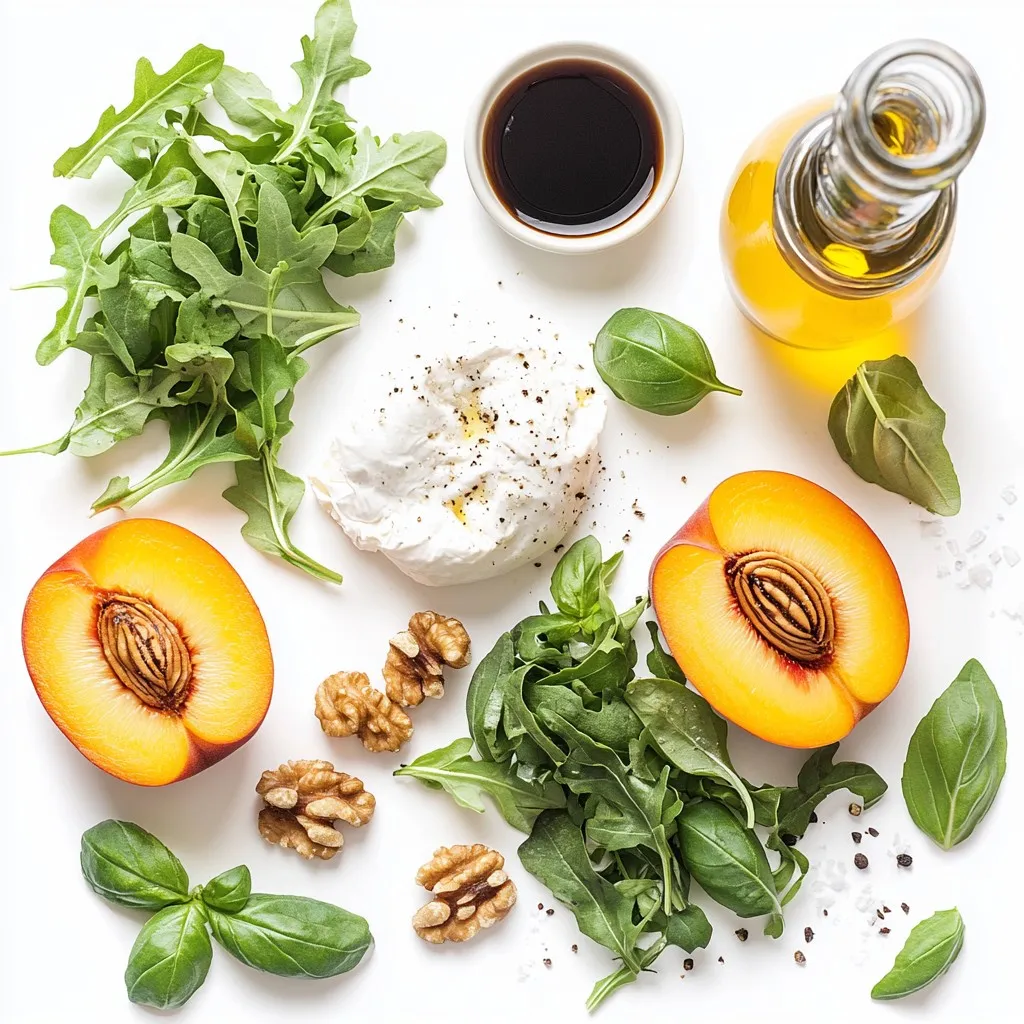
List of Main Ingredients
– 2 ripe peaches, halved and pitted
– 8 ounces creamy burrata cheese
– 4 cups baby arugula or mixed salad greens
– 1/4 cup walnuts, toasted to perfection
– 2 tablespoons balsamic glaze for drizzling
– 2 tablespoons extra-virgin olive oil
– Freshly cracked salt and pepper to taste
Optional Garnishes
– A handful of fresh basil leaves for a fragrant garnish
Nutritional Information
This salad is not only tasty but also healthy. Each serving offers a good mix of vitamins and minerals. The peaches provide vitamin C, while the walnuts add healthy fats and protein. The burrata cheese gives you a creamy texture full of calcium. This dish is low in carbs and fits many diets, making it a great choice for any meal.
Step-by-Step Instructions
Prepping the Grill and Peaches
First, preheat your grill to medium-high heat. This step is key for great grilling. While the grill gets hot, take two ripe peaches. Cut them in half and remove the pits. Brush the cut sides with olive oil. This helps prevent sticking and adds flavor. When the grill is ready, place the peaches cut side down. Grill them for about 4-5 minutes. You want nice grill marks and soft peaches.
Assembling the Salad
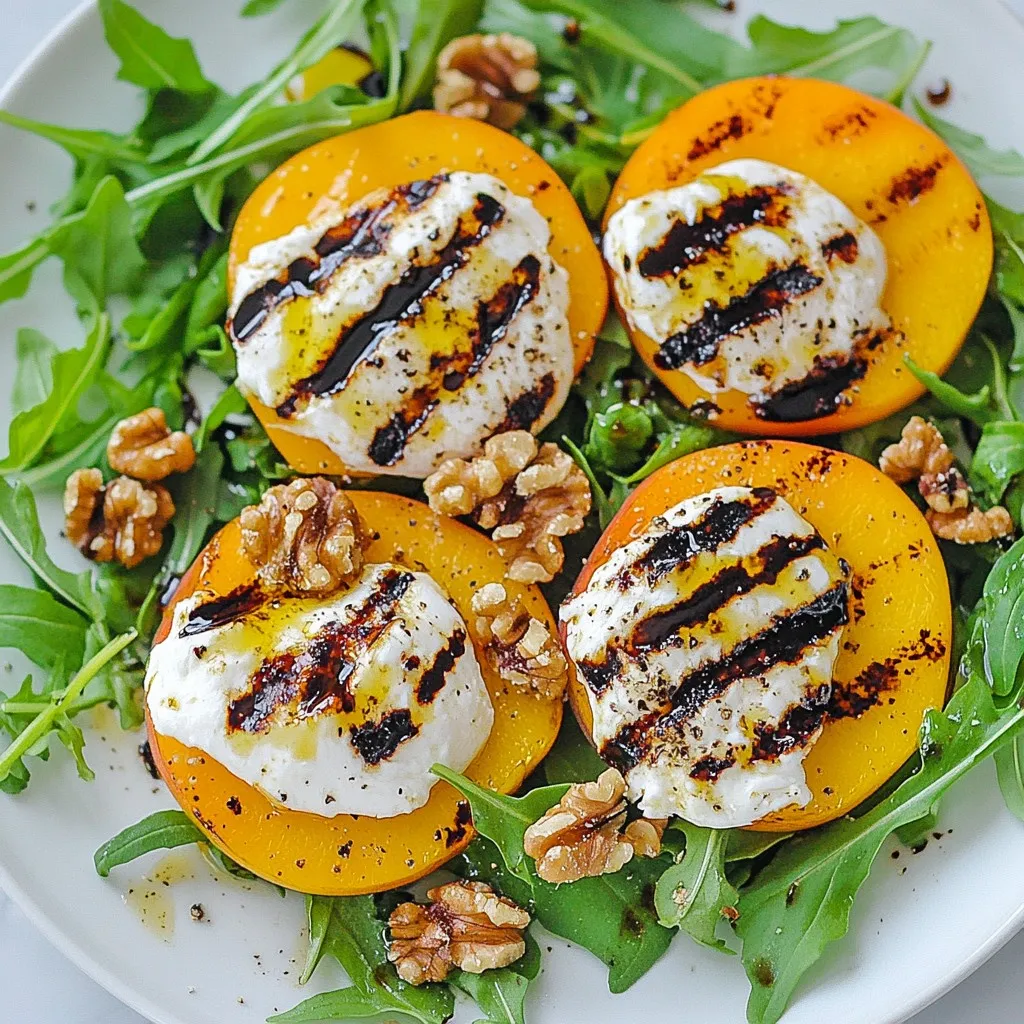
While the peaches grill, grab a large salad bowl. Place 4 cups of baby arugula or mixed greens at the bottom. This creates a fresh base. After grilling, let the peaches cool for a moment. Tear 8 ounces of creamy burrata cheese into bite-sized pieces. Spread these pieces over the greens. Next, slice the grilled peaches into wedges. Arrange them artfully around the burrata.
Final Touches to Serve
Now, sprinkle 1/4 cup of toasted walnuts on top for crunch. Drizzle with 2 tablespoons of balsamic glaze and 2 tablespoons of olive oil. This adds depth to your salad. Finish with a sprinkle of freshly cracked salt and pepper to taste. For a fragrant touch, add a handful of fresh basil leaves. Serve this beautiful salad on a large platter for a stunning presentation!
Tips & Tricks
Selecting Ripe Peaches
When picking peaches, look for ones that feel slightly soft. They should have a sweet aroma. The skin should be a nice golden-yellow. Avoid peaches with green or very firm spots. The ripeness impacts the sweetness and juiciness in your salad.
Best Practices for Grilling
To grill peaches well, preheat your grill to medium-high. Brush the cut sides with olive oil. This keeps them from sticking and adds flavor. Grill the peaches for about 4-5 minutes. Watch for nice grill marks. The goal is to soften them while keeping their shape.
Serving Suggestions for a Balanced Meal
Serve this salad with crusty bread or grilled chicken for added protein. The creamy burrata and crunchy walnuts provide good texture. Use the balsamic glaze for a sweet finish. Fresh basil adds a pop of flavor. Present it on a big platter for a family-style meal.
Pro Tips
- Choose the Right Peaches: Look for peaches that are slightly soft to the touch and fragrant. This ensures they are ripe and will grill beautifully.
- Grill Temperature Matters: Keeping the grill at medium-high heat is crucial for achieving those perfect grill marks while ensuring the peaches are tender but not mushy.
- Opt for Fresh Burrata: Always use fresh burrata cheese for the best flavor and texture. Its creaminess enhances the overall dish.
- Enhance with Additional Toppings: Consider adding sliced prosciutto or crumbled feta for an extra layer of flavor that complements the sweetness of the peaches.
Variations
Adding Proteins (Chicken, Shrimp, etc.)
You can easily boost this salad by adding protein. Grilled chicken or shrimp works well. Simply season them with salt, pepper, and a bit of olive oil. Grill them for a few minutes until they are cooked through. Slice the grilled chicken or shrimp and toss them on top of the salad. This adds heartiness and makes the dish more filling.
Alternative Cheese Options
If burrata isn’t available, don’t worry! You can swap it for other cheeses. Fresh mozzarella or goat cheese are great choices. Both bring creamy textures that blend well with grilled peaches. You can even try feta for a tangy twist. Each cheese option changes the flavor but keeps the salad fresh and tasty.
Flavor Infusions (Herbs, Dressings)
Enhance your salad with fresh herbs and dressings. Basil adds a sweet note, but you can try mint or cilantro for a different flavor. For dressings, a lemon vinaigrette or a honey mustard dressing can brighten the dish. Just drizzle your chosen dressing over the salad before serving. This adds depth and makes every bite a delight.
Storage Info
How to Store Leftover Salad
To store leftover grilled peach burrata salad, place it in an airtight container. This will keep the salad fresh. Make sure to separate the salad from the dressing if possible. This prevents sogginess. You can keep it in the fridge for up to two days.
Reheating or Refreshing the Salad
Do not reheat the salad. The creamy burrata and greens taste best fresh. If the salad seems a bit wilted, you can refresh it. Just add a little more olive oil or balsamic glaze. Toss the salad gently to mix in the new dressing.
Shelf Life of Ingredients
– Peaches: Fresh peaches last about 3-5 days in the fridge.
– Burrata: Once opened, burrata stays fresh for about 3 days.
– Greens: Baby arugula or salad greens can last up to a week in the fridge.
– Walnuts: Toasted walnuts stay fresh for about 2 weeks if stored in a cool place.
– Balsamic Glaze: An unopened bottle lasts for years, but once opened, use it within a year.
FAQs
Can I make this salad ahead of time?
Yes, you can prepare parts of the salad in advance. I suggest grilling the peaches and making the balsamic glaze ahead of time. Store the peaches in an airtight container in the fridge. When you’re ready to serve, assemble the salad with fresh greens, burrata, and walnuts. Keep the dressing separate until serving for the best taste.
What are the best substitutes for burrata cheese?
If you can’t find burrata, fresh mozzarella is a great choice. It offers a similar creamy texture. Ricotta cheese can work too, adding a different flavor. Vegan cheese alternatives can also be used for a dairy-free option. Just remember to choose a cheese that melts well for a creamy effect.
How do I know when my peaches are ripe?
To check if peaches are ripe, gently squeeze them in your palm. They should give slightly, indicating softness. Look for a vibrant color and a sweet aroma. Avoid peaches that feel hard or have green patches, as these are not ripe. A ripe peach will be smooth and fragrant, perfect for grilling!
This blog covered how to make a peach salad. We discussed key ingredients, tips for grilling, and ways to customize your dish. Remember to choose ripe peaches and try different proteins or cheeses for unique flavors. Store your leftovers properly to enjoy later. I hope you feel ready to create a refreshing salad that balances taste and health. Enjoy your cooking adventur

Grilled Peach Burrata Salad
Ingredients
- 2 whole ripe peaches, halved and pitted
- 8 ounces creamy burrata cheese
- 4 cups baby arugula or mixed salad greens
- 1 4 cup walnuts, toasted to perfection
- 2 tablespoons balsamic glaze for drizzling
- 2 tablespoons extra-virgin olive oil
- to taste freshly cracked salt and pepper
- 1 handful fresh basil leaves for a fragrant garnish
Instructions
- Begin by preheating your grill to medium-high heat, ensuring it reaches a steady temperature for optimal grilling.
- To prepare the peaches, lightly brush the cut sides with a bit of olive oil. This will help them grill beautifully without sticking to the grill grates.
- Place the peach halves cut side down on the grill. Grill them for about 4-5 minutes until you see beautiful grill marks form and the peaches have softened slightly, releasing their sweet juices.
- While the peaches are grilling, take a large salad bowl and layer the arugula or mixed greens at the bottom, creating a fresh base for your salad.
- Once the peaches are grilled to perfection, carefully remove them from the grill and allow them to cool for a minute or two.
- Tear the burrata cheese gently into bite-sized pieces and evenly distribute it over the bed of greens, allowing the creamy texture to contrast with the freshness of the salad.
- Slice the grilled peaches into wedges and artfully arrange them around the burrata on the salad, enhancing both visual appeal and flavor.
- Sprinkle the toasted walnuts over the top, adding a delightful crunch, and then generously drizzle with balsamic glaze and the remaining olive oil for depth of flavor.
- Finish with a sprinkle of freshly cracked salt and pepper to taste, and garnish with fresh basil leaves, which will add an aromatic touch to the dish.

![To make Cheesy Ranch Potatoes, you will need a few simple items. Gather these ingredients before you start cooking: - 2 pounds baby potatoes, halved - 1 cup shredded sharp cheddar cheese - ½ cup creamy sour cream - 1 packet ranch dressing mix (about 1 ounce) - 3 tablespoons extra virgin olive oil - 1 teaspoon garlic powder - 1 teaspoon onion powder - Salt and freshly ground black pepper to taste - 2 green onions, finely sliced (for garnish) Each ingredient plays a key role in creating that cheesy, ranch-flavored goodness. The baby potatoes serve as the base, providing a tender texture. Sharp cheddar cheese adds a rich, creamy taste. Sour cream brings a tangy flavor, while the ranch dressing mix ties everything together with its herby notes. The garlic and onion powders enhance the overall taste, making every bite delicious. Don't forget the green onions; they add a fresh crunch on top! For the complete recipe, check out the [Full Recipe]. - Preheat the oven to 400°F (200°C). This makes sure your potatoes cook evenly. - In a large bowl, mix the olive oil, ranch dressing mix, garlic powder, onion powder, salt, and pepper. Stir until well combined. - Add the halved baby potatoes to the bowl. Toss them until every piece is coated in the ranch mixture. This step adds great flavor. - Line a baking sheet with parchment paper. This helps with easy cleanup. - Spread the coated potatoes on the lined baking sheet in a single layer. This helps them roast evenly. - Roast the potatoes for 25-30 minutes. They should turn golden brown and be tender when pierced. - Take the baking sheet out of the oven and sprinkle cheddar cheese over the hot potatoes. - Return the baking sheet to the oven for 5-7 minutes. Wait until the cheese melts and bubbles. - Drizzle sour cream over the cheesy potatoes and top with sliced green onions. This adds a fresh touch. Check out the Full Recipe for more details! To make Cheesy Ranch Potatoes, start by preheating your oven to 400°F (200°C). This helps the potatoes roast evenly. Spread the potatoes out on a lined baking sheet. This ensures they cook well and get crispy. Check for doneness by piercing them with a fork. They should be tender and golden brown. To boost flavor, try adding herbs like parsley or dill. You can also mix in spices like paprika or cayenne for a kick. If you want a different cheese, use mozzarella or pepper jack. Each type brings a unique taste and texture to the dish. For serving, use a colorful bowl to show off the cheesy ranch potatoes. Add a sprinkle of extra cheddar on top for flair. You can also place whole green onion tops around the edge for a fresh look. These simple steps make your dish appealing and ready for guests. For the full recipe, follow the steps provided in the earlier sections. Enjoy your cooking! {{image_4}} You can make Cheesy Ranch Potatoes even more fun with simple swaps. - Using different types of cheese: Try mozzarella for a milder taste or pepper jack for a kick. You can even mix cheeses for a rich flavor. - Substituting Greek yogurt for sour cream: Greek yogurt gives you a nice tang and adds protein. It’s a healthier option that keeps your potatoes creamy. Change the flavor to keep things exciting. - Spicy ranch version: Add a teaspoon of cayenne pepper to the ranch mix. This will give your potatoes a nice heat. - Herb-infused options: Mix in dried herbs like thyme or rosemary. This adds a fresh taste that pairs well with the cheese. Making Cheesy Ranch Potatoes work for everyone is easy! - Vegan adaptations: Swap the cheese for a vegan cheese and use coconut yogurt. This keeps all the creamy goodness without dairy. - Gluten-free adjustments: Use a gluten-free ranch mix. Most ranch mixes are gluten-free, but always check the labels. Feel free to explore these variations to make this dish your own! For the full recipe, check out Cheesy Ranch Potatoes Delight. To keep your cheesy ranch potatoes fresh, store them in the fridge. Place them in an airtight container. They will last about 3 to 5 days. Make sure they cool completely before sealing. For longer storage, you can freeze them. Put the cooled potatoes in a freezer-safe bag. They can last up to 2 months in the freezer. To reheat your potatoes, the best method is using an oven. Preheat the oven to 350°F (175°C). Spread the potatoes on a baking sheet. Heat them for about 15 to 20 minutes. This will help keep the texture crispy. You can also use a microwave. Place the potatoes in a microwave-safe dish. Heat them in short bursts of 1 minute. Stir in between to ensure even heating. To keep flavor and texture, avoid reheating them too long. If they dry out, add a little bit of sour cream or cheese on top. These tips will help you enjoy the cheesy ranch potatoes just as much as the first time. You can tell the potatoes are done by checking a few signs. First, they should be golden brown and crispy on the outside. Second, when you poke them with a fork, they should feel soft inside. If the fork slides in easily, your potatoes are ready to enjoy! Yes, you can prepare Cheesy Ranch Potatoes ahead of time! Start by following the recipe steps, but stop before roasting. Cover the potatoes and store them in the fridge for up to 24 hours. When you’re ready to bake, simply add extra time in the oven if they are cold. This way, you can enjoy them fresh without much fuss. These cheesy potatoes pair well with many dishes. Serve them alongside grilled chicken or steak for a filling meal. They also go great with a fresh salad or steamed veggies. For a fun twist, try them with barbecue or as a side for tacos. The options are endless, making it easy to create a delicious meal. For the complete cooking steps, check out the Cheesy Ranch Potatoes Delight 🥔. In this blog post, we covered how to make Cheesy Ranch Potatoes. We started with the ingredients, then walked through easy steps to prepare and roast them. I shared helpful tips, variations, and storage info to keep your dish fresh. These potatoes are a tasty side for any meal. You can customize them to fit your taste. Enjoy making this dish, and let it add flavor to your table!](https://goldendishy.com/wp-content/uploads/2025/06/4f138a04-3393-4361-b7e8-8b602e29b2ef-768x768.webp)
![To make Cranberry Orange Energy Bites, you need the right mix of flavors and textures. Here’s what you will need: - 1 cup rolled oats - 1/2 cup almond butter - 1/4 cup honey or maple syrup - 1/2 cup dried cranberries, finely chopped - Zest of 1 medium orange - 1/4 cup freshly squeezed orange juice - 1/4 cup chia seeds - 1/2 teaspoon ground cinnamon - Pinch of sea salt - Optional: 1/4 cup chopped nuts or seeds These ingredients come together to create a tasty and healthy snack. The oats provide fiber and energy. Almond butter adds protein and a creamy texture. Honey or maple syrup gives a touch of sweetness, while dried cranberries add a chewy burst of flavor. The zest and juice of the orange brighten the bites, making them refreshing. Chia seeds add crunch and healthy omega-3s. You can also mix in nuts or seeds for extra texture. They can make your bites even more filling. You can find the full recipe for the perfect energy bites in the recipe section above. - Mixing the Base Ingredients Start by taking a large bowl. Add 1 cup of rolled oats, 1/2 cup of almond butter, and 1/4 cup of honey or maple syrup. Mix with a sturdy spoon until everything blends well. This base forms the heart of your energy bites. - Adding Flavorful Components Next, stir in 1/2 cup of finely chopped dried cranberries, the zest of 1 medium orange, and 1/4 cup of freshly squeezed orange juice. Also, add 1/4 cup of chia seeds, 1/2 teaspoon of ground cinnamon, and a pinch of sea salt. Keep mixing until you see a uniform color and texture. - Achieving the Right Texture Use your hands or a spatula to mix the ingredients thoroughly. You want a sticky but manageable consistency. If it feels too dry, add a bit more orange juice. If it’s too wet, sprinkle in extra oats until it feels just right. - Rolling Into Balls After you’ve mixed everything, cover the bowl with plastic wrap or a lid. Chill the mixture in the fridge for about 30 minutes. Once chilled, take portions and roll them into 1-inch balls. You should get about 15 to 20 bites. - Optional Coating with Nuts or Seeds For added crunch and flavor, roll some of the balls in chopped nuts or seeds. This step is optional, but it gives a nice touch to each bite. - Chilling the Mixture After rolling, arrange the energy bites on a plate. You can chill them for an extra 10 to 15 minutes to firm them up even more. This makes them easier to eat. - Presentation Tips For a pretty display, stack the energy bites or place them in a rustic jar. You can sprinkle some extra orange zest on top for color and aroma. Enjoy your tasty, nutritious snack! Check the [Full Recipe] for more details. - Best Practices for Freshness: Store energy bites in an airtight container. This keeps them moist and tasty. - Duration of Shelf Life: These bites last up to 1 week in the fridge. After that, they may dry out. - Freezing Energy Bites for Later Use: You can freeze these bites. Place them in a single layer on a tray. Once frozen, store them in a bag. They can last for up to 3 months. - Preparing in Bulk: Make a double batch! This way, you always have a quick snack ready. - Overmixing or Undermixing: Mix just enough to combine all ingredients. Too much mixing can make them tough. - Adjusting Consistency: If the mixture is too dry, add more juice. If too wet, mix in more oats. Always aim for a sticky but manageable mixture. For the full recipe, check out Cranberry Orange Energy Bites. {{image_4}} You can mix things up by adding different nuts. Walnuts, almonds, or pecans give a nice crunch. Just chop them finely and fold them into the mix. You can use about 1/4 cup of your choice. Incorporating other fruits can also change the flavor. Try using dried apricots, raisins, or figs. They add sweetness and texture. Just chop them to match the size of the cranberries. If you want a vegan option, swap honey for maple syrup. This keeps the bites sweet without using animal products. Almond butter is already vegan, so you’re set there! For gluten-free substitutions, choose certified gluten-free oats. Most oats are naturally gluten-free but can get cross-contaminated. Make sure to check the label. Using different nut butters can change the taste and texture. Peanut butter or cashew butter works great. Just use the same amount as almond butter. Adjusting crunchiness with seeds is another fun option. Add chia seeds or flaxseeds for some extra bite. You can also toss in sunflower seeds for a nut-free crunch. The cranberry orange energy bites are packed with nutrients. Each ingredient brings unique health benefits. - Rolled oats offer fiber, which helps digestion and keeps you full. - Almond butter is a great source of healthy fats and protein. - Dried cranberries add antioxidants that fight free radicals. - Chia seeds are rich in omega-3s and help with heart health. - Orange juice boosts your immune system with vitamin C. These bites provide energy and nutrients to fuel your day. They are perfect for a quick boost before a workout or during a busy afternoon. How many bites should you eat for a snack? I suggest two to three bites. This gives you enough energy without overdoing it. Each bite is satisfying. Dietary recommendations may vary. Listen to your body. If you feel hungry after two bites, enjoy another! Balance is key. Each bite contains about 70 calories. This makes it easy to track your snack intake. If you want fewer calories, consider adjusting the recipe. You can reduce the honey or use less nut butter. This way, you can fit these bites into your dietary goals without losing flavor. For more details, check the full recipe. Enjoy these tasty energy bites while staying mindful of your nutrition! Cranberry orange energy bites can last up to one week in the fridge. Store them in an airtight container to keep them fresh. If you want to keep them longer, you can freeze them. They can last up to three months in the freezer. Just thaw them in the fridge before enjoying. Yes, you can substitute almond butter with other nut butters. Peanut butter, cashew butter, or sunflower seed butter work well. Each will give a unique taste. Make sure to choose one that fits your dietary needs. You can use the mixture for various snacks. Try spreading it on toast or mixing it into yogurt. You can also make energy bars by pressing the mixture into a pan and slicing it. This way, you have more options for your snack. To make them sweeter, you can add more honey or maple syrup. You can also mix in some chocolate chips or dried fruits like dates. Adjust the sweetness based on your taste. This way, you can create a snack that you love. Yes, there are many alternatives for honey or maple syrup. You can use agave nectar, brown rice syrup, or coconut nectar. Each of these will add a different sweetness. Just make sure to adjust the amount based on how sweet you want your bites to be. For the full recipe, check out the recipe section above. These Cranberry Orange Energy Bites are simple to make and taste great. You mix healthy ingredients, shape them into bites, and enjoy a tasty snack. Remember to store them properly to keep them fresh. You can also tweak ingredients for your tastes or diet. With these tips and flavor ideas, you’ll enjoy these bites any time you need a quick boost. Get creative and make this snack your own!](https://goldendishy.com/wp-content/uploads/2025/06/5774e534-56b3-4e6d-8a48-215f930e3d22-768x768.webp)
![- 1 pound fresh asparagus, trimmed - 3 tablespoons unsalted butter - 2 tablespoons freshly squeezed lemon juice - Zest of 1 lemon - 2 cloves garlic, finely minced Fresh asparagus is key to this dish. When you choose asparagus, look for bright green stalks that feel firm. The butter adds richness, while the lemon juice and zest bring a bright, zesty punch. Garlic gives a nice aroma and flavor, making the dish exciting. - Salt and freshly ground black pepper, to taste Salt and pepper enhance all the flavors. Use good-quality salt for the best taste. Freshly ground black pepper adds warmth and a bit of spice. - 1 tablespoon fresh parsley, finely chopped (for garnish) Fresh parsley adds color and freshness. You can also use lemon wedges for extra zing. They allow you to customize how much lemon flavor you want. These small touches make the dish look and taste even better. For the full recipe, check out the details above! Start by washing the fresh asparagus. Rinse it well under cool water to remove dirt. Next, trim the tough ends. You can snap them off or cut 1-2 inches from the bottom. This makes the asparagus more tender and easy to eat. In a large skillet, melt the unsalted butter over medium heat. Watch for the butter to bubble and foam; this means it is hot enough. Once it is ready, add the minced garlic. Cook the garlic for about 30 seconds and stir often. It should smell great but not turn brown. Brown garlic can taste bitter. Now, add the trimmed asparagus to the skillet. Toss it gently in the garlic butter. Make sure each piece gets coated well. Sauté the asparagus for 4-6 minutes. Turn it with tongs so it cooks evenly. You want it bright green and still a bit crisp. Once cooked, drizzle the lemon juice over the asparagus and sprinkle the zest on top. Season with salt and black pepper. Toss everything together to mix the flavors. Finally, transfer the asparagus to a serving dish. Garnish with chopped parsley for a lovely look. For the complete recipe, check the [Full Recipe]. To cook asparagus just right, start with fresh, vibrant stalks. Look for asparagus that is firm and bright green. Trim the ends, as they can be tough. When cooking, aim for a tender yet crisp texture. Sauté for 4 to 6 minutes. The color should become a vivid green. If you want to test doneness, simply pierce a stalk with a fork. It should be easy to pierce but still hold its shape. If you're out of any ingredients, don't worry! You can swap unsalted butter for olive oil. This will give a different flavor but still taste great. For lemon juice, you can use lime juice instead. If you lack fresh garlic, try garlic powder. Use half the amount, as it's stronger. Fresh parsley can be replaced with basil or cilantro for a fun twist. These substitutions keep the dish flavorful while using what you have. How you present your dish matters! Arrange the asparagus neatly on a white platter. This will highlight the bright green color. For a pop of color, add lemon wedges around the sides. This not only looks nice but also invites guests to add more lemon. You can sprinkle extra parsley on top for a fresh look. A simple, clean presentation makes your lemon butter asparagus look gourmet. {{image_4}} You can make Lemon Butter Asparagus a full meal by adding protein. Chicken or shrimp works well. For chicken, use thin strips and sauté them in the butter first. Cook until they turn golden brown. Then, add the asparagus and follow the recipe as usual. For shrimp, add them after the garlic. Cook until they turn pink, then toss in the asparagus. This adds flavor and makes it more filling. To spice things up, add red pepper flakes. Just a pinch can bring a nice kick. You can mix them in with the garlic for a burst of heat. If you love bold flavors, try adding lemon zest or herbs like thyme or basil. These add depth and make the dish more exciting. Feel free to mix in other seasonal vegetables. Cherry tomatoes, bell peppers, or snap peas all pair nicely with asparagus. Add them in the skillet after the garlic to keep them fresh. This not only enhances the taste but also boosts the nutrition of your dish. For the full recipe, check out the details above. After enjoying your Lemon Butter Asparagus, you might have some left. Store it in an airtight container. Keep it in the fridge for up to three days. The asparagus will stay fresh, but it may lose its crispness over time. To reheat, use a skillet over medium heat. Add a splash of water or a bit of butter. This helps keep the asparagus moist. Cook for about 3-4 minutes. Stir occasionally until warm. You can also use a microwave. Heat in 30-second bursts until hot. Freezing is a great option if you want to save this dish for later. Start by blanching the asparagus for 2-3 minutes in boiling water. Then, cool it quickly in ice water. Once cool, drain and pat dry. Place it in a freezer-safe bag, removing as much air as possible. It can stay frozen for up to three months. When you're ready to eat, thaw it in the fridge overnight before reheating. Yes, you can use frozen asparagus. It is a great option if fresh asparagus is not available. Just remember to thaw it first. Drain any excess water before cooking. You may need to adjust cooking time. Frozen asparagus cooks faster, so keep an eye on it. Aim for a tender yet crisp texture. Lemon Butter Asparagus pairs well with many dishes. Here are some ideas: - Grilled chicken - Pan-seared fish - Quinoa or rice - Pasta with olive oil - A fresh salad These options balance the flavors and add variety to your meal. Making lemon butter sauce is simple. Here’s how: 1. Melt butter in a pan over medium heat. 2. Add minced garlic and sauté until fragrant. 3. Stir in freshly squeezed lemon juice and zest. 4. Season with salt and pepper. This easy lemon butter sauce elevates many dishes, not just asparagus. For the full recipe, refer to the earlier sections. In this post, we covered everything you need for Lemon Butter Asparagus. I shared the fresh ingredients, pantry staples, and optional garnishes. We went through step-by-step instructions to prepare and cook each part. Tips and tricks helped you perfect your dish and suggested tasty variations. Finally, I gave you storage info and answered common questions. Embrace this dish, and enjoy your cooking adventure!](https://goldendishy.com/wp-content/uploads/2025/07/9c4cbd12-069a-483d-8240-a9afe0533cf0-768x768.webp)