
Sriracha Lime Grilled Shrimp Flavorful Dinner Delight

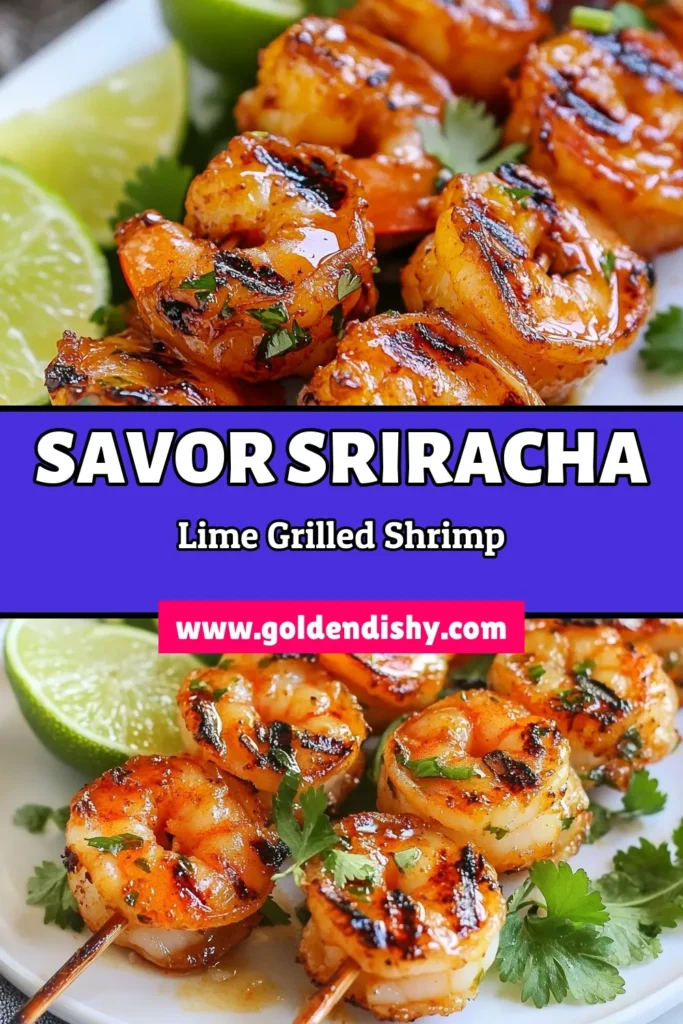
Are you ready to spice up your dinner routine? This Sriracha Lime Grilled Shrimp will bring bold flavors to your table! With a zesty kick and quick prep time, it’s perfect for busy nights or casual gatherings. I’ll guide you through easy steps and tips, from selecting fresh shrimp to grilling techniques. Let’s dive into this flavorful dinner delight that will have everyone asking for seconds!
Why I Love This Recipe
- Bold Flavors: The combination of Sriracha and lime creates a perfect balance of heat and acidity that elevates the shrimp.
- Quick and Easy: With minimal prep time and a short marinating period, this recipe is perfect for busy weeknights or last-minute gatherings.
- Healthy Option: Shrimp is a lean protein that is low in calories, making this dish a nutritious choice without sacrificing flavor.
- Versatile Serving: These grilled shrimp can be served as an appetizer or main dish, and they pair wonderfully with various sides.
Ingredients
List of Ingredients
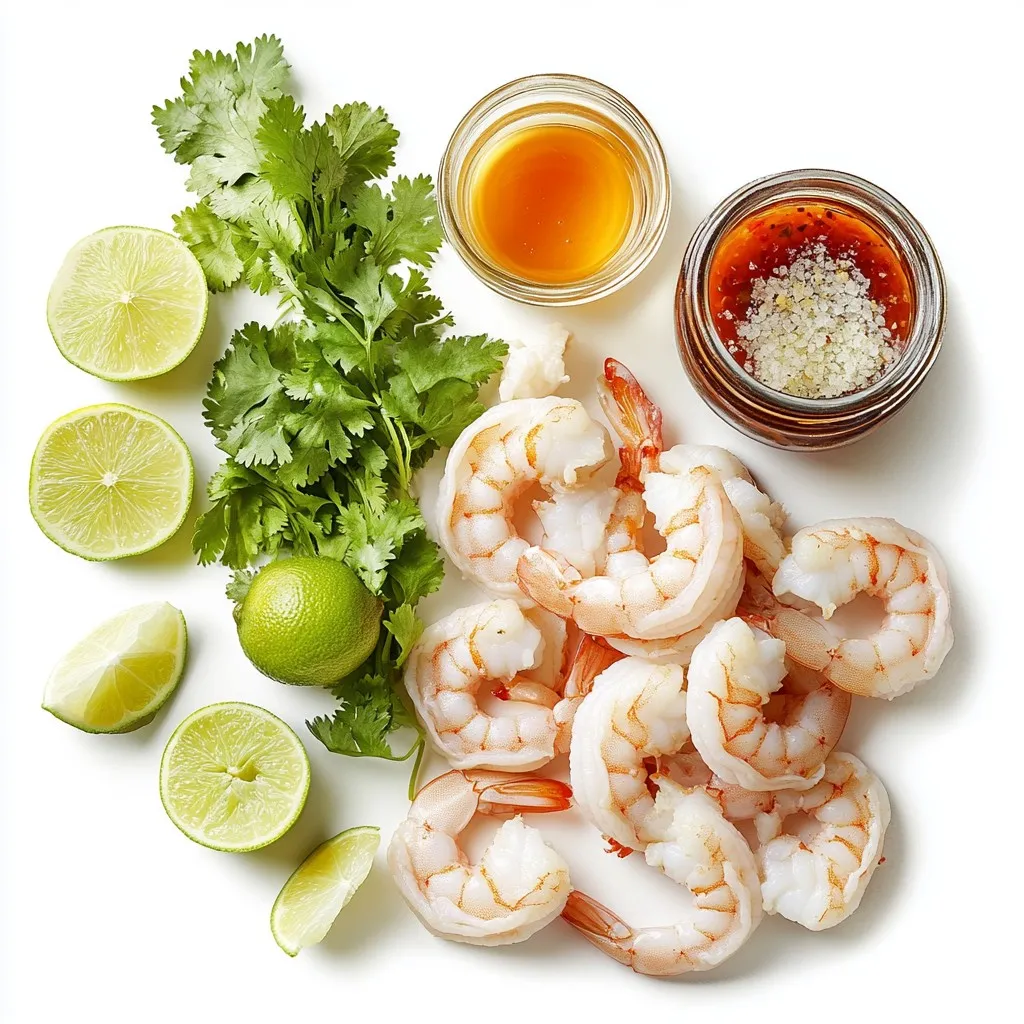
To make Sriracha lime grilled shrimp, gather these simple ingredients:
– 1 lb large shrimp, peeled and deveined
– 3 tablespoons Sriracha sauce
– 2 tablespoons freshly squeezed lime juice
– 1 tablespoon lime zest
– 2 tablespoons olive oil
– 2 cloves garlic, finely minced
– 1 teaspoon honey
– Sea salt and freshly ground black pepper to taste
– Fresh cilantro leaves, for garnish
– Lime wedges, for serving
Ingredient Substitutions
You can swap some ingredients if needed. For the shrimp, any large shrimp will work. Use a different hot sauce if you want less spice. Lime juice can be replaced with lemon juice for a new twist. If you don’t have honey, maple syrup is a good choice. For the olive oil, any light oil will do.
Tips for Selecting Fresh Shrimp
When buying shrimp, look for these signs of freshness:
– They should smell like the ocean, not fishy.
– The shells should be firm and not slimy.
– The shrimp should have a nice, shiny color.
– If possible, buy shrimp that are wild-caught. They often taste better than farmed shrimp. Always check the sell-by date.
These tips will help you choose the best shrimp for your delicious dish.
Step-by-Step Instructions
Detailed Preparation Steps
First, gather your ingredients. You will need one pound of large shrimp, Sriracha sauce, lime juice, lime zest, olive oil, garlic, honey, sea salt, and black pepper. In a medium mixing bowl, combine three tablespoons of Sriracha sauce, two tablespoons of lime juice, one tablespoon of lime zest, and two tablespoons of olive oil. Add two minced garlic cloves and one teaspoon of honey. Sprinkle in sea salt and black pepper to taste. Whisk this mixture until it blends well.
Next, add the shrimp to the bowl. Make sure each shrimp is coated fully in the marinade. Cover the bowl with plastic wrap, then refrigerate it for at least 30 minutes. For deeper flavor, let the shrimp soak for up to two hours.
Grilling Tips
Preheat your grill to medium-high heat. If you use wooden skewers, soak them in water for about 30 minutes. This step keeps the skewers from burning on the grill. Once the grill is hot, thread the marinated shrimp onto the soaked skewers. Leave a small gap between each shrimp. This gap helps them cook evenly.
Cooking Time and Techniques
Place the skewers on the grill. Cook the shrimp for about 2-3 minutes on each side. Watch for the shrimp to change color. They should turn a bright pink and become opaque. This change shows they are fully cooked. After grilling, remove the skewers and let them rest for one minute. This resting time helps keep the juices inside.
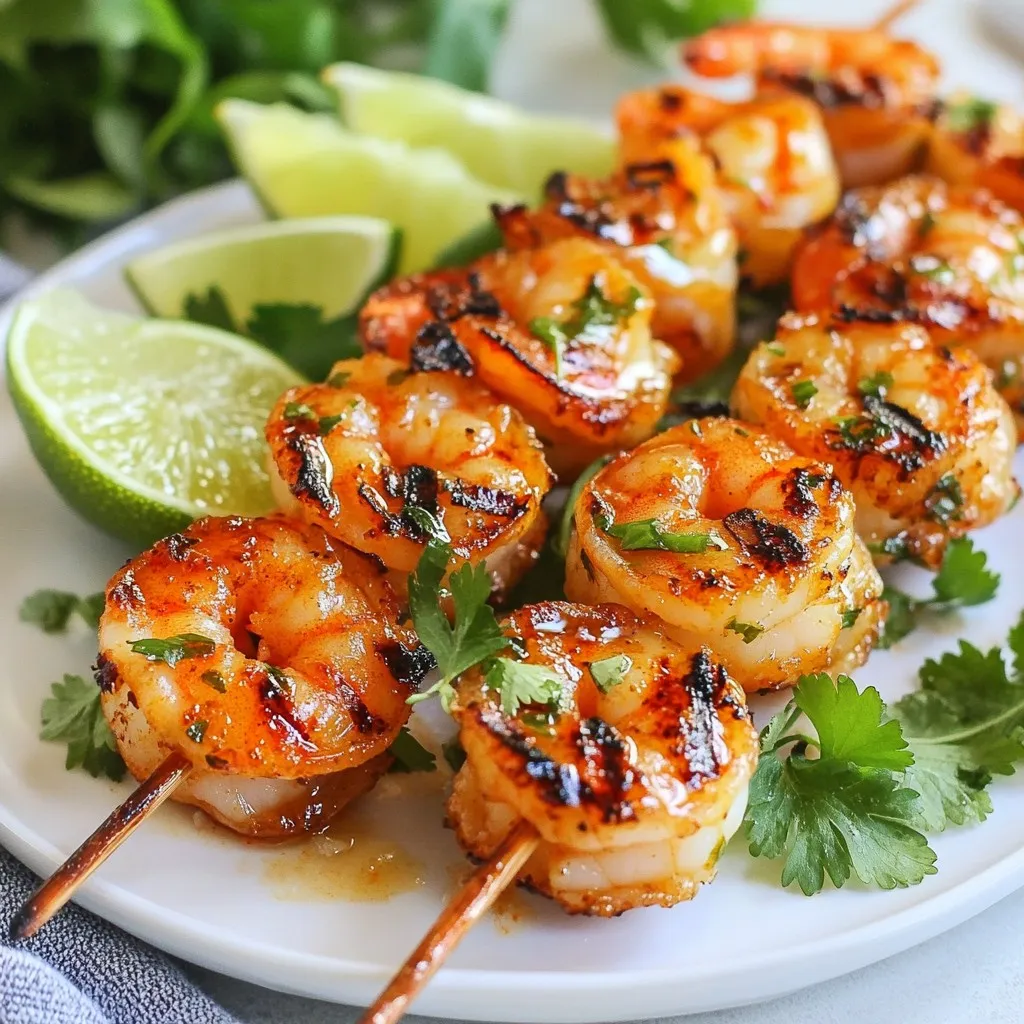
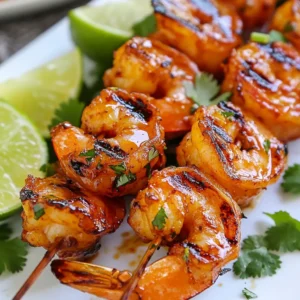
Now, your Sriracha lime grilled shrimp is ready to serve. Garnish with fresh cilantro and add lime wedges for a zesty touch. Enjoy your flavorful dinner delight!
Tips & Tricks
Marinade Best Practices
For the best flavor, let your shrimp soak in the marinade. I suggest 30 minutes at least. If you have time, marinate for up to 2 hours. Use a medium bowl to mix your Sriracha sauce, lime juice, lime zest, olive oil, minced garlic, honey, and some sea salt and pepper. Whisk well until smooth. Make sure each shrimp is fully coated. This ensures every bite bursts with flavor.
Achieving Perfectly Grilled Shrimp
Grilling shrimp is easy if you follow some simple steps. First, preheat your grill to medium-high heat. If using wooden skewers, soak them for about 30 minutes. This keeps them from burning. Thread your marinated shrimp onto the skewers, but leave a small gap between each piece. This helps them cook evenly. Grill shrimp for 2-3 minutes on each side. Look for a vibrant pink color and opaque texture to know they’re done.
Serving Suggestions and Pairings
Once your shrimp are ready, let them rest for a minute. This keeps them juicy. Serve the skewers on a bright platter. I love adding fresh cilantro leaves on top for a pop of color. Lime wedges on the side add a zesty kick. Pair your shrimp with rice, a fresh salad, or even tacos for a full meal. Enjoy the delicious burst of flavors!
Pro Tips
- Perfectly Cooked Shrimp: Keep an eye on the shrimp while grilling; they cook quickly and should only take 2-3 minutes per side. Overcooking can lead to rubbery shrimp.
- Marination Time: For the best flavor, marinate the shrimp for at least 30 minutes, but up to 2 hours is ideal. This allows the spices and lime to penetrate the shrimp fully.
- Grill Temperature: Make sure the grill is preheated to medium-high heat. This ensures a nice sear on the shrimp and prevents them from sticking to the grill.
- Serving Suggestion: Serve the shrimp skewers with additional lime wedges and a side of dipping sauce, such as a tangy yogurt sauce, to enhance the flavors further.
Variations
Sriracha Lime Shrimp Tacos
You can turn Sriracha lime grilled shrimp into tasty tacos. Use warm corn tortillas. Add your grilled shrimp, some crunchy cabbage, and avocado slices. A squeeze of lime brings it all together. You can also add a drizzle of extra Sriracha for more heat. This meal is fun and easy to make.
Alternative Marinades
You can change the flavor by using different marinades. Try a garlic and herb mix with olive oil, lemon juice, and parsley. You can also mix soy sauce, ginger, and sesame oil for an Asian twist. Each marinade gives the shrimp a unique taste. Feel free to experiment and find your favorite!
Using Other Proteins
If shrimp isn’t your thing, you can use other proteins. Chicken or fish works well with the same marinade. Just adjust the cooking time based on the protein you choose. For chicken, grill until it reaches a safe internal temperature. For fish, cook until it flakes easily with a fork. Each choice offers a new flavor experience!
Storage Info
How to Store Leftovers
After enjoying your Sriracha Lime Grilled Shrimp, you might have some leftovers. Place the shrimp in an airtight container. Store it in the fridge for up to three days. Make sure it cools down before sealing. This keeps the shrimp fresh and tasty.
Reheating Tips
When reheating, avoid using a microwave. It can make shrimp rubbery. Instead, use a skillet on low heat. Add a tiny bit of oil to the pan. Heat the shrimp for a few minutes, turning often. This keeps the shrimp juicy and flavorful.
Freezing Grilled Shrimp
If you want to save the shrimp for later, freezing is a great option. First, let the shrimp cool completely. Then, place them in a freezer-safe bag. Remove as much air as possible before sealing. You can freeze them for up to three months. When ready to eat, thaw in the fridge overnight.
FAQs
Can I use frozen shrimp?
Yes, you can use frozen shrimp. Just thaw them before cooking. Place them in cold water for about 15-20 minutes. This makes them safe to eat and easier to cook. Always check for a firm texture. Avoid shrimp that feel mushy.
How do I know when shrimp are cooked?
Shrimp cook quickly. They turn bright pink and become opaque. Look for a slight curl as they cook. Use a timer for 2-3 minutes on each side. When done, they should feel firm to the touch. Overcooked shrimp can become tough, so watch carefully.
What can I serve with Sriracha Lime Grilled Shrimp?
Sriracha Lime Grilled Shrimp pairs well with many sides. Here are some ideas:
– Rice: Jasmine or basmati rice adds a nice touch.
– Salad: A fresh green salad with citrus dressing brightens the meal.
– Tacos: Serve the shrimp in soft tortillas with toppings.
– Vegetables: Grilled veggies or a corn salad complement the shrimp well.
– Dips: Prepare a creamy avocado dip for a fun twist.
These options make your meal colorful and tasty!
We covered how to make Sriracha Lime Grilled Shrimp with fresh ingredients, step-by-step tips, and tricks. Choosing the right shrimp and knowing how to grill them perfectly is key. Remember to try different marinades for fun flavors. Store leftovers properly to enjoy later. Serving ideas enhance your meal even more. Use the FAQs to clarify any doubts. With these tips, you can create a tasty dish that satisfies. Get ready to impress your friends and famil
Sriracha Lime Grilled Shrimp
Ingredients
- 1 lb large shrimp, peeled and deveined
- 3 tablespoons Sriracha sauce
- 2 tablespoons freshly squeezed lime juice
- 1 tablespoon lime zest
- 2 tablespoons olive oil
- 2 cloves garlic, finely minced
- 1 teaspoon honey
- to taste sea salt and freshly ground black pepper
- for garnish fresh cilantro leaves
- for serving lime wedges
Instructions
- In a medium mixing bowl, combine the Sriracha sauce, freshly squeezed lime juice, lime zest, olive oil, finely minced garlic, honey, and a sprinkle of sea salt and black pepper. Whisk these ingredients together until the marinade is well blended and smooth.
- Add the peeled and deveined shrimp to the marinade, making sure each piece is thoroughly coated. Cover the bowl with plastic wrap or a lid and refrigerate for at least 30 minutes to allow the flavors to absorb (for a richer flavor, marinate for up to 2 hours).
- Preheat your grill to medium-high heat. If you are using wooden skewers, soak them in water for about 30 minutes prior to grilling to prevent them from burning.
- Carefully thread the marinated shrimp onto the soaked skewers, ensuring to leave a small gap between each shrimp to promote even cooking.
- Place the skewers on the preheated grill and cook for approximately 2-3 minutes on each side. Grill the shrimp until they turn a vibrant pink color and are opaque, signaling they are fully cooked.
- Once cooked, remove the skewers from the grill and allow them to rest for about a minute to retain their juices.
- To serve, garnish the grilled shrimp with freshly picked cilantro leaves and present with lime wedges on the side for an extra burst of citrusy flavor.
![To make Cheesy Ranch Potatoes, you will need a few simple items. Gather these ingredients before you start cooking: - 2 pounds baby potatoes, halved - 1 cup shredded sharp cheddar cheese - ½ cup creamy sour cream - 1 packet ranch dressing mix (about 1 ounce) - 3 tablespoons extra virgin olive oil - 1 teaspoon garlic powder - 1 teaspoon onion powder - Salt and freshly ground black pepper to taste - 2 green onions, finely sliced (for garnish) Each ingredient plays a key role in creating that cheesy, ranch-flavored goodness. The baby potatoes serve as the base, providing a tender texture. Sharp cheddar cheese adds a rich, creamy taste. Sour cream brings a tangy flavor, while the ranch dressing mix ties everything together with its herby notes. The garlic and onion powders enhance the overall taste, making every bite delicious. Don't forget the green onions; they add a fresh crunch on top! For the complete recipe, check out the [Full Recipe]. - Preheat the oven to 400°F (200°C). This makes sure your potatoes cook evenly. - In a large bowl, mix the olive oil, ranch dressing mix, garlic powder, onion powder, salt, and pepper. Stir until well combined. - Add the halved baby potatoes to the bowl. Toss them until every piece is coated in the ranch mixture. This step adds great flavor. - Line a baking sheet with parchment paper. This helps with easy cleanup. - Spread the coated potatoes on the lined baking sheet in a single layer. This helps them roast evenly. - Roast the potatoes for 25-30 minutes. They should turn golden brown and be tender when pierced. - Take the baking sheet out of the oven and sprinkle cheddar cheese over the hot potatoes. - Return the baking sheet to the oven for 5-7 minutes. Wait until the cheese melts and bubbles. - Drizzle sour cream over the cheesy potatoes and top with sliced green onions. This adds a fresh touch. Check out the Full Recipe for more details! To make Cheesy Ranch Potatoes, start by preheating your oven to 400°F (200°C). This helps the potatoes roast evenly. Spread the potatoes out on a lined baking sheet. This ensures they cook well and get crispy. Check for doneness by piercing them with a fork. They should be tender and golden brown. To boost flavor, try adding herbs like parsley or dill. You can also mix in spices like paprika or cayenne for a kick. If you want a different cheese, use mozzarella or pepper jack. Each type brings a unique taste and texture to the dish. For serving, use a colorful bowl to show off the cheesy ranch potatoes. Add a sprinkle of extra cheddar on top for flair. You can also place whole green onion tops around the edge for a fresh look. These simple steps make your dish appealing and ready for guests. For the full recipe, follow the steps provided in the earlier sections. Enjoy your cooking! {{image_4}} You can make Cheesy Ranch Potatoes even more fun with simple swaps. - Using different types of cheese: Try mozzarella for a milder taste or pepper jack for a kick. You can even mix cheeses for a rich flavor. - Substituting Greek yogurt for sour cream: Greek yogurt gives you a nice tang and adds protein. It’s a healthier option that keeps your potatoes creamy. Change the flavor to keep things exciting. - Spicy ranch version: Add a teaspoon of cayenne pepper to the ranch mix. This will give your potatoes a nice heat. - Herb-infused options: Mix in dried herbs like thyme or rosemary. This adds a fresh taste that pairs well with the cheese. Making Cheesy Ranch Potatoes work for everyone is easy! - Vegan adaptations: Swap the cheese for a vegan cheese and use coconut yogurt. This keeps all the creamy goodness without dairy. - Gluten-free adjustments: Use a gluten-free ranch mix. Most ranch mixes are gluten-free, but always check the labels. Feel free to explore these variations to make this dish your own! For the full recipe, check out Cheesy Ranch Potatoes Delight. To keep your cheesy ranch potatoes fresh, store them in the fridge. Place them in an airtight container. They will last about 3 to 5 days. Make sure they cool completely before sealing. For longer storage, you can freeze them. Put the cooled potatoes in a freezer-safe bag. They can last up to 2 months in the freezer. To reheat your potatoes, the best method is using an oven. Preheat the oven to 350°F (175°C). Spread the potatoes on a baking sheet. Heat them for about 15 to 20 minutes. This will help keep the texture crispy. You can also use a microwave. Place the potatoes in a microwave-safe dish. Heat them in short bursts of 1 minute. Stir in between to ensure even heating. To keep flavor and texture, avoid reheating them too long. If they dry out, add a little bit of sour cream or cheese on top. These tips will help you enjoy the cheesy ranch potatoes just as much as the first time. You can tell the potatoes are done by checking a few signs. First, they should be golden brown and crispy on the outside. Second, when you poke them with a fork, they should feel soft inside. If the fork slides in easily, your potatoes are ready to enjoy! Yes, you can prepare Cheesy Ranch Potatoes ahead of time! Start by following the recipe steps, but stop before roasting. Cover the potatoes and store them in the fridge for up to 24 hours. When you’re ready to bake, simply add extra time in the oven if they are cold. This way, you can enjoy them fresh without much fuss. These cheesy potatoes pair well with many dishes. Serve them alongside grilled chicken or steak for a filling meal. They also go great with a fresh salad or steamed veggies. For a fun twist, try them with barbecue or as a side for tacos. The options are endless, making it easy to create a delicious meal. For the complete cooking steps, check out the Cheesy Ranch Potatoes Delight 🥔. In this blog post, we covered how to make Cheesy Ranch Potatoes. We started with the ingredients, then walked through easy steps to prepare and roast them. I shared helpful tips, variations, and storage info to keep your dish fresh. These potatoes are a tasty side for any meal. You can customize them to fit your taste. Enjoy making this dish, and let it add flavor to your table!](https://goldendishy.com/wp-content/uploads/2025/06/4f138a04-3393-4361-b7e8-8b602e29b2ef-768x768.webp)
![- 1 lb Brussels sprouts, cleaned and halved - 3 tablespoons extra virgin olive oil - 4 cloves garlic, finely minced - 1/2 cup freshly grated Parmesan cheese - Zest of 1 lemon - 1/2 teaspoon red pepper flakes (optional for heat) - Fresh parsley for garnish - Sea salt and freshly cracked black pepper When I make Garlic Parmesan Brussels sprouts, I always start with the basics. Fresh Brussels sprouts are key. I buy about a pound and clean them well. Halving them helps them cook evenly and adds texture. Next, I add extra virgin olive oil. It coats the sprouts and gives them a rich flavor. I use about three tablespoons. Garlic is a must. Four cloves of finely minced garlic bring a great kick to the dish. Parmesan cheese is what makes these sprouts shine. I use half a cup of freshly grated cheese. The cheese melts and creates a tasty crust when roasted. For extra brightness, I often add zest from one lemon. It lifts the flavors and adds a fresh note. If you like heat, a half teaspoon of red pepper flakes gives the dish a spicy kick. Lastly, I season with sea salt and freshly cracked black pepper. These simple seasonings enhance the flavor without overpowering it. Don't forget to garnish with fresh parsley for a pop of color. This combination of ingredients makes a flavorful side dish that everyone will love. For the full recipe, check out the details above. - Preheat oven to 400°F (200°C). - Prepare a baking sheet with parchment paper. First, you want to make your oven hot. This helps cook the Brussels sprouts fast. The parchment paper makes cleanup simple and helps them roast better. - Mix Brussels sprouts with olive oil, garlic, and seasonings. Take your cleaned and halved Brussels sprouts and put them in a big bowl. Add the olive oil, minced garlic, sea salt, and black pepper. Toss everything together. Make sure each sprout gets coated nicely. This mix gives them great flavor. - Spread Brussels sprouts on the baking sheet. - Roast for 20 minutes, stirring halfway through. Now, spread the Brussels sprouts out on the baking sheet. Keep them in a single layer to roast evenly. Set the timer for 20 minutes, but remember to stir them halfway. This helps them get golden and crispy all over. - Add Parmesan cheese and return to oven for additional 5-7 minutes. - Garnish with parsley before serving. After roasting, take them out and sprinkle the grated Parmesan cheese on top. You can also add lemon zest and red pepper flakes if you like some heat. Put them back in the oven for 5-7 minutes. This melts the cheese and makes it bubbly. Once done, take them out and garnish with parsley. Serve them warm for the best taste. For the full details, check the Full Recipe. To get great Brussels sprouts, keep them in a single layer. This helps them cook evenly. If you crowd them, they will steam instead of roast. Stir them halfway through cooking. This ensures every side gets that nice, crispy brown. Want to brighten the dish? Add lemon zest before serving. It gives a fresh taste that pairs well with the savory flavors. You can also try different cheeses. Parmesan is great, but Pecorino Romano adds a nice twist. One common mistake is overcrowding the baking sheet. This leads to uneven cooking. Also, watch your cooking time. Undercooking makes them tough, while overcooking turns them mushy. Follow the recipe closely for the best results. For the full recipe, check out the details above. {{image_4}} To switch up the taste, try using different cheeses. Pecorino Romano adds a salty, sharp flavor. It brings a new twist to the dish. If you want a vegan option, use nutritional yeast. It gives a cheesy flavor without dairy. Plus, it's packed with nutrients! Adding protein can make your dish heartier. Toss in crispy bacon or pancetta for a savory touch. Their rich flavor pairs well with the sprouts. You can also add cooked chicken pieces. This makes the dish more filling and satisfying. For a vegetarian option, substitute the cheese with vegan alternatives. There are many great cheese substitutes that melt well. Use plant-based oil for roasting instead of olive oil. This keeps the dish fully vegan while still being delicious. For the full recipe, check out Garlic Parmesan Brussels Sprouts Delight! Store your Garlic Parmesan Brussels Sprouts in an airtight container. Refrigerating them helps keep their flavor fresh. They are best eaten within 3-5 days for optimal taste and texture. To restore crispiness, reheat the sprouts in the oven. Set your oven to 350°F (175°C) and bake for about 10-15 minutes. If you're in a hurry, you can use the microwave. However, be aware that the texture may suffer a bit. You can freeze Brussels sprouts before roasting for long-term storage. This way, they maintain their flavor. To reheat, simply thaw them first, then roast as per the [Full Recipe]. This will help you enjoy them fresh and tasty! To make your Brussels sprouts crispy, follow these tips: - Use high heat: Roasting at 400°F (200°C) gives the best results. - Spread them out: Place Brussels sprouts in a single layer on your baking sheet. - Don’t overcrowd: Give them room to breathe, which helps them roast better. - Toss halfway: Stir them at the halfway point of roasting for even browning. - Add cheese last: Sprinkle Parmesan cheese towards the end of the cooking time so it melts but does not burn. Yes, you can prepare Brussels sprouts in advance. Here’s how: - Clean and cut: Clean and halve the Brussels sprouts the day before. - Store properly: Keep them in an airtight container in the fridge. - Roast fresh: When ready to eat, toss them with oil and seasonings, and roast right before serving. Garlic Parmesan Brussels sprouts go well with many dishes. Here are a few: - Roasted chicken: The savory flavors complement crispy chicken well. - Grilled steak: The rich flavors of steak pair nicely with the sprouts. - Pasta dishes: They add a fresh, crunchy element to creamy pastas. Yes, Brussels sprouts are very healthy! They are: - Low in calories: Great for weight management. - High in fiber: Good for digestion. - Rich in vitamins: They provide vitamin C, vitamin K, and folate. Plus, they have antioxidants that help your body fight disease. Yes, you can use frozen Brussels sprouts. Here are some tips: - Thaw first: Thaw them completely before cooking for even roasting. - Pat dry: Remove moisture with a paper towel to help them crisp up. - Adjust cooking time: You may need to roast them a bit longer to achieve the same crispiness. For the full recipe, check out Garlic Parmesan Brussels Sprouts Delight. Garlic Parmesan Brussels sprouts are simple to make and full of flavor. We covered essential ingredients like fresh Brussels sprouts, olive oil, and cheese. You learned step-by-step how to prepare, toss, and roast them. Plus, I shared tips for perfecting your dish and variations to keep it exciting. Remember, the key to great Brussels sprouts is even cooking and the right flavors. Take your time to enjoy this healthy side dish. You’ll love the taste and how easy it is to make!](https://goldendishy.com/wp-content/uploads/2025/05/a403e98b-d04b-46c1-bd99-9a315ef16e11-768x768.webp)