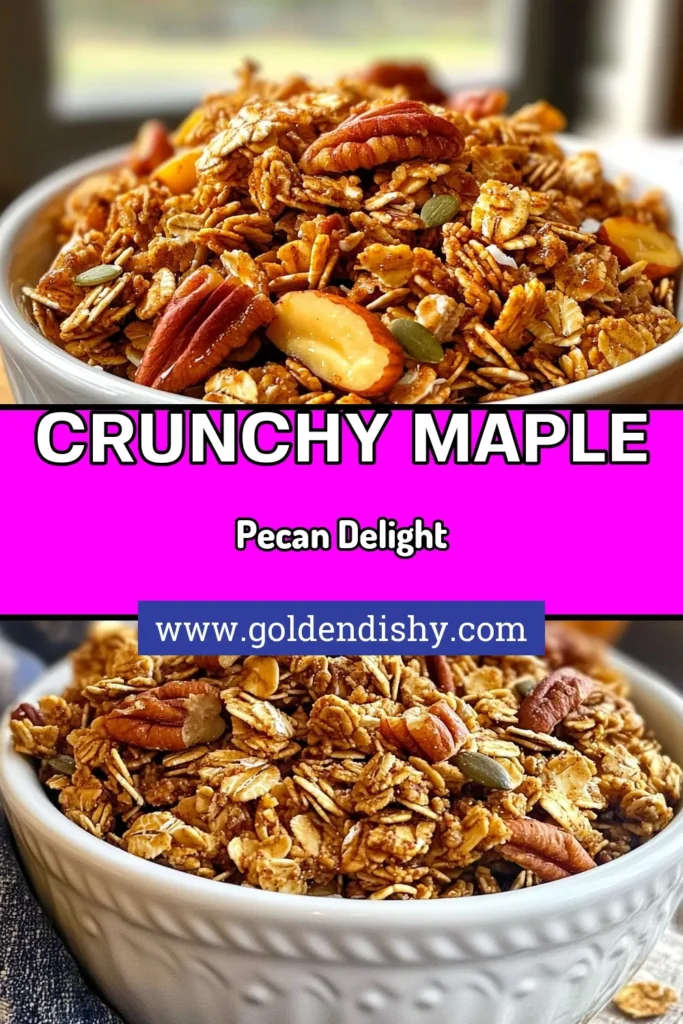
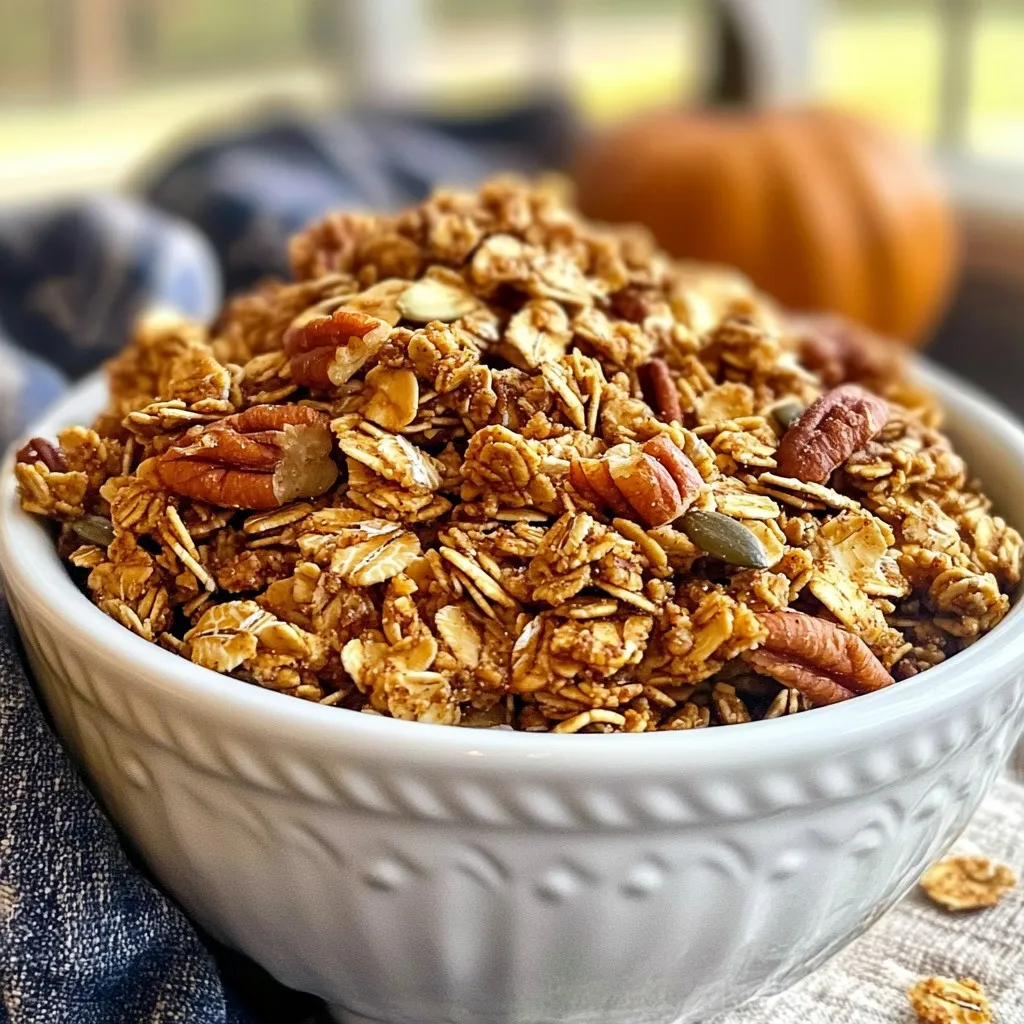
Maple Pecan Granola Fresh and Crunchy Recipe
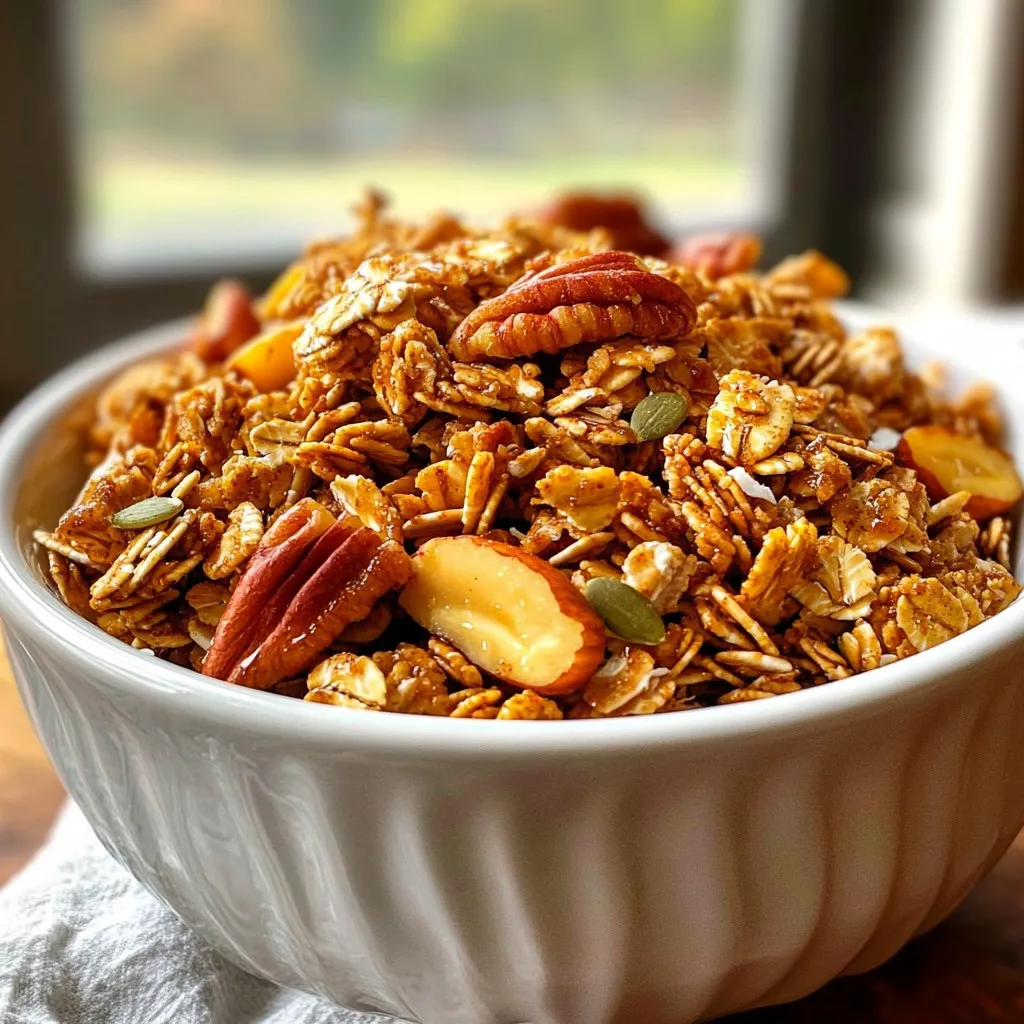
Are you ready to enjoy a tasty, healthy snack? This Maple Pecan Granola recipe is fresh, crunchy, and packed with flavor. With just a few simple ingredients, you can create a breakfast or snack that’s easily customizable. Whether you enjoy it with yogurt or as a grab-and-go treat, this granola is sure to please. Let’s dive into this easy, step-by-step guide to making your own delicious batch!
Why I Love This Recipe
- Deliciously Nutty: The combination of pecans and seeds adds a delightful crunch and rich flavor that makes each bite satisfying.
- Wholesome Ingredients: Made with oats, seeds, and pure maple syrup, this granola is packed with nutrients and energy for your day.
- Customizable: Add your favorite dried fruits or nuts to make it your own, tailoring the flavor to match your preferences.
- Perfect for Any Meal: This granola can be enjoyed as a snack, breakfast, or topping for yogurt, making it a versatile addition to your pantry.
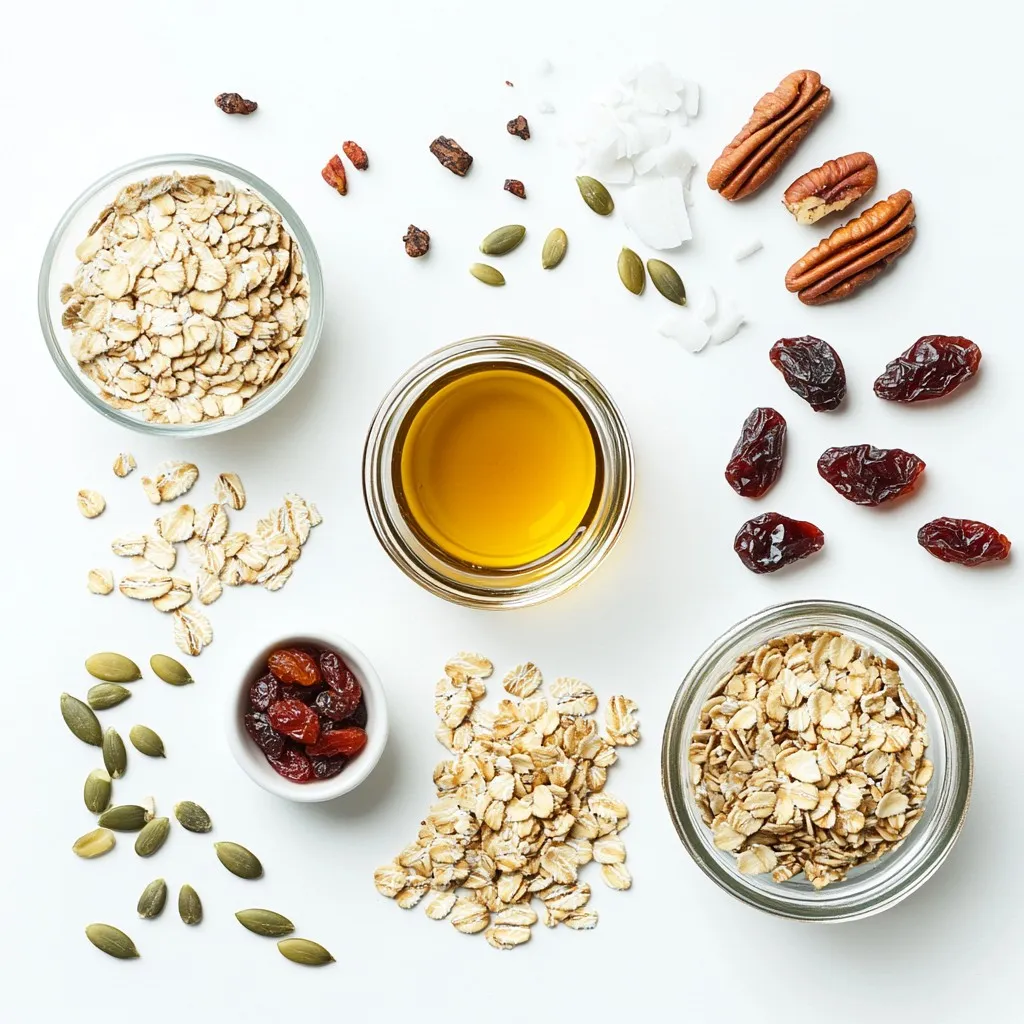
Ingredients
To make a delicious Maple Pecan Granola, you need these simple ingredients:
– 2 cups rolled oats
– 1 cup pecans, roughly chopped
– 1/2 cup sunflower seeds
– 1/4 cup pumpkin seeds
– 1/2 cup pure maple syrup
– 1/4 cup coconut oil, melted
– 1 teaspoon pure vanilla extract
– 1 teaspoon ground cinnamon
– 1/2 teaspoon sea salt
– Optional add-ins: dried cranberries, coconut flakes
Each of these ingredients plays a key part in creating a tasty treat. The rolled oats form the base, giving the granola its hearty texture. Chopped pecans add a nice crunch and rich flavor. Sunflower seeds and pumpkin seeds provide healthy fats and protein.
The star of the show, pure maple syrup, sweetens the granola and gives it a lovely glaze. Melted coconut oil helps bind everything together while adding a subtle sweetness. The vanilla extract and ground cinnamon create warmth and depth in flavor. Lastly, sea salt balances the sweetness.
You can also mix in optional items like dried cranberries or coconut flakes for a fun twist. This granola is not just a snack; it’s great on yogurt or with milk. Each bite is fresh and crunchy!
Step-by-Step Instructions
Preparation Steps
– Preheat your oven to 350°F (175°C) and line a baking sheet with parchment paper.
– In a large bowl, mix together 2 cups of rolled oats, 1 cup of chopped pecans, 1/2 cup of sunflower seeds, and 1/4 cup of pumpkin seeds. Make sure the dry ingredients are well mixed.
– In another bowl, whisk together 1/2 cup of pure maple syrup, 1/4 cup of melted coconut oil, 1 teaspoon of vanilla extract, 1 teaspoon of ground cinnamon, and 1/2 teaspoon of sea salt until smooth.
Mixing and Baking
– Pour the wet mixture over the dry ingredients. Stir well to coat all the oats and nuts.
– Spread the mixture evenly on the prepared baking sheet using a spatula.
– Bake in the preheated oven for 25 to 30 minutes. Stir the granola halfway through to ensure even toasting. Look for a golden brown color and a lovely smell.
Cooling and Storing
– Once baked, take the granola out and let it cool completely on the baking sheet.
– If you want, add in 1/2 cup of dried cranberries or coconut flakes while the granola is still warm. Gently mix them in.
– After cooling, break the granola into clusters. Store it in an airtight container. Enjoy it as a snack, atop yogurt, or with milk!
Tips & Tricks
Achieving Perfect Crunch
To get that perfect crunch in your granola, pay attention to your baking. Start by setting your oven to 350°F (175°C). This temperature helps toast the oats without burning them. Use parchment paper on your baking sheet to stop sticking and make cleanup easy. Stir the granola halfway through baking. This helps it brown evenly and prevents burning. Look for a golden brown color and a sweet smell. Once done, let the granola cool completely on the sheet. This cooling step is key for a crunchy texture.
Flavor Enhancements
Boost the flavor of your granola with spices. A pinch of nutmeg or ginger can add warmth. You can also try different sweeteners like honey or agave syrup. For fun mix-ins, consider dried fruits like cranberries or raisins. They add sweetness and chewiness. If you want to swap out ingredients, feel free. You can use any nuts or seeds you like. Just keep the total amounts the same to maintain texture.
Presentation Ideas
Serving your granola can be fun! Try it in a bowl with yogurt or milk. Top it with fresh fruits like berries or banana slices. For a special touch, add extra coconut flakes on top. Think about how you store your granola, too. Use clear jars to show off the colorful layers. This makes it easy to grab a snack when you need one.
Pro Tips
- Use Fresh Ingredients: Always opt for fresh nuts and seeds to enhance the flavor and nutritional value of your granola.
- Customize Your Sweetness: Adjust the amount of maple syrup according to your taste. You can also experiment with honey or agave syrup.
- Store Properly: Keep your granola in an airtight container to maintain its crunchiness and prevent it from becoming stale.
- Try Different Add-ins: Feel free to add other dried fruits, nuts, or spices to make your granola unique and tailored to your preferences.
Variations
Nut-Free Version
If you want a nut-free granola, you can skip the pecans. Use more seeds instead. Try using these options instead of nuts:
– Sunflower seeds
– Pumpkin seeds
– Chia seeds
You can also add dried fruits like raisins or cranberries. These will add a sweet touch. This way, you keep the crunch without nuts.
Flavor Infusions
Adding new flavors can make your granola special. You can mix in spices like:
– Nutmeg
– Ginger
These spices can add warmth and depth to your granola. You can also try different syrups. Instead of maple syrup, use:
– Honey
– Agave syrup
These can change the taste and sweetness of your granola.
Granola Bars
You can turn your granola into bars. Just adjust the recipe a bit. Use less oil and syrup for a firmer mix. Here’s how:
– Reduce coconut oil to 2 tablespoons.
– Cut maple syrup to 1/3 cup.
Press the mixture firmly into a pan. After baking, let it cool before cutting. These bars make a great snack on the go.
Storage Info
Best Storage Practices
To keep your granola fresh, use airtight containers. Glass jars work well. They prevent air and moisture from getting in. You can also use plastic containers with tight lids. Store your granola in a cool, dry place. Avoid direct sunlight, as heat can make it stale.
For long-lasting granola, do not leave it open. Each time you open the container, air gets in. This can make your granola lose its crunch. If you want to keep it extra fresh, consider vacuum-sealing it. This removes air and extends its life.
Shelf Life
Maple pecan granola stays fresh for about two weeks at room temperature. If you store it in the fridge, it can last even longer. You might get about a month of freshness.
Watch for signs of spoilage. If the granola smells off or has a stale taste, it may be bad. Also, check for any signs of mold. If you see any, throw it away right away.
Freezing Options
You can freeze granola for long-term storage. First, let the granola cool completely. Then, pack it in freezer-safe bags. Squeeze out as much air as possible before sealing. Label the bags with the date.
When you want to use frozen granola, take it out of the freezer. Let it thaw at room temperature for a few hours. You can also use it straight from the freezer. Just add it to yogurt or milk for a tasty treat!
FAQs
What is the nutrition information for maple pecan granola?
One serving of maple pecan granola has about 200 calories. It includes:
– Carbohydrates: 30g
– Protein: 5g
– Fat: 8g
– Fiber: 3g
This granola gives you energy and keeps you full. The nuts and seeds add healthy fats and protein.
Can I customize the recipe?
Yes, you can make this granola fit your needs. For a gluten-free option, use gluten-free oats. If you want a vegan version, substitute the honey with more maple syrup. You can also skip the nuts if you have allergies.
Where can I buy premade maple pecan granola?
You can find good premade granola in many stores. Look for brands like Nature Valley or Kind. When choosing a product, check for:
– Whole ingredients: Avoid added sugars and preservatives.
– Nut content: Ensure it matches your taste or dietary needs.
– Texture: Select one with crunchy clusters for the best experience.
This guide covered everything about making tasty maple pecan granola. We explored the key ingredients and provided easy steps to create the perfect batch. I shared tips for achieving the best crunch and ways to customize the flavors. You can keep granola fresh with proper storage and even freeze it for later. With these insights, you can make delicious granola at home, tailored to your tastes. Enjoy your healthier snacking choic

Maple Pecan Granola
Ingredients
- 2 cups rolled oats
- 1 cup pecans, roughly chopped
- 0.5 cup sunflower seeds
- 0.25 cup pumpkin seeds
- 0.5 cup pure maple syrup
- 0.25 cup coconut oil, melted
- 1 teaspoon pure vanilla extract
- 1 teaspoon ground cinnamon
- 0.5 teaspoon sea salt
- 0.5 cup dried cranberries or raisins (optional)
- 0.25 cup unsweetened coconut flakes (optional)
Instructions
- Preheat your oven to 350°F (175°C). Prepare a large baking sheet by lining it with parchment paper to prevent sticking and facilitate easy cleanup.
- In a spacious mixing bowl, combine the rolled oats, chopped pecans, sunflower seeds, and pumpkin seeds, ensuring an even distribution of the dry ingredients.
- In a separate bowl, whisk together the maple syrup, melted coconut oil, vanilla extract, ground cinnamon, and sea salt until you achieve a smooth and homogenous mixture.
- Pour the wet mixture over the dry ingredients in the large bowl. Stir thoroughly to ensure that everything is well-coated with the sticky blend, allowing for better flavor and texture in your granola.
- Evenly spread the granola mixture across the prepared baking sheet, using a spatula to create an even layer.
- Place the baking sheet in the preheated oven and bake for 25-30 minutes. Remember to stir the mixture halfway through the baking time to promote even toasting and prevent any burning—look for a golden brown color and delightful aroma.
- Once your granola is perfectly baked, remove it from the oven and allow it to cool completely on the sheet. If you are adding dried cranberries or coconut flakes, gently fold them into the warm granola for optimal mixture.
- After the granola has cooled, break it into clusters of your desired size and transfer it to an airtight container for storage. This granola is perfect as a healthy snack, a topping for yogurt, or enjoyed with milk!

![To make Cherry Cheesecake Dip, gather these simple ingredients: - 8 oz cream cheese, softened - 1/2 cup powdered sugar - 1 teaspoon pure vanilla extract - 1/4 cup sour cream - 1 cup cherry pie filling or fresh cherries - 1/2 teaspoon freshly squeezed lemon juice - Graham crackers or vanilla wafers - Fresh cherries for garnish These items come together to create a rich and creamy dip. The cream cheese gives it a smooth texture. The powdered sugar adds sweetness. The vanilla extract brings warmth and flavor. Sour cream adds a nice tang. You can use cherry pie filling for ease or fresh cherries for freshness. Lemon juice brightens the taste. Graham crackers or vanilla wafers make perfect dippers. Fresh cherries on top make it look beautiful. If you want to see how to put this all together, check the Full Recipe. 1. Beat the cream cheese until smooth. Start with 8 oz of softened cream cheese in a large bowl. Use an electric mixer on medium speed. Beat for about 2-3 minutes. You want it creamy and smooth. 2. Mix in powdered sugar gradually. Take 1/2 cup of sifted powdered sugar. Slowly add it to the bowl while mixing on low speed. Keep mixing until there are no lumps. This step adds sweetness. 3. Add vanilla extract and sour cream. Measure 1 teaspoon of vanilla extract and 1/4 cup of sour cream. Mix them in on medium speed. Blend until fluffy, about 1 minute. This gives a nice flavor and creaminess. 1. Fold in cherry pie filling and lemon juice. Use 1 cup of cherry pie filling. You can also use fresh cherries if you prefer. Add 1/2 teaspoon of fresh lemon juice. Gently fold these into the mixture with a spatula. Be careful not to over-stir; you want to keep some cherry chunks. 2. Spoon mixture into serving bowl. Take a decorative bowl and carefully spoon the dip mixture into it. Make it look nice! This is where the magic happens. 1. Chill in the refrigerator. Cover the bowl with plastic wrap. Place it in the fridge for at least 30 minutes. This lets the flavors come together. 2. Prepare accompaniments for dipping. While the dip chills, get your dippers ready. Use graham crackers or vanilla wafers. These pair perfectly with the creamy dip. When you serve, it will look and taste wonderful! For the complete recipe, check [Full Recipe]. Softened cream cheese is key to a smooth dip. It blends easily and avoids lumps. To get it just right, leave the cream cheese out for about an hour. You want it soft, not melted. When adding powdered sugar, do it slowly. Sprinkle it in while mixing. This helps it mix well. If you add it all at once, you may get clumps. A fine sift can help too, ensuring smoothness. You can add extra flavors to make this dip special. Try a splash of almond extract or a bit of cocoa powder. These can give the dip a different twist. If you want it sweeter, taste as you mix. You can add more sugar if you like. Just remember that the cherry pie filling adds some sweetness too. Serve your dip in a fun bowl to catch the eye. You can use a bright plate for contrast. This makes it stand out at parties. For garnish, top the dip with fresh cherries. They look great and taste amazing! You can also add a sprinkle of crushed graham crackers on top for crunch. Serve with a mix of graham crackers and vanilla wafers for a tasty dipper combo. For the full recipe, check out the Cherry Cheesecake Dip Delight. {{image_4}} You can switch up the fruit in this dip. Instead of cherries, try blueberries or strawberries. They add a fresh taste and a fun color. You can also mix in other pie fillings. Peach or apple pie filling works well too. Each fruit gives the dip a unique flavor. Experiment and find your favorite! Want to try something new? Create a chocolate cheesecake dip. Use cream cheese and mix in cocoa powder and chocolate chips. It’s rich and sweet. You can also make a peanut butter cheesecake dip. Just blend in creamy peanut butter for a nutty twist. Both options are sure to please your guests. If you need gluten-free options, use gluten-free graham crackers. They taste great and keep the dip crunchy. For vegan variations, swap the cream cheese for vegan cream cheese. You can also use maple syrup instead of powdered sugar. These changes make the dip suitable for more diets. Enjoy every bite without worry! Cherry cheesecake dip can last up to 3 days in the fridge. To keep it fresh, store it in an airtight container. This will prevent the dip from drying out and help it stay creamy. Make sure the container is sealed tight before placing it in the fridge. Can you freeze cherry cheesecake dip? Yes, you can! Freezing helps you save leftovers for later. To freeze it, place the dip in a freezer-safe container. Leave some space at the top, as the dip may expand when frozen. When you want to enjoy it again, thaw the dip in the fridge overnight. Avoid microwaving it, as this can change the texture. After thawing, stir it gently to bring back the creamy consistency. Enjoy your cherry cheesecake dip anytime! You can make this dip without cream cheese by using Greek yogurt or cottage cheese. Both options give a creamy texture. For a sweeter taste, add a bit more powdered sugar. You can also blend in ricotta cheese for a slight twist. These substitutes keep the dip light and flavorful. Yes, fresh cherries work great! They add a bright, juicy flavor. Chopping them finely keeps the texture nice. You might want to add a bit of sugar to balance the tartness. This change can make your dip taste fresh and vibrant. For the best dipping experience, try graham crackers, vanilla wafers, or fresh fruit slices. You can also use pretzels for a salty twist. Present your dip in a colorful bowl and surround it with your dippers. Add fresh cherries on top for a fun touch. This makes your dish look inviting and tasty. This blog post covered the easy steps to make cherry cheesecake dip. We started with the ingredients, then moved on to making, chilling, and serving the dip. I shared helpful tips for great texture and flavor. You can also explore fun variations like using other fruits or dips. Finally, we discussed storing your delicious creation. This dip is perfect for gatherings or a family treat. Enjoy making it and tasting the joy it brings!](https://goldendishy.com/wp-content/uploads/2025/06/2157293b-a45d-439f-9bc7-da334d1e6e82-768x768.webp)