Eggnog Rice Pudding Creamy and Comforting Delight
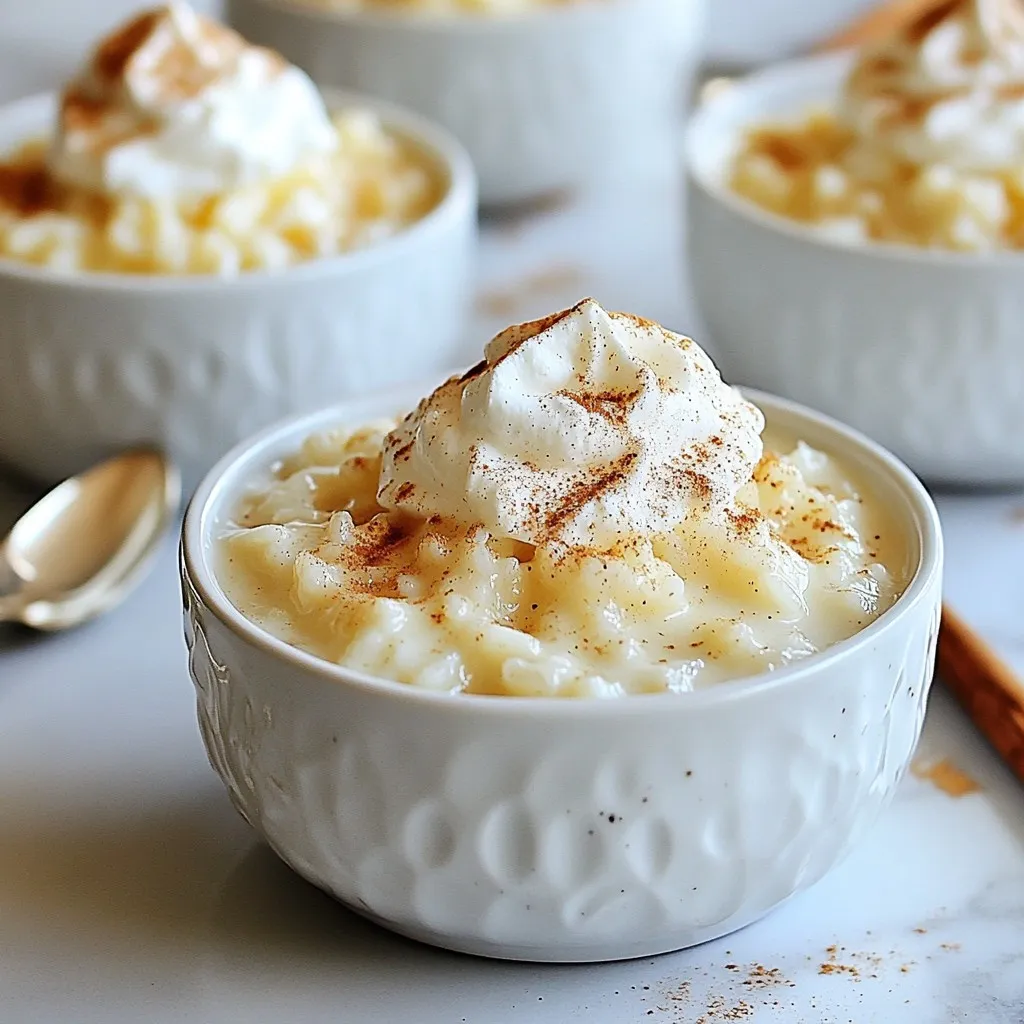

Looking for a tasty twist on a holiday classic? Eggnog Rice Pudding is your creamy and comforting delight! This dish brings the festive flavors of eggnog into a warm, luscious dessert. Whether you’re entertaining guests or enjoying a cozy night in, I’ll guide you step-by-step to create this rich treat. Get ready to impress your friends and family with a dessert that warms the heart and fills the belly!
Why I Love This Recipe
- Festive Flavor: This eggnog rice pudding perfectly captures the essence of the holiday season with its rich and creamy flavors.
- Comforting Dessert: The warm, comforting texture of this pudding makes it an ideal treat for chilly winter nights.
- Easy to Make: With simple ingredients and straightforward steps, this recipe is accessible for cooks of all skill levels.
- Customizable Toppings: Top it with whipped cream and spices, or get creative with seasonal garnishes for a personal touch.
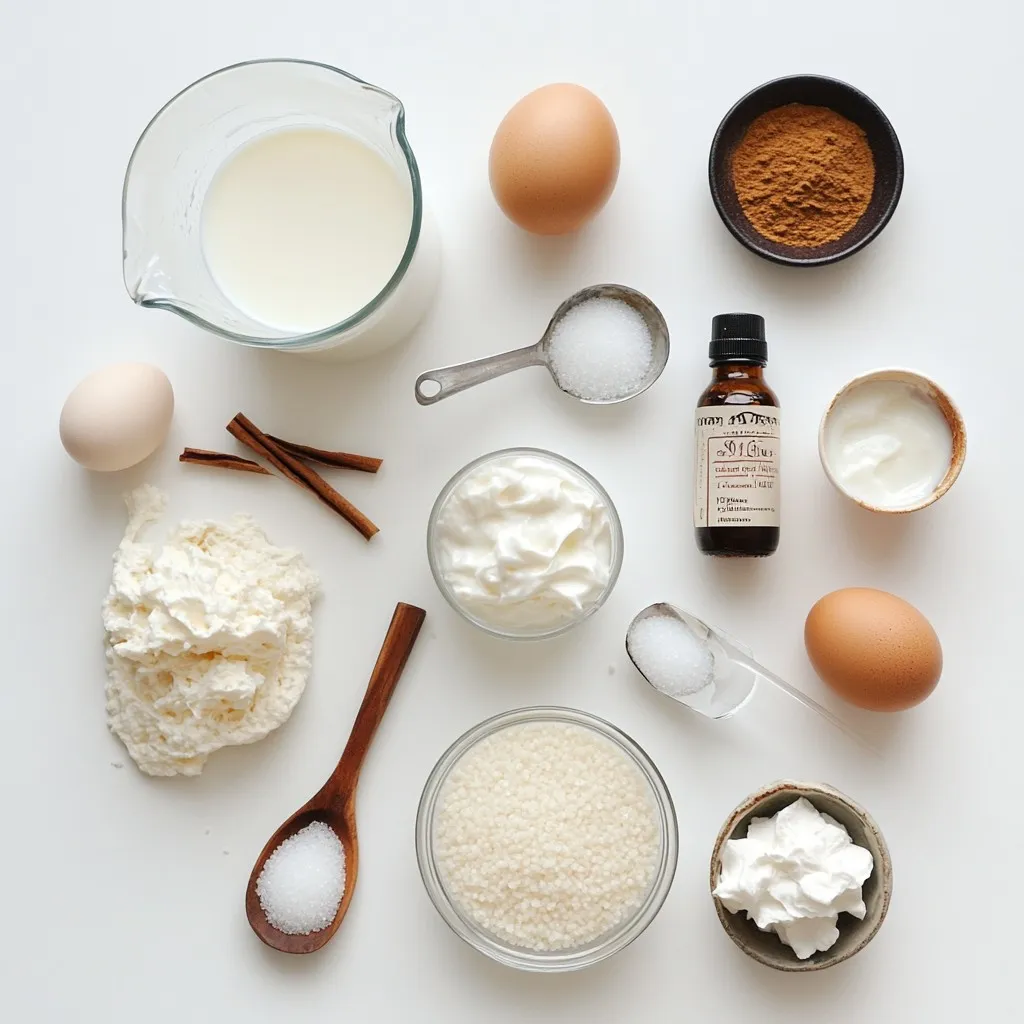
Ingredients
List of Required Ingredients
To make eggnog rice pudding, you need the following items:
– 1 cup Arborio rice
– 4 cups whole milk
– 1 cup creamy eggnog
– 1/2 cup granulated sugar
– 1 teaspoon pure vanilla extract
– 1/2 teaspoon freshly ground nutmeg
– 1/4 teaspoon ground cinnamon
– A pinch of salt
– 2 large eggs, lightly beaten
– Whipped cream for serving
– Additional ground cinnamon or nutmeg for garnish
Ingredient Substitutions
You can swap some ingredients if you like. Here are my suggestions:
– Arborio rice can be replaced with jasmine rice or sushi rice. Both will give a creamy texture.
– Whole milk can be switched with 2% milk. It will be lighter but still tasty.
– Use non-dairy eggnog for a vegan version of this dish.
– Granulated sugar can be replaced with brown sugar for a richer taste.
– If you don’t have nutmeg, you can use allspice or cloves for a similar flavor.
Nutritional Information per Serving
Each serving of eggnog rice pudding contains:
– Calories: 300
– Fat: 10g
– Carbohydrates: 45g
– Protein: 8g
– Sugar: 18g
This pudding is creamy and comforting, making it a perfect holiday treat. Enjoy it warm or chilled!
Step-by-Step Instructions
Preparing the Rice Pudding Base
Start by gathering your ingredients. You will need Arborio rice, whole milk, sugar, and salt. In a medium saucepan, combine 1 cup of Arborio rice, 4 cups of whole milk, 1/2 cup of granulated sugar, and a pinch of salt. Set the heat to medium. Stir the mix often until it simmers gently. Once it simmers, reduce the heat to low. Cook for 25-30 minutes. Stir frequently to prevent sticking. The rice should be tender and the mix creamy.
Adding Eggnog and Flavorings
Once your rice is tender, it’s time to add more flavor. Carefully stir in 1 cup of creamy eggnog. Then, add 1 teaspoon of pure vanilla extract, 1/2 teaspoon of freshly ground nutmeg, and 1/4 teaspoon of ground cinnamon. Keep the heat low and cook for another 5 minutes. This step helps the flavors blend and warm the pudding. You want it to smell like the holidays!
Tempering the Eggs and Final Cooking Steps
Now, let’s add the eggs for richness. Remove the pan from the heat first. Gradually whisk in 2 large eggs, which you should have lightly beaten. It’s key to temper the eggs. Do this by adding them slowly to the warm pudding. This way, you avoid scrambling the eggs. After mixing, return the pan to low heat. Cook for another 5 minutes, stirring often. The pudding will thicken more in this step. Once it reaches your desired thickness, take it off the heat. Let it cool slightly before serving. Enjoy this treat warm or chilled!
Tips & Tricks
Tips for Achieving Creamy Texture
To make your Eggnog Rice Pudding super creamy, use Arborio rice. This rice has a high starch content. It helps create a rich, thick pudding. Always stir the rice often while cooking. This prevents it from sticking to the bottom of the pot. Cook on low heat once it simmers. This gives the rice time to absorb the milk slowly. When you add eggnog, do it slowly. This helps blend it well into the pudding.
Common Mistakes to Avoid
One common mistake is cooking the rice on high heat. This can lead to uneven cooking. Another mistake is not stirring enough, which can cause sticking. Make sure to whisk the eggs slowly into the pudding. If you add them too quickly, they can scramble. Lastly, don’t skip the resting time before serving. This allows the flavors to settle and taste better.
Enhancing Flavor Profiles
To boost the flavor of your pudding, use fresh spices. Ground nutmeg and cinnamon add warmth. You can also experiment by adding a splash of rum or bourbon for depth. If you want a sweeter touch, add more sugar or vanilla. Don’t forget to top your pudding with whipped cream. This adds a light, airy contrast to the creamy base. For a festive twist, sprinkle crushed candy canes or festive sprinkles on top.
Pro Tips
- Use Fresh Nutmeg: For the best flavor, grate whole nutmeg instead of using pre-ground. The freshness makes a significant difference in taste!
- Tempering Eggs: When adding the beaten eggs, do it slowly to prevent scrambling. Gradually mix in some of the warm pudding to raise the egg temperature before adding it to the pot.
- Adjusting Sweetness: Depending on your preference for sweetness, feel free to adjust the sugar. You can also use a sugar substitute if desired.
- Chill for Flavor: Allow the pudding to chill in the fridge for a few hours before serving. This enhances the flavors and gives it a delightful texture.

Variations
Vegan Eggnog Rice Pudding Recipe
To make a vegan version, swap the dairy and eggs. Use almond or coconut milk instead of whole milk. Replace eggnog with a vegan eggnog made from almond milk and spices. For thickening, a mix of cornstarch and coconut cream works well. Follow the same steps as the classic recipe, stirring often. This keeps the texture creamy, just like the original.
Spice Variations for Seasonal Flavor
You can change up the spices for a twist. Try adding ginger or allspice for warmth. Cardamom gives a unique taste and pairs well with eggnog. For a fun kick, add a dash of cayenne pepper. These spices add depth and make your pudding even more festive.
Toppings and Serving Suggestions
Serve your eggnog rice pudding warm or cold. Top it with whipped cream for a light finish. A sprinkle of cinnamon or nutmeg adds a nice touch. For extra sweetness, add chocolate shavings or caramel sauce. Fresh berries or candied nuts bring color and crunch. Use holiday-themed sprinkles for a fun look.
Storage Info
How to Store Eggnog Rice Pudding
To store your eggnog rice pudding, let it cool first. Use an airtight container. Place it in the fridge if you plan to eat it soon. Make sure it is tightly sealed to keep it fresh. This pudding will stay good for about 3 to 5 days in the fridge.
Reheating Tips
When you want to enjoy your pudding again, use a microwave or a saucepan. For the microwave, place a portion in a bowl. Heat it for 30 seconds, then stir. Repeat until it’s warm. If using a saucepan, add a splash of milk. Heat over low heat, stirring often to keep it creamy.
Freezing Eggnog Rice Pudding
You can freeze eggnog rice pudding too! Portion it into small containers. Leave some space at the top, as it will expand. Freeze for up to two months. To thaw, place it in the fridge overnight. Reheat as mentioned above for the best taste and texture.
FAQs
Can I use low-fat milk instead of whole milk?
Yes, you can use low-fat milk. However, whole milk gives a richer taste. The creaminess will be less, but it will still taste good. If you want a creamier pudding, try using half-and-half instead. This will keep the flavor rich, while still being a bit lighter.
How long does eggnog rice pudding last in the fridge?
Eggnog rice pudding lasts about 4 to 5 days in the fridge. Make sure to store it in an airtight container. If you notice it thickens up, just stir in a bit of milk before serving. This will help bring back its creamy texture.
What’s the best way to serve eggnog rice pudding?
Serve eggnog rice pudding warm or chilled. I love it warm with a big dollop of whipped cream on top. You can also sprinkle extra cinnamon or nutmeg for a festive touch. For a fun twist, add some candy cane pieces or festive sprinkles. This makes it a perfect holiday dessert!
This post covered all you need for eggnog rice pudding. I listed the main ingredients, offered alternatives, and shared nutritional info. The step-by-step guide helps you make it right. I also included tips for creaminess and flavoring. Variations show you how to mix it up, from vegan options to spices. Finally, I shared storage tips for freshness. Enjoy making this cozy treat that warms your heart and hom

Eggnog Rice Pudding
Ingredients
- 1 cup Arborio rice
- 4 cups whole milk
- 1 cup creamy eggnog
- 1 2 granulated sugar
- 1 teaspoon pure vanilla extract
- 1 2 freshly ground nutmeg
- 1 4 ground cinnamon
- 1 pinch salt
- 2 large eggs, lightly beaten
- 1 dollop whipped cream for serving
- 1 to taste additional ground cinnamon or nutmeg for garnish
Instructions
- In a medium saucepan, combine 1 cup of Arborio rice, 4 cups of whole milk, 1/2 cup of granulated sugar, and a pinch of salt. Place over medium heat, stirring occasionally until the mixture begins to simmer gently.
- Once simmering, reduce the heat to low for a gentle simmer. Cook for 25-30 minutes, stirring frequently to ensure the rice doesn’t stick. The rice should be tender and the mixture should be creamy and thickened.
- Carefully stir in 1 cup of eggnog, 1 teaspoon of vanilla extract, 1/2 teaspoon of freshly ground nutmeg, and 1/4 teaspoon of ground cinnamon. Continue to cook for an additional 5 minutes, allowing the flavors to meld and the pudding to heat through.
- Remove the saucepan from the heat. Gradually whisk in the 2 beaten eggs, ensuring to temper them by mixing them slowly into the warm rice pudding without scrambling. Return the saucepan to low heat and cook for another 5 minutes, stirring frequently until the pudding thickens further.
- Once the rice pudding reaches your desired thickness, remove it from the heat and allow it to cool slightly for a few minutes before serving.
- To serve, spoon the creamy pudding into individual bowls or dessert cups. Add a generous dollop of whipped cream on top and finish with a light dusting of ground cinnamon or nutmeg for that festive flair.
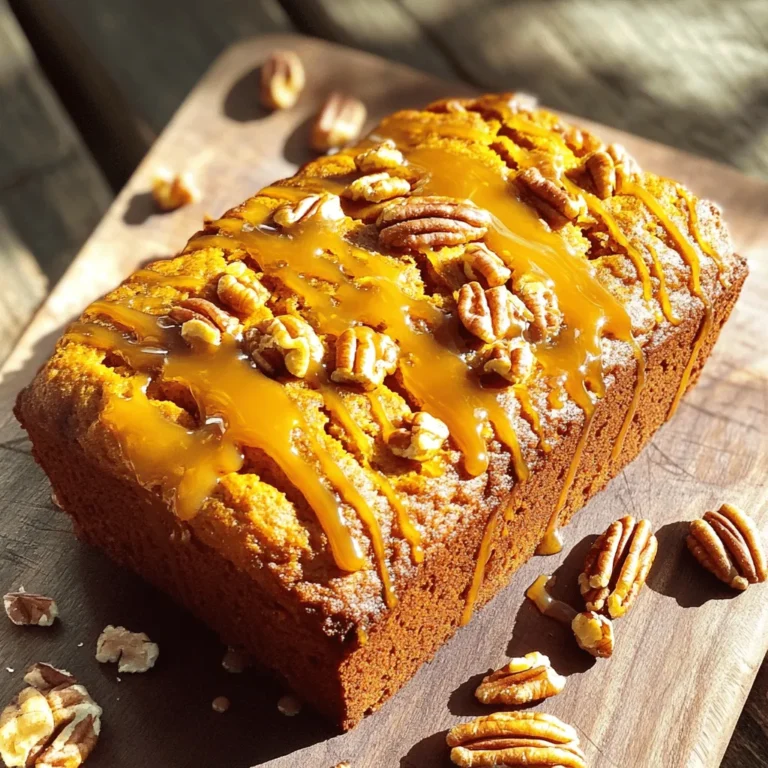
![- 2 cups fresh blueberries, rinsed and drained - 2 cups ripe peaches, diced (approximately 3 medium-sized peaches) - 1 tablespoon freshly squeezed lemon juice - 1/2 cup granulated sugar (adjust based on your sweetness preference) - 1 tablespoon cornstarch - 1 teaspoon pure vanilla extract - 1 1/2 cups rolled oats - 1 cup all-purpose flour - 1/2 cup packed brown sugar - 1/2 teaspoon baking powder - 1/4 teaspoon fine salt - 1/2 cup unsalted butter, melted and slightly cooled - 1 teaspoon ground cinnamon (optional, for added warmth) These simple ingredients create a tasty balance of sweet and tart flavors. The fresh blueberries and ripe peaches shine in each bite. You can change the sugar to fit your taste. I often add a bit more if the fruit is not very sweet. I love using oats for texture; they give a nice chewiness. This recipe is so flexible. You can swap out fruit or adjust flavors based on what you have at home. For example, try adding a pinch of nutmeg for a warm spice twist. This recipe takes only 15 minutes to prepare. It bakes in about 30 to 35 minutes. You will get about 12 bars from this batch, perfect for sharing with friends or family. If you want the full recipe, check the section below. - Preheat your oven to 350°F (175°C). - Grease a 9x13-inch baking dish or line it with parchment paper. - In a medium mixing bowl, combine 2 cups of fresh blueberries, 2 cups of diced peaches, 1 tablespoon of lemon juice, 1/2 cup of granulated sugar, 1 tablespoon of cornstarch, and 1 teaspoon of vanilla extract. - Gently mix the ingredients until the fruit is coated. Let it sit for a few minutes to enhance the flavor. - In a large mixing bowl, whisk together 1 1/2 cups of rolled oats, 1 cup of all-purpose flour, 1/2 cup of brown sugar, 1/2 teaspoon of baking powder, 1/4 teaspoon of salt, and 1 teaspoon of cinnamon if desired. - This mixture will give your bars that perfect crumb texture. - Pour 1/2 cup of melted butter into the dry mixture and stir until it looks like coarse crumbs. - Reserve about 1 cup of this crumb mixture for later. - Press the remaining crumb mixture into the bottom of your greased dish to form the crust. - Spread the fruit mixture evenly over the crust, then sprinkle the reserved crumbs on top. - Bake in your preheated oven for about 30-35 minutes. - Look for golden brown color and bubbling filling to know it's done. - Once baked, let the bars cool on a wire rack for 15-20 minutes before slicing into squares. - This cooling time helps the bars set well for easy serving. Enjoy making these Blueberry Peach Crumble Bars with the [Full Recipe]. - Check for doneness by ensuring the filling is bubbling and the top is golden brown. - Letting the bars cool completely aids in easier slicing. This step prevents squishing the filling and keeps the layers intact. - Use frozen blueberries or peaches if fresh ones are unavailable. Frozen fruit works well and saves time. - Substitute brown sugar with coconut sugar for a healthier option. Coconut sugar adds a nice depth to the flavor. - Serve warm or at room temperature. This allows the flavors to shine. - Pair with vanilla ice cream or whipped cream. This adds a creamy texture that balances the tartness of the fruit. For an extra touch, garnish with fresh blueberries or peach slices. You can find the Full Recipe above for detailed instructions on making these delightful bars! {{image_4}} You can mix things up with different fruits. For a fresh twist, switch blueberries and peaches for raspberries and apples. The tartness of raspberries pairs well with sweet apples. You can also try plums or cherries. Both add their unique flavors and keep the bars fun and exciting. Want to make these bars gluten-free? No problem! Just replace all-purpose flour with a gluten-free flour blend. Many good mixes are available at stores. Also, ensure that your oats are certified gluten-free. This small change lets everyone enjoy this tasty dessert. For a vegan version, swap unsalted butter for coconut oil or vegan butter. Both options work well and keep the bars rich and tasty. If your recipe includes eggs, you can use flax eggs instead. To make a flax egg, mix one tablespoon of ground flaxseed with two and a half tablespoons of water. Let it sit for five minutes. This creates a great egg substitute that still binds everything together. Store your Blueberry Peach Crumble Bars in an airtight container. They stay fresh at room temperature for up to 3 days. This makes them great for quick snacks or dessert. To keep them longer, refrigerate the bars. They will stay fresh for up to a week. For even longer storage, you can freeze the bars. Wrap them tightly in plastic wrap or aluminum foil. They can be frozen for up to 3 months. When you're ready to enjoy your frozen bars, reheating is easy. Simply pop them in the microwave for a few seconds. You can also warm them in the oven at 350°F (175°C). This brings back their delicious taste and texture. For the full recipe and tips, check out the detailed instructions above. Enjoy your tasty treat! Yes, you can make these bars a day in advance. Just store them in the fridge. This helps the flavors blend nicely. Look for bubbling filling and a golden brown topping. This shows they are ready to eat. Yes, you can add chopped nuts like almonds or walnuts. They give the bars extra crunch and flavor. I love pairing them with a scoop of ice cream or yogurt. It makes a delicious treat. Store them in an airtight container at room temperature. You can also refrigerate them for up to a week. - Blueberry Peach Crumble Bars 🫐 To make these delicious Blueberry Peach Crumble Bars, you need simple, fresh ingredients. Here’s what you will need: - 2 cups fresh blueberries, rinsed and drained - 2 cups ripe peaches, diced (approximately 3 medium-sized peaches) - 1 tablespoon freshly squeezed lemon juice - 1/2 cup granulated sugar (adjust based on your sweetness preference) - 1 tablespoon cornstarch - 1 teaspoon pure vanilla extract - 1 1/2 cups rolled oats - 1 cup all-purpose flour - 1/2 cup packed brown sugar - 1/2 teaspoon baking powder - 1/4 teaspoon fine salt - 1/2 cup unsalted butter, melted and slightly cooled - 1 teaspoon ground cinnamon (optional, for added warmth) These ingredients come together to create a wonderful balance of sweet and tart flavors. The fresh blueberries and peaches mix well with the lemon juice. This adds a nice zing to the bars. The sugar and cornstarch help create a thick, juicy filling. The crumble topping is a blend of oats, flour, and sugars. It gives the bars a crunchy texture that pairs perfectly with the soft fruit layer. The butter adds richness, while the cinnamon gives a warm, cozy vibe to each bite. If you want to try this recipe, check the Full Recipe for step-by-step instructions. You'll love making and sharing these bars! These Blueberry Peach Crumble Bars are easy to make and full of flavor. You learned about the key ingredients, simple steps, and different variations. Remember, you can swap fruits or adjust sweetness to fit your taste. Store leftovers in a container for later. Enjoy these bars warm or with ice cream for a tasty treat. Happy baking!](https://goldendishy.com/wp-content/uploads/2025/06/77e155cd-d820-4acd-a50c-b849e6ba2e1e-768x768.webp)

![- 1 cup all-purpose flour - 1 cup whole wheat flour - 1 tablespoon pumpkin pie spice - ½ cup granulated sugar - 1 can (15 oz) pumpkin puree - 2 large eggs - ½ cup brewed coffee, cooled - ⅓ cup vegetable oil - Optional mix-ins: ½ cup chocolate chips or nuts - Baking soda - Baking powder - Salt - Brown sugar - Pure vanilla extract The main ingredients form the base of your muffins. The blend of all-purpose and whole wheat flour adds great texture. Pumpkin puree brings moisture and a rich flavor. You can’t forget the pumpkin pie spice; it gives that cozy fall taste. Granulated sugar adds sweetness, while brown sugar provides depth. For the additional ingredients, eggs help the muffins rise and become fluffy. Brewed coffee gives a coffee kick, enhancing the flavor without being too strong. Vegetable oil keeps them moist. If you want, add chocolate chips or nuts for extra fun. Now, let’s talk staples. Baking soda and baking powder help the muffins rise. Salt balances the sweetness. Finally, pure vanilla extract adds a warm note that ties everything together. You can find the full recipe at the end. Set your oven to 350°F (175°C). This temperature helps the muffins rise nicely. Line or grease the muffin tin to keep the muffins from sticking. I prefer using paper liners for easy cleanup. In a large mixing bowl, whisk together the flours, baking soda, baking powder, pumpkin pie spice, and salt. This step is key for even flavor and texture. Make sure there are no lumps in the mixture. In another bowl, mix the granulated sugar and brown sugar until smooth. Then, add the pumpkin puree, eggs, cooled coffee, vegetable oil, and vanilla extract. Stir until everything is well combined. The mixture should look creamy and inviting. Gradually mix the dry ingredients into the wet mixture. Use a spatula to fold gently. Avoid overmixing; a few lumps are just fine. If you want, gently fold in chocolate chips or nuts for added flavor and texture. Spoon the batter into the muffin tins. Fill each cup about two-thirds full to allow for rising. Place the muffin tin in the oven and bake for 18-22 minutes. To check for doneness, insert a toothpick into a muffin. If it comes out clean, they are ready. Let the muffins cool in the pan for about 5 minutes. After that, transfer them to a wire rack to cool completely. Enjoy them warm for a cozy treat! For an extra touch, serve with cinnamon sugar or maple syrup. You can find the full recipe [here]. To make your muffins light and fluffy, avoid overmixing the batter. Stir gently until the dry and wet ingredients just come together. A few lumps are okay! Also, use room temperature ingredients. This helps the batter mix better and rise well. For a stronger coffee taste, try substituting brewed coffee with espresso. This adds depth to the flavor. Another great tip is to sprinkle some cinnamon sugar on top of the muffins before baking. This gives them a sweet, crispy crust that enhances their cozy taste. These muffins taste best when warm. Enjoy them with a fresh cup of coffee. For added sweetness, drizzle some maple syrup on top or spread a little cream cheese frosting. These simple touches make your cozy fall treat even more delightful! {{image_4}} You can easily make these muffins gluten-free. Simply swap the all-purpose flour with a gluten-free flour mix. Make sure to check the blend. Some mixes work better in baked goods than others. Using a good quality mix helps maintain texture and taste. If you want a dairy-free version, use almond milk instead of regular milk. Almond milk adds a light flavor that pairs well with the spices. For oil, replace vegetable oil with coconut oil. Coconut oil adds a subtle sweetness and complements the pumpkin nicely. To add some crunch, you can mix in nuts like walnuts or pecans. They add a nice texture and flavor. You can also play with spices. Try adding a pinch of nutmeg or cardamom for a twist. If you love chocolate, consider adding chocolate chunks. They melt perfectly and create a rich taste. To keep your pumpkin spice latte muffins fresh, place them in an airtight container at room temperature. This method helps maintain their soft texture and rich flavor. If you have a lot of muffins, you can stack them with parchment paper between layers. This prevents them from sticking together. If you want to enjoy these muffins later, freezing is a great option. First, let the muffins cool completely. Wrap each muffin in plastic wrap, then place them in a freezer bag. Make sure to remove as much air as possible to avoid freezer burn. You can store them in the freezer for up to three months. When you're ready to eat one, take it out and let it thaw at room temperature. You can also reheat it in the microwave for about 15-20 seconds. To keep your muffins moist and tasty over time, consider these tips: - Add a slice of bread to the container. This helps keep the muffins moist. - Avoid exposing them to direct sunlight or heat sources, as this can dry them out. - If you notice any muffins getting stale, you can toast them lightly. This can bring back some of their original flavor. Storing your pumpkin spice latte muffins correctly ensures you can enjoy their warm, cozy flavors for days to come. For the full recipe, check the earlier section! Yes, you can add more pumpkin puree. However, this change will affect the muffins. Adding extra puree makes the muffins moister. It may also make them denser. If you want a lighter muffin, keep the amount as in the Full Recipe. You can try adding an extra tablespoon at first. This way, you can see how the texture changes. These muffins last about three days at room temperature. Keep them in an airtight container. They can also last about a week in the fridge. The cold helps keep them fresh longer. If you want to save them for later, freeze them. They stay good for about three months in the freezer. Just remember to wrap them well. Yes, you can make these muffins without eggs. Here are some good substitutes: - 1/4 cup unsweetened applesauce - 1/4 cup mashed banana - 1 tablespoon flaxseed meal mixed with 2.5 tablespoons water Each option helps bind the muffins. They also add moisture. Choose the one you like best for a vegan version. You can use several options instead of brewed coffee. Here are some alternatives: - Brewed tea for a lighter flavor - Milk or almond milk for a creamy texture - Pumpkin spice tea for a fall twist These options help keep the muffins moist and tasty. You can experiment with what you have at home. These Pumpkin Spice Latte Muffins mix simple ingredients in easy steps. You learned how to combine flours, spices, and pumpkin puree for a tasty treat. I shared tips for perfect muffins and ways to store them well. Remember, you can adjust flavors to your liking. Try nuts or different spices for variety. Whether you enjoy them warm or frozen, these muffins are sure to please. Happy baking!](https://goldendishy.com/wp-content/uploads/2025/06/a78bef71-23f4-423c-981c-d5caf094e886-768x768.webp)