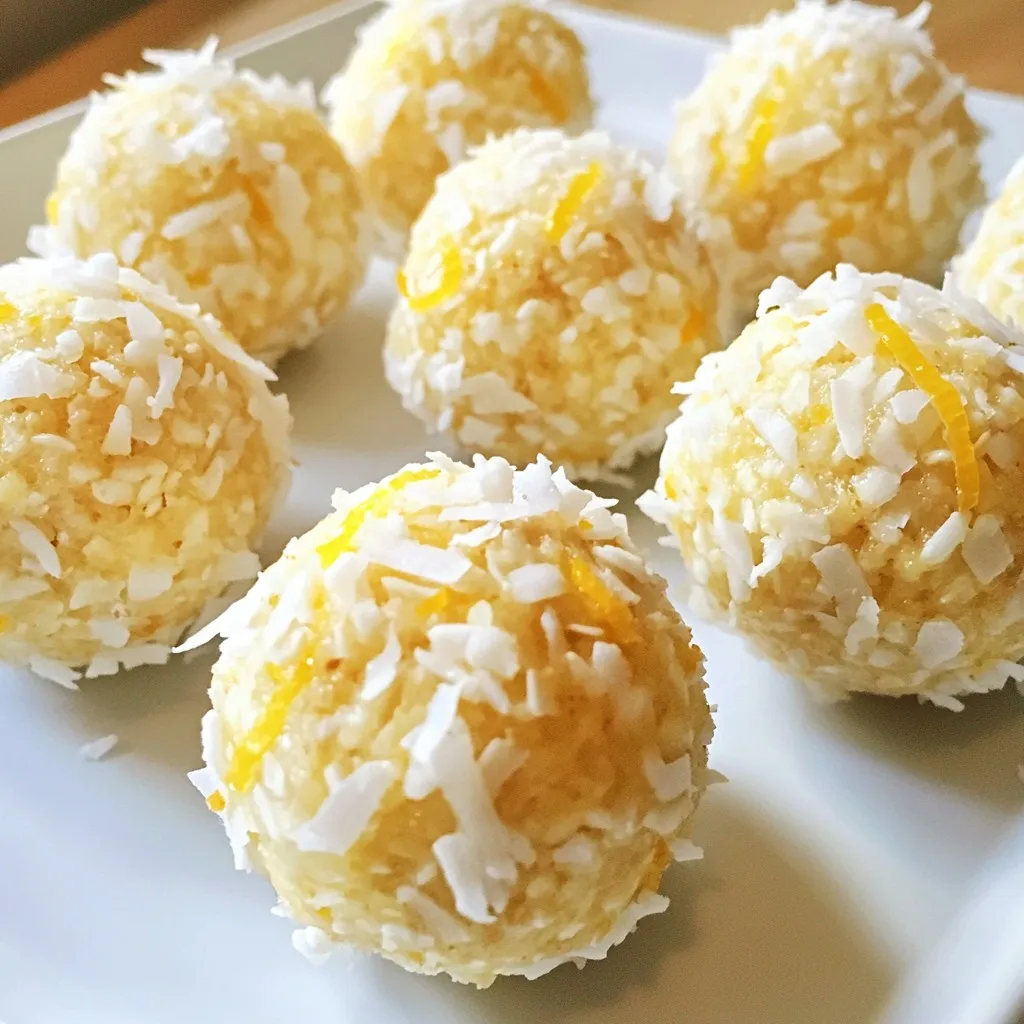
Lemon Coconut Energy Balls Simple Healthy Snack


Looking for a quick and tasty snack? Lemon Coconut Energy Balls are the perfect solution! These little bites pack a punch of flavor and nutrition. Made with simple, wholesome ingredients like oats, coconut, and fresh lemon juice, they’re easy to whip up and incredibly satisfying. In this guide, I’ll show you how to create these delicious treats, plus tips for customizing them to your taste. Let’s get started!
Why I Love This Recipe
- Quick to Prepare: This recipe takes only 10 minutes to whip up, making it perfect for busy days.
- Nutritious Ingredients: Packed with oats, nuts, and seeds, these energy balls provide the energy boost you need.
- Refreshing Flavor: The combination of lemon and coconut creates a bright, refreshing taste that’s hard to resist.
- Versatile Snack: Enjoy them as a breakfast option, snack, or post-workout treat – they fit any occasion!
Ingredients
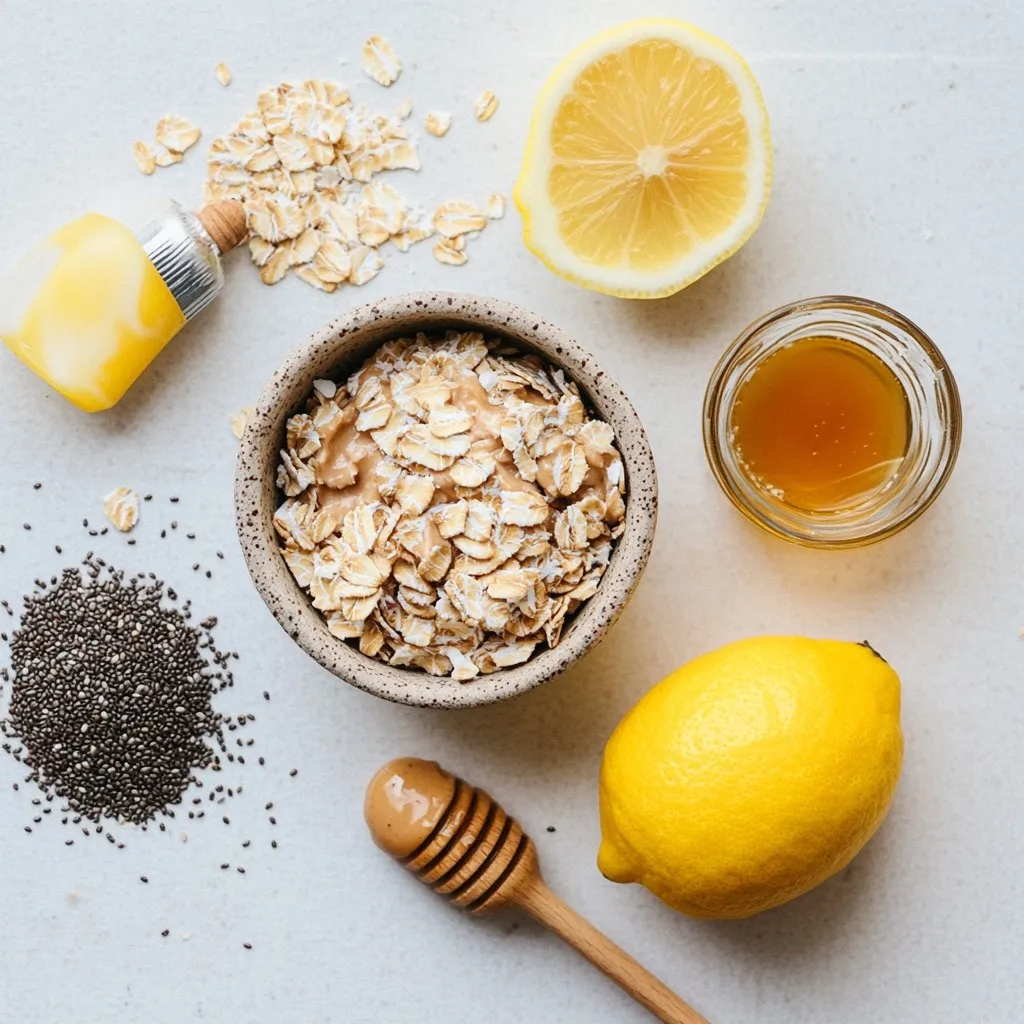
To make Lemon Coconut Energy Balls, you need simple, healthy ingredients. Here’s what you’ll need:
– 1 cup rolled oats
– 1/2 cup unsweetened shredded coconut
– 1/4 cup almond butter
– 1/4 cup honey or maple syrup
– Zest of 1 lemon
– 2 tablespoons fresh lemon juice
– 1/2 teaspoon vanilla extract
– A pinch of salt
– Optional: 2 tablespoons chia seeds or flaxseeds
Each ingredient plays a key role in flavor and texture. The rolled oats form the base and provide energy. Shredded coconut adds a tropical taste and chewiness. Almond butter gives creaminess and healthy fats. Honey or maple syrup sweetens the mix and binds it together.
Lemon zest and juice bring freshness and a zesty kick. Vanilla extract enhances the overall flavor, while salt balances the sweetness. If you want a nutrition boost, add chia or flaxseeds. These tiny seeds pack a punch of omega-3s and fiber.
This combination creates a tasty snack that’s easy to make. Now that you have your ingredients, you can start creating these energy balls!
Step-by-Step Instructions
Mixing the Base
– In a large bowl, combine 1 cup of rolled oats and 1/2 cup of unsweetened shredded coconut. This is the heart of your energy balls.
– Next, add 1/4 cup of almond butter and 1/4 cup of honey or maple syrup. This will give your mixture a sweet and creamy base.
Adding Flavor
– Now, incorporate the zest of 1 lemon and 2 tablespoons of fresh lemon juice. This will make your energy balls bright and zesty.
– Mix in 1/2 teaspoon of vanilla extract and a pinch of salt. These flavors will enhance the taste.
– For an extra boost, you can include 2 tablespoons of chia seeds or flaxseeds. This adds fiber and healthy fats.
Forming the Energy Balls
– Use a sturdy spatula or your hands to mix all the ingredients thoroughly. The mixture should feel sticky but moldable.
– Take small amounts of this mixture, about 1 inch in diameter, and roll them gently between your palms until smooth. Aim for uniform size for even texture.
– Arrange the shaped energy balls on a lined baking tray. This prevents them from sticking.
Chilling the Balls
– Transfer the tray to the refrigerator and chill for at least 30 minutes. This helps the energy balls firm up nicely.
– After chilling, your tasty bites are ready for snacking or taking on the go!
Tips & Tricks
Achieving the Right Texture
To get the perfect texture, your mix should be sticky yet moldable. If it feels too dry, add a bit more almond butter or honey. If it’s too wet, add a little more oats or coconut. Adjust the sweetness to your taste. You can add more honey or use less, depending on how sweet you like it.
Extra Nutrition Boosts
You can make these energy balls even better! Try adding nuts for crunch or protein powder for extra energy. Chia seeds or flaxseeds are great optional add-ins too. They boost fiber and omega-3s without changing the taste much.
Serving Suggestions
Pair these energy balls with a refreshing drink, like green tea or coconut water. They also taste great with fresh fruit. Try them with slices of apple or some berries for a fun snack!
Pro Tips
- Adjust Sweetness: If you prefer a less sweet energy ball, reduce the amount of honey or maple syrup. You can also substitute with a sugar-free sweetener of your choice.
- Experiment with Flavors: Try adding different flavor extracts like almond or coconut for a unique twist, or mix in spices such as cinnamon or nutmeg for added warmth.
- Storage Tips: Keep the energy balls in an airtight container in the fridge to maintain freshness. You can also freeze them for up to 3 months for longer storage.
- Rolling Technique: To make rolling easier, wet your hands slightly before shaping the balls. This prevents the mixture from sticking to your palms.
Variations
Flavor Variations
You can create fun twists on the Lemon Coconut Energy Balls. Here are two ideas:
– Coconut Lime Energy Balls: Replace the lemon zest and juice with lime. The lime gives a fresh, zesty kick. Just follow the same steps in the recipe.
– Chocolate Chip Lemon Coconut Balls: Add mini chocolate chips to the original mix. The chocolate pairs well with the lemon flavor. Use about 1/4 cup of chips for a sweet surprise.
Dietary Substitutions
Many people have dietary needs. Here are ways to make these energy balls fit your diet:
– Nut-free options: If you can’t use almond butter, try sunflower seed butter. It has a similar texture and taste without nuts.
– Vegan alternatives for honey: Swap honey for maple syrup or agave nectar. Both options work well and keep it plant-based.
Ingredient Swaps
Sometimes, you might want to change up the ingredients. Here are simple swaps:
– Using peanut butter instead of almond butter: Peanut butter adds a different flavor but still keeps the balls tasty.
– Other sweetener options available: You can use coconut sugar, date syrup, or stevia as sweeteners. Each will give a unique flavor while keeping sweetness in check.
Feel free to experiment with these variations and substitutions. They help you make these energy balls your own!
Storage Info
Best Practices for Storage
To keep your Lemon Coconut Energy Balls fresh, always use airtight containers. This helps prevent moisture and keeps them from drying out. Store them in the fridge for up to one week. You can grab one whenever you need a quick snack!
Freezing Energy Balls
If you want to save some for later, freezing works great. Place the energy balls in a single layer on a tray. Once they freeze, transfer them to a freezer-safe bag or container. They can last up to three months in the freezer. When you want to eat them, just take out what you need. Let them thaw in the fridge or at room temperature for about 15 minutes.
Monitoring Freshness
Check your energy balls for signs of spoilage. If they smell off or have an unusual texture, it’s best to toss them. For the best taste, eat them within the first week. Enjoy them fresh for the best flavor and texture!
FAQs
How long do Lemon Coconut Energy Balls last?
Lemon Coconut Energy Balls can last up to one week in the fridge. Store them in an airtight container. They will stay fresh and tasty. If you want them to last longer, you can freeze them. They can last up to three months in the freezer.
Can I make these energy balls gluten-free?
Yes, you can easily make these energy balls gluten-free. Just use certified gluten-free oats. This way, you ensure no gluten touches your snack. Most brands offer gluten-free oats, so finding them is simple.
What can I substitute for almond butter?
If you need a substitute for almond butter, try peanut butter or sunflower seed butter. Both options work well. Each will give a different flavor, but they will still taste great. Just make sure the substitute is smooth and creamy.
Are these energy balls suitable for kids?
Absolutely! Lemon Coconut Energy Balls are perfect for kids. They are healthy and fun to eat. Kids love the sweet, tangy flavor. Plus, they can help you make them. It’s a great way to get them involved in the kitchen.
How can I make them sugar-free?
To make these energy balls sugar-free, use a sugar-free syrup. You can use monk fruit syrup or stevia. They add sweetness without sugar. Just remember to check the measurements, as they can vary from honey or maple syrup.
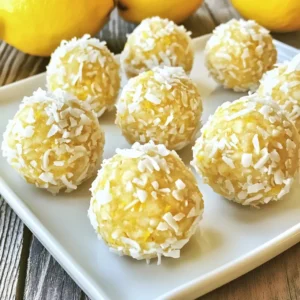
Making Lemon Coconut Energy Balls is simple and fun. We learned about the key ingredients, like rolled oats and almond butter. Then, I showed you how to mix, shape, and chill them for the best taste. You can even try different flavors or substitutes to fit your needs.
Energy balls are a great snack for everyone. They are healthy and easy to store. I hope you enjoy making these tasty bites as much as I do. Now, grab the ingredients and start your tasty adventur
Lemon Coconut Energy Balls
Ingredients
- 1 cup rolled oats
- 0.5 cup unsweetened shredded coconut
- 0.25 cup almond butter
- 0.25 cup honey or maple syrup
- 1 piece zest of lemon
- 2 tablespoons fresh lemon juice
- 0.5 teaspoon vanilla extract
- a pinch salt
- 2 tablespoons chia seeds or flaxseeds (optional)
Instructions
- In a spacious mixing bowl, combine the rolled oats and shredded coconut to create a base.
- Add the almond butter and honey (or maple syrup) to the bowl. Incorporate the zest of 1 lemon and the fresh lemon juice, which will infuse the mixture with bright flavor.
- Pour in the vanilla extract and add a pinch of salt to enhance the overall taste. If you're opting for added nutrition, sprinkle in the chia seeds or flaxseeds at this point.
- Using a sturdy spatula or your hands, mix all the ingredients thoroughly until the mixture is fully integrated. It should feel sticky yet moldable.
- To form the energy balls, take small amounts of the mixture—about 1 inch in diameter—and roll them gently between your palms until smooth. Aim for uniformity in size for even texture.
- Arrange the completed energy balls on a baking tray lined with parchment paper to prevent sticking. You should yield approximately 12-15 energy balls, depending on your rolling size.
- Once all the mixture is shaped into balls, transfer the tray to the refrigerator and chill for at least 30 minutes. This will allow the energy balls to firm up for the best texture.
- After they have set, these delightful bites are ready for snacking or on-the-go energy!


![- 2 cans (15 oz each) chickpeas, thoroughly drained and rinsed - 2 tablespoons extra virgin olive oil - 1 tablespoon smoked paprika - 1 teaspoon cayenne pepper - 1 teaspoon garlic powder - 1 teaspoon onion powder - 1 teaspoon ground cumin - Salt, to taste - Fresh cilantro for garnish (optional) Chickpeas are the star of this recipe. They are high in protein and fiber, making them a healthy choice. Each can of chickpeas gives you a great base for a crispy snack. Now, let's break down the other ingredients. Extra virgin olive oil adds healthy fats, helping the spices stick. Smoked paprika gives a deep flavor, while cayenne pepper adds heat. Garlic and onion powders give a nice aroma and a touch of sweetness. Ground cumin brings an earthy taste that balances the spices. You can adjust the salt to your liking. Fresh cilantro is optional but adds a fresh touch. Chickpeas are packed with nutrients. One serving has about 120 calories. They provide around 6 grams of protein and 2 grams of fat. You also get about 20 grams of carbs and 5 grams of fiber. Chickpeas support heart health, help with digestion, and can aid in weight management. They are a smart choice for a snack or a meal. They fit well into many diets, too! For the full recipe, check out [Full Recipe]. Start by preheating your oven to 400°F (200°C). This step is key for making the chickpeas crispy. Use a baking sheet lined with parchment paper. This helps with easy cleanup and ensures the chickpeas do not stick. Next, rinse the chickpeas under cold water. Drain them well, then pat them dry with a clean paper towel. This step is very important. Removing moisture makes the chickpeas crispier when roasting. In a large bowl, mix the drained chickpeas with olive oil and spices. Use smoked paprika, cayenne pepper, garlic powder, onion powder, ground cumin, and a pinch of salt. Toss gently so every chickpea gets coated in the spice mix. Even coverage is vital for that great flavor. Spread the seasoned chickpeas on the baking sheet in a single layer. This helps them roast evenly. Place the sheet in the oven and roast for about 25-30 minutes. Shake the pan halfway through to promote even cooking. Watch them closely near the end to avoid burning. Once they are golden and crispy, take the chickpeas out. Let them cool on the baking sheet for a few minutes. They will continue to crisp up as they cool. For a fresh touch, sprinkle chopped cilantro on top before serving. Enjoy them as a snack or use them as a topping on salads. For the full recipe, check the ingredient list above. To make your spicy roasted chickpeas super crispy, dry them well. After draining, rinse them under cold water. Then, pat them dry with a paper towel. This step is vital! Any leftover moisture will make them soggy. Spread the chickpeas in a single layer on your baking sheet. This helps them cook evenly. If they overlap, they won’t get as crisp. Adjusting the spice levels is easy. If you want more heat, add more cayenne pepper. For less spice, reduce the amount or skip it. You can also experiment with other spices! Try adding chili powder or even a dash of curry powder for a fun twist. Taste the mix before roasting to find your perfect balance. Store any leftover roasted chickpeas in an airtight container. Keep them at room temperature for up to three days. If they get soft, re-crisp them in the oven for a few minutes. This restores their crunch. Enjoy them as a snack or toss them on salads. For the full recipe, check out the original source. {{image_4}} You can change the flavor of spicy roasted chickpeas easily. Try adding different spices or herbs. Here are some great ideas: - Cumin: Boost the earthy flavor. - Chili powder: Add more heat. - Turmeric: For a warm, golden color. - Herbs: Experiment with thyme or rosemary for fresh notes. For a sweet twist, mix in a little cinnamon and honey. Toss your roasted chickpeas with a bit of honey after cooking. The sweetness pairs well with spice. It creates a tasty snack that balances flavors. Spicy roasted chickpeas work well with many dishes. They are great as a snack on their own. You can also add them to salads or grain bowls for extra crunch. - Salads: Sprinkle them over leafy greens. They add texture and flavor. - Bowls: Use them in grain bowls for a hearty meal. - Snacking: Serve them in a bowl at parties for a fun treat. Feel free to mix them into soups for added richness. The crispy texture enhances warm dishes too. Get creative and enjoy these versatile little gems! For the full recipe, check the earlier section. To keep your spicy roasted chickpeas fresh, place them in an airtight container. This helps lock in their crunch. You can store them on the counter for up to three days. For longer storage, try the fridge, where they can last up to a week. However, they might lose some crispness in the fridge. If you want to save them for later, consider freezing them. In the freezer, they can last for about three months. Just remember to let them cool completely before storing. When you’re ready to enjoy leftovers, the best way to reheat them is in the oven. Preheat your oven to 375°F (190°C). Spread the chickpeas on a baking sheet in a single layer. Heat them for about 10 minutes. This method helps restore their crunch and flavor. You can also use an air fryer for quick reheating. Set it to 350°F (175°C) and heat for five to seven minutes. Both methods keep your chickpeas crispy and tasty! If you can't use chickpeas, try these options: - Canned white beans: They are creamy and mild in taste. - Edamame: These young soybeans add a nice crunch. - Lentils: Cooked lentils can work, but they won’t be as crunchy. - Roasted pumpkin seeds: They give a great crunch and are nutty. These alternatives are great for those with dietary restrictions or different tastes. Yes, you can easily adapt this recipe for an air fryer. Here’s how: - Preheat your air fryer to 400°F (200°C). - Follow the same steps to season your chickpeas. - Place them in the air fryer basket in a single layer. - Cook for about 15 to 20 minutes, shaking the basket halfway. This method gives you extra crispiness while saving time. The spice level of spicy roasted chickpeas is adjustable. The cayenne pepper in the recipe gives a kick, but you can change it. - For mild: Use less or skip the cayenne. - For extra spicy: Add more cayenne or include chili powder. Taste as you go to find your perfect heat! Yes, spicy roasted chickpeas are naturally gluten-free. Chickpeas do not contain gluten, making them a safe choice for those with gluten sensitivities. Always check your spice labels to ensure no gluten-containing ingredients are added. Enjoy these snacks worry-free! For the full recipe, visit the Spicy Roasted Chickpeas section. This blog post covered how to make spicy roasted chickpeas. We went through the ingredients, detailed the steps, and shared tips for perfecting your snack. Chickpeas are healthy, tasty, and easy to customize. You can adjust spices or enjoy them sweet. Whether you serve them in salads or as a snack, there are many ways to enjoy them. With proper storage, your leftovers will stay fresh. Get ready to impress with this simple recipe!](https://goldendishy.com/wp-content/uploads/2025/07/52a5824a-88a4-4b76-bbe8-61087731f54f-768x768.webp)