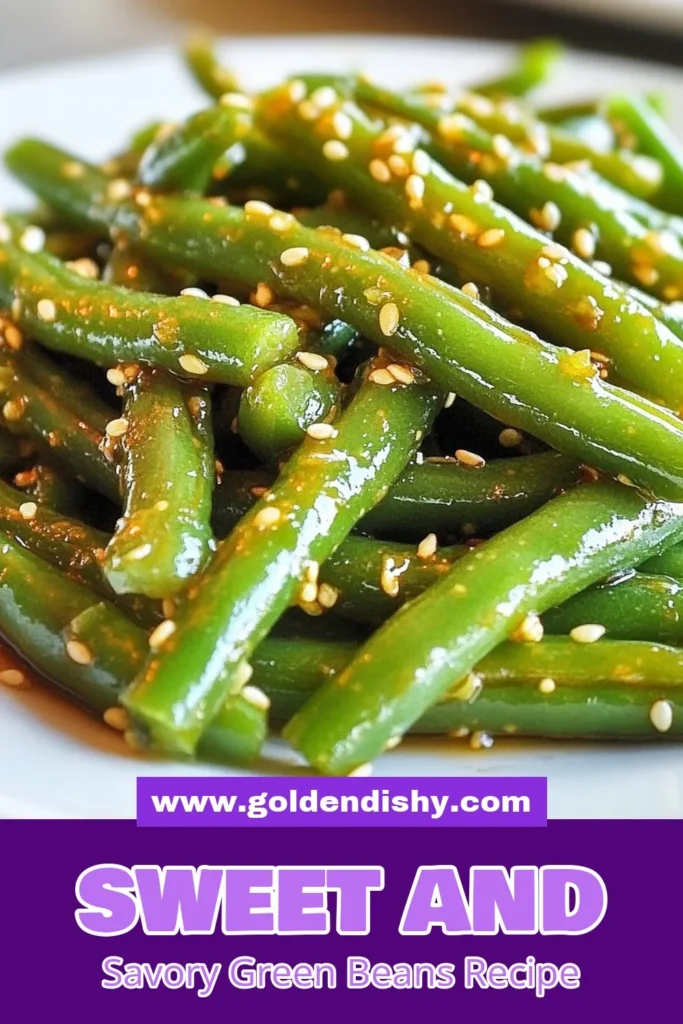
Honey Garlic Green Beans Savory Delight in Minutes
Are you ready to whip up a dish that tastes amazing in minutes? Honey Garlic Green Beans are your answer! This simple recipe combines sweet honey and savory garlic for a delightful side. With just a few easy steps and basic ingredients, you’ll impress everyone at your table. Let’s dive into how you can make this flavorful dish. Your taste buds will thank you!
Why I Love This Recipe
- Fresh & Crisp: The blanched green beans retain a vibrant green color and a satisfying crunch, making each bite refreshing and delightful.
- Sweet & Savory Harmony: The combination of honey and garlic creates a perfect balance of sweetness and umami, elevating the classic green bean dish to new heights.
- Quick & Easy: With just a few simple steps, this recipe can be prepared in under 20 minutes, making it a perfect side dish for busy weeknights.
- Customizable Heat: Add red pepper flakes for a touch of spice or keep it mild; the recipe allows you to tailor the flavors to your liking.
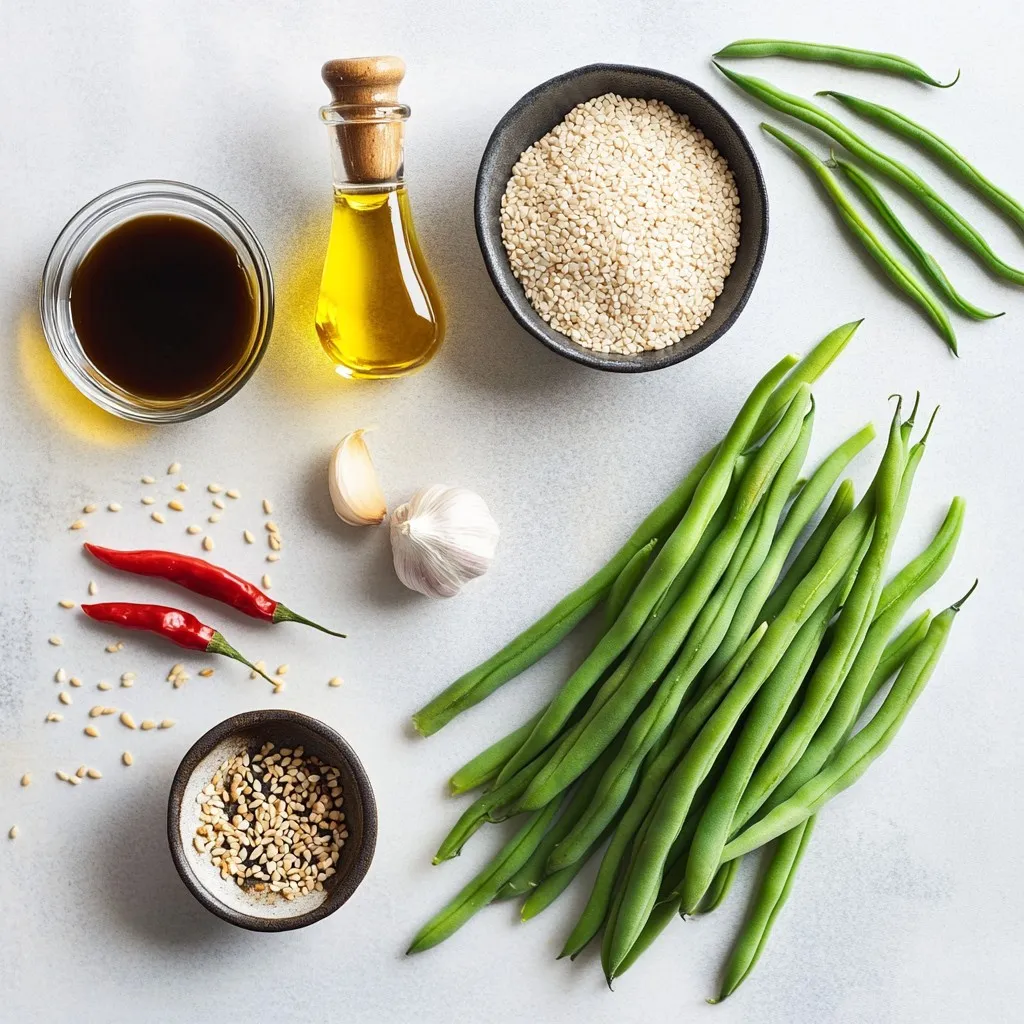
Ingredients
List of Ingredients
– 1 pound fresh green beans, trimmed and ends removed
– 2 tablespoons honey, preferably raw for more flavor
– 3 cloves garlic, finely minced
– 2 tablespoons low-sodium soy sauce
– 1 tablespoon olive oil
– ½ teaspoon sesame oil for nutty flavor
– ¼ teaspoon red pepper flakes (optional, for a hint of heat)
– Salt and freshly ground black pepper to taste
– Toasted sesame seeds for garnish
Key Ingredient Benefits
– Green Beans: These provide fiber, vitamins A and C, and minerals like manganese. They help support heart health and digestion.
– Honey: Raw honey has antioxidants that can boost your immune system. It adds a natural sweetness that complements the garlic.
– Garlic: This adds flavor and has health benefits. Garlic can help lower blood pressure and improve cholesterol levels.
– Low-Sodium Soy Sauce: This adds umami flavor without too much salt, making it great for seasoning.
– Olive Oil: A heart-healthy fat, it helps to absorb nutrients from the veggies.
– Sesame Oil: This oil enhances the dish with a rich, nutty flavor, making it even more appealing.
– Red Pepper Flakes: They add a spicy kick, enhancing the flavor profile of the dish.
Substitutions for Ingredients
– Green Beans: You can use snap peas or asparagus for a different texture.
– Honey: Maple syrup works well for a vegan option, providing a similar sweetness.
– Garlic: Garlic powder can be used, though fresh garlic is best for flavor.
– Soy Sauce: Tamari is a gluten-free alternative that offers the same salty flavor.
– Olive Oil: Avocado oil or vegetable oil can be used if you prefer.
– Sesame Oil: If unavailable, you can skip it or use a little extra olive oil.
– Red Pepper Flakes: If you prefer no heat, simply omit them.
Step-by-Step Instructions
Preparation Steps
1. Rinse the green beans: Start by rinsing 1 pound of fresh green beans under cold water. This helps remove any dirt.
2. Trim the ends: Use kitchen scissors or a knife to remove both ends of the beans. This step is simple but makes a big difference.
3. Prepare an ice bath: Fill a bowl with cold water and ice cubes. This will keep your beans bright and crisp.
4. Blanch the green beans: Boil a pot of water. Once it’s boiling, add the beans and cook for 3-4 minutes. They should turn a vibrant green.
5. Ice bath plunge: Drain the beans and quickly place them in the ice bath. This stops the cooking and keeps them crunchy.
Cooking Steps
1. Make the sauce: In a small bowl, mix 2 tablespoons of honey, 3 finely minced garlic cloves, 2 tablespoons low-sodium soy sauce, 1 tablespoon olive oil, and ½ teaspoon sesame oil. Add ¼ teaspoon of red pepper flakes if you want some heat. Whisk until smooth.
2. Heat the skillet: Place a large skillet over medium heat. Once hot, add the blanched green beans. Sauté for 2-3 minutes until warmed through.
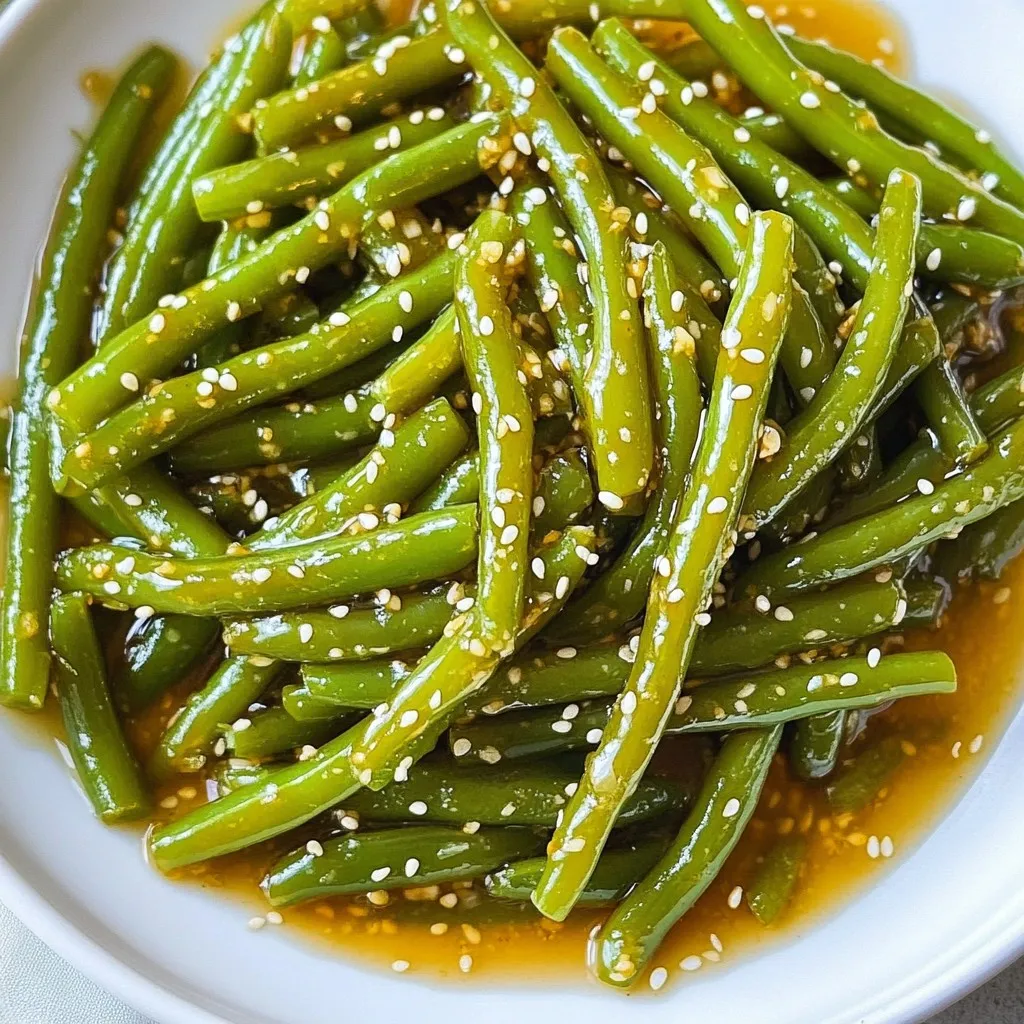
3. Add the sauce: Pour the honey garlic sauce over the warm beans. Toss gently to coat them evenly. Cook for another 3-4 minutes to let the sauce thicken.
4. Season to taste: Sprinkle salt and freshly ground black pepper over the beans. Taste and adjust as needed.
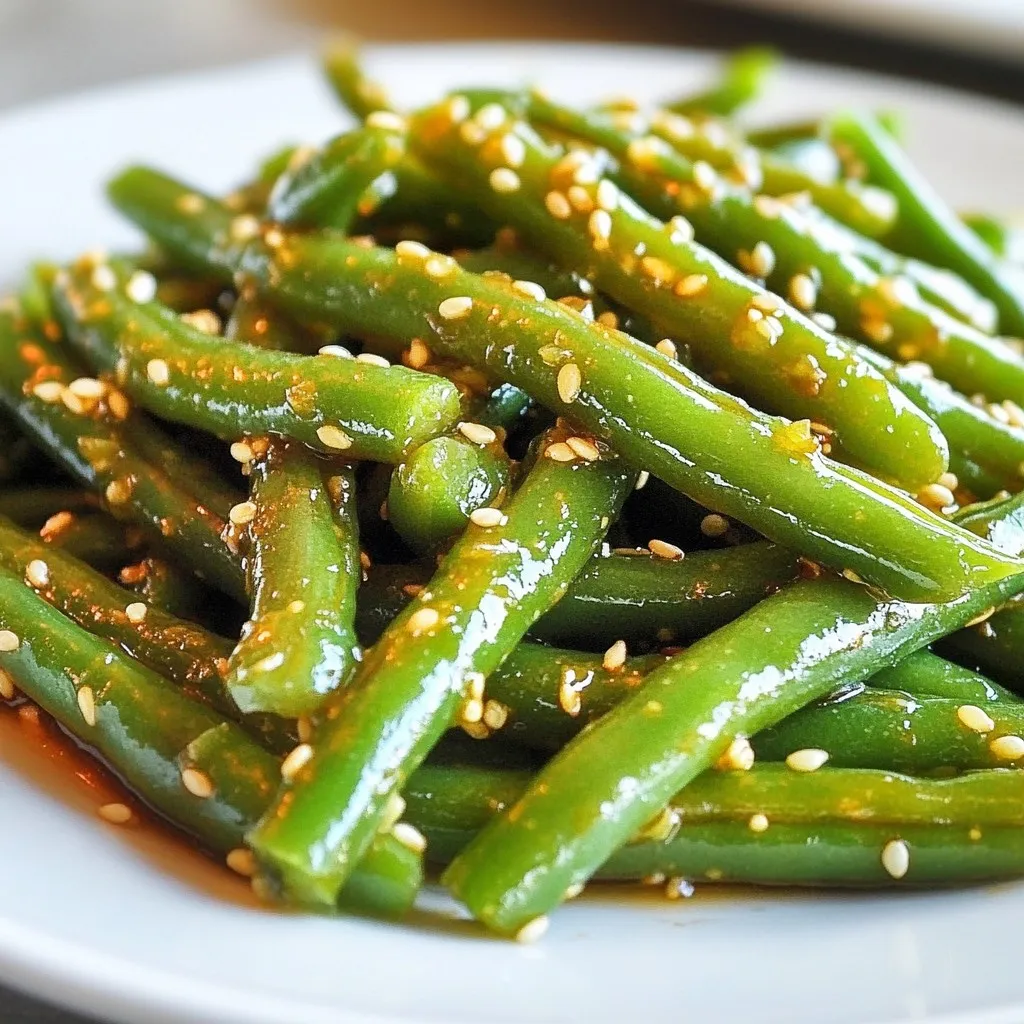
5. Serve: Remove the skillet from heat. Transfer the honey garlic green beans to a serving platter.
Serving Suggestions
– Garnish: Sprinkle toasted sesame seeds on top for crunch and visual appeal.
– Presentation: Use a white serving dish to highlight the colors of the beans and sauce.
– Pairing: These green beans pair well with grilled chicken, fish, or tofu for a complete meal.
Enjoy this dish fresh for the best flavor and texture!
Tips & Tricks
How to Enhance Flavor
To make your honey garlic green beans pop, use fresh ingredients. Fresh green beans taste better and have more crunch. Raw honey has a richer flavor than processed honey. For an extra kick, add more red pepper flakes. You can also drizzle a bit of lemon juice before serving for brightness.
Best Cooking Techniques
Blanching the green beans helps keep their bright color. This method also makes them tender yet crisp. After blanching, a quick sauté in a hot skillet adds a nice gloss. Use medium heat to prevent burning the garlic. Toss the beans gently with the sauce to coat evenly. This ensures every bite is flavorful.
Common Mistakes to Avoid
Avoid overcooking the green beans. They should stay bright green and crisp. If you skip the ice bath, the beans may lose their vibrant color. Don’t add too much salt until the end. Soy sauce already brings saltiness, so taste first. Lastly, don’t rush the sauce; let it thicken a bit for better flavor.
Pro Tips
- Choose Fresh Beans: Always select crisp, vibrant green beans for the best flavor and texture. The fresher the beans, the more delightful the dish will be!
- Perfectly Blanch: Make sure to plunge the beans into ice water immediately after boiling to lock in that bright green color and crispness.
- Customize the Sauce: Feel free to experiment with additional seasonings or spices in the honey garlic sauce to suit your taste. A splash of rice vinegar can add a nice tang!
- Serving Suggestions: Pair these green beans with grilled chicken or fish for a complete meal, or serve them as a vibrant side dish at your next gathering.
Variations
Adding Protein Options
You can easily add protein to your honey garlic green beans. Chicken, shrimp, or tofu work well. For chicken, slice it into thin strips. Cook it in the skillet before adding green beans. For shrimp, just toss them in with the beans. Tofu can be cubed and sautéed until golden before mixing. This adds heartiness to the dish.
Different Flavor Profiles
Switching flavors can make this dish new each time. Try adding ginger for a spicy kick. You can also use lime juice instead of soy sauce for a zesty taste. Adding a splash of balsamic vinegar can give it a sweet tang. Experimenting with flavors keeps your meals exciting and fresh.
Seasonal Ingredient Swaps
Using seasonal ingredients enhances flavor and freshness. In spring, add asparagus for a crunchy texture. In summer, mix in cherry tomatoes for a burst of sweetness. During fall, you can swap green beans for Brussels sprouts. Each season offers unique tastes that can elevate your honey garlic green beans.
Storage Info
How to Store Leftovers
Once you finish your meal, let the honey garlic green beans cool down. Place them in an airtight container. Store the container in the fridge. They will keep well for about 3 to 4 days. If you want to enjoy your dish later, make sure to seal it tightly. This helps retain the flavor and texture.
Reheating Instructions
When you’re ready to eat your leftovers, you have a few options. The best method is to use a skillet. Heat it over medium heat, then add the beans. Stir them gently until they are warm. You can also use a microwave. Place the beans in a bowl and cover with a microwave-safe lid. Heat for about 1 to 2 minutes. Check if they are warm enough, then enjoy!
Freezing Tips
If you want to keep your honey garlic green beans longer, freezing is a great option. First, cool the beans completely. Then, place them in a freezer-safe bag. Make sure to remove as much air as possible. Label the bag with the date. These beans can last for up to 3 months in the freezer. When you are ready to eat them, thaw the beans in the fridge overnight. Reheat them as mentioned earlier for the best taste.
FAQs
What to serve with Honey Garlic Green Beans?
You can pair honey garlic green beans with many dishes. They work well with grilled chicken or fish. They also complement rice or quinoa nicely. For a complete meal, serve them with a protein and a starch. The sweet and savory flavor of the beans adds balance to your plate.
Can I make this recipe vegan?
Yes, you can easily make this recipe vegan. Simply replace honey with maple syrup. This swap keeps the sweet flavor intact. The rest of the ingredients are already plant-based. Use low-sodium soy sauce and olive oil as they are. This way, you can enjoy the same great taste without animal products.
How long do honey garlic green beans last in the fridge?
Honey garlic green beans can last for about 3 to 5 days in the fridge. Store them in an airtight container to keep them fresh. When you reheat, give them a quick sauté to regain their crispness. If they start to lose color or texture, it’s time to toss them.
In this article, we explored the ingredients, preparation, and serving ideas for honey garlic green beans. We discussed the benefits of each ingredient and offered substitutions. You learned cooking steps and tips for enhancing flavors. We also shared variations and storage info to keep your dish fresh.
For great meals, remember these key points. Enjoy your cooking and have fun with flavor

Honey Garlic Green Beans Delight
Ingredients
- 1 pound fresh green beans, trimmed and ends removed
- 2 tablespoons honey, preferably raw for more flavor
- 3 cloves garlic, finely minced
- 2 tablespoons low-sodium soy sauce
- 1 tablespoon olive oil
- ½ teaspoon sesame oil for nutty flavor
- ¼ teaspoon red pepper flakes (optional, for a hint of heat)
- to taste Salt and freshly ground black pepper
- to taste Toasted sesame seeds for garnish
Instructions
- Begin by rinsing the green beans under cold water and trimming both ends. Prepare an ice bath by filling a bowl with cold water and ice cubes. Blanch the green beans in a pot of vigorously boiling water for about 3-4 minutes until they turn vibrant green and are just tender but still crisp. Once done, immediately drain and plunge the beans into the ice bath to stop the cooking process and preserve their bright color.
- In a separate small bowl, combine the honey, finely minced garlic, low-sodium soy sauce, olive oil, sesame oil, and red pepper flakes (if using). Whisk these ingredients together until they are well blended into a smooth sauce.
- Heat a large skillet over medium heat, then add the blanched green beans, sautéing them for about 2-3 minutes until they are warmed through and start to glisten.
- Carefully pour the prepared honey garlic sauce over the green beans, tossing them gently to ensure that they are evenly coated. Continue to cook for an additional 3-4 minutes, allowing the sauce to thicken slightly while the beans absorb all the tantalizing flavors.
- Season the mixture generously with salt and freshly ground black pepper to taste, ensuring balance in flavors.
- Once cooked to your satisfaction, remove the skillet from the heat and transfer the delectable honey garlic green beans onto a serving platter. For a delightful crunch and an appealing visual finish, sprinkle toasted sesame seeds generously over the top.
![- 2 ripe peaches, halved and pitted - 1 tablespoon extra virgin olive oil - Kosher salt and freshly cracked black pepper, to taste - 4 cups fresh arugula or a mix of leafy greens - 8 oz creamy burrata cheese - ¼ cup toasted almonds, roughly chopped - ¼ cup balsamic glaze - Fresh basil leaves, for garnish When you make this Grilled Peach Burrata Salad, you need just a few key ingredients. Each one plays a big role in the flavor and texture. The peaches bring sweetness, while the burrata adds creaminess. The arugula gives a nice peppery bite. The toasted almonds add crunch, and the balsamic glaze ties everything together with a sweet tang. You can even add fresh basil leaves for a pop of color and taste. I love how simple ingredients can create such a beautiful dish. - Calories: Approximately 300 per serving - Fats: 22g - Protein: 8g - Carbohydrates: 20g This salad is not just tasty; it also offers health benefits. Peaches are low in calories and high in vitamins A and C. They support eye health and boost your immune system. Arugula is rich in vitamins and minerals. It helps with digestion and adds fiber. Burrata is creamy and delicious, providing protein and healthy fats. Almonds are good for your heart and give you energy. Overall, this dish is a great choice for a healthy meal or snack. You can enjoy this salad while knowing it’s good for you! For the complete recipe, check out the [Full Recipe]. - Preheat grill or grill pan to medium-high heat. - Brush peach halves with olive oil, salt, and pepper. To start, I heat my grill or grill pan to medium-high heat. This helps the peaches caramelize nicely. While my grill heats up, I prepare the peaches. I cut them in half and remove the pit. Then, I brush the cut sides with olive oil. A sprinkle of salt and pepper adds a touch of flavor and enhances the natural sweetness of the peaches. - Grill peaches cut side down for 4-5 minutes. - Remove and set aside to cool. Next, I place the peaches cut side down on the grill. I let them cook for 4 to 5 minutes. I look for those beautiful grill marks, which mean they are ready. Once grilled, I carefully remove them and set them aside to cool. The grilling process brings out the peaches' natural sugars, making them even sweeter. - Create a base of arugula in the serving bowl. - Tear and place burrata on greens. - Slice and arrange peaches around burrata. - Add almonds and drizzle with balsamic glaze. - Garnish with basil leaves. Now for the fun part—assembly! I take a large serving bowl and create a bright base of arugula. The fresh greens add a peppery bite. I then gently tear the burrata cheese into pieces, placing them on top of the greens. The creamy texture of burrata pairs perfectly with the grilled peaches. Next, I slice the peaches into wedges and artfully arrange them around the burrata. I love the contrast of the warm peaches and the cool cheese. I then scatter toasted almonds over the salad. They add a nice crunch to each bite. Finally, I drizzle balsamic glaze all over the salad. This adds a sweet and tangy touch that ties all the flavors together. I finish with fresh basil leaves for color and aroma. This salad is a true delight, and you can find the Full Recipe for all the details above! To achieve perfect grill marks on your peaches, start with a clean grill. Preheat it to medium-high heat. Brush your peach halves with olive oil. This helps them avoid sticking and gives them a nice sear. Place the peaches cut side down. Let them cook for about 4-5 minutes without moving them. This ensures nice grill lines and caramelization. If you don’t have a grill, you can use a griddle or stovetop pan. Heat it well and follow the same oiling and cooking steps. You can still get great flavor without a grill! To boost the flavor of your grilled peaches, try adding some spices. A pinch of cinnamon can add warmth. Fresh thyme or rosemary adds a nice herbal touch. You can sprinkle these on before grilling. If you need an alternative to balsamic glaze, try honey or maple syrup. Drizzle these over the salad for a sweet touch. A splash of lemon juice can also add brightness to the dish. For a beautiful display, serve the salad on a large, shallow platter. This lets the colors pop. You can also use individual bowls for a personal touch. Drizzle extra balsamic glaze on the plate for added flair. Garnishing is key! Use fresh basil leaves to add color and aroma. Consider adding edible flowers for an extra visual boost. These small touches make your salad stand out and look professional. {{image_4}} You can change the salad by adding protein. Grilled chicken adds a nice, savory touch. Shrimp also works well, bringing a sweet flavor. If you want a plant-based option, try tofu. For cheese, you can swap burrata for feta. Feta gives a nice salty kick. Goat cheese is another great choice. It brings creaminess and a tangy flavor. You can also switch up the dressing. A honey vinaigrette adds sweetness and pairs well with peaches. A citrus dressing, made with lemon or lime, brightens the dish and adds zest. If you want to make this salad vegan, skip the cheese. You can use a vegan cheese option or leave it out. A simple olive oil and vinegar mix works well too. In the summer, use fresh peaches. But when peaches are out of season, try nectarines. They have a similar taste and texture. Plums are another great choice, adding a sweet and juicy bite. As the seasons change, adapt your salad to use what’s fresh. In fall, add roasted squash for warmth. In winter, try pomegranate seeds for a burst of color and flavor. Each season offers new ways to enjoy this salad. To keep your grilled peach burrata salad fresh, store leftovers in a sealed container. This helps prevent drying and keeps flavors strong. You can store it in the fridge for up to three days. The peaches will soften, but they still taste great. The burrata may lose some creaminess but remains delicious. I do not recommend freezing the salad. The texture of peaches and burrata changes when frozen. If you must freeze, store only the grilled peaches. Wrap them in plastic and place in an airtight bag. When ready to use, thaw them in the fridge overnight. To refresh your salad, take it out of the fridge and let it sit for a few minutes. This helps bring back the flavors. If the greens look wilted, consider adding fresh arugula. You can also drizzle a bit more balsamic glaze for added flavor. Gently mix the salad to combine the ingredients, then serve. This will make it look and taste great again. You can prep the salad in parts. Grill the peaches and store them in the fridge. You can also wash and dry the greens. Keep the burrata cheese wrapped until you're ready to serve. Assemble everything just before you eat. This keeps the salad fresh and tasty. If you do not have burrata, try using fresh mozzarella. It has a similar creamy texture. Goat cheese is another good choice. It adds a tangy flavor that pairs well with peaches. Yes, this salad is naturally gluten-free. All the ingredients listed are free from gluten. Just make sure any balsamic glaze you use is gluten-free. Some brands may add gluten, so check the label. Fresh basil is a great choice for this salad. It adds a sweet and aromatic touch. Mint is another option that gives a refreshing flavor. You can also try arugula for a spicy kick. Use these herbs to boost the taste of your dish. This blog post detailed a delicious grilled peach and burrata salad. We covered the ingredients, from juicy peaches to creamy burrata and flavorful arugula. You learned how to prepare, grill, and assemble this fresh dish easily. We also shared tips for grilling and creative variations. Remember, you can adapt this salad for every season, and it stores well for later use. Enjoy experimenting with flavors and presentations to make it your own. This salad is sure to impress at any meal!](https://goldendishy.com/wp-content/uploads/2025/06/bc92e29d-8312-48fc-8428-fe4367025cca-768x768.webp)