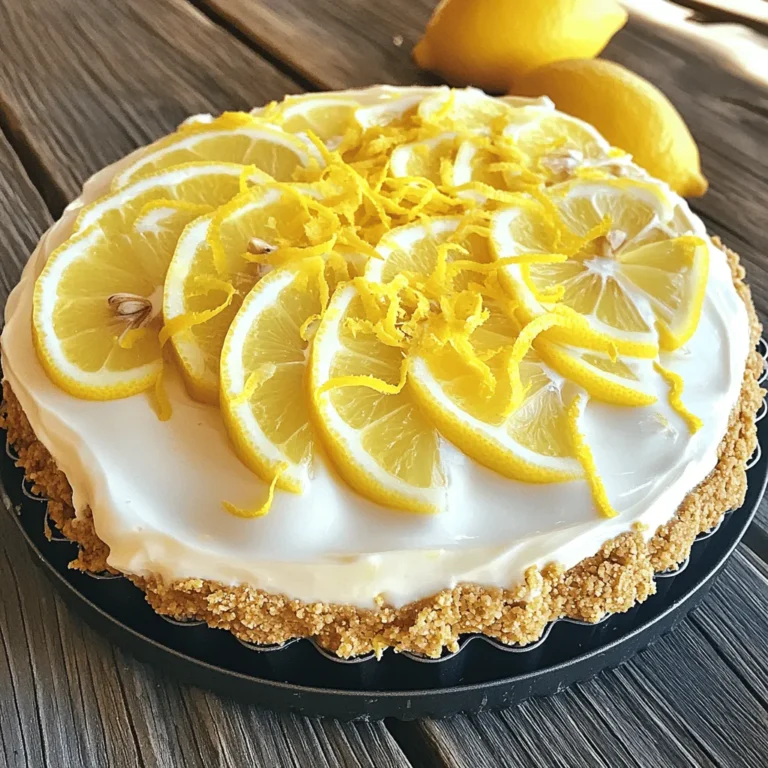
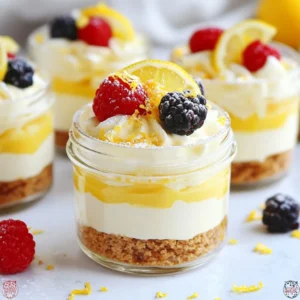
No-Bake Lemon Cheesecake Jars Delightful and Simple

- 8 oz cream cheese, softened to room temperature - 1 cup powdered sugar - 1/2 cup sour cream - 1/4 cup freshly squeezed lemon juice - Zest of 1 large lemon - 1 cup heavy whipping cream The main ingredients make this cheesecake creamy and bright. Cream cheese gives the filling its rich base. Powdered sugar adds sweetness without grittiness. Sour cream helps to balance the sweetness and adds a tangy taste. The fresh lemon juice brings a zesty punch, while the lemon zest adds a fragrant aroma. Finally, the heavy whipping cream creates a light and airy texture. - 1 cup graham crackers, finely crushed - 4 tablespoons unsalted butter, melted - 2 tablespoons granulated sugar For the crust, graham crackers provide a crunchy base. The melted unsalted butter binds the crumbs together. Granulated sugar sweetens the crust slightly, making every bite enjoyable. This crust is easy to make and sets a great foundation for the cheesecake filling. - Fresh seasonal berries - Additional lemon zest Garnishing with fresh seasonal berries adds color and flavor. Berries like strawberries, blueberries, or raspberries contrast the creamy cheesecake. A sprinkle of lemon zest on top enhances the citrus flavor. These garnishes make your jars look appealing and inviting. {{ingredient_image_2}} To begin, gather your ingredients for the crust. You will need: - 1 cup graham crackers, finely crushed - 4 tablespoons unsalted butter, melted - 2 tablespoons granulated sugar In a medium bowl, mix the crushed graham crackers, melted butter, and sugar. Stir until it looks like wet sand. Next, take your serving jars and divide the mixture into them. Press down firmly with your fingers. This creates a nice, compact layer at the bottom. Now, let's move on to the cheesecake filling. You will need: - 8 oz cream cheese, softened to room temperature - 1 cup powdered sugar - 1/2 cup sour cream - 1/4 cup freshly squeezed lemon juice - Zest of 1 large lemon In a large bowl, use an electric mixer to beat the softened cream cheese and powdered sugar. Mix until it is creamy and smooth. Then, add the sour cream, lemon juice, and lemon zest. Keep mixing until all the flavors are blended well. You want that bright lemon taste to shine! Next, we will whip the cream. For this step, you need: - 1 cup heavy whipping cream In a clean bowl, pour in the heavy cream. Use a mixer at medium-high speed to whip until stiff peaks form. This takes about 2-3 minutes. Be careful not to overbeat. Once you have the whipped cream, gently fold it into the cheesecake mixture with a spatula. This keeps the filling light and airy. Now it’s time to assemble your jars. Grab a spoon or a piping bag. Carefully layer the cheesecake filling over the crust in each jar. Fill them to the top. Use a spatula to smooth out the surface. This gives a nice, polished look to your jars. Cover the jars with lids or plastic wrap. Place them in the fridge for at least 2 hours. This time is key for setting and blending the flavors. Your cheesecake will taste even better after chilling! Just before serving, add some fresh seasonal berries on top of each jar. You can also sprinkle lemon zest or add a dollop of whipped cream for extra flair. These final touches make your no-bake lemon cheesecake jars even more delightful! To get a smooth cheesecake, beat the cream cheese well. Start with room temperature cream cheese. Mix it with powdered sugar until creamy. This step is key for a lump-free filling. When making whipped cream, use a clean bowl. Beat the heavy cream until stiff peaks form. This takes about 2-3 minutes. Do not overbeat, or it may turn grainy. Gently fold the whipped cream into the cheesecake mixture. This keeps it light and airy. Using a piping bag makes layering easy. It allows you to control how much filling goes in each jar. If you don't have a piping bag, a spoon works too. Just be careful to layer evenly. Start with the crust, then add the cheesecake. Fill the jars to the top. Smooth the surface with a spatula for a neat look. This adds to the charm of your dessert. Want more lemon flavor? Add extra lemon zest to the filling. You can also try adding a splash of lemon extract. This will give your cheesecake a bright kick. For variations, swap lemon juice for lime juice. You can also mix in other flavors like berry puree. Just remember to keep it balanced to enjoy the lemon's freshness. Pro Tips Chill Your Ingredients: For a smoother cheesecake filling, ensure that your cream cheese is softened at room temperature before mixing. This will help avoid lumps and create a creamy texture. Perfect Whipping: When whipping the heavy cream, stop as soon as you see stiff peaks. Overbeating can result in a grainy texture, which you want to avoid for a light and airy cheesecake. Layering Technique: Use a piping bag to layer the cheesecake filling into the jars for a neat and elegant presentation. This technique also helps ensure even distribution of the filling. Flavor Enhancement: For an extra burst of lemon flavor, consider adding a splash of lemon extract to the cheesecake mixture. It will deepen the citrus notes and elevate the overall taste. {{image_4}} You can change the flavor of your no-bake lemon cheesecake jars easily. Here are some fun ideas: - Berry Cheesecake Jars: Add a layer of mixed berries. You can use strawberries, blueberries, or raspberries. The berries add color and a sweet touch. - Chocolate Lemon Cheesecake: Mix in some melted chocolate with the cream cheese. This twist gives a rich taste that pairs well with lemon. Making your cheesecake jars fit different diets is simple. Here are two options: - Gluten-Free Crust: Use gluten-free graham crackers for the crust. This way, everyone can enjoy the treat without worries. - Vegan Alternatives: Replace cream cheese with a vegan cream cheese. You can also use coconut cream instead of heavy cream. This makes the dessert plant-based. You can change the garnish based on the season. Here are some fun ideas: - Using Different Fruits for Garnish: In spring and summer, add fresh berries. In fall, try diced apples or pears with cinnamon. In winter, pomegranate seeds add a festive touch. These seasonal fruits not only look great but also add unique flavors to your jars. To keep your cheesecake jars fresh, store them in the fridge. Use airtight containers or cover each jar tightly with plastic wrap. This helps prevent the cheesecake from absorbing other smells. Keep the jars on a shelf in the fridge, not on the door. The back of the fridge stays colder. No-bake lemon cheesecake jars last about 3 to 5 days in the fridge. After that, the texture and flavor may change. For the best taste, enjoy them within the first few days. Always check for any signs of spoilage before you dig in. You can freeze no-bake cheesecake jars, but it changes the texture. To freeze, cover each jar tightly with plastic wrap and place it in a freezer bag. They can last up to 2 months in the freezer. When ready to eat, thaw them overnight in the fridge. Enjoy the freshness for a sweet treat anytime! No-bake cheesecakes last about 3 to 5 days in the fridge. Store them in airtight containers. This keeps them fresh and tasty. Always check for any signs of spoilage before enjoying them. Yes, you can make these jars a day ahead. Just assemble them and keep them in the fridge. This lets the flavors blend nicely. It also saves you time when you want to serve them. Yes, chilling is very important. It helps the cheesecake set up properly. Cooling it for at least 2 hours allows the flavors to meld. This extra time makes every bite taste better. You can use Greek yogurt or silken tofu as a substitute for cream cheese. Both options give a creamy texture. Greek yogurt adds a tangy flavor, while silken tofu makes it lighter. Adjust the sweetness if needed, as these alternatives may change the taste. This blog post covered how to make easy no-bake cheesecake jars. We discussed the key ingredients, including cream cheese and fresh lemon. You learned how to prepare the crust and filling. We also went over storage tips and variations for special diets. In conclusion, these cheesecake jars offer a fun treat for everyone. You can customize them any way you like. Enjoy making these delicious jars at home.

WANT TO SAVE THIS RECIPE?

Looking for a quick and tasty dessert? You’ll love these No-Bake Lemon Cheesecake Jars! They are easy to make and perfect for any occasion. With creamy layers of lemon goodness and a crunchy crust, these jars are a delightful treat you can’t resist. In this post, I’ll guide you through simple steps and share tips to help you create this refreshing dessert. Let’s dive in and start making something delicious!

Why I Love This Recipe

  1. Easy to Make: This no-bake cheesecake requires minimal effort, making it perfect for those who want a delicious dessert without spending hours in the kitchen.
  2. Refreshing Flavor: The combination of fresh lemon juice and zest provides a bright, citrusy flavor that is incredibly refreshing, especially on warm days.
  3. Versatile Presentation: Serving the cheesecake in jars not only looks appealing but also makes it easy to transport and share with friends and family.
  4. Customizable Toppings: You can easily customize the jars with various toppings like fresh berries or additional lemon zest, allowing each serving to have a unique touch.
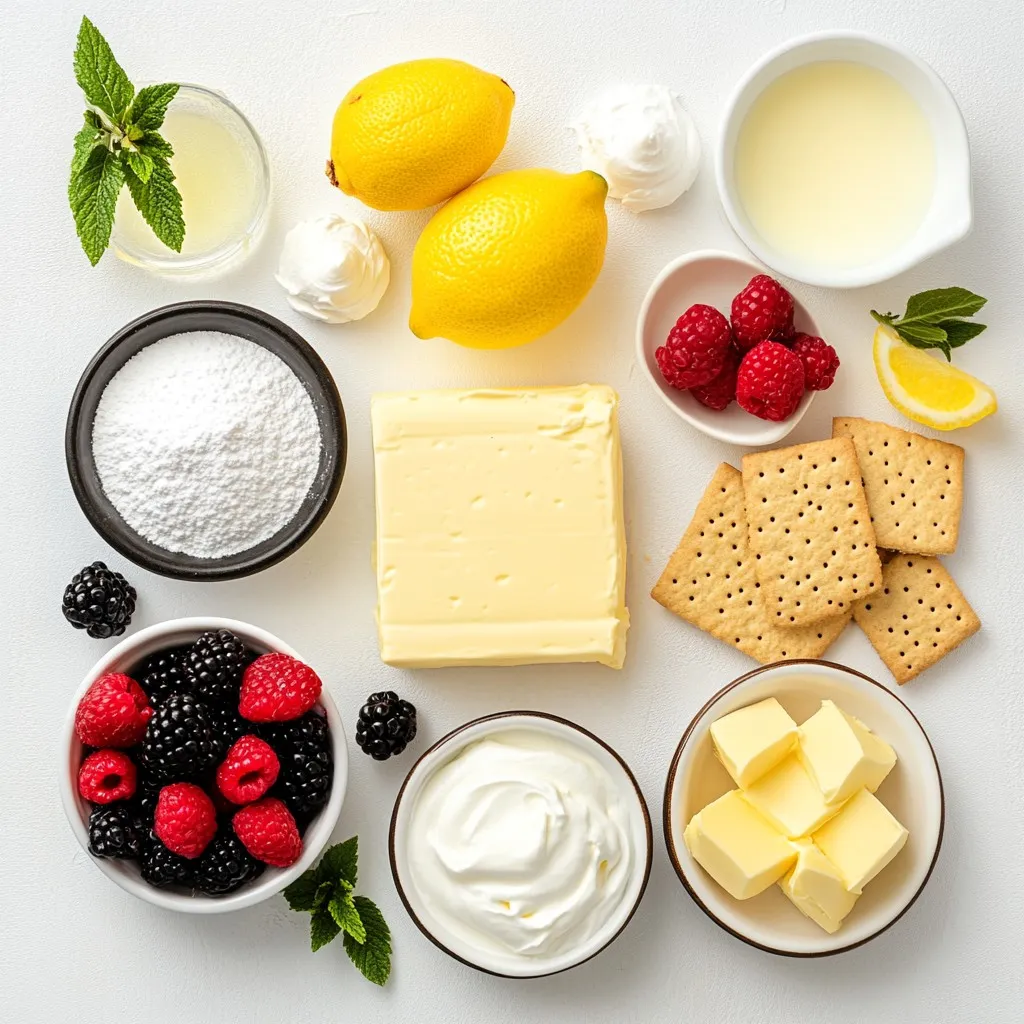
Ingredients

Main Ingredients

– 8 oz cream cheese, softened to room temperature

– 1 cup powdered sugar

– 1/2 cup sour cream

– 1/4 cup freshly squeezed lemon juice

– Zest of 1 large lemon

– 1 cup heavy whipping cream

The main ingredients make this cheesecake creamy and bright. Cream cheese gives the filling its rich base. Powdered sugar adds sweetness without grittiness. Sour cream helps to balance the sweetness and adds a tangy taste. The fresh lemon juice brings a zesty punch, while the lemon zest adds a fragrant aroma. Finally, the heavy whipping cream creates a light and airy texture.

Crust Ingredients

– 1 cup graham crackers, finely crushed

– 4 tablespoons unsalted butter, melted

– 2 tablespoons granulated sugar

For the crust, graham crackers provide a crunchy base. The melted unsalted butter binds the crumbs together. Granulated sugar sweetens the crust slightly, making every bite enjoyable. This crust is easy to make and sets a great foundation for the cheesecake filling.

Garnish Options

– Fresh seasonal berries

– Additional lemon zest

Garnishing with fresh seasonal berries adds color and flavor. Berries like strawberries, blueberries, or raspberries contrast the creamy cheesecake. A sprinkle of lemon zest on top enhances the citrus flavor. These garnishes make your jars look appealing and inviting.

Step-by-Step Instructions

Prepare the Crust

To begin, gather your ingredients for the crust. You will need:

– 1 cup graham crackers, finely crushed

– 4 tablespoons unsalted butter, melted

– 2 tablespoons granulated sugar

In a medium bowl, mix the crushed graham crackers, melted butter, and sugar. Stir until it looks like wet sand. Next, take your serving jars and divide the mixture into them. Press down firmly with your fingers. This creates a nice, compact layer at the bottom.

Make the Cheesecake Filling

Now, let’s move on to the cheesecake filling. You will need:

– 8 oz cream cheese, softened to room temperature

– 1 cup powdered sugar

– 1/2 cup sour cream

– 1/4 cup freshly squeezed lemon juice

– Zest of 1 large lemon

In a large bowl, use an electric mixer to beat the softened cream cheese and powdered sugar. Mix until it is creamy and smooth. Then, add the sour cream, lemon juice, and lemon zest. Keep mixing until all the flavors are blended well. You want that bright lemon taste to shine!

Whip the Cream

Next, we will whip the cream. For this step, you need:

– 1 cup heavy whipping cream

In a clean bowl, pour in the heavy cream. Use a mixer at medium-high speed to whip until stiff peaks form. This takes about 2-3 minutes. Be careful not to overbeat. Once you have the whipped cream, gently fold it into the cheesecake mixture with a spatula. This keeps the filling light and airy.

Assemble the Jars

Now it’s time to assemble your jars. Grab a spoon or a piping bag. Carefully layer the cheesecake filling over the crust in each jar. Fill them to the top. Use a spatula to smooth out the surface. This gives a nice, polished look to your jars.

Refrigerate

Cover the jars with lids or plastic wrap. Place them in the fridge for at least 2 hours. This time is key for setting and blending the flavors. Your cheesecake will taste even better after chilling!

Serve

Just before serving, add some fresh seasonal berries on top of each jar. You can also sprinkle lemon zest or add a dollop of whipped cream for extra flair. These final touches make your no-bake lemon cheesecake jars even more delightful!

Tips & Tricks

Achieving the Perfect Texture

To get a smooth cheesecake, beat the cream cheese well. Start with room temperature cream cheese. Mix it with powdered sugar until creamy. This step is key for a lump-free filling. When making whipped cream, use a clean bowl. Beat the heavy cream until stiff peaks form. This takes about 2-3 minutes. Do not overbeat, or it may turn grainy. Gently fold the whipped cream into the cheesecake mixture. This keeps it light and airy.

Layering for a Beautiful Presentation

Using a piping bag makes layering easy. It allows you to control how much filling goes in each jar. If you don’t have a piping bag, a spoon works too. Just be careful to layer evenly. Start with the crust, then add the cheesecake. Fill the jars to the top. Smooth the surface with a spatula for a neat look. This adds to the charm of your dessert.

Flavor Enhancements

Want more lemon flavor? Add extra lemon zest to the filling. You can also try adding a splash of lemon extract. This will give your cheesecake a bright kick. For variations, swap lemon juice for lime juice. You can also mix in other flavors like berry puree. Just remember to keep it balanced to enjoy the lemon’s freshness.

Pro Tips

  1. Chill Your Ingredients: For a smoother cheesecake filling, ensure that your cream cheese is softened at room temperature before mixing. This will help avoid lumps and create a creamy texture.
  2. Perfect Whipping: When whipping the heavy cream, stop as soon as you see stiff peaks. Overbeating can result in a grainy texture, which you want to avoid for a light and airy cheesecake.
  3. Layering Technique: Use a piping bag to layer the cheesecake filling into the jars for a neat and elegant presentation. This technique also helps ensure even distribution of the filling.
  4. Flavor Enhancement: For an extra burst of lemon flavor, consider adding a splash of lemon extract to the cheesecake mixture. It will deepen the citrus notes and elevate the overall taste.

Variations

Flavor Variations

You can change the flavor of your no-bake lemon cheesecake jars easily. Here are some fun ideas:

Berry Cheesecake Jars: Add a layer of mixed berries. You can use strawberries, blueberries, or raspberries. The berries add color and a sweet touch.

Chocolate Lemon Cheesecake: Mix in some melted chocolate with the cream cheese. This twist gives a rich taste that pairs well with lemon.

Dietary Options

Making your cheesecake jars fit different diets is simple. Here are two options:

Gluten-Free Crust: Use gluten-free graham crackers for the crust. This way, everyone can enjoy the treat without worries.

Vegan Alternatives: Replace cream cheese with a vegan cream cheese. You can also use coconut cream instead of heavy cream. This makes the dessert plant-based.

Seasonal Twists

You can change the garnish based on the season. Here are some fun ideas:

Using Different Fruits for Garnish: In spring and summer, add fresh berries. In fall, try diced apples or pears with cinnamon. In winter, pomegranate seeds add a festive touch. These seasonal fruits not only look great but also add unique flavors to your jars.

Storage Info

Storage Recommendations

To keep your cheesecake jars fresh, store them in the fridge. Use airtight containers or cover each jar tightly with plastic wrap. This helps prevent the cheesecake from absorbing other smells. Keep the jars on a shelf in the fridge, not on the door. The back of the fridge stays colder.

Shelf Life

No-bake lemon cheesecake jars last about 3 to 5 days in the fridge. After that, the texture and flavor may change. For the best taste, enjoy them within the first few days. Always check for any signs of spoilage before you dig in.

Freezing Tips

You can freeze no-bake cheesecake jars, but it changes the texture. To freeze, cover each jar tightly with plastic wrap and place it in a freezer bag. They can last up to 2 months in the freezer. When ready to eat, thaw them overnight in the fridge. Enjoy the freshness for a sweet treat anytime!

FAQs

How long do no-bake cheesecakes last in the fridge?

No-bake cheesecakes last about 3 to 5 days in the fridge. Store them in airtight containers. This keeps them fresh and tasty. Always check for any signs of spoilage before enjoying them.

Can I make these jars in advance?

Yes, you can make these jars a day ahead. Just assemble them and keep them in the fridge. This lets the flavors blend nicely. It also saves you time when you want to serve them.

Is it necessary to chill no-bake cheesecake before serving?

Yes, chilling is very important. It helps the cheesecake set up properly. Cooling it for at least 2 hours allows the flavors to meld. This extra time makes every bite taste better.

What can I substitute for cream cheese?

You can use Greek yogurt or silken tofu as a substitute for cream cheese. Both options give a creamy texture. Greek yogurt adds a tangy flavor, while silken tofu makes it lighter. Adjust the sweetness if needed, as these alternatives may change the taste.

This blog post covered how to make easy no-bake cheesecake jars. We discussed the key ingredients, including cream cheese and fresh lemon. You learned how to prepare the crust and filling. We also went over storage tips and variations for special diets.

In conclusion, these cheesecake jars offer a fun treat for everyone. You can customize them any way you like. Enjoy making these delicious jars at hom

- 8 oz cream cheese, softened to room temperature - 1 cup powdered sugar - 1/2 cup sour cream - 1/4 cup freshly squeezed lemon juice - Zest of 1 large lemon - 1 cup heavy whipping cream The main ingredients make this cheesecake creamy and bright. Cream cheese gives the filling its rich base. Powdered sugar adds sweetness without grittiness. Sour cream helps to balance the sweetness and adds a tangy taste. The fresh lemon juice brings a zesty punch, while the lemon zest adds a fragrant aroma. Finally, the heavy whipping cream creates a light and airy texture. - 1 cup graham crackers, finely crushed - 4 tablespoons unsalted butter, melted - 2 tablespoons granulated sugar For the crust, graham crackers provide a crunchy base. The melted unsalted butter binds the crumbs together. Granulated sugar sweetens the crust slightly, making every bite enjoyable. This crust is easy to make and sets a great foundation for the cheesecake filling. - Fresh seasonal berries - Additional lemon zest Garnishing with fresh seasonal berries adds color and flavor. Berries like strawberries, blueberries, or raspberries contrast the creamy cheesecake. A sprinkle of lemon zest on top enhances the citrus flavor. These garnishes make your jars look appealing and inviting. {{ingredient_image_2}} To begin, gather your ingredients for the crust. You will need: - 1 cup graham crackers, finely crushed - 4 tablespoons unsalted butter, melted - 2 tablespoons granulated sugar In a medium bowl, mix the crushed graham crackers, melted butter, and sugar. Stir until it looks like wet sand. Next, take your serving jars and divide the mixture into them. Press down firmly with your fingers. This creates a nice, compact layer at the bottom. Now, let's move on to the cheesecake filling. You will need: - 8 oz cream cheese, softened to room temperature - 1 cup powdered sugar - 1/2 cup sour cream - 1/4 cup freshly squeezed lemon juice - Zest of 1 large lemon In a large bowl, use an electric mixer to beat the softened cream cheese and powdered sugar. Mix until it is creamy and smooth. Then, add the sour cream, lemon juice, and lemon zest. Keep mixing until all the flavors are blended well. You want that bright lemon taste to shine! Next, we will whip the cream. For this step, you need: - 1 cup heavy whipping cream In a clean bowl, pour in the heavy cream. Use a mixer at medium-high speed to whip until stiff peaks form. This takes about 2-3 minutes. Be careful not to overbeat. Once you have the whipped cream, gently fold it into the cheesecake mixture with a spatula. This keeps the filling light and airy. Now it’s time to assemble your jars. Grab a spoon or a piping bag. Carefully layer the cheesecake filling over the crust in each jar. Fill them to the top. Use a spatula to smooth out the surface. This gives a nice, polished look to your jars. Cover the jars with lids or plastic wrap. Place them in the fridge for at least 2 hours. This time is key for setting and blending the flavors. Your cheesecake will taste even better after chilling! Just before serving, add some fresh seasonal berries on top of each jar. You can also sprinkle lemon zest or add a dollop of whipped cream for extra flair. These final touches make your no-bake lemon cheesecake jars even more delightful! To get a smooth cheesecake, beat the cream cheese well. Start with room temperature cream cheese. Mix it with powdered sugar until creamy. This step is key for a lump-free filling. When making whipped cream, use a clean bowl. Beat the heavy cream until stiff peaks form. This takes about 2-3 minutes. Do not overbeat, or it may turn grainy. Gently fold the whipped cream into the cheesecake mixture. This keeps it light and airy. Using a piping bag makes layering easy. It allows you to control how much filling goes in each jar. If you don't have a piping bag, a spoon works too. Just be careful to layer evenly. Start with the crust, then add the cheesecake. Fill the jars to the top. Smooth the surface with a spatula for a neat look. This adds to the charm of your dessert. Want more lemon flavor? Add extra lemon zest to the filling. You can also try adding a splash of lemon extract. This will give your cheesecake a bright kick. For variations, swap lemon juice for lime juice. You can also mix in other flavors like berry puree. Just remember to keep it balanced to enjoy the lemon's freshness. Pro Tips Chill Your Ingredients: For a smoother cheesecake filling, ensure that your cream cheese is softened at room temperature before mixing. This will help avoid lumps and create a creamy texture. Perfect Whipping: When whipping the heavy cream, stop as soon as you see stiff peaks. Overbeating can result in a grainy texture, which you want to avoid for a light and airy cheesecake. Layering Technique: Use a piping bag to layer the cheesecake filling into the jars for a neat and elegant presentation. This technique also helps ensure even distribution of the filling. Flavor Enhancement: For an extra burst of lemon flavor, consider adding a splash of lemon extract to the cheesecake mixture. It will deepen the citrus notes and elevate the overall taste. {{image_4}} You can change the flavor of your no-bake lemon cheesecake jars easily. Here are some fun ideas: - Berry Cheesecake Jars: Add a layer of mixed berries. You can use strawberries, blueberries, or raspberries. The berries add color and a sweet touch. - Chocolate Lemon Cheesecake: Mix in some melted chocolate with the cream cheese. This twist gives a rich taste that pairs well with lemon. Making your cheesecake jars fit different diets is simple. Here are two options: - Gluten-Free Crust: Use gluten-free graham crackers for the crust. This way, everyone can enjoy the treat without worries. - Vegan Alternatives: Replace cream cheese with a vegan cream cheese. You can also use coconut cream instead of heavy cream. This makes the dessert plant-based. You can change the garnish based on the season. Here are some fun ideas: - Using Different Fruits for Garnish: In spring and summer, add fresh berries. In fall, try diced apples or pears with cinnamon. In winter, pomegranate seeds add a festive touch. These seasonal fruits not only look great but also add unique flavors to your jars. To keep your cheesecake jars fresh, store them in the fridge. Use airtight containers or cover each jar tightly with plastic wrap. This helps prevent the cheesecake from absorbing other smells. Keep the jars on a shelf in the fridge, not on the door. The back of the fridge stays colder. No-bake lemon cheesecake jars last about 3 to 5 days in the fridge. After that, the texture and flavor may change. For the best taste, enjoy them within the first few days. Always check for any signs of spoilage before you dig in. You can freeze no-bake cheesecake jars, but it changes the texture. To freeze, cover each jar tightly with plastic wrap and place it in a freezer bag. They can last up to 2 months in the freezer. When ready to eat, thaw them overnight in the fridge. Enjoy the freshness for a sweet treat anytime! No-bake cheesecakes last about 3 to 5 days in the fridge. Store them in airtight containers. This keeps them fresh and tasty. Always check for any signs of spoilage before enjoying them. Yes, you can make these jars a day ahead. Just assemble them and keep them in the fridge. This lets the flavors blend nicely. It also saves you time when you want to serve them. Yes, chilling is very important. It helps the cheesecake set up properly. Cooling it for at least 2 hours allows the flavors to meld. This extra time makes every bite taste better. You can use Greek yogurt or silken tofu as a substitute for cream cheese. Both options give a creamy texture. Greek yogurt adds a tangy flavor, while silken tofu makes it lighter. Adjust the sweetness if needed, as these alternatives may change the taste. This blog post covered how to make easy no-bake cheesecake jars. We discussed the key ingredients, including cream cheese and fresh lemon. You learned how to prepare the crust and filling. We also went over storage tips and variations for special diets. In conclusion, these cheesecake jars offer a fun treat for everyone. You can customize them any way you like. Enjoy making these delicious jars at home.

No-Bake Lemon Cheesecake Jars

A delightful no-bake cheesecake layered in jars, featuring a zesty lemon flavor and a crunchy graham cracker crust.
Prep Time 20 minutes
Total Time 2 hours 20 minutes
Course Dessert
Cuisine American
Servings 4
Calories 300 kcal

Ingredients
  

  • 8 oz cream cheese, softened to room temperature
  • 1 cup powdered sugar
  • 1/2 cup sour cream
  • 1/4 cup freshly squeezed lemon juice
  • 1 large lemon zest
  • 1 cup heavy whipping cream
  • 1 cup graham crackers, finely crushed
  • 4 tablespoons unsalted butter, melted
  • 2 tablespoons granulated sugar
  • to taste fresh seasonal berries (for garnish)

Instructions
 

  • Prepare the crust: In a medium bowl, blend together the finely crushed graham crackers, melted butter, and granulated sugar until the mixture resembles wet sand. Divide this mixture evenly among your serving jars, pressing down firmly with your fingers or the back of a spoon to form a compact crust layer at the bottom.
  • Make the cheesecake filling: In a large mixing bowl, use an electric mixer to beat the softened cream cheese and powdered sugar together until the mixture is creamy and free of lumps, achieving a smooth and fluffy consistency.
  • Incorporate lemon flavors: Add the sour cream, freshly squeezed lemon juice, and lemon zest to the creamed mixture. Continue to mix until all ingredients are fully incorporated, ensuring a bright, citrusy flavor shines through.
  • Whip the cream: In a separate clean bowl, whip the heavy cream using a mixer on medium-high speed until stiff peaks form—this should take about 2-3 minutes. Be cautious not to overbeat, as you want a light and airy texture. Gently fold the whipped cream into the cheesecake mixture using a spatula, taking care to maintain its lightness.
  • Assemble the jars: Using a spoon or a piping bag, carefully layer the cheesecake filling on top of the crumbly crust in each jar. Fill to the brim, then use a spatula to level and smooth the surface for a polished look.
  • Refrigerate: Cover the jars with lids or plastic wrap and refrigerate for at least 2 hours, allowing the cheesecake to fully set and the flavors to meld beautifully.
  • Serve: Just before serving, top each jar with a handful of fresh seasonal berries, a light sprinkling of lemon zest, or an extra dollop of whipped cream for added indulgence.

Notes

Opt for clear glass jars to exhibit the gorgeous layers of crust and creamy filling. For an extra refreshing touch, drizzle a little fresh lemon juice over the top just before serving to enhance the citrus flavor.
Keyword cheesecake, dessert, jars, lemon, no-bake

WANT TO SAVE THIS RECIPE?

Related Posts