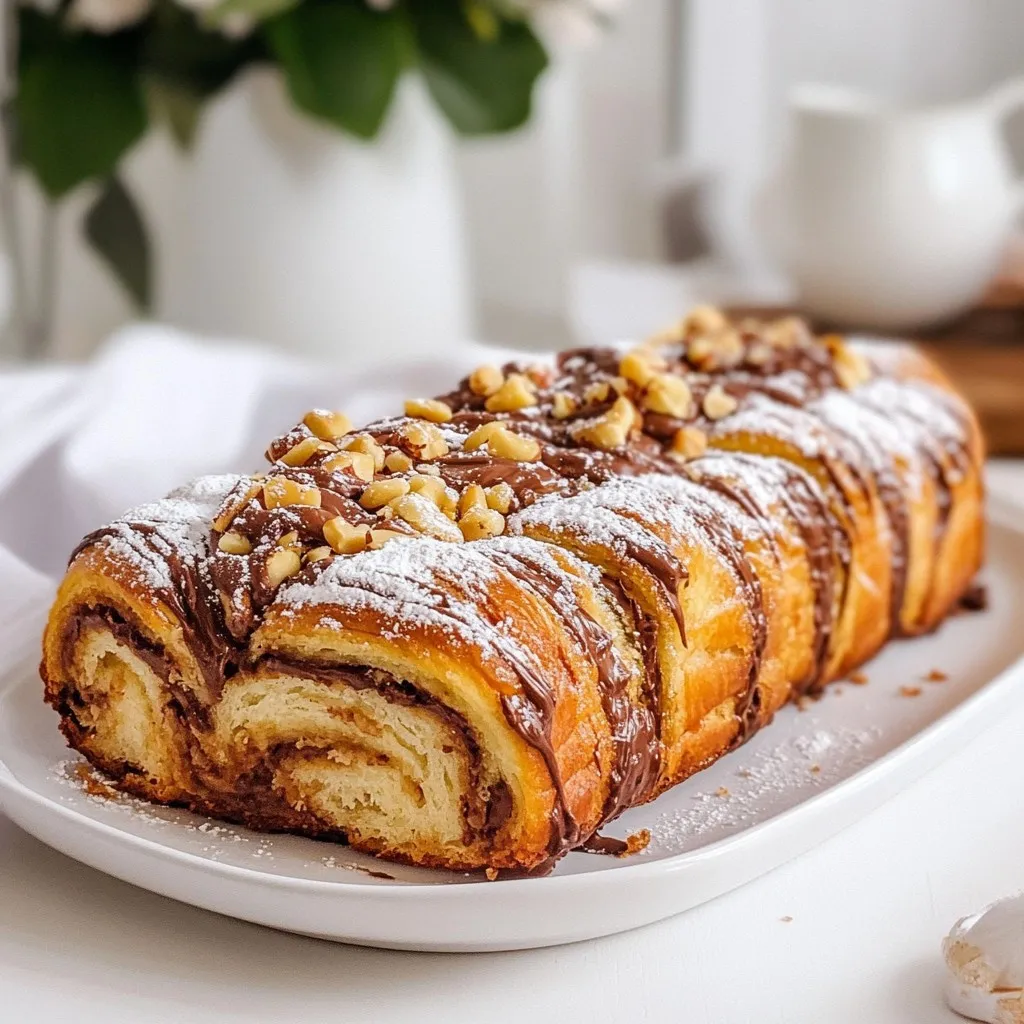
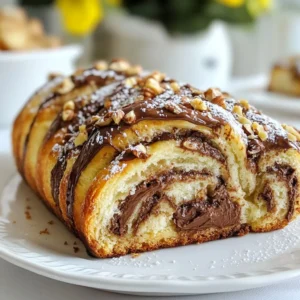
Chocolate Hazelnut Babka Delectable and Easy Recipe

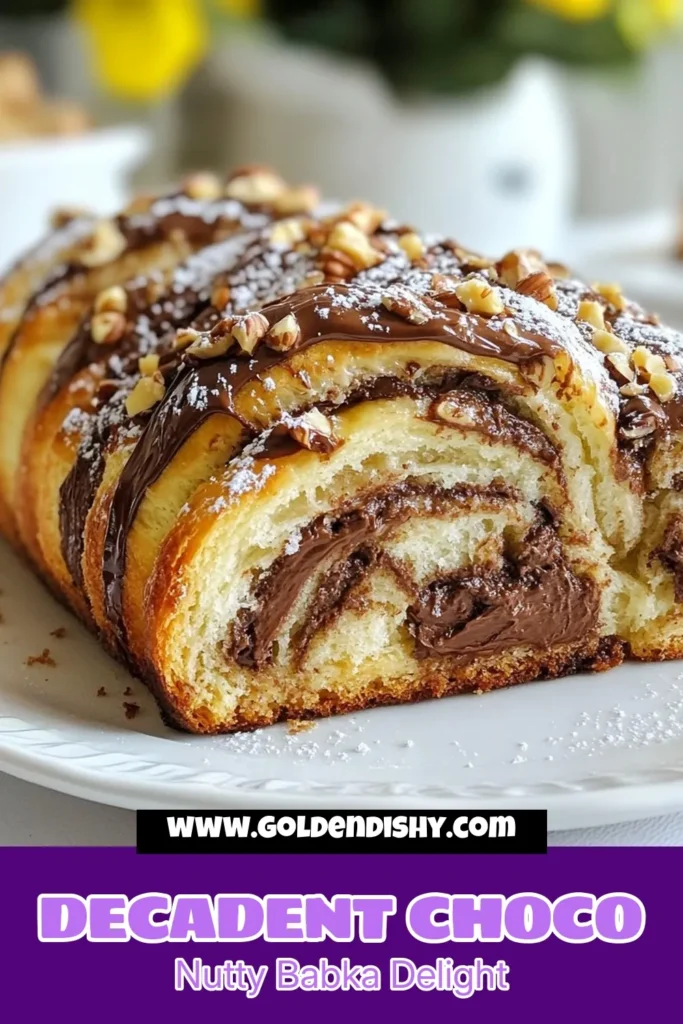
Are you ready to dive into the world of baking with chocolate hazelnut babka? This delicious treat is not only easy to make, but it’s also a crowd-pleaser. With a rich filling and a soft, buttery dough, you’ll impress your family and friends with every slice. In this post, I’ll guide you through simple steps, essential tips, and creative variations to create your own chocolate hazelnut masterpiece. Let’s get started!
Why I Love This Recipe
- Decadent Flavor: This babka is a heavenly combination of rich chocolate and crunchy hazelnuts, creating a satisfying treat for any sweet tooth.
- Beautiful Presentation: The twisted layers of dough reveal a stunning pattern that makes this babka a showstopper on any dessert table.
- Perfect for Sharing: With 10 servings, this recipe is ideal for gatherings, making it a great way to bring people together over delicious food.
- Customizable: Feel free to experiment with different spreads or nuts, allowing you to tailor this babka to suit your taste preferences.
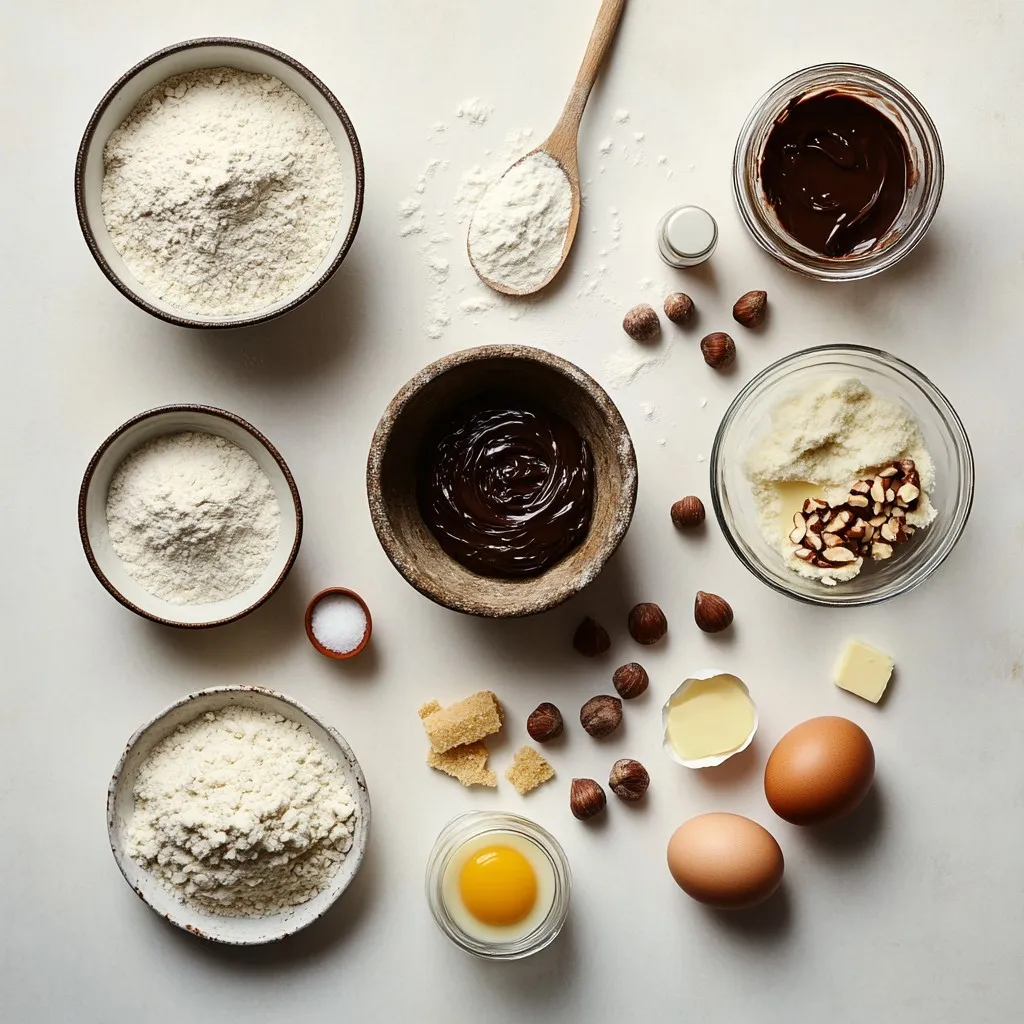
Ingredients
Complete List of Ingredients
To make Chocolate Hazelnut Babka, you need:
– 4 cups all-purpose flour
– 2 teaspoons instant yeast
– 1/2 cup granulated sugar
– 1 teaspoon salt
– 1 cup warm milk (about 110°F)
– 1 large egg
– 1/2 cup unsalted butter, softened
– 1 cup chocolate hazelnut spread (like Nutella)
– 1/2 cup finely chopped hazelnuts
– 1 teaspoon pure vanilla extract
– 1 egg (for egg wash)
– Optional: powdered sugar for dusting
Ingredient Substitutions
If you’re missing an ingredient, here are some easy swaps:
– For all-purpose flour, use bread flour for a chewier texture.
– Instead of instant yeast, you can use active dry yeast. Just proof it in warm milk first.
– Substitute almond milk for dairy milk if you want a dairy-free option.
– You can replace unsalted butter with coconut oil for a dairy-free alternative.
Tips for Choosing the Best Ingredients
When picking your ingredients, focus on quality:
– Use fresh yeast. Check the expiration date. Fresh yeast rises better.
– Choose a good chocolate hazelnut spread. The flavor makes a big difference.
– Grab unsalted butter. It gives you better control over the sweetness.
– Select high-quality vanilla extract. This will enhance the overall taste.
These choices set you up for a delicious babka!
Step-by-Step Instructions
Mixing and Kneading the Dough
Start by mixing warm milk, yeast, and sugar in a large bowl. Stir gently, then let it sit for five minutes. This helps the yeast become active. You will see bubbles forming, which means it’s ready to use.
Next, in another bowl, whisk together flour, salt, and the rest of the sugar. Make a well in the center. Pour in the frothy yeast mix, an egg, and vanilla extract. Mix this with a wooden spoon or dough hook until it forms a shaggy dough.
Now, add the softened butter bit by bit. Knead the dough with your hands or a stand mixer for eight to ten minutes. It should become smooth and a bit sticky. Shape it into a ball and place it in a greased bowl. Cover it and let it rise in a warm place until it doubles in size. This takes about one to two hours.
Preparing the Chocolate Hazelnut Filling
After the dough rises, punch it down gently to release air. On a floured surface, roll it into a rectangle, about 12 by 18 inches. Spread a generous layer of chocolate hazelnut spread on the dough. Leave a one-inch border around the edges.
Next, sprinkle the finely chopped hazelnuts on top of the spread. This adds a nice crunch. Now you are ready to roll it up.
Shaping and Twisting the Babka
Starting from one long side, roll the dough tightly away from you to form a log. Pinch the edges to seal it well. With a sharp knife, slice the log lengthwise down the middle. This will show the lovely layers.
Twist both halves together, making a lovely spiral shape. Place the twisted babka in a greased loaf pan. Cover it with a towel and let it rise again for about 30 to 45 minutes.
While it rises, preheat your oven to 350°F. Once it has puffed up, brush the top with a beaten egg for a shiny finish. Bake for 30 to 35 minutes until it turns a deep golden brown.
Let it cool in the pan for 10 minutes before moving it to a wire rack. If you like, dust it with powdered sugar before serving. Enjoy this sweet treat!
Tips & Tricks
Common Baking Mistakes to Avoid
Baking can be tricky. Here are key mistakes to avoid:
– Not measuring ingredients: Use a scale for precision.
– Skipping the yeast proofing: Always let the yeast bloom.
– Overworking the dough: Knead until smooth, not too long.
– Not preheating the oven: Preheat to ensure even baking.
– Opening the oven door too soon: Resist the urge during baking.
How to Achieve a Perfectly Golden Crust
A golden crust makes your babka look and taste great. Here are tips:
– Use an egg wash: Brush the babka with beaten egg before baking.
– Bake at the right temperature: Set your oven to 350°F (175°C).
– Check for doneness: Look for a deep golden brown color.
– Rotate the pan: Halfway through baking, turn the pan for even heat.
Recommended Tools for Baking Babka
Using the right tools can make your baking easier. Here’s what you need:
– Mixing bowls: Have a few in different sizes.
– Measuring cups and spoons: Essential for accuracy.
– Dough hook: If using a stand mixer, this helps with kneading.
– Rolling pin: For rolling out the dough.
– Sharp knife: Perfect for slicing the dough.
– Loaf pan: A 9×5-inch pan works best for shaping.
– Wire rack: Great for cooling the babka after baking.
These tips and tools will help you make a fantastic Chocolate Hazelnut Babka that everyone will love!
Pro Tips
- Proof Your Yeast: Always ensure your yeast is fresh by checking its expiry date. If it doesn’t foam after 5 minutes in warm milk, it may be inactive, and you should start over.
- Chill the Dough: If the dough is too sticky to handle, refrigerate it for 30 minutes. Chilled dough is easier to roll out and shape.
- Layer Generously: Don’t skimp on the chocolate hazelnut spread! A generous layer will ensure each slice is rich and delicious.
- Check for Doneness: When baking, use a toothpick to check the center. If it comes out clean, the babka is ready. Keep an eye on baking time to avoid over-baking.
Variations
Seasonal Flavors (e.g., Pumpkin Spice, Raspberry)
You can change the flavors of your babka for the seasons. For fall, try pumpkin spice. Mix pumpkin puree with cinnamon, nutmeg, and sugar. Spread this mix instead of chocolate hazelnut spread. For summer, use raspberry jam. It adds a bright, fruity taste. Just remember to leave a border when you spread it.
Alternative Nut or Chocolate Combinations
You can switch up the nuts or chocolate for fun. Use almond butter instead of chocolate hazelnut spread. Pair it with chopped almonds for a nice crunch. You can also try peanut butter and peanuts. This gives a unique twist on the classic babka. Just make sure you keep the same amounts.
Gluten-Free Babka Option
If you need a gluten-free option, it’s easy. Use a gluten-free flour blend in place of all-purpose flour. Look for a blend with xanthan gum for the best texture. The taste will be just as good as the original. Follow the same steps in the recipe, and you’ll have a delicious gluten-free babka.
Storage Info
How to Store Leftover Babka
To keep leftover babka fresh, wrap it well. Use plastic wrap or foil. Store it at room temperature for up to three days. If your kitchen is warm, place it in the fridge. This helps keep it tasty longer. Just remember, it may dry out a bit in the fridge.
Freezing Instructions for Babka
You can freeze babka for later enjoyment. First, let it cool completely. Then wrap it tightly in plastic wrap. Next, place it in a freezer bag. Label the bag with the date. It will be good for up to three months. When ready to eat, thaw it overnight in the fridge.
Best Ways to Reheat Babka
To reheat babka, preheat your oven to 350°F. Remove the wrapping and place it on a baking sheet. Heat for about 10-15 minutes. This warms it through and makes the crust nice again. If you want to use a microwave, heat it for 15-20 seconds. Keep an eye on it to avoid making it tough. Enjoy your warm, gooey treat!
FAQs
What is the best way to serve Chocolate Hazelnut Babka?
The best way to serve Chocolate Hazelnut Babka is warm. Slice it to show off the layers. You can dust it with powdered sugar for a nice touch. Pair it with coffee or tea for a delightful treat. Friends and family will love it!
How long does Chocolate Hazelnut Babka stay fresh?
Chocolate Hazelnut Babka stays fresh for about 3 to 4 days at room temperature. Keep it in a sealed container or wrap it tightly to keep it soft. If you want it to last longer, consider freezing it.
Can I make this recipe ahead of time?
Yes, you can make this recipe ahead of time. Prepare the dough and let it rise. After shaping, you can freeze it before the second rise. When ready to bake, let it thaw and rise. This makes it easy to enjoy freshly baked babka anytime!
You learned how to make a delicious Chocolate Hazelnut Babka. We covered key ingredients and tips to choose the best ones. Step-by-step instructions helped guide your baking process, while helpful tips showed how to avoid common mistakes. We explored fun variations to try and ways to store and reheat your babka.
Now, you’re ready to impress with this sweet treat. Enjoy your baking journe

![To make the Easy Lemon Raspberry Loaf, you need a few simple ingredients. Here’s the list you will use: - 1 ¾ cups all-purpose flour - 1 cup granulated sugar - ½ cup unsalted butter - 2 large eggs - 1 teaspoon pure vanilla extract - 1 tablespoon fresh lemon zest - ½ cup freshly squeezed lemon juice - 1 teaspoon baking powder - ½ teaspoon baking soda - ¼ teaspoon fine sea salt - 1 cup fresh raspberries - Powdered sugar for dusting (optional) These ingredients help create a moist and zesty loaf. The lemon zest and juice add bright flavor. Fresh raspberries give you sweet bursts in every bite. Use unsalted butter to control the saltiness. It’s best to use fresh raspberries, but frozen will work too. Make sure to measure everything carefully. Baking is all about balance. Each ingredient plays a role in the final taste and texture. If you want to learn more about the steps to make this treat, check out the Full Recipe. - Setting the Temperature First, set your oven to 350°F (175°C). This step is crucial for even baking. - Preparing the Loaf Pan Grease a 9x5-inch loaf pan. You can also line it with parchment paper. This helps the loaf come out easily after baking. - Method of Mixing In a large bowl, combine softened butter and granulated sugar. Use a hand mixer or stand mixer to beat them together. - Desired Consistency Mix until the blend is light and fluffy. This should take about 3-4 minutes. The mixture should look pale and creamy. - Adding Eggs One at a Time Add the eggs one by one. Mix well after each egg to ensure they are fully blended. - Mixing Techniques After adding the eggs, stir in the vanilla extract and lemon zest. Mix gently but thoroughly to keep the batter smooth. - Combining Flour and Leavening Agents In another bowl, whisk together flour, baking powder, baking soda, and salt. This ensures even distribution of leavening agents. - Proper Mixing Technique Gradually add the dry mix to the wet mixture, alternating with lemon juice. Start and end with the dry ingredients. Mix gently, and don’t overmix. - Techniques to Preserve Raspberry Shape Carefully fold in the raspberries. Use a spatula to gently mix. This keeps the raspberries intact. - Ensuring Even Distribution Make sure the raspberries are evenly spread throughout the batter. This enhances the flavor in every slice. - Baking Time and Techniques for Doneness Pour the batter into the loaf pan. Bake for 55-60 minutes. To check doneness, insert a toothpick into the center of the loaf. It should come out clean. - Cooling Tips for Best Texture Once done, let the loaf cool in the pan for 10-15 minutes. Then, transfer it to a wire rack to cool completely. This helps achieve a perfect texture. Feel free to check the Full Recipe for more details! To make the best lemon raspberry loaf, avoid overmixing. Mixing too much can make the loaf dense. When you combine wet and dry ingredients, mix just until you see no flour. To check for doneness, insert a toothpick into the center. If it comes out clean or with a few crumbs, your loaf is ready. If not, bake a little longer. If the top is browning too fast, cover it with foil halfway through. Measuring ingredients incorrectly can lead to issues. Always use dry measuring cups for flour and sugar. Spoon the flour into the cup, then level it off with a knife. This keeps the correct ratio. Adjust baking time if you use a dark pan. Dark pans can cook faster, so start checking for doneness a few minutes early. Fresh lemon juice makes a big difference. Squeeze the lemons right before you use them. This keeps the juice bright and zesty. You can also add extras like nuts or spices. Chopped walnuts or a touch of cinnamon can add great depth. For a sweet twist, consider a lemon glaze on top for extra shine. {{image_4}} You can switch out raspberries for other fruits. Blueberries make a great choice. They add a sweet touch and look pretty too. Strawberries can also work well. Just chop them into smaller pieces. If you like seasonal fruits, use what is fresh. In summer, try peaches or cherries. In fall, apples or pears can add a nice twist. Each fruit brings its own flavor and charm to the loaf. If you need a gluten-free loaf, don’t worry. You can use almond flour or coconut flour. Both work great as substitutes. Just remember, the texture may change a bit. You might need to adjust the liquid too. Gluten-free flours absorb more moisture. Adding an extra egg or some yogurt can help keep it moist and fluffy. Want to jazz up your loaf? Adding nuts can give it a nice crunch. Chopped walnuts or pecans are perfect. Just fold them in gently with the raspberries. You can also add spices for warmth. Cinnamon or nutmeg can enhance the flavor. For a sweet finish, create a lemon glaze. Mix powdered sugar with lemon juice. Drizzle this over the cooled loaf for a zesty touch. These variations keep your lemon raspberry loaf exciting and fun! For the full recipe, check out the details provided earlier. Room Temperature Storage Store your lemon raspberry loaf at room temperature. Use an airtight container to keep it fresh. This will help it stay moist and tasty. It can last for up to three days this way. Refrigeration Guidelines If you want to keep it longer, put the loaf in the fridge. Wrap it tightly in plastic wrap or foil. This will keep it from drying out. It can last up to one week in the fridge. How to Freeze the Loaf Freezing the lemon raspberry loaf is easy. Wait until it cools completely. Then, wrap it in plastic wrap and foil. This protects it from freezer burn. You can freeze it for up to three months. Thawing Tips To thaw, take it out of the freezer. Leave it in the fridge overnight. If you want it warm, slice and heat it in the microwave for a few seconds. Freshness Indicators Check for signs of spoilage. Look for mold or a change in smell. If the loaf feels dry or hard, it’s time to toss it. Maximum Storage Duration In total, the loaf can last up to one week in the fridge or three months in the freezer. Proper storage helps maintain its delicious flavor and texture. To keep the loaf moist, use a few key ingredients. Butter adds fat and moisture. Eggs also help with texture. Additionally, use fresh lemon juice for tang and juiciness. Baking techniques matter too. Do not overmix the batter. This keeps air in the loaf. Bake at the right temperature and check for doneness with a toothpick. A little moist crumb is perfect! Yes, you can use frozen raspberries! Just make sure to thaw them first. Drain any extra juice to avoid a soggy loaf. Using frozen fruit may change the texture. Fresh raspberries give a firmer bite. However, frozen raspberries still add great flavor and color. You can substitute lemon juice with lime or orange juice. Lime juice adds a tart zing. Orange juice gives a sweeter flavor. Keep in mind that this changes the flavor profile. The loaf will taste different but still delicious! This loaf pairs well with tea or coffee. The bright lemon flavor complements hot drinks nicely. For a fun twist, serve it with whipped cream. Fresh berries on the side add a lovely touch too. For the full recipe, feel free to check the [Full Recipe]. You now know how to make a delicious Lemon Raspberry Loaf. We covered key ingredients, step-by-step instructions, and helpful tips for success. Remember, watch your mixing and baking time to avoid mistakes. Try different fruits or flavors to put your spin on it. Store it properly to keep it fresh. Whether for breakfast or dessert, this loaf will please everyone. Enjoy your baking adventure and the tasty treats you create!](https://goldendishy.com/wp-content/uploads/2025/07/5ff44623-bcfe-47fa-965b-01d738fc2f08-768x768.webp)